


Likes
Comments
Share


@BigUncGotGaz
Follow
Day 56 Veg from Seed
Crazy what a scrog method could do in just 1 week 🔥
Definitely going to preform this method again in my future grows.
Today was the last day of veg I prep my reservoir for flowering stage (nutrients mix with 5Gal spring water) and flip my lights to 12/12
Also collected a few clones from each plant giving me the opportunity for a mother plant or 2 then have a full run in the near future ⛽️

Likes
2
Share


@MyHightimesMunchie
Follow
Jack is still stretching and she’s loving every minute of it not one leaf deficiency not one stem deficiency or soil.
Likes
3
Share

@RelaeX
Follow
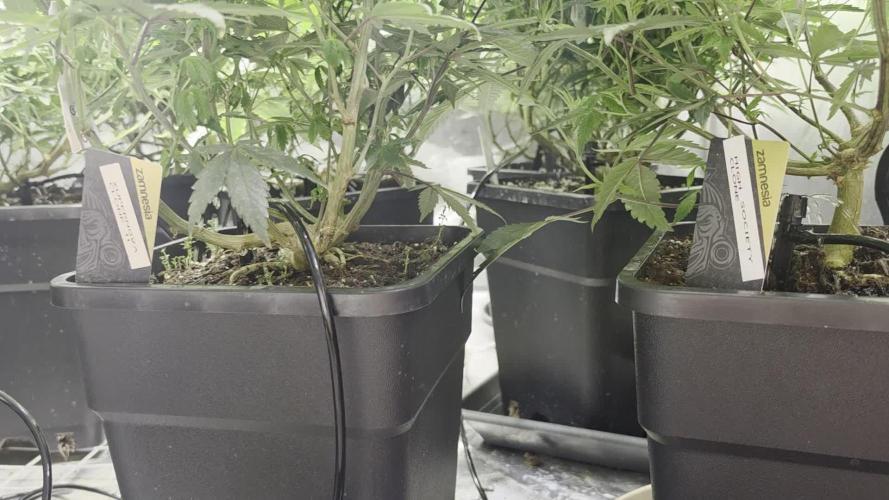
Alright, Week 13 of the jungle adventure is here! 🌴🐒 I gave the ladies a good trim so they're getting all the light and breeze they need. ✂️🌬️ Plus, I moved two plants to the side tent. 🏕️
Right now, it's a comfy 27.7°C with 65.8% humidity, so the VPD is a sweet 1.27 kPa. 🌡️💧 Down in the roots, the soil is chilling at 22.6°C with 35.9% moisture and a gentle EC of 0.10 mS/cm. 🌱💧 And yeah, the grow room supervisor is making sure everything's on track! 😼✅ Next week is MJ 26, when it's over we go to flower. 🌸🌼

Likes
23
Share


@Canadian
Follow
Day 50 the plant has been growing at an incredible speed and has a very very large flowering stretch in fact I only have left 5 inches to raise up my light and then I'm going to have to do something to keep an eye on those branches so they don't stretch anymore or at least they can have enough light to proper development.
From all the plants I have grow indoors this one is the only one that has make my light stretched to the top of the tent I guess it's a good problem to have.
Other than the incredible stretch the plan seems to be healthy and doing pretty well the flower is development and I'm looking forward to see how this is going to turn out.
Day 52 I have rise my light to the top as high as I can and she still grow past the light towards the exhaust system I had to tie her down in order to create an arch and in that way make her receive enough light instead of growing over the top of the light where there is actually no sufficient light if this problem persist I will have no choice but to do super cropping on the tallest branches and see how they react to that I decide to take some cuttings I'm trying to clone this one to see if I can get her outside in the summer in another buddy house and see how she reacts to challenging Ontario weather.
Day 53 I have to Super crop several branches Unfortunately they were growing straight into the light becoming burned by the intense light I hope the plant doesn't react to bad to HST and still deliver awesome buds
thank you for reading I will continue to update have a happy grow.


Likes
6
Share

@Bdog7878
Follow
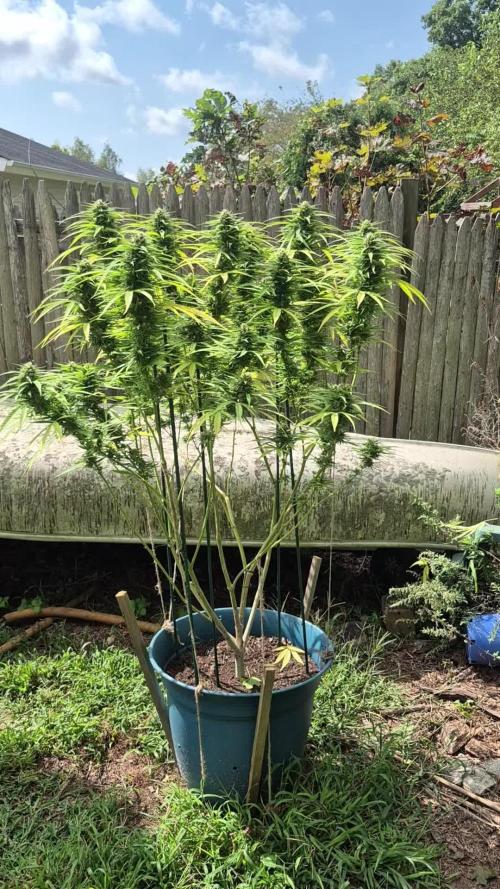
All doing well. Watering every 2 days. The weather has been pretty good. 55 at night 73 to 78 day humidity around 60 to 70 rh. The one Mimosa x orange punch is starting to get some purple leaves. I noticed a slight strain from switching to bloom nutes but they seem to have moved past and are doing great. I did find a couple of buds with the very start of bud rot on the mop#1 I removed the buds and see no sign of more. I think this weekend is gonna be the last fert on the mop#1 going to start the flush and im thinking the week after for the mop#2. Most water and all fert solution goes in between 6.2 to 6.7 ph


Likes
11
Share

@TheGreenfulOne
Follow
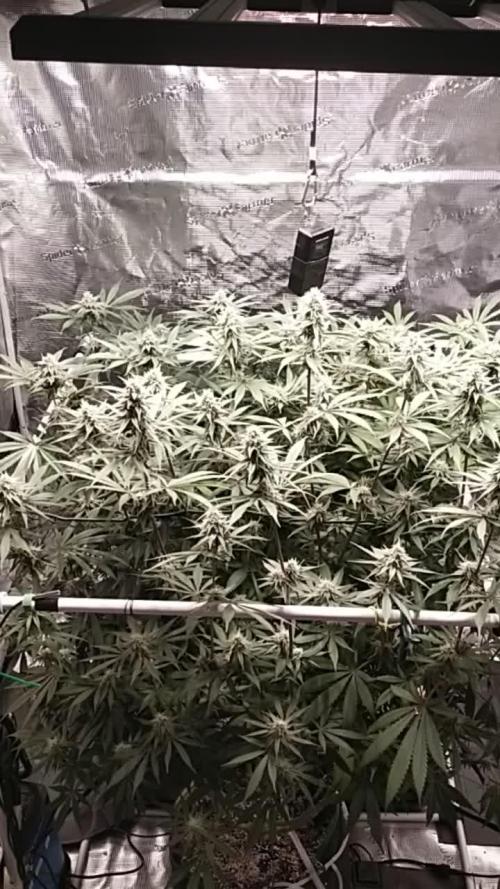
Bruce Banners are frosting up heavily and stacking dense buds, but close-ups shows tip burn and leaf clawing after the recent stress.
Likes
26
Share


@pifflestikkz
Follow
Day 29
29/07/24 Monday
Nice feeding today with De-chlorinated tap water pH 6.
Gave her 300 ml and she had a small run off.
Getting chunky in the stem now 💪💚
Day 31
31/07/24 Wednesday
De-chlorinated water pH 6 today with Plagron pk13-14 5ml to 5L
Plagron power buds 5ml to 5L
Used 300ml of the 5L solution.
I will be using these on water days from now on as they are advised to be used every irrigation.
We'll see how they perform 💪💚
Day 32
01/08/24 Thursday
Another feed today using de-chlorinated tap water pH 6, there now taking 300ml every evening.
Day 35
04/08/24 Sunday
END OF WEEK 😁
De-chlorinated tap water pH 6 today with Plagron products. 300ml each.
Had a issue with leaf invaders this week, I have treated and am checking every 48 hrs so far seems ok and not progressive.
All plants look great, very healthy, one of the Overdose is way behind and due to space maybe culled at flower I'll see how she gets on.


Likes
1
Share


@Loulouland80
Follow
Buds are getting denser, some nitrogen deficiency started on lower leaves, a little mpk burn on big leaves , this monster is ready for harvest but I will give it another week or so coz budds are fattening quickly.

Likes
22
Share


@brokeboyz
Follow
This week was awesome, i cant stop stressing these plants, i know its an Indica strain.. and i know that maybe there is so much time lost on the constant recovery.. but i know that this will result in more branchess
Awesome work HSO..
I cant wait for flowering.

Likes
Comments
Share


@Appalachia_bucket
Follow
Day 19. Another defoliation. Watered in a gallon from the top. Then topped off sip buckets.
Likes
41
Share


@Reyden
Follow
Siamo ormai entrati nella 3º settimana di fioritura e sto cercando di tenere un EC intorno a 1650 e PH 6.5, le piante crescono sane e con pochi problemi di carenze, con questi vasi bevono più o meno il 3º giorno e si asciugano benissimo…dovrò sicuramente comprarne altri molto presto!😎
Sono curioso di vedere fino a che punto posso spingere questi semi di Anesia! La prossima settimana saliamo a 1.750 💚🌱

Likes
17
Share


@Right2Flower
Follow
Day 120 - Getting closer to harvest day for this lady. She's huge and full of buds towards the top, smaller somewhat fat buds in the middle, and larfy buds at the bottom. I should have lollipopped her 1 or 2 more nodes up, especially for the colas that did not end up stretching as far as the others. Fed the lady water amended per this week's diary. Still seeing white pistils on her main colas so still 2 weeks away or so from harvest. I think this will be her last full nutrient feeding and for her next watering she'll get her last Cal-Mag feeding. I'll probably do 2 more plain water feedings from there and harvest once the soil is dried out after her last plain water feeding. I'm seeing a few of the lower buds of the lowest colas show some spots on the leaves so I just cut those parts off and hung to begin drying. It doesn't appear to be spreading but I'll keep an eye out these next few days.
Day 123 - Fed the lady her last Cal-Mag amended feeding. Trichomes are looking more cloudy now on the middle buds. Will give 1 more plain water feeding instead of 2, I want to see how this bud will smoke with minimal flush versus the first lady harvested that was flushed more.
Day 127 - Decided to skip completely flushing her to compare versus an over flushed plant. Harvested her today with the soil nice and dry.


Likes
14
Share


Likes
7
Share


@DaddyPrime2
Follow
2/12/25
top dressed with 2 tsp grow 1 tsp microbe and 2 tsp bloom.
this genetic is always sooo freaking frosty. shes already starting to frost up on the fan leaves.
finally looking like shes in flower. it took her awhile to get started i feel like compared to past grows/ other Cultivars.
2/18/25
she has a very nice and even structure to her. a bunch of tops that are 3-5 node top colas with a nice disconnected set of buds after an inch two space between the nodes.
frosty gassy and fairly large considering pot size.
Likes
Comments
Share


@jporfiado
Follow
Esta semana aplique la tecnica lst. Hubiera preferido hacerlo antes pero estaba esperando por que antes queria trasplantarlas. Pero no he podido comprar macetas, ni el medio de cultivo. Entonces decidi hacerlo en las macetas actuales para comenzar a guiar la planta, ya que va creciendo muy rapido.
Junto con la tecnica lst tambien hice defoliacion a todas las plantas.
Comence a regar con fertilizante en polvo Green House para la etapa de vegetacion. Uso 0.5g / 1L . Ocupo unos 2L para regar cada planta.


Likes
39
Share


@Hattiwatti
Follow
Res change at day 29. Have to lower nitrogen a bit cause its clawing and pretty dark. Otherways everything is just fine and it grows nice. Ad calmag 5ml to 20L.
Likes
17
Share


@German_GrowLab
Follow
Einen wunderschönen guten Tag, liebe Grow-Community, und herzlich willkommen zur neunten Woche meines kleinen Outdoorprojekts!
Heute dann doch mal wieder an einem Montag :). Ich habe es nach dem Mary-Jane-Wachenden leider noch nicht nach Hause geschafft. Allerdings habe ich paar Bilder vorproduziert, um hier nicht mit leeren Händen aufzutauchen.
Ich bin die letzte Woche ein wenig durch die heimischen Wälder flaniert und habe den ein oder anderen Schatz bergen können. Aber alles der Reihe nach …
Da ich messbedingt nicht bei den Pflanzen sein konnte und das mit dem Gießdienst an Dritte abgeben mal so, mal so funktioniert. Dachte ich mir, man muss der Verdunstung und der damit einhergehenden Trockenheit etwas entgegensetzen.
Ich habe mich als kurz und knapp für eine Mulchschicht entschieden. Diese schützt nicht nur vor Austrocknung, sondern macht ebenso die obere Erdschicht für die Durchwurzelung brauchbar. Sie ist obendrein ein weiterer Schritt zu einem gesunden Bodennahrungsnetzwerk. Dieses wird durch die in dem auf dem Grünschnitt/Waldlaub enthaltenen Mikroorganismen (Protozonen, Wimperntierchen), welche durch das Belüften im Tank nochmals gefördert werden, noch einmal gestärkt. Last but not least führt der Mulch dazu, dass Schadorganismen das Einfallen in die obere Erdschicht erschwert wird.
Aber was ist drin?
Ähnlich wie schon beim Komposttee wird bakterienreiches organisches Material in einen Tank mit vorzugsweise Regenwasser gegeben und anschließend über einen gewissen Zeitraum belüftet (siehe Woche 5). Der wohl größte Unterschied zum Komposttee ist, dass wir eher auf das Material und nicht auf die Flüssigkeit aus sind. Dieses besteht zu ca. 90 % aus Grünschnitt (in meinem Fall eine Biokleintiermischung) und zu ca. 10 % aus Laub, welches ich in einem wenig bis gar nicht bewanderten Waldstück gesammelt habe.
Die richtige Platzwahl:
Bei der Platzwahl war mir wichtig, einen möglichst naturbelassenen Teil des Waldes auszusuchen, um eine Kontaminierung von bspw. Müll oder Hundeurin zu vermeiden. Ebenso habe ich nach Material Ausschau gehalten, welches schon Kontakt mit einem Pilzmyzel und dem ein oder anderen Regenwurm aufwies. Beides sind Indikatoren für ein gesundes Bodenleben.
Zum Schluss …
Nun einfach alles in einen großen Tank, Wasser drauf und Pumpe an. Belüftet wurde das Ganze für drei Tage. Danach das Material entfernen und luftig um die Pflanzen aus Ringen (leicht in den Boden einarbeiten). Um mit so wenig Waste wie möglich zu arbeiten, habe ich dann noch das Wasser gegossen. Dieses ist sehr reich an Mikroorganismen.
Aber nun (besser spät als nie) noch ein paar Credits:
Und zwar an Flo von Florganics, von dem ich das meiste Wissen um den Komposttee, die Erdmischung sowie auch das Mulchen bezogen habe. All die genannten Themen sind nochmal deutlich detaillierter auf seinem Yt-Kanal (Florganics) zu finden.
Noch ein kurzes Wort zu den Damen:
Soweit sehen alle sehr saftig und grün aus. Mit dem Toppen warte ich noch, bis ich wieder da bin. Alles in allem sollte am Ende doch ein wenig herauskommen (im Optimalfall 50 g/Person).
Das war’s für diese Woche. Euch nun einen schönen Restmontag und einen guten Wochenstart.
Peace


Likes
4
Share

@BeskarBuds
Follow
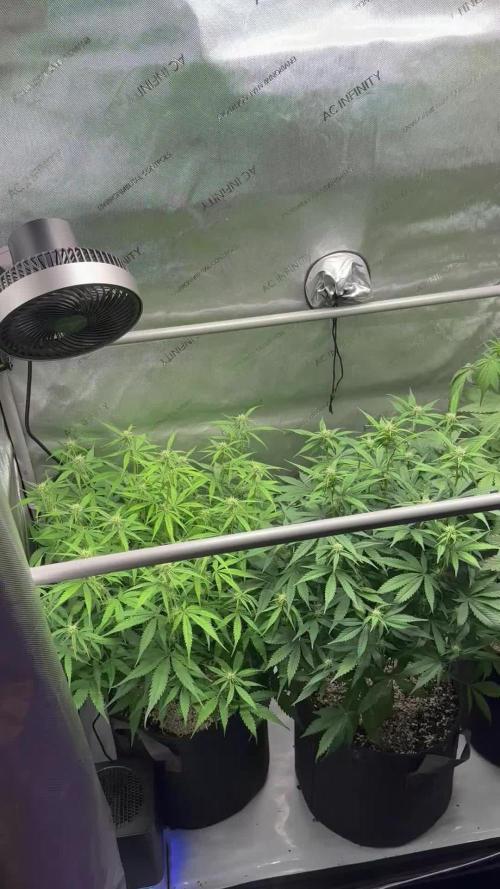
Flowers starting to grow in beautiful however my humidity is running so high these days I may need to invest in a good dehumidifier for the tent to get these girls successfully through. Humidity has been around 70% some days way to high for flower stage.
Either way though growing big and healthy still 💚
This is the way