
Likes
Comments
Share


@Tetiana_Riz
Follow
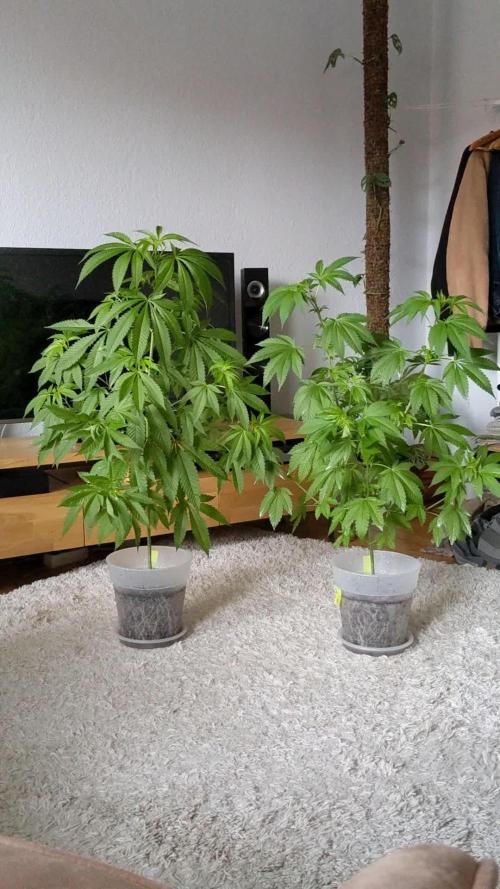
The fourth week into flowering – and our results are simply stunning! Our girl has transformed into a true beauty: thick stems, lush greenery, and plenty of gorgeous buds. Thanks to LST training, our little one has become even bushier and more compact – doubling in size over the past week alone! And it's all thanks to Xpert Nutrients fertilizers. Currently, we're actively watering with bloom-stage additives: Master Bloom, Master Root, and Sugar Shot, diluted at a rate of 2 ml per 1 liter of water. Of course, the water has been purified and has a pH of 6.5 and TDS of 1500 ppm. Everything is going according to plan – we can't wait to see what else lies ahead!


Likes
35
Share


@Pot_Portraits
Follow
Another week, she is growing great and its time to clean the bottom part of the plant. I remove leaves and branches to focus the energy to the top and not waste it on the lower branches.

Likes
8
Share


@jayizrollin
Follow
Pictures are from Day 91.
Top Gun 2 is coming to the finish line, the whole tent reeks and starting to see good amounts of amber, although the buds aren’t as solid as I was hoping for.
I could harvest as soon as today.
This grow has been another great experience of learning about these awesome plants. Please also check out my gorilla cookies grow that went alongside these two topguns. Thanks!

Likes
14
Share


@555ABKY555
Follow
finally the scorching sun came having moved the plants from under the canopy outdoors a downpour created a bit of mold in a small part of the skywalker and also to the little cherry i later removed it and sprayed the plants with garlic infused water now i'm the bomb i'm fertilizing with long awaited organic vermicompost, the plants are perfect, i think i will delay the harvest for the cherry to make it gain a little more weight at the expense of the flavors the flavors are amazing absurd...i ordered some clones by freakshow humbolt seeds I also made new transfers with old seeds tried to germinate and they went splendidly.honey cream and special queen by royal queen seeds


Likes
2
Share


@Saintvicious
Follow
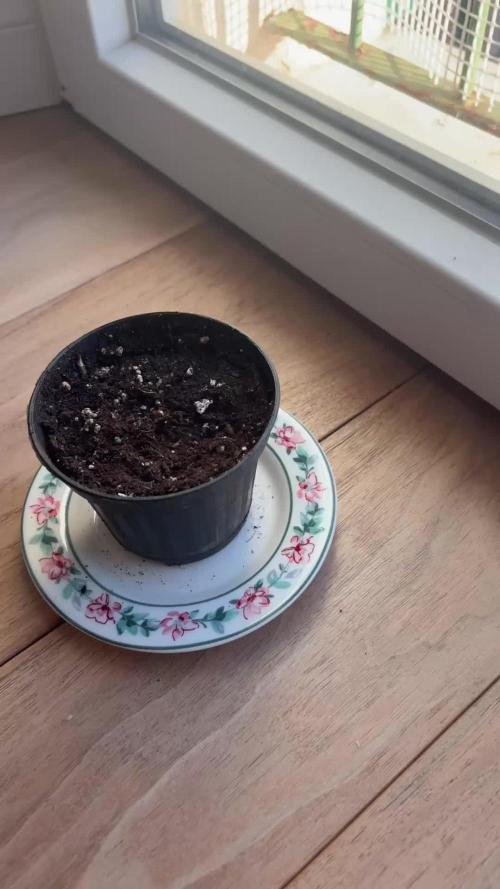
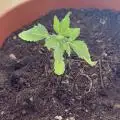
Holy Lst. Getting crazy now for just a few weeks from seed. No stopping it now.
Likes
33
Share


@burnerac
Follow
Day 50: Added one gallon of pH 6.5 water with nutrients. Plant looking healthy. Continuing to try LST but the tent stakes are not wanting to stay in the soil. Going to get some soft plant ties and begin pinning to the smartpot. Forgot to take pictures.
Day 51: Maybe approaching flowering?
Day 52: Looking good. She's getting real thirsty.
Day 53: Pretty
Day 54: Added a gallon of water with nutrients, Man she's getting thirsty.
Day 55: Posted timelapse but no glamour shots
Day 56: Added one gallon of pH 6.5 water without nutrients.


Likes
15
Share


@valiotoro
Follow
Easy trim✂️
As always first the top buds then after 7 days the lower buds✂️
The smell is divine citrus & ripe cherry super sweet🤤🍋🍒
Imagine if you mix a scoop of amarena & lemon sorbet gelato and you have the smell!


Likes
49
Share


@MadeInGermany
Follow
Hi folks :-)
This week it has developed very nicely 👍 The shoots are starting to grow again, and will soon be ready to be tied down again 👍
I wish you all a nice weekend and let it grow 🍀🌱🙏🏻

Processing
Likes
12
Share


@GrowGuy97
Follow
Day 28 - These ladies are growing like crazy! 2 of them are already almost as tall as my white widow autos that are about 2 weeks ahead!
Day 30 - Still stretching like crazy, starting to look much better though I have to say!
Day 32 - Ladies are starting to get nice & purple!
Likes
38
Share


Likes
Comments
Share


@Yiyis_Grow
Follow
Primera semana de floración, se continuó con nutriente de vegetación reducido y se empezó a la vez con el de floración también reducido.
- Luz: Bestva Pro 1000W / 18 h/d
-FloraNova Grow G.Hydroponics: 0.4ml/l
- FloraNova Bloom G. Hydroponics: 0.3 ml/l
- Armour SI G. Hydroponics 0.4ml/
- Everest: 0.5 ml/l
Control biológico:
-Solution (bioinsecticida generalista: Beauveria, Metarhizium, Lecanicillium y
Cladosporium + esencia de ajo y chile).
-Acaridox (bioacaricida: Metarhizium e Hirsutella + esencia de canela)
- Scamin (control escama y cochinilla) Cladosporium Herbarum

Processing
Likes
10
Share


@StarletBud21
Follow
The week has been going very well plants are reacting good to nutrients and seem to be happily growing , haven’t fiddled around too much this week as starting to get the hang of things slowly ! The grow so far has been quite smooth And haven’t run into any Major problems all plants have been topped and will continue lst throughout I believe they look quite healthy haha ?
First timers luck 😉🤨 we hope so
Good end to the week next week I shall trim and see how that goes
Happy growing 💎


Likes
41
Share


@AumShanti
Follow
ॐ
MOBY DICK from BARNEY'S FARM
"Bedroom setup"
10th week of flowering from 12.1.2026. to 18.1.2026.
but content of pictures is from 12.1.2026. to 22.1.2026.
Harvest week :) also drying days included.
Harvest was done after 4 days of darkness (15.1.2025.)
i did heavy wet trim and let them hang for few days
before puting them in nets, after some days in net,
i removed all buds from stems and put all in jars,
will burp them for next few weeks every few days.
Trough drying process(10days) i took 25g for somoking.
and with that included weight of dry bud was 992grams,
also i forgot about first two braches which i removed and smoked
while platns was alive at end of week 9 which was 18g, so all in all around 1kg with 13 plants.
Here with these 13 plants which i had is three phenos,
maybe only two plants was real Moby Dick (pheno no1),
these others (most of them) was mix between G13Haze and WhiteWidow,
with strong domination of WW over the G13Haze (pheno 2),
and one plant was where G13Haze was more dominant over WW (pheno 3).
All buds are dense and rich with trichomes, smell is citrusy and very very strong.
This buds hiting hard, very strong sativa which i rly like :)
Moby Dick was very easy to grow, plants rly liked heavy training,
and once again Barney's Farm genetics did great for me. :)
Take care and much love.
ॐ

Likes
56
Share


@JuanHaze_Arg
Follow
04/04 se levantaron hermosas! Les faltaba alimento a las pobres plantas,
Se realiza fertilizacion foliar y se riega el sustrato con el estimulador de floración big one. 500 cm3 de agua de osmosis + 500 cm3 de agua del grifo + 0.5 ml - cal mag de top crop + 1.5 ml de big one - top crop. EC: 1.1 PH: 6.3.
En 10 días se pasa a flor.
Se agrega al sustrato 20 gramos de bokashi de murciélago 🦇 vegetativo
07/04 se riega con 2 litros de agua( 50% osmosis + 50% canilla) + 1 ml de cal-mag de top crop (una bomba) + 2 ml de oro negro de namaste PH: 6.2 EC: 1.0
Se coloca red para hacer scrog

Likes
17
Share


@Buffi
Follow
Endspurt...es wird langsam herbstlich...bekommt nach wie vor nur noch wasser...Trichome werden ab jetzt regelmäßig geprüft
Licht auf ca 60% reduziert
Likes
32
Share


@BudBoutique
Follow
! this is my current status, gonna upload my last veg weeks within the next week - got a bit busy around Spannabis - thank you for your understanding! 💚
Welcome to Bud Boutique Grow Diary - really appreciate all your love and support :)
Dont forget to check out my other current grows!
🗓️ This Week:
after 48 hours of complete darkness (important for seedlings to make sure all plants switch into flower same time), I finally switched my lights to the 12/12 schedule and sent my ladies into the flower.
- more than healthy and going well
- Day 5: super strong and praying upas u can
- Day 3: Foliar spray with APTUS Regulator and APTUS Nutrispray to give them extra micronutrients and give them a little shell for protection.
! always use APTUS Regulator first and mix well with your water before adding any other nutrients for Feeding or Foliar!
Thank you for still staying with me 💚
___________________________________________
--- 🌱 Strain (Sponsor) ---
🏷️ Stardawg by MSNL
https://www.marijuana-seeds.nl/stardawg-feminized-seeds
--- 🥗 Nutrients and Feeding (sponsored by APTUS: APTUS Ambassador) ---
🍸 APTUS: full nutrient schedule extreme
-- Regulator, N-Boost, P-Boost, CaMg-Boost, K-Boost, Allin1 Liquid, Startbooster, Topbooster, Enzym+ every feeding
-- Fulvic-Blast, NutriSpray as Foliar each once a week
🔗 https://aptus-holland.com/
--- ♻️ Grow Control (Sponsor) ---
TROLMASTER: TENT-X + LM14 Light Adapter to dim/sunrise/sunset lights + Temp & rH Sensor all remote on App
🔗 https://www.trolmaster.eu/
--- 🏭 Grow Setup ---
💡LUMATEK Zeus Pro 600
* 🏠🌿 Indoor: Homebox 120x120x200cm (4x4)
* 📐🌀 PrimaKlima exhausting Fan 1180m3/h (running on 60-80%)
* 🌀 Can Light Filter 800m3/h & 1x Fanbox 1x Dyson fan for Air circulation
🔗 https://lumatek-lighting.com/zeus-600w-pro-29/
🔗 https://primaklima.com/de/shop/ventilatoren-de/ec-ventilatoren/pk160ec-tc/
🔗 https://canfilters.com/products/filters/
All Likes and comments are highly appreciated!!!
👨🌾 don't forget to check out my Instagram for daily educational content: budboutiquee
- Bud Boutique

Likes
99
Share


@TheFoxFarmer
Follow
Week 8 Flower
Flush flush flush 💦🚽💦🚽💦
It's extremely important to flush for at least 14 days when using synthetic nutes, or any bottled nutes in my opinion. The aim is to make her cannibalize (fade) as much as possible before she's chopped. By doing this, she's using up her stored nutrients, causing the leaves to eventually die. The better the flush the cleaner the smoke 👌💨 even when in an organic set up, the plant needs to be nicely faded before being harvested. Otherwise she's still full of nutrients. I still feel I'll be able to get an even better flush when I eventually make the switch to RO water, as my tap water holds a ppm value of approx 150. It's not too much, but 0 is always better.
She was taken down on Day 57 flower, after a 16 Day flush. I didn't want to take her any further as she was quite stressed being so close to the light. So to avoid getting seeds I waited until she had a beautiful fade before giving her the chop ✂️ I always take my girls down about 30mins before the light turns on so there is minimal chlorophyll production in the plant. This is to ensure the best smell, taste and overall burn after drying and curing.
A subtle but very sweet-ish tropical fruit skin kind of smell to her. Her buds are super dense and covered in trichomes. I trimmed off all fan leaves and then each branch was hung in my drying box and placed in a cool area. She was dry after 6 days and ready to be dry trimmed and jarred for curing. I'll post those pics with the harvest update!
Thanks for following and happy growing! 🐺