The Grow Awards 2026 🏆 


Likes
Comments
Share
@The_Doctor_Green
Follow
Esta semana he regado solo con flora booster 2 ml x litro de agua.
La planta de la tierra, la sigo estirando hacia los costados.
Las de las macetas se ven sanas y bien, de a poco se van
Likes
24
Share
@Dr_Sampson
Follow
Day 8- CRX Sunny X-5 is failing. Time for a new flowering LED. Thinking either the Viparspectra 1200w or the Mars Reflector 192 but open to suggestions for a 4x4 canopy.
Day 9- more leaf tucking in the net. Decided to go with two smaller lights(Mars ECO98’s) rather than 1 big one as there’s nothing in the middle to utilize the primaryily lit area of a bigger light. Hopefully they arrive tomorrow.
Day 10- Everyone happy and flowering. Topped up res with H2O. Anxiously awaiting new lighting
Day11 - New lights arrived and installed. More leaf tucking. All plants are actively flowering now
Day13- more tucking. Buds are beginning to stack up and seem to be liking the new lights.
Day 14- more leaf tuck and H2O topup. Next week lower N. Raise PK and will likely add some RAW amino acids, and biogenic silica. Possibly some vitamin B.


Likes
163
Share
@JamMAKEcan
Follow
After plucking middle stems she has filled out perfect...just waiting couple weeks to grow up little before switching to flowering.. She in same tent as malasana cookies an purple shot... BIG UP MARS HYDRO COMBO LIGHT & TENT.. HIGHLY RECOMMENDED
Don't get any better

Processing
Likes
7
Share
@thephalanx420
Follow
Welcome to my FastBuds GSC grow-off diary! I plan on growing 2 seeds from the same package - one using a 950ml Gatorade bottle dwc system, and the other sharing a 64L reservior DWC. I'll grow them both while trying to be as simiar in techique as i can, but i'm more interested in how the 950ml does, so might not be super picky about doing things exactly the same, heh.
I'm making this all up as I go!
Enjoy the ride!
Week 0
======
Day 0.1 - 2 seeds in water for 24hrs
Day 0.2- 2 Seeds in wet paper towel, in a plastic bag for 24-48hrs until taproot is out
Day 0.3 - 24hrs later - one seed has sprouted a tail
Day 0.4 - 2nd seed sprouted tail; put both seeds into rockwool
Day 0.5 - 1st seed sprouted from rockwool
Day 0.6 - 1st seed doing well, 2nd seed no change
Day 0.7 - Checked 2nd seed and hasn't budged, so it's a dud. Started a new seed (had 3 GSC, so all good!)
Day 0.8 - 1st seed into the 1L DWC bottle!
Day 0.10 - 3rd seed germinated - into rockwool to sprout.
DWC Prototype
-----------------
- 950ml Gatorade Bottle
- 2x small air stones
- 1/2" overflow tube where i want the water level to be
- Nutrient top-feed line
The reservoir below is 19L (~15L of solution) with a small 80gph water pump on lowest setting, which will be on a timer for 15 mins every 3 hours (at first - we'll see how that goes).
The water pumps nutrient solution up to the Gatorade bottle and the overflow goes back down into the reservoir.


Likes
5
Share
@Ninjabuds
Follow
My Rainbow Saltz plant is branching out really nicely! It's about medium-sized compared to the others in the tent, but it looks super healthy and vigorous. I've got a good feeling about this one – it seems like it's going to be a strong grower. Can't wait to see how it develops!
The weather has been absolutely gorgeous this past week! We've been hitting that sweet spot of 70 degrees during the day, perfect for getting outside and soaking up some sun. Then, it cools down to a comfy 50 degrees at night, which is ideal for sleeping with the windows open. I've been loving all the fresh air!
I finally got around to building that little wooden planter for my windowsill. It was a fun project, and now my regular plants have a nice new home. It really brightens up the room, and I'm thinking of adding some herbs to it soon. Maybe I'll even try growing some basil!
Likes
26
Share
@Dirtysouthgrower27
Follow
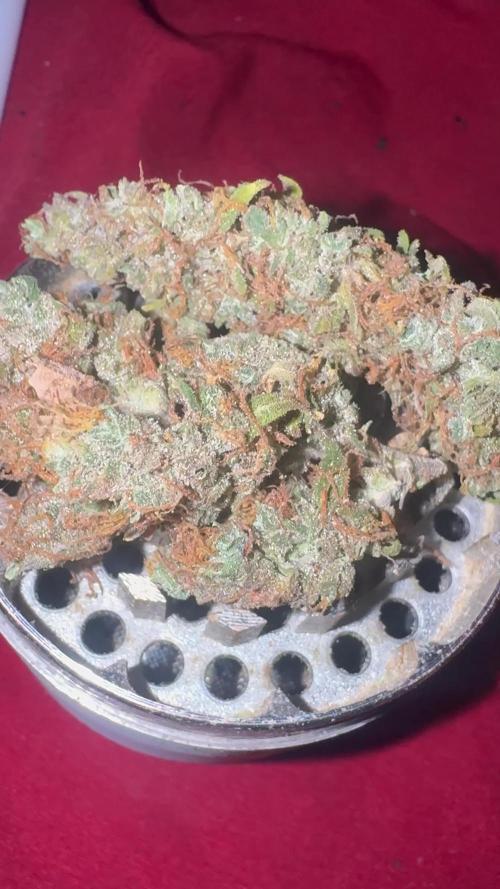
82.5 grams she taste so good ... thanks for all the love everyone


Likes
5
Share
@Ninjabuds
Follow
Last week, my pound cake auto plant totally exploded with growth! It's insane how much it's changed. I swear it grew several inches overnight. The leaves are this gorgeous shade of green, and the whole thing looks super healthy and happy. I'm seriously so proud of my little plant baby.
Likes
31
Share
@Tweak
Follow
Lots of new growth this week, looks like the screen is about 50% full, I’m thinking in the next week or two I’ll get to 12/12. In the mean time I’m adding an extra hour of darkness every few days to make her transition to flower smooth and stress less for her.

Likes
13
Share
@Lazuli
Follow
I feel this plant will need 14 weeks so 3 to go, next week i start the overdrive
Likes
8
Share
@czar712
Follow
close to harvest have milky trichromes all over the place but only 4th week of flower some ambers too. buds getting thicker by the day . can she be ready after the fourth week? gonna try for better trichromes shots i know spelling is off but its ok

Likes
31
Share
@JeyGanesha
Follow
Hanno iniziato bene la seconda settimana...Om namah shivaya..dal 30 /01/2024 inizierò a fertilizzare tutte le mie piccole......non capisco perché mi ha caricato 2 o più volte i nutrienti di advanced nutrient.....boh!!! Sto provando a cancellare ma invece di cancellare me li ricopia...sto uscendo pazzo..basta lascio così...
OM NAMAH SHIVAYA 🕉️
Likes
2
Share
@BudArt
Follow
Flushed her for 10 days straight water and waiting for it to fade to yellow before final cut. She will be hung next time we meet. The smell is amazing and super strong. Smells spicy and fruity somewhat, yes its sticky icky! See yall soon!!!!

Likes
15
Share
@WeedWagon
Follow
Not much happened this week except trichomes came out to be about 10% clear 75% cloudy 15% amber.
Likes
6
Share
@Chubbs
Follow
Week 6 update:
What up Grow family. These testers are growing fast and strong. Where in week 6 now and the swelling and ripening of flowers are going amazing. Still feeding 500ml/16oz daily as I've found that's the sweet spot for 3gal fabric pots for these. I'd say these probably have about 2 weeks left until they'll be finished.
All in all Happy Growing.
Likes
6
Share
@CalGonJim
Follow
1/16 it didn’t save the last thing I said on here it’s Tuesday and I just cut off a NUG and she is so good. I don’t need to dry her there’s not a lot of moisture this plant feels more like a crisp salad than anything else it’s just great I can’t even describe it but the smell and taste of the plant is the best and it doesn’t need to be dried. It just is perfect cut it smoke it and I love it it’s the best experience
1/17 👍
1/19
1/20


Likes
25
Share
@Elpicor
Follow
Start 25/10/2024
Harvest Day 74 - 06/01/2025
92 cm jet fuel was the taller
No flush, flawless finish 2 ml a week an half before harvest then just watering with pH 8.
Smelling exactly as described in Sweet Seeds site, a fruits explosion, special thanks! They sent me a lot of free stuff Thanks!
Also thanks to Grow Diaries as my best professor ever...and obviously all of you sharing your magic experience, see ya next two weeks maybe