Likes
Comments
Share
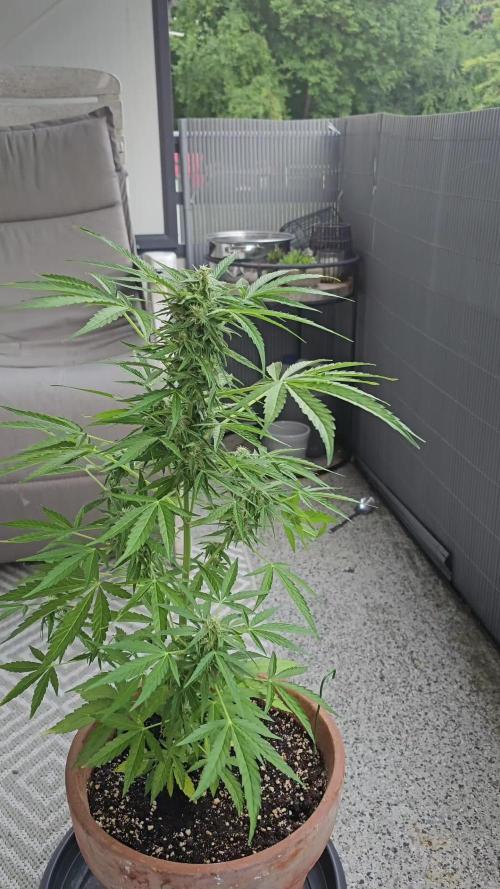
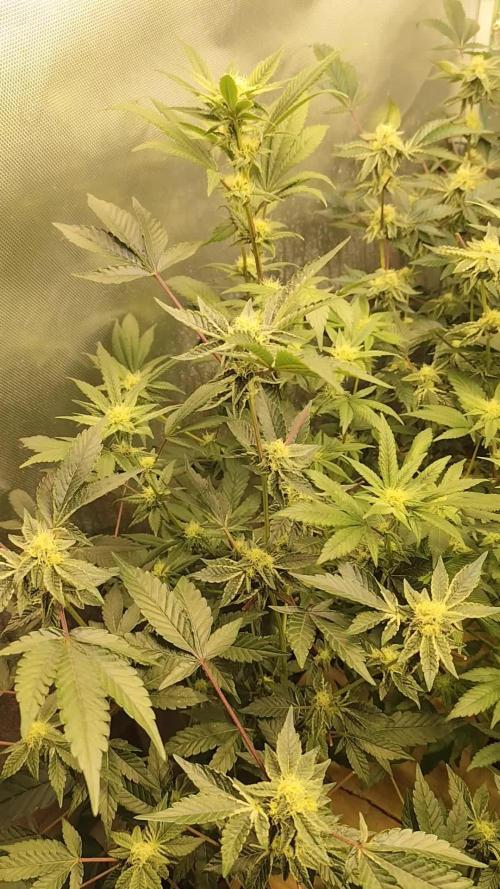
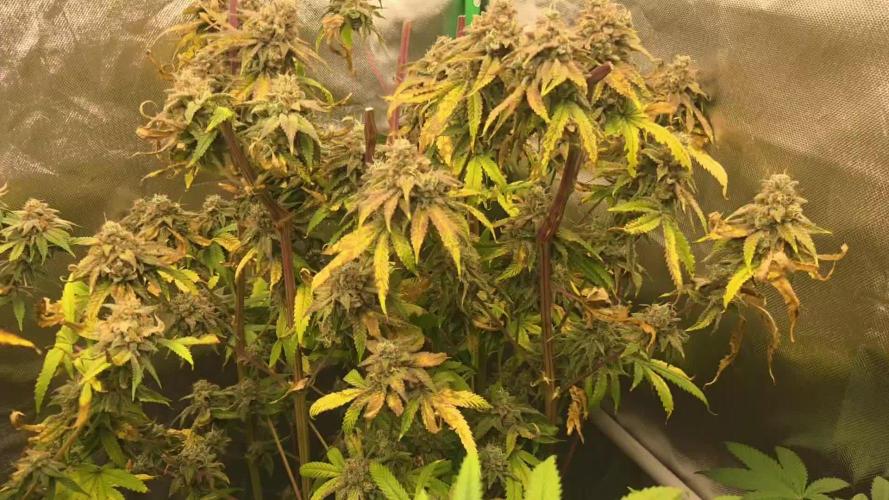
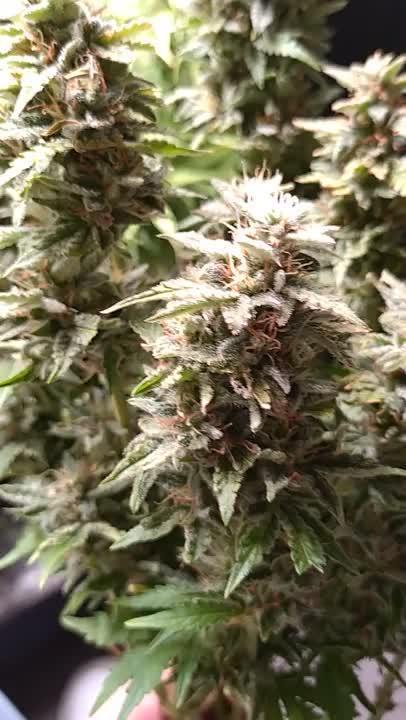
Eccoci qui!!! Tutto procede per il meglio, i pistilli sono usciti e ora si va dritti dritti alla maturazione, NE VEDREMO DELLE BELLE!!! La piccola cresce molto vigorosa ed in salute, chissà cosa ne verrà fuori intanto possiamo solo ammirare questa bellezza!! Grazie a tutti per il supporto ❤️🔥🌲
Likes
5
Share
—————650umol/s————— G.E. Lighting LUCALOX 400W
Likes
4
Share
@m0use
Follow
***Sponsored Grow*** = Medic || https://medicgrow.com || Grow = ***Sponsored Grow*** Ok big update this week, I finally edited the footage of the lights and got their unboxing photos processed, this took way longer then expected and should have been done on germination or week 1 entry but better late then never. You can really see how the lights shine in comparison to my older ones. The brightness of the leds is next level and I can use their V1 spectrum from seed to harvest. Its a great balance of red and blue in a full spectrum light. The medic grow mini sun 2 is a all purpose light that I can see myself getting lots of use out of in the future. Plus they fit in my tent just as snug as my last ones and that's a big thing for me, I don't like dim corners. I am using the lights at 80% dim level. this will be raised to 100% when they enter flower :D First time useing lights I can dim. they also have an onboard timer attached to them, I will be playing aorund with this to see if its something I want to use in the coming weeks, I all ready have all the external timers so I can see how this is a useful tool for anyone starting off without them. On top of all this I also transplanted my plants into their final pots. they went from a .7-.8L to a 2gal or 7.5L, all the root balls on the plants where perfect, nice white roots, maybe a bit compacted for the size and might explain why I am having some issues with them but healthy none the less. I think they will not start to grow a bit better and I will see less issues moving forward. I still have yet to get a new PH pen but I am blindly guessing the PH by adding 2 drops of phosphoric acid ph down per 1gal of feed solution. it seems to be working out just fine. Till next week. ***Sponsored Grow*** Official Website: https://medicgrow.com/ Facebook: https://www.facebook.com/medicgrowled Twitter: https://twitter.com/medicgrow Instagram: https://www.instagram.com/medicgrow420/ YouTube: https://www.youtube.com/channel/UCNmiY4F9z94u-8eGj7R1CSQ Growdiaries: https://growdiaries.com/grower/medicgrowled https://growdiaries.com/grow-lights/medic-grow
Likes
9
Share
@MeneBud
Follow
DAY 83 - 26/05/2025 - COLHEITA First cycle results: Despite a broken branch in the third week of flowering, the harvest was 35 grams. I ended up tasting it uncured, and it was wonderful. After a month of curing, the grassy flavor has completely disappeared, maintaining a sweet tea with a hint of sour green apple. When smoking, the taste lingers with each puff, leaving a similar aftertaste in the mouth. The effects are energizing, upbeat, and creative. I've already reserved space for it in my next cycle, but this time I'll use FastBuds Afghan Kush Auto for more relaxing effects.
Likes
253
Share
@Hologram
Follow
Sticky has survived another night outside in my greenhouse..it was very cold this morning,; 10 C 😠! She hasnt grown much this week, only 5 cm but that has to do with me topping her, last week🙏 Tonight im gonna use heathing mats in the GH.. so maybe it will stay little bit warmer (waiting for my extention cord 2b delivered today✊) But maybe i will just put them inside again tonight, on my windowsill .. i dont want them to get sick🙏 the temp. at night is just too cold..heating mats in Greenhouse outside is not gonna help much i think.. But now she is on my garden table waiting to catch some rays from the sun..and then im gonna give her a good fotoshoot! forcast of today is very sunny so 🙌 But i will put her in my greenhouse this afternoon, so she can hide from the strong winds.. I already see some sighns of pre-flower coming up.(so shes still happy!) Sure the hedgehogs will keep her warm ! 😇 And dont forget: FOR ALL MY GROWBROS/SISTERS IS A DISCOUNT CODE: ZAMMIGD2023 Happy growing for all✊ Hour later: It was hard to make nice pix, bc of wind..so i made a small video so you can see her dancing(headbanging 😁) in the wind (and to check if my videos can upload.. my cam had some probs..) wanted to make a better one, but then my batt. died.. 💩happens i guess..😳
Likes
44
Share
No changes hav starters to feed with more water and they seem to be loving it tge revegged clones n triple g has went crazy with fresh growth Im going to try get a ten week veg period but am no sure how long or wen a started av. it checked a sm to stoned yo notice or remember lol ma diary’ will be updated rite before the flip
Likes
48
Share
@PapaNugs
Follow
This was a quiet week. The girls were recovering from their topping but were also flipping into flower. They have been getting water every two days and that seems to be an issue so I bought an auto watering drip system to install next week. This girl has the biggest comeback outta all of them. Has continued to do well and has responded very well to the topping. Excited for this one Dimmed to 60% Here are the lights details: Medic Grow Mini Sun-2 150W LED Model: MN150-022 Spectrum mode: V1 Efficacy: 2.8 umol/J Thanks for stopping by! You can find the light on Grow Diaries: https://growdiaries.com/grow-lights/medic-grow/mini-sun-2-150-watts You can find the light on Medic Grow's website: https://medicgrow.com/
Likes
1
Share
@mauigrown
Follow
Week 8 is finally here! We changed up the nutrient feeding to the week 8 on the feed chart. I am diluting everything at a 50-40% rate to keep EC within acceptable ranges of 0.8 - 1.1 EC. I started adding Terpinator to the mix and I do notice a significant smell increase vs. without it. I am going to keep using this as I think it is a great supplement. I did figure out that even though on the bottle and on the specific feed chart, it says it is a light formula that will have minimal impact on EC and will not burn your plants at the recommended rates - it will! First time mixing up my nutrients with terpinator, I had to dilute it because the EC was too high. I put the recommended amount in my mix, and checked EC and low and behold it was high. The next feeding I did a 50% dilution rate and that seemed to be ok if you are diluting your other inputs properly to compensate. ALWAYS make sure your EC and PH are in check prior to fertigating your plants. I am watching the trichomes on a daily basis and am looking to harvest sometime this week or next. I plan to dry it in the tent it is growing in as it has AC and good airflow. Once they are done drying, they will get trimmed up, lightly vacuum sealed and stored in the freezer. Updates will be coming throughout the week!
Likes
76
Share
Day 57 - Gave 17oz of water, rotated but not liking the leaves. Spritzed leaves with water... Day 58 - Moved light to 22" cause I am not liking the leaves... Day 59 - No amber tricomes yet that i can see, raising light may have helped. She looks better after removing much of the brown leaves as suggested, Thank you!! Going to try the Molasses treatment for 2 days then just let go. 18oz of Molasses solution @ 1 tsp per 36oz... Rotated and Spritzed leaves with water... Day 60 - 17oz of water, Rotated and spritzed leaves with water. Day 61 - Rotated and spritzed leaves with water. (Sorry no pics) Day 62 - 17oz of water @ rotated Day 63 - 34oz of water @ rotated
Likes
170
Share
Bonjour à tous les padawans et les maîtres jedis Jour42 ma plante entre bien en floraison je pratique sur elle une defolliation pour permettre aux têtes de prendre la lumière La floraison des plantes de cannabis La plante de cannabis passe par différentes étapes de vie avant de parvenir à la récolte. Ces étapes sont : la germination, la pré-croissance, la croissance et la floraison. Pour les autofloraisons il n'est pas nécessaire d'avoir de changer le cycle de lumière elle entre en floraison automatiquement voilà d'où elle tient son nom "d'autofloraison" L'origine de l'auto-floraison vient de la sous-espèce "cannabis sativa ruderalis" , qui à l'origine produit de très faibles niveaux de THC. C'est en croisant cette variété de marijuana avec d'autres qui produisent des niveaux de THC plus élevés qu'à vu le jour ce magnifique compromis que sont les variétés auto-fleurissantes avec des taux de THC très satisfaisants. En parallèle, cela a permis d'améliorer la production de ces variétés, qui initialement étaient exceptionnellement basse. Pour des résultats optimaux, en culture Outdoor (extérieur), je recommande que la germination des graines de marijuanaAuto-flo se fasse entre avril et août. En culture Indoor(intérieur), la photopériode idéale que ce soit pour la croissance comme pour la floraison est de 20h de lumière. N'oubliez pas que ces graines ne sont pas tributaires de la photopériode pour passer en floraison. Il est préférable d'utiliser des pots d'une capacité de 10 à 20L dès le début, étant donné que leur cycle de vie est réduit, les auto-flo n'ent pas besoin de plus de volume pour se développer. Vu sa petite taille (et la discrétion) elle fait l'objet d'un bon choix pour la culture de cannabis sur balcons. La première variété de Lowryder auto-floraison a été créé à partir de cannabis indica sativa croisé avec des génétiques de cannabis sativa rudelaris par la banque de graines de marijuana "The Joint Doctor". Puis vinrent la White Dwarf de "Buddha Seeds", la Roadrunnerde "Dinafem", l' Auto Stoned d' "Autofem", la Speed Devil de "Sweet Seeds" , la Maxi Gom de "Grassomatic", la Flash, la Gnomo de Kannabiaet bien d'autres. Jour42 defolliation (video) Avant toute chose n'oublions pas de bien désinfecter ses outils et bien ce laver les mains. Quesque la defolliation ? LES CULTIVATEURS AMATEURS, PRENEZ GARDE, MAIS NE PRENEZ PAS PEUR La défoliation consiste à retirer les feuilles des plants de cannabis en intérieur afin d'accroître le rendementfinal. Le cultivateur amateur doit faire preuve de vigilance lorsqu'il commence à appliquer cette technique de taille. Malgré le débat sans fin entre ceux qui prônent cette technique et ceux qui la dénigre, il n'y aucune raison pour qu'un amateur ne s'y essaie pas afin de voir si ça lui convient ou non. COMMENT DÉFOLIER Que vous tailliez les feuilles ou les branches des plants de cannabis, il vaut mieux utiliser un sécateur stérile qui est confortable en main. Arracher des feuilles à la main manque de finesse et engendre souvent par accident, l'arrachement des couches d'une tige en plus de la feuille. L'objectif principal de la défoliation est de permettre une meilleure pénétration de la lumière et de promouvoir la production de plus grosses têtes. Les feuilles éventails qui font de l'ombre doivent être retirées. Tailler la tige principale et/ou les pousses secondaires n'est pas de la défoliation. La règle d'or lorsque vous donnez à vos plantes un rafraîchissement est de commencer avec les feuilles nourricières les plus grandes et les plus larges, en taillant du bas vers le haut. Il est important de retirer les feuilles stratégiquement et non pas au hasard. Pensez également qu'il vous faut limiter votre rafraîchissement à approximativement 10 à 20 % des feuilles totales de votre pied. Il est très facile de s'emporter durant la taille et de se retrouver avec des plantes chauves. Un excès de taille de feuilles empêchera la photosynthèse et paralysera vos plants. QUAND FAUT-IL DÉFOLIER Il est assez rare d'appliquer la défoliation comme seule technique pour obtenir un fort rendement. La taille des feuilles est généralement associée à d'autres méthodes de tailles et de palissage pour un meilleur rendement telles que le topping ou étêtage, le FIMming, le LST, le manifolding, le supercropping et le ScrOG. Les cultivateurs utilisant la méthode ScrOG auront besoin de retirer toutes les croissances inférieures ainsi que les feuilles et les tiges se trouvant sous le filet. Les plants de cannabis peuvent être défoliés dès lors qu'ils sont passés de la phase de plantule vers la phase de croissance végétative. Cependant, il est recommandé aux cultivateurs amateurs de laisser aux plantes 1 à 2 semaines de croissance végétative avant de s'attaquer à la défoliation de celles-ci. De plus, certaines variétés sont plus sensibles à la taille que d'autres et de ce fait, seront plus stressées par la taille des feuilles. Surveillez minutieusement le comportement de vos plants après la taille. Une période de convalescence de minimum 3 à 7 jours avant de recommencer la défoliation est fortement recommandée pour éviter trop de stress aux plants. Les cultivateurs peuvent également défolier pendant la phase de floraison, ce qui permettra à l'énergie de la plante d'être concentrée vers la production de têtes tout en limitant l'ombre et l'excès d'humidité. Néanmoins, il est important de ne pas défolier trop tard sous peine de simplement blesser ses plants inutilement. LES AVANTAGES DE LA DÉFOLIATION Évidemment, l'avantage numéro un de la défoliation, c'est l'augmentation du potentiel de rendement de cette technique de taille pour tous types de cannabis allant de la photopériode aux variétés autofloraison. Ce n'est pas un secret que les fleurs qui reçoivent plus de lumières deviennent plus grandes et larges que celles dissimulées dans l'ombre des feuilles. De plus, retirer les feuilles intérieures des plants touffus aide à prévenir toutes menaces de moisissure. Les plants très feuillus avec un feuillage intérieur dense produiront une quantité importante de têtes pop-corn. Dans le pire des cas, les branches de têtes et les têtes qui sont denses succomberont au pourrissement. Si vous observez des gouttes d'eau se former sur la surface des feuilles, il est grand temps de penser à faire de la défoliation. Libérer la zone inférieure et médiane des feuilles est un excellent moyen d'améliorer la circulation de l'air. LES DÉSAVANTAGES DE LA DÉFOLIATION Les plants de cannabis en intérieur bénéficient de la défoliation pour deux raisons. La première est parce qu'ils reçoivent la lumière d'une source stationnaire au-dessus d'eux, et la deuxième est parce que les conditions environnementales sont contrôlées par le cultivateur et non Mère Nature. Les plants d'extérieurs eux, n'y gagnent pas beaucoup, car les cas échéants se vérifient pour eux. Le soleil traverse le ciel, illuminant sur sa route, différentes portions de la plante de son lever à son coucher. Les cultivateurs en extérieur n'ont pas besoin de manipuler les plantes afin qu'elles se développent en adoptant une structure plate puisque le soleil est infiniment plus puissant que n'importe quelle lampe de culture et qui plus est, il est toujours en mouvement. Tailler les feuilles des plants extérieurs les rend également plus vulnérables aux conditions humides et brise leurs barrières naturelles contres les nuisibles. De nombreux cultivateurs d'intérieur peuvent, et malheureusement, c'est souvent le cas, réduire le rendement final à cause d'une défoliation faite au mauvais moment et/ou excessive. Tailler les plantules n'est pas conseillé et engendre souvent des plants nains. Scalper les plants matures est encore pire, et au lieu d'obtenir de longues branches de têtes, vous obtiendrez probablement encore moins de fleurs. De même, tailler des plants malades ou en mauvaise santé à n'importe quelle période de la croissance risque de paralyser la croissance plutôt que d'encourager la formation de fleurs denses. Jour44 Arrosage une fois sur 2 topmax de biobizz Jour46 arrosage avec de l'eau ph6.3 à laquelle j'ajoute 0.8g par litre d'eau de feeding enhancer greenhouse. Jour47 léger arrosage. Jour48 léger arrosage
Likes
48
Share
~ WEDDING CHEESECAKE FAST FLOWER by FastBuds ~ Well fam, here we go again with another epic strain from FastBuds Fast Flowering stable. After having such tremendous success growing their Gorilla Cookies Fast Flower outdoors last year, I've decided to run another of their fast flowering strains outdoors this year... Wedding Cheesecake Fast Flower! The best description of this awesome cultivar comes directly from my friends at FastBuds which is as follows: "A delight for the mind and body: Wedding Cheesecake FF (Fast-Flowering) is a delicious strain that offers XXL yields in a 7-8 weeks flowering cycle. This terpene powerhouse produces loads and loads of mouth-watering vanilla-creamy-cookie-scented terps with hints of citrus and cinnamon. In addition to its delicious aromas, this variety grows very well in both indoor and outdoor setups, yielding up to 650 g/m2 without extra maintenance, making it the ideal strain for beginners as it allows you to maximize yields while minimizing work. This super-fast feminized photoperiod version offers upbeat and energetic yet deeply relaxing effects that are perfect for consumers looking for a heavily focused, motivating, and creative high. It’s the ideal strain for those needing that extra energy boost to start a busy day on the right foot. Wedding Cheesecake FF boasts chunky, large-sized buds with a thick layer of silvery-white resin and bright orange hairs scattered all over: that just screams ‘quality’. The lime-green flowers sparkle with an array of hues ranging from dark to light green, to magenta and purple, and reek of a delicious aroma that’ll remind you of fresh store-bought cheesecake. This is an XXL hybrid that grows extremely tall in height, reaching up to 3m with one huge main cola and multiple long side branches that can withstand enormous yields of up to 650 g/m2 with ease. Wedding Cheesecake FF is extremely resilient to the elements and can be grown in almost every climate as long as you’ve got the space and basics covered, making her an excellent choice for those looking for large-scale harvests with a quick turnaround time without much effort." ____________________________________________________________________________________________________________________________________________________________________________________________________________________________________________________________________________________________________________________________________________________________ The Setup: This is going to be an outdoor grow, but I have started the Wedding Cheesecake FF indoors as our weather is still too cold to put her outside (nighttime temp's dipping regularly into the 30's℉). The plan is simple... let her grow inside under a 19/5 light schedule until the nighttime temperatures stay above the mid 40's℉, at which point she'll be moved outside and transplanted into the soil which I have already setup and inoculated with beneficial microbes, and then let the fun begin!🤪💚 ____________________________________________________________________________________________________________________________________________________________________________________________________________________________________________________________________________________________________________________________________________________________ Weekly Updates: 3/28- Day one for the FastBuds Wedding Cheesecake FF! I initially soaked the seed in lukewarm tap water for 24 hours, at which time the shell had split and a root tip was visible. I then transferred the seed to a pre-soaked peat pellet which was placed in a 1.5"x1.5" plastic seedling pot which was set into the bottom half of a Solo cup that I cut in half. 3/30- As soon as I could see a root beginning to emerge from the peat pellet I transferred the pellet, that I first coated with Extreme Gardening's MYCOS, into a Solo cup that had a 70/30 Coco/Perlite mix that was pre-amended with Gaia Green 4-4-4 slow release dry amendment, along with wiggle worm castings. After placing the Wedding Cheesecake FF in the cup, I watered it in and placed a humidity dome over it to ensure that it stayed in a relatively moist environment as it gets acclimated to its new 'temporary home'. 4/1- The Wedding Cheesecake FF has taken right to her Solo cup and is looking stress free. Her vigor and color are both exceptional as well! 4/3- Well there's the first week for this little girl. Stay tuned in the coming weeks, especially when she gets moved outside and really starts to take off. I can't wait... can you? Thank you for checking out my diary, your positive comments and support make it all worthwhile! 💚Growers Love!💚😎🙏
Likes
27
Share
Welcome back 🙌🏼 Update - Week 4 - just through week 4 and things are looking great. The runtz is finally starting to pack on some size, and both plants are beginning to get some girth to them too! Moving into week 4 now - I’ve just got a new light that’s pretty much double the intensity, and the light coverage reaches the sides of the whole tent now from 12/14 inches away from the tops - so hopefully we shall see the buds start popping. Switched out voodoo juice for B52 now. Photos don’t show the best pics of the trichs forming, but they’re starting to pop off. The zkitttlez seems to still be slightly ahead of the runtz in development and it’s starting to produce a lovely scent on the nose. Other than that, business as usual! 😎 Thanks for reading! 🤟🏻
Likes
6
Share
Happy about this harvest. Very strong orange citrus aroma with some dense buds along with it. Definitely a sativa dominant bud, with a smooth smoke. Have experimenting on self pollinating and tried it on one particular bud on this plant, and i have to say, it has worked! One seed has been found and is directly been placed in soil 3 days ago. Have not seen any faces submerged yet but hopefully fat monkey #2 is on the way soon with some new growing techniques 😏
Processing
Likes
65
Share
She has been on 12/12 for 2 weeks now and starting to flower. She is one of the slower ones to transition but making progress. I raised the light a little to try to get some stretch on her for more open bud structure. Couldn't be happier with how these 6 girls are playing well together so far. Going to start them on some liquid Koolbloom next week. Nutrients per gallon .5 tsp maxibloom .25 tsp maxigro .5 tsp calimagic .25 tsp armor si .1 tsp 90/10 humic/fulvic acid.
Likes
Comments
Share
@xHide_BG
Follow
Good Strain .. it's not the best of all. but the experience is worth it. 😀I think it's a great plant to test xxxxxxxxxxxxxxxxxxxxxxxxxxxxxxxxxxxxxxxxxxxxxxxxxxxxxx xxxxxxxxxxxxxxxxxxxxxxxxxxxxxxxxxxxxxxxxxxxxxxxxxxxx xxxxxxxxxxxxxxxxxxxxxxxxxxxxxxxxxxxxxxxxxxxxx xxxxxxxxxxxxxxxxxxxxxxxxxxxxxxxxxxxxxx xxxxxxxxxxxxxxxxxxxxxxxxxxxxxxx xxxxxxxxxxxxxxxxxxxxxxxxxx xxxxxxxxxxxxxxx xxxxxx x it's not the best of all. but the experience is worth it.
Likes
7
Share
7/8/26 I really dont feel there is much to report on this plant or my whole grow in general. Maybe im just being lazy. I feel like it was just a bit of a normal week everyone got fed twice. I made sure to take my time and water them with care. Only real note is that i got a few spidermites in the tent. I caught it super early and manually squished them and hopefully its done. I did see one outside i believe. And thats got me wanting to lay down some pesticide to get rid of those bastards from around my house. This spit shot has been loving the sun loving it outside and is looking great. Photoperiod plants are the shit. Bad slow start? No worries just veg em longer and bang big gorgeous girl like woah now! 🙃happy growing friends ✌️
Processing
Likes
8
Share
@Max1973
Follow
Day 35 - few pics and vids..... everything going along nicely 👍 This is a pretty big update, so i'll add to it over the next few days, as i finish building it all.... i'm building these 2 x SS haze, the full tent, just finishing up the setup..... trimming them, changing solutions to 12/12 and flower..... changed the exhaust fan and filter setup to the better outside the tent method.... and installed 12v CPU computer fan, lol ("alta9" fits in 4in ducting perfectly), drops wattage on extractor fan.... 10w tops... got a few kg of active carbon and making/replacing the carbon filter .... i'll add afew vids of the new setup in afew days... Day 36 - few pics/vid of new tent setup...... "alta 9" fan :) post tomorrow after i finish trimmin and settin up night mode etc...... and into tomorrow we go, lol ... Day 37.... slowly getting there..... little bit more to go... this should make things abit more interesting..... right tank (short babie) has : 19 lts of tap water @18oC + 150 ml -dutch master one gold FLOWER.... 6.4 PH - 1400 PPM left tank has : 19 lts of tap water @18oC + 50 ml of elements a and 50ml of b and 10 ml of nitro and 20ml of Crystalic (molasses/pot) .... 6.5 PH - 1200 PPM more pics / vids of the finished tent setup.... roots, transfer, etc... Day 37 is alot of vids of the clean and change to flower..... edit - day after build noticed left tank (nutrifield) not enough bubbles..... pulled out the 4 air pump and swapped to the 2 x original oxipumps... much better, also to fix the problem with ph goin high, and bubbles not stirin the mix, was to add another 10ml of crystallic and another 5ml of nitro... then pumped both tanks with ph down and set em to 5.8-6.2 - both plants have fully recovered from the big trim, and bounced back within 12-24hrs, post pics/vid in abit..... Day 39 - made a freaky video... was curious about what the plants would see looking up at the lights... the lights and buzzing of air compressors and bubbling tank water, and dazzling lights turned out pretty cool in vid editor, was in selfie mode.... and final vid of the bounceback from trim :) 👍😎
Likes
6
Share
Привет друзья. Наше знакомства продолжается с новым сортом автоцветущих растений от Smail_Seeds сорт TROPICANNA POISONZKITTLEZ XL AUTO F1 reg. Сегодня растению 58 дней. Растение очень хорошо развивается, ни каких сбоев в генетике не наблюдается. Шишки наливаются😀 Сорт выводим сами. Смотри мой профиль, у нас всегда есть что то интересное. Не забудь поставить лайк❤️, если понравилась как прошла неделя И читайте наш TELEGRAM: https://t.me/smail_seeds #Smail_Seeds 😀
Likes
14
Share
Likes
6
Share
@Floryx
Follow
-getting really tight now -will install scrog-web to use the space fully -some leafs still have yellow and brown spots -think i will fetilize twice a week from now on -getting a lil cold in the night but therefore humidity is now almost perfect Thankful for any comment :)
Likes
21
Share
Hey guys :-) . Today the plant was sprayed again with neem oil. There weren't any more trips to be seen after the second application, but to be on the safe side, you did it again today get a cure. That's why the beautiful dark shimmer on the leaves :-). The ladies are developing well and have 1 week before I change the time to flowering. Normally I would let it get bigger and train because the tent only has 80x80 and 180 watts are available, so I will switch it over soon enough. This week it was poured twice with 0.8 l each time (for nutrients, see table above). Otherwise everything was cleaned and, as always, everything was checked. Have fun with the update and stay healthy 🙏🏻 👇🏼👇🏼👇🏼👇🏼👇🏼👇🏼👇🏼👇🏼👇🏼👇🏼👇🏼👇🏼 You can buy this Nutrients at : https://greenbuzzliquids.com/en/shop/ With the discount code: Made_in_Germany you get a discount of 15% on all products from an order value of 100 euros. 👇🏼👇🏼👇🏼👇🏼👇🏼👇🏼👇🏼👇🏼👇🏼👇🏼👇🏼👇🏼 You can buy this strain at : Clearwater Seeds Water 💧 💧💧 Osmosis water mixed with normal water (24 hours stale that the chlorine evaporates) to 0.2 EC. Add Cal / Mag to 0.4 Ec Ph with Organic Ph - to 5.8 - 6.4 MadeInGermany