


Likes
Comments
Share



Likes
1
Share


@Michijardinero
Follow
Bueno familia les cuento esta semana fue muy buena crecieron mucho hoy empiezan su primera noche de 12/12 e puesto el mismo riego la punta más alta esta en 50cm y las demás más o menos tienen la misma medida como es mi primera ves con un armario de 160 cm de alto y haciendo poda apical me dava miedo quedarme corto o que después no entren en el armario jejeje las e dejado en 50 cm y que sea lo que Dios quiera 🤣🤣🤣como siempre cualquier Consejo o cualquier crítica será bienvenida buenos humos familia paz

Processing
Likes
3
Share


@Kushizlez
Follow
Day 42-49
(Day 43) I was at the dollar store today and I found the best little plant risers. And they all link together in perfect 12” squares. Fits in my tent perfectly and only spent 15 bucks. That should help the dry downs quite a bit.
I’m going to transplant the euro genetics into 1.7g pots with amended sunshine mix #4 for their final containers.
I moved all of the non-marijuana seedlings into a small greenhouse out of my tent so I have some more space and light per plant.
I also set up an exhaust fan to keep the humidity at a perfect 65-70% night and day.
(Day 44) Everything is looking a little nute burned and droopy. The garlics are showing signs of overwatering and nitrogen toxicity. They look like they want to flower so badly. Node spacing is weirdly short too. I picked up the American genetics to look for roots and they were busting out of the bottom. They’re definitely not rootbound as they’re not even a foot tall yet. This is likely from having soil that is too compact (from using too much rock dust and not enough drainage) causing my waterings to not even reach the bottom of the pot. This was also happening to my other grow. I will make sure to very lightly pack soil into pots for now on because you can always add more later. I’m going to fluff up the pots and see if I can loosen the soil a bit. If that doesn’t work I’m going to look at transplanting into 3g fabric pots and lightly shaking off most of the old soil. Luckily I added a shit ton of drainage for the euro genetics when I amended the sunshine mix so they won’t need a transplant.
(Day 46) The fluffing didn’t do much. In fact it might have made it worse lol. I just went to the store and bought some Destiny Organics soil and have decided to transplant.
I dusted off 90% of the old soil down to root ball which will cause an insane amount of stress to the plants. The plants started in the aero garden were being choked out by the shitty sponge plug it was germinated in. I took a razor blade and carefully cut them down the middle so the stem can expand. I might have cut a few major roots one or two plants. Other than that everything is transplanted. I cut all my amendments in half and I packed the soil very loosely this time.
The situation is not ideal by any means but I’m hoping they will bounce back in the next week. This should at least set them up for a more successful flower. I can’t really expect much quality from botched run but who knows. I might come out with some fire. Since this is my last grow here I don’t even have to pay the power bill for the next few months! (I have a very generous landlord as he’s letting me finish my grow until mid September now 😂)
(Day 47) I’m going to give them their first good watering and test my fluffy soil. I watered in approximately 700mls each making sure it soaks to the bottom of the pot.
(Day 49) All the plants have bounced back except for the ones with root damage. They are still looking droopy and sad. The black garlic #1 has recovered really nicely and is looking happier than ever. The apical growth tip is so tight it has like 4 nodes within an inch somehow. I recently learned that hormones contained in kelp and seaweed extracts can act as plant growth inhibitors and shorten node spacing drastically. I only added a very small amount of kelp meal to the soil so it must be leftover from the previous foliar sprays Velokelp. I’m going to pinch the top off bg1 and see if the lowers can catch up. Sucks to do that so close to flip but oh well.
The euros are looking fully recovered from their burn a little while ago. The sunshine mix is quite thick and water retentive as well but at least it has some extra drainage. They’re all looking quite healthy.


Processing
Likes
73
Share


@cannabis_connoisseur_circle
Follow
Day 29: Beginning of week
Problem: there are some flies in grow room and treatment will start from today to discover what they are and how to get rid of them.
we will let soil on top get dry and hang a few yellow stick to catch them.
Light will be changed to 600W next week.
I caught one of bugs and I guess it's a fungus gnat.
___________________________________________________________________________________________________________________________________________________________________________________________
Day 30:
Fungus Gnats Update: there were no more adult one and plants are looking better.
CCA1,CCA2,CCB1 had their Nutrient feed in big pot after transplanting stress with 6.3 PH and 1.2 EC.
CCA1 had 2L Nutrients mixed with water with 100 ml Run off (7.3PH and 7.5EC).
CCA2 had 2L Nutrients mixed with water with 100 ml Run off (7.8PH and 6.4EC).
CCB1 had 2L Nutrients mixed with water with 250 ml Run off (7.6PH and 5.9EC).
CCB2 had a dry day
CCC1 had dry day so fungus gnats wont attack this pretty lady.
___________________________________________________________________________________________________________________________________________________________________________________________
Day 31
All the plants were fed with Sensi Cal-Mag Xtra foliar feeding.
___________________________________________________________________________________________________________________________________________________________________________________________
Day 32:
Fungus Gnats Update: I made Cinnamon mixed with hot water, after 24 h this mixture been sprayed everywhere.
CCA1 and CCA2 had a dry and normal day.
CCB1 Had some defoliation
CCB2 and CCC1 had their Nutrient feed (6.3PH and 1.7EC)
CCB2 had only 1L
CCC1 had 2.5 L Nutrients mixed with water with 150 ml Run off (8.0PH and 7.3EC).
CCC1 had her last veg fed and she had more LST and Defoliation.
___________________________________________________________________________________________________________________________________________________________________________________________
Day 33:
it was a dry day for all the ladies.
___________________________________________________________________________________________________________________________________________________________________________________________
Day 34:
Dry tea had been mixed with top of the soil in pot.
CCA1,CCA2,CCB1 had 2.5 L water each with 6.0PH and 0.4 EC
CCC1 And CCB2 Had dry day
___________________________________________________________________________________________________________________________________________________________________________________________
Day 35: Last day of Veg weeks
Fungus Gnats Update: there is one or two not more. i think i am close to defeat them.
It was a dry day for CCA1,CCA2,CCB1 but some LST were performed on them.
CCB1 had 1L of water with 6.1PH and 0.4 EC.
CCC1 had more defoliation and LST. we wont perform any training on her for next week so she can get a full recovery with good flowering nutrients.
CCC1 had 3.5L of water(6.1PH and 0.4 EC) with a 500ml Run off(9.3PH and 6.1 EC).
I gave her more water so she can give more run off before starting flowering nutrients on her.
It is last day of using 400w HID.
___________________________________________________________________________________________________________________________________________________________________________________________


Likes
37
Share


@Gardener_of_Goodness
Follow
Well this was the last week! Had to chop her for various reasons but she’s pretty much done!
I will let the pics and videos do the talking!
I will update in 7 days with details of the harvest weights etc 😎

Likes
39
Share


@King_Green21
Follow
Everything going nicely so far not much stretch after the first week and bud sites popping up everywhere.
Day 66 - they were really bushy so decided to give them a lil hair cut, cutting away all the big fan leaves leaving all the bud sites.
Day 68 - I fed them until run of today as going on holiday next week and have a pal sorting them out from Monday
So far so good :)
Will wait till end of the 3rd week and give them a little defoliation to improve air flow and light spread untill then there fed either everyday or every other day depending on when they need it.

Likes
Comments
Share


@Leonweed10
Follow
Esta semana se hiso poda de ramas bajas y una pequeña desfoleacion a los 16 clones,y se comenzo a alimentar con alga bloom mas power roots aun.

Processing
Likes
5
Share


@Bombtofu
Follow
I got a new, bigger light. The old one just didn't seem to be doing much at 25w. This new one is 150w. Been keeping up the same feeding. Every feeding is 200ml. Every other one has 5ml of the grow big. Now that it seems to be at flowering stage, I'll be moving onto big bloom for nutrients next feeding. Staying at the same 5ml. I hear with plants less is more. I'd say I'm watering plant two every three days. Plant one has miracle grow in it. So I water it maybe once a week. The m.g. retains water for a very long time.

Likes
13
Share

@Kirsten
Follow
I have gone through the tent this week, and I have removed a lot of the lower branches on the plants, as they're not going to grow into big colas or anything.
So it's better not to waste the plant's energy, developing those to hopefully redirect it into the larger flowers.
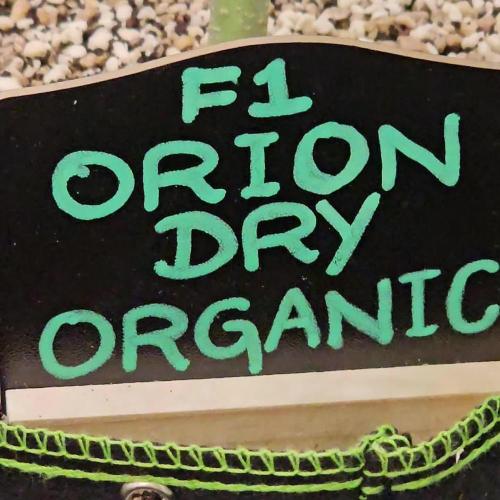
Orion F1 organic, dry amendments.
The plant is really developing the flowers while they look really dense, and like they will be some very top shelf buds!
The buds are beginning to stack on weight now, and hopefully, we'll just see the colas become larger and larger as we go on from here!
I'm really impressed with this plant so far, and the organic dry amendments are really working wonders, and that's been really eye-opening for me during this experiment!
I'm very pleased that Royal Queen Seeds were kind. Enough to allow me to try this experiment with some of the F1 hybrid strains.
It has been, and continues to be an extremely exciting experiment, and I am again learning more and more with each plant.
I cannot wait for harvest and to see what these buds look like after I've dried and trimmed them!
3.8.25:
I watered with 2ltrs of dechlorinated water PH'd to 6.2 with;
💜 1ml Trace
PH: 6.2
PPM: 371
I've just been keeping the medium, not bone dry, but there were some fungus gnats.
So I have let it dry out more than I usually would probably, because I wanted to sprinkle some Diatomaceous Earth on the soil, and it only works when it's dry.
4.8.25:
I watered with 3ltrs of dechlorinated water PH'd to 6.6 with;
💜 3ml Ecothrive Trace
💜 1.25 TSP Ecothrive Biosys
PH: 6.6
PPM: 385
I am going to top dress next week as I checked and it has been exactly a month since I last did one.
Thanks for checking in and hanging out 😁💚✌️🌱🤞🧡
Likes
49
Share


@The_Projexx
Follow
Whats going on ladies and gents !! We on the start of week 2 . Not much to say here shes growing and doubling in size daily shes pushing her second node already and I have a feeling that I may be planting her in her final home by the end of this week or next week . So far I'm loving the way she grows she's looking like shes going to finish strongly . Going to starting the nutrient regime this week to get her going nice and strong !
Thanks to everyone who stops in to the diary !!! A special thank you to all my followers that come in daily and weekly to check out the updates you guys kick ass !
-Happy Growing!
Likes
23
Share


@Jakobyzone420
Follow
Ottime genetiche con qualche pecca però poca stabilità nel gusto centrale e tende a piegarsi per il peso delle foglie. Hanno lo stesso trattamento delle mendocino e loro sono molto più in salute

Likes
49
Share


@masterofsmeagol
Follow
5/24 Woke up on payday to find that my father is in the hospital. My house was robbed a few days before so I guess the hits keep coming. The plants are doing good though. I'm glad I kept them in as we had a frost last night. I moved my cage yesterday onto the asphalt and put the big pallet in. I just need to sanitize the others before they go in the cage. I'm being super cautious. I think tomorrow will be the day I make the switch to the garage while they fill out these 3's.OK.
5/25 Plants were all moved to the garage with the door open for indirect light. It's 54 degrees. At night I'll pull them back in and give them a few more hours under the hps which will also help with heat. Knocked a stem sideways but it'll pop back. Feels good to get things moving. HST seems to being going good.
UPDATE: Went back over at one and noticed that the plant I hit with a wire (or something I didn't see what happened) was almost sideways and really loose. I had tied it to a clip with flagging. That didn't work. I asked a friend and I ended up pinching off the first true leaves then mounded happy drug up around it to keep it upright. It LOOKS much happier. Of course that shit happens to your biggest healthiest plants. Oh well all the 10th planet are doing phenomenal. Can't wait to move these girls to there final homes. Plants went under lights at seven. I'm acclimenting them to the right light schedule. I don't want to jump from 18/6 to 15 hours. They did really good in the cold Temps and wind. The big one I had to fix looks like it's doing great. Once they are hardened and fill these pots they go in their final home.
5/26 Plants did great being in direct sunlight for a few hours and staying in the garage at night. They look super healthy. I'm planning on watering tomorrow. Wondering if I should start to add some silica to strengthen the stalks. Also wondering if I should add more soil to some of the pots like I did to the other one as the stretched a little. This is something I may do tomorrow before I water.
Went back over to switch the lights on and pull the plants back and lock up at 7:30. Forgot my phone of course and these girls were looking amazing. I have to water tomorrow. I coukd add more soul to some of the pots but I'm reluctant due to stem rot. They'll get buried much deeper in there final homes. Don't want to mount up soil and then water and promote rot. Anyway plants are adapting amazing. Dialing the light closer to normal here. This is a great transition place for them to he. I've noticed a few wrinkled leaves but thats to be expected. Oh, I got my free pure Michigan seeds from premium cultivars!!!
5/27 WATERED EVERYTHING TODAY WITH HALF A Powerade BOTTLE APPROX. 16OZ. Plants are in direct light in the mornings and I haven't seem any burning yet. I noticed a small spot on one of the first true leaves but I think it's just a bite from an insect. Everything is green as hell. I'm wondering if I should add fresh soil to the pots but I didn't want to do it on a watering day. Plus the plants will be going in there final homes shortly. Very happy with progress this far.
UPDATE Went over at 1230 and everything looked great. I sanitized the cage AND the pallets. Also bought 3 more 30 gallon grow bags. Once they go in there they will explode! I can't wait. I'm considering ordering netting for moths. Depending on price i might get some. If not I'll keep using the BT.
UPDATE: Went and checked around 430. Temps were in the 70's and they had a few hours of direct sun. No burns evident as of yet. Pallets fit in the cage like puzzle pieces. Now I need to sanitize my grade stakes bamboo and trellis and setthat stuff up. I'm going to screw the grade stakes to the pallets and attach garden rods and bamboo with zip ties and I'll have a horizontal trellis. Once branches are a little bigger I'll begin LST. The plants that I topped AND the ones I FIMed are doing great. The FIMed ones with at least three colas some have four. Hoping the plants took that time growing roots.
5/28 Plants are all standing up tall. They loved that water. Haven't noticed any burns and they get direct sunlight in the mornings. Soon I can put them in the cage and start setting up my trellis and supports. Fan leaves on soms are bigger than my hands. These girls are probably the healthiest plants I've grown. I usually do clones and end up starting with problems. This is great starting with seeds and have no problems.
UPDATE: Went back around two because Temps had reached 92f and rh was only 20%. Nights cool off greatly so it's a dramatic temperature shift. Plants looked great. All standing up looking great. Put plants in at 7:30 ,and continue the light until 9 and have it turn on at 4am. Then they are out by sunrise. Did notice some burning on one of my plants a large fan leaf. What can I say? It was extremely hot. I'm surprised they did as well as they did.
5/29 Everything standing up perfectly looking great. Plantscget an extra hour of sun at night and morning and are on 19/7 with the extra added light. Trying to acclimate and finish hardening off this week. I'd love to be able to at least put them in full sunlight for the day. I think they'd be fine. I'm really impressed with how they are growing. Second guessing not HST all of them. However I think I might light dep a couple. We'll see. I've still got work to do.
UPDATE: put the plants in around 7. One of my lights shit the bed. They are just 150 watt hps but I was using them to finish hardening off my plants and slowly adjust them to the natural light. The on/off switch fell off. I'm sure my cousin can fix it bit the one is pe9bably fine as I'm only going fir a few more days. The thing about having this many plants to choose from is that I can pheno hunt and put the VERY best into the final containers and if I decide too I could light dep.
5/30 WATERED EVERYTHING TODAY WITH HALF A POWERADE BOTTLE. My cousin can probably fix the other light but I don't think it will matter. Within a week I'm going to have these girls in their final homes. I just need to sanitize the trellis and posts and then screw them to the pallets. I'll have this all taken care of before the plants go in the hole. I did notice another burn on a leaf. Def glad I'm taking the time to do this right.
UPDATE: I put the girls in the barn around 7:30 and flicked the one 150 watt HPS light I have working on. I added a half hour more of darkness to try to acclimate them quicker. Light stays on until 9 qnd came back on at four but i changed it to 4:30. I'm usually there by 5. I'm looking through my surveillance cameras and it doesn't even look like the light is on. Of course its super bright out but I should be able to see from that image. Luckily the building the go in has massive windows up top to let light in and windows on every side so the light is probably unnecessary. However due to my bullshit luck last year I'm being as cautious as I can. Tomorrow is supposed to be extremely hot again as is the next day. I think I'll leave the door down a little, open the other and move the plants back so they have no direct sunlight and adding a fan. That way they can continue to recover. They seem bigger everything I see them.
5/31 Another hot day. I figure a few more days (under a week) and I can transplant these girls! Supposed to be 85 today and 90 tomm. It was 45 when I got here. These girls are doing well handling this bipolar weather.
UPDATE: IM AN IDIOT AND THIS IS AN 8 DAY WEEK lol. Maybe I'll do a six day week next time to get back on track. Went back over at two and noticed some burns. Sent a video to a friend andcwith the sun we've had and the weather in the 90's he agreed the damage was minimal. However there was someone there working who opened more doors which let a lot more light in. It's supposed to be in the 90s tomorrow too. I may leave the doors shut. There are windows on everyside and an enormous cone at the top so the get plenty of sun. He also grows and I've been careful to not let anyone that grows go around my plants. I'm going to have to talk with family about this. To be honest I'm kinda pissed. Next watering I may add some kelp me kelp you and start a small nute regimen.
UPDATE Went back over at seven after having a panic attack. Half stoned half asleep. Stupidly I was looking at a plant and thought "shit" the FIM must not have took but in reality I was just stoned and tired so I topped a plant that had already been fimmed so we'll see how that goes. Purple punch is so far behind everything else it's not even funny. There might be one that's doing pretty well and that of course is the one with no HST. Branches on the other strains are thick and ready for LST though. What I think I'll do is transplant the 10th planets and the blueberry cheese ones that are ready and hold off on the rest for a while. Hopfully I'll be able to show plants in final homes next week.


Likes
4
Share

@eldruida_lamota
Follow
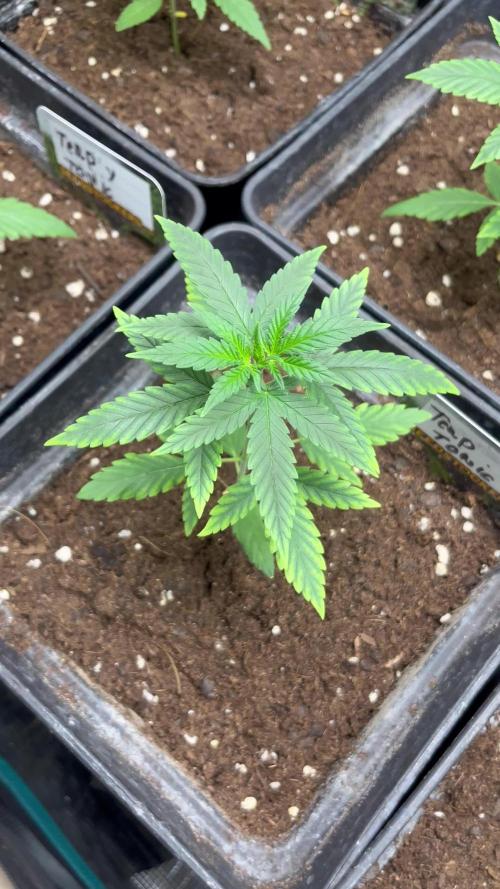
Vamos familia, actualizamos la cuarta semana de vida de estas Terploc & Tonic de Seedstockers.
Tuve problemas con la temperatura que estuvo alta 28/26 grados y humedad dentro de los rangos correctos, la única queja es la temperatura por empezar pronto, 16 horas luz, 8 oscuridad, estiraron un poco, pero van lentas por el momento, que cojan fuerza.
El trasplante a sido realizado a la maceta definitiva, 7L con sustrato Top crop.
Hasta aquí todo, Buenos humos 💨💨💨

Likes
9
Share


@Inganjawetrust
Follow
This was my first time growing a photoperiod and I decided to put her outside along with some autoflowers this past summer.
I started Purple Shot Photoperiod Fem. from Exotic Seeds in a one liter air pot and moved her into a 5 gallon phat sack on day 14 when she was 2.5 inches tall.🌱🌱🌱
By the start of week three she was 6.5 inches tall and looking quite happy in her new five gallon home. A short while later she was moved outside to adjust to her new environment.☀️☀️☀️☀️
By day 35 she was 16.5 inches tall and developing a nice bushy structure.
She started to flower towards the end of week 10
By week thirteen it was evident this girl was going to be making some nice tight lil nuggets 😁
By week fourteen I could hardly take my eyes off of her as she started to show her fall colors.
I harvested her on day 130 18wk 4d She was 43" tall and looking pretty as can be.
Her nuggets are not large but they are hard as rocks and sticky as fuck.
The original plan was to turn all the outside plants into hash but I like this one too much just the way she is 😋
After a nine day dry and month and a half to cure the dry weight for this girl was 78.50g / 2.80 oz
✌️😎💨

Likes
7
Share


@Mr_nugs_lover_David
Follow
This strain had to suffer a little bit at the end of the cycle due to a fungus gnats issue but she managed great, her buds are really citrussy and dense and she has grown at a very fast pace in her vegetative stage. I really hope you guys enjoyed, this lady has been grown with kush FLO (Living soil blend) and water.

Likes
13
Share


@Krautbauern
Follow
Flowers are growing great. All the plants have been given 2 small shovels of compost. The compost was mixed into the soil on top.
Likes
2
Share


@jardinprimitivo
Follow
El sabado 7 arranca una nueva semana de vegetativo, las plantas crecen con vigor, la Ztrawberry esta mas bajita que las Full Gas.
Se esta regando solo con 2 litros de agua con ph 6.3 dia por medio solamente para mantener la humedad.
10/9 Se aplica poda apical a todas las puntas y se retiran hojas que tapen la luz.

Likes
38
Share


@Cariboo_OG
Follow
Utopia Haze is a rare heavily sativa dominant hybrid (90% sativa/10% indica) strain created through back crossing Brazilian Sativa strains. This tasty little bud took home 1st Place for Best Sativa in the 2008 High Times’ Cannabis Cup and for good reason – with its potent 18-22% average THC level and long lasting cerebral effects, Utopia Haze is one powerhouse smoke. The Utopia Haze high comes on soon after you finish your first toke, hitting you with a strong cerebral lift that infuses you with a sense of hazy relaxation.
Type: Feminised/Photoperiod
Cultivation: Indoor/Outdoor
Flowering Time (days): 70-75
Indoor Yield (g): Up to 650
Feminised Outdoor Harvest Month: October
Feminised Outdoor Harvest Month Week: 3rd-4th week
Aroma: Citrus, Woody, Pungent, Mint
Effect: Cerebral Lift, Hazy Relaxation, Sleepy
Welcome Everyone to the Final Entry of my Utopia Haze Grow !
There is so much to discuss ! I have been extremely busy as of late trying to get this Harvest together, but i am happy to have it here for you now !
I Seriously under estimated the amount of time, help from others, and my own necessary skills to pull this off.. and i still kind of screwed it up lol !
But its worth noting i have never actually done this before and trying to document it during....was extremely hard.
It is next to impossible to work an iPhone with rubber gloves on !
First I want to discuss everything step by step so before you jump straight into the comments on how the end product is so small in "quantity"
Rest assured i am happy with its"quality"...and thats all that matters to me because Life is a journey not a destination! and i have learned so much from this grow that I couldn't be any happy even if i messed some things up :)
But at the very least I hope you read through this entry in its entirety with an open mind and focus more on the process, rather than just the outcome!
I ran out of Ice & i was only able to wash three times..(normally I've heard you should go sometimes 5-6 washes)
Preparation is Key & things will be much better next round :)
Photos 1-22
These are pretty self explanatory but for those of you just tuning in now.. this is what happens to a very happy plant when you don't have the necessary tools to monitor key components of growing cannabis.. Ph, as well as EC levels play a very key role in the outcome of your grow lol that being said I was just able to save this plant by purchasing both tools but that doesn't mean the plant didn't suffer because of the prior events.. This was a Huge reason behind me choosing to turn this harvest into what i would consider
"Solventless Hash Rosin" from "Ice water extracted Bubble hash".
Pictures 23
The idea here is the process of using "fresh Frozen Cannabis" this has been discussed many a time online on such sites as instagram and here on grow diaries as well.. I personally have Never tried the process so i decided to try it out and make a judgement for myself..
Video 24
The Cannabis has now been in the freezer for 72 hours making it very well frozen.. as you can tell i struggled getting it all into the 25u Screen Wash Bag. One thing of note i would do differently is i will de-stem my next batch as i also believe this played a part in the amount of plant matter that escaped through the sieves.
Photo/Video's 25-28
The idea here is "ice water Seiving" & especially with the bags that I am using here that are only have screen material on the bottom portion of the bag it is very important to have spaces in-between the screens to allow the water to pass directly through the screens into the bottom bucket with the least amount of resistance.. because the hash is so extremely temperature dependant if it gets warm on the side of the bag.. it will stick there and not make it to the bottom to become use able product..
29
You do not need to use as much Ice as i used here lol... the idea is to keep everything very cold..i certainly achieved that but at the sacrifice of using so much that i ended up grinding product and producing "contaminants" but in the end they are just plant matter that i would be smoking when i rolled up my joint either way so.. I'm not super disappointed..
But it should be noted that what you want to achieve here is a Layering effect where you have the wash bag between two small layers of ice while the "water current" washes the Trichomes away allowing them to be separated by the screens setup below :)
Before Starting the machine you should allow some time (i.e.;10-12minutes pre soak to allow the product to become saturated) before the first cycle.
By video 32 I have just ran out of ice lol..
Video 33-34
Here I have a tip for you.. to separate the screens that you sieve through.. cut 5 gallon buckets to stretch them across nice and tight.. it'll make scooping your Bubble that much easier ! i learned this from the many "Frenchy" videos I have watched :)
Picture 35
Here in lays the problem for most people.. drying your hash without loosing vast amounts of "Terpenes" whilst also stay ever vigilant against mold !
Thanks to all those videos I've watched on youtube.. id like to think this was one of my most successful parts of this process..
Things to Note; Terpenes start to seriously evaporate at temperatures 68F or 20C
you need to stay as cold as possible whilst bringing the Relative Humidity in the space down into the 40-30% to stay away from that nasty mold !
I used my cold storage room in the basement.. with a dehumidifier running to keep the space at 45% RH & staying at a constant 15c.
All while spreading the hash as thin as possible across parchment paper, on top of the white screens with a fan moving air across both sides of the paper.
Pictures 36-38
These are some macros i took in the middle of my drying session I fell in love with the colour.
Yes i know the black spots are plant material but they will get caught when i bag the hash & squish the oil out.
Thing to Note; at this stage it is important to ensure you 'micro plane" the hash down as fine as you can whilst staying weary of the temperature... any "chunks" will hold pockets of moisture.. that lead to potential problems..ie; mold ...
Picture/Video 39-41
Successfully planed bubble hash ready to be bagged and Squished !
Picture 42
Ive decided to follow Pedro.. from Pedros Grow Room and double bag to be on the safe side so i don't have any blow outs.
So thats One 25u bag inside one 160u bag ! :)
Pictures 43
This is almost 3 grams of the bubble hash from above, already melting in the bag.. this is where i ran into trouble again lol things started getting to warm in the house and i was only able to get one of the three squish's i did on video :( things started getting sticky.
Picture 44
This is basically just a photo of the equipment I'm using; 3x5 LowTemp Cage in the frame I built myself, with a 20Ton bottle jack.
Something to note here is this is an older Lowtemp model with only a single heating zone which is which i have it closed here heating Both sides of the press :)
As well as the importance of having adequate pressure on your plates.. my rig is very overkill for the size of hash bags..lol
Video 45
Here is the lovely press video.. its didn't quite work the way i wanted either lol my directional folding wasn't quite tight enough for a big "drip" :)
&the Press was set to 65°c
Photo's 46-50 are pretty self explanatory :) I had a blow out.. but still managed to pull an 80% return from the hash once squished...& yes it tasted amazing :)
Was it worth it in the end... that could be debated.. for some..i understand..its not your thing, but for those of us that are interested in making our own concentrates.. free from Solvents...
I wouldn't make it any other way :)
If even ONE of you reading this diary finds it helpful to reference for ANYTHING.....even if its "what not to do" ill consider it a success !
Thanks again for tagging along on this garden adventure.. its been one heck of a journey !
Much Love from B.C. Canada,
Until Next time,
Cariboo


