
Likes
Comments
Share


@Black_Magic
Follow
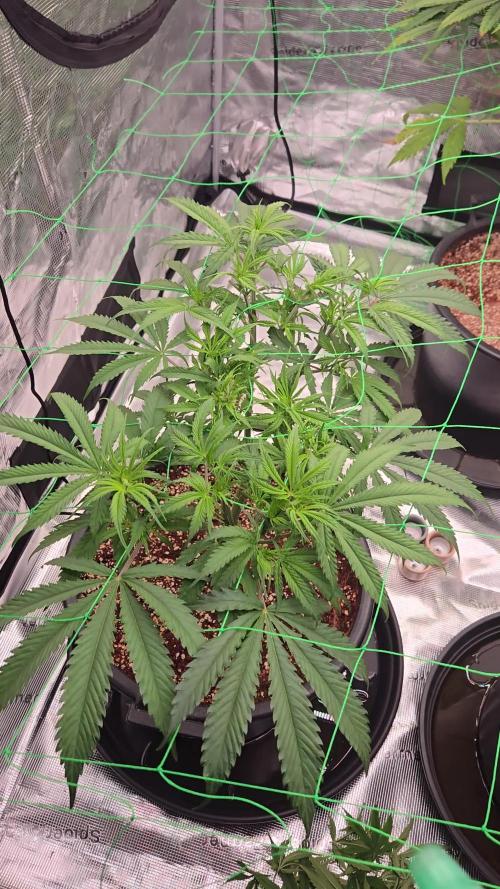
3rd week
Ladies doing good ,not many changes
Watering every day , humidity is around 35-45
switched the time to 24/7 got some automatics in the tent

Likes
Comments
Share


@Ogchemst
Follow
I have had to touch the a bud by accident and went to wipe my nose, omg the smell I have never smelled anything g this sweet fruity zkittlez with a nice balance of that gelato... my nose has a relationship with that buds as I love such fruity strains I can't imagine the taste mixed with gelato...
I like the bud formation alot.

Likes
2
Share

@Growfather1
Follow
Hello everyone.
A week has passed and the 2 plants in the front are going into the second week of 12/12 while the amnesia in the back is going into the third week.
Everything is going to plan temperature and humidity is good for now.
Thanks for stopping by and have a nice week.


Likes
50
Share


@Fibro_Witch
Follow
It was a good week for Night Nurse👍
Now that they're in the ground they're doing much better and putting out more growth.
The one on the end could have better color, since her new growth is a bit yellow. I gave her an extra feeding last night after I transplanted some Calendula into the bed since it's a good pest repelling companion.
We're getting some much needed rain today🙏
Otherwise there's not much else to report!
Update 6/26- I totally forgot to add that on Monday the garden got a spraying of horn manure. Horn manure is a biodynamic preparation of cow manure that's been fermented in a buried horn. This results in a material that's teeming with beneficial flora and fauna for the soil. Ideally it would be sprayed prior to planting in the spring as it encourages healthy root growth. I purchased the pre-potenized so that I only had to spend 20 mins stirring rather than an entire hour. That would have been brutal😵
I sprayed it at night when the earth is breathing in and used a spruce bough to sprinkle it over the plants in the garden. The extra icing on the cake was that there was a rain the day before, and another the day after I sprayed so it was well watered in.
Likes
9
Share


@GrowingFarmer
Follow
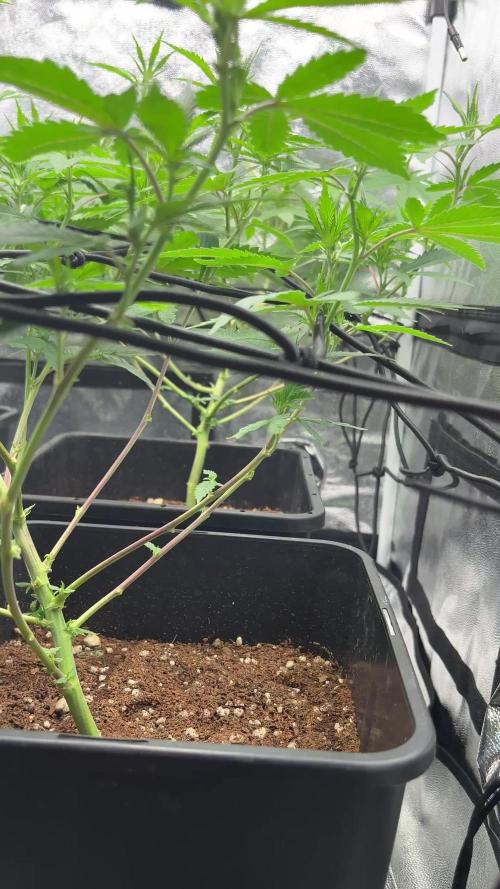
Trying some experiments with my trellis and getting ready to flip into flower. Watch the video for the update.


Likes
Comments
Share

@Jardin33ro
Follow
En esta semana comienza a estirarse y formarse estructuralmente para soportar las flores. Ya cambiamos el ferti por el de floracion y sus respectivos aditivos. El led a esta altura ya estaba a un 60% y el calor no cesaba

Likes
8
Share


@CortezKush
Follow
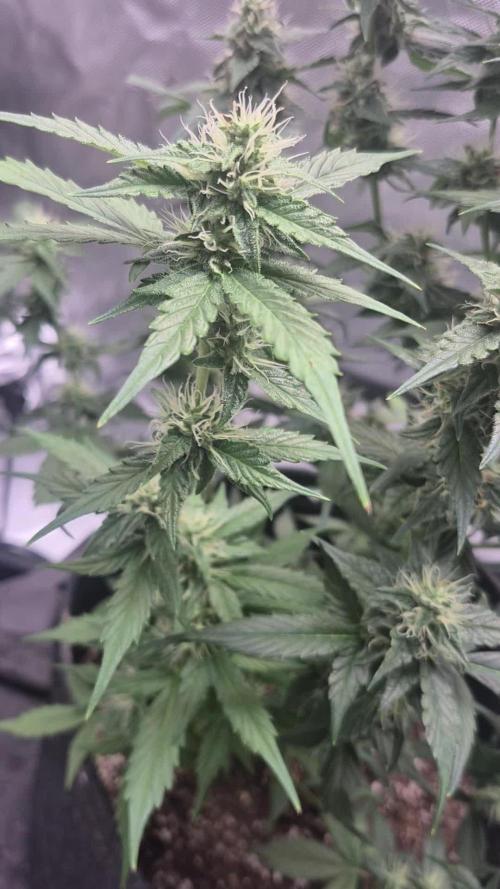
Fade is coming through nicely. Regretting trimming up some leaves early. Thought id be chopping it down a few days back.
Ec has rocketed up to 1.0 after being a bit more thorough with my watering technique. Guessing the plant had a fair bit of salt build up throughout the grow that had really set in.
Gonna have to just keep watering like this until that ec really drops off and the leaves all yellow out.
Starting to get some solid ambers, lots of cloudy trichomes. Shes definitely almost ready


Processing
Likes
77
Share


@BipolarHellas
Follow
Hello world,
🇬🇷
the previous week was training week for Michelle,who was LSTed and for Lucy who was topped...the girls are fine and growing...they also got fed with the Enhancer,which scares me a bit,but everything went well...
WEEK 5:"MAGIC PEOPLE,VOODOO PEOPLE"
☠️Day 29...out in the sun with normal temps and no wind...watered with ph 6,4,about 500 ml...I have changed my water pattern with these girls...I used to water every 3 days with 1,5 L but now I do it daily with less water...What I need now is light...I grow with the sun and the last days haven't been too sunny here...now the weather is changing again...come on Sun,give me some light!Meanwhile when it's sunny it's too windy,so windy that I have to put them inside as they will be seriously damaged...
☠️Day 30...I think instead of topping I may have fimmed Lucy...not sure as I have never done fimming before...Now I inderstand why they call it like that...in my case: Fuck,did I miss???🤣🤣🤣...we"ll see...however new shoots are growing well...
☠️Day 31...as I was watching my girls with pride and love,the sunlight revealed hundreds of tiny white bugs jumping on the soil..I mean they are hundreds...I sprayed with vinegar just the top layer of the soil and waiting to see...
I made a grow question and I got a very interesting advice from a fellow grower...I sprayed with cinnamon extract...hope it will help...
Today I applied LST to Lucy as she is getting very tall and lunky...she's been topped,LSTed and she will be topped again when time comes...
☠️Day 32...windy and rainy outdoors...the girls are inside...Today I adjusted Michelle's LST...
☠️Day 33...the weather is fucked up...one week ago we had 40°C and today it's cold and rainy...summer is not here yet....I realized I Fimmed Lucy instead of topping her as new growth came up on the cut stem...I cut it off again as I can't experiment now,I have never Fimmed before and don't know what to expect...
☠️Day 34...no sunlight for the girls...its very cloudy and may rain again...meanwhile the bugs are vanished...cinnamon and vinegar did their job...
☠️Day 35...finally we have some sun and the girls are outside...they have stayed a bit behind all those days inside without proper light...
the week is ending,thank u all for watching..see u next week ☠️

Likes
38
Share


@Chucky324
Follow
Hello. This is the end of week 8 and the beginning of week 9 of flowering.
Getting near the end and I've started flushing. I like to flush for 2 weeks. I find I get a better end product if I flush.
Things are looking good in here. I had the light up to 80% so the leaves in the main lighting area are turning a little yellow. I'll turn the light down to 70% for a couple of days to slow the yellowing and then back to 80% to finish off this week.
OK, we have finished the Grow Yer Own Stone book printed in 1970 for Canada. My only hope was that you got something out of it that might help your grow or further your knowledge.😊 And it was fun to read too.
OK, Have fun out there. Chuck

Likes
6
Share


Processing
Likes
4
Share


@mr_smooke
Follow
7 week is behind us. On day 45 i setting up net for holding buds and a bit more fullit up tent. There is past 3 day since she started flower. In this update i can not move out of grow room and some picture is not so perfect
Peace and love ✌️😁💜💚


Likes
23
Share

@Kirsten
Follow
This week has shown some nice growth, and gained some height too.
The leaves are a lush healthy green colour, there hasn't been anything to do this week apart from watering, and this is what I gave this week.
20.8.25:
I watered with 1.5ltrs of dechlorinated water PH'd to 6.0 with;
💜 2ml Trace
PH: 6.0
PPM: 340
24.8.25:
I watered with 2L of dechlorinated water PH'd to 6.6 with;
💜 1ml Flourish
PH: 6.6
PPM: 315
29.8.25:
I watered with 2L of dechlorinated water PH'd to 6.5 with;
💜 2ml Trace
PH: 6.5
PPM: 321
Thanks for stopping by this week and hanging out 😁💚👌🌱✌️

Likes
13
Share


@SwabianMadness
Follow
Last Week i did in my Opinion the last Defoliation and clean up the Bottom. But after a Week there are no light Penetration under the Canopy. So i decided to take a few more Leaves
Deep Red runs all the 12 hours. Infrared 15 mins before light goes on and off. And UV Light every Hour for 10 Mins

Likes
3
Share


@richsanfarmorganic
Follow
Hello brother 👋🤠
I'm grower jahrich from thailand
Nice to miss u🙏🙏🇹🇭💚💛❤️🇹🇭🙏🙏
My farm organic100%
Livingsoil: naturalfarmsoil
Organic Fertilizer: Handmade & naturalfarmsoil
How to water plants: Water every plant by hand.
Every pot has earthworms.
By growerjahrich420 #thailand #organicthailand #10Y 🙏🙏🙏
Likes
5
Share


@glenk222
Follow
Transplanted week 5 put it 3 gal cloth pots 1/3 strawberry fields soil, 2/3 Happy frog, 1/2 cup rice hulls total, mixed into both soils. watered with recharge mix 1/4 tsp to a gallon of water. Back in to the veg tent.
Likes
9
Share


@DisTentAint4Campin
Follow
Well she was a squaty plant don't know how she harmed happened to couple other strains but ohwell shit happens still amazing smoke just gotta break it up caveman

Likes
16
Share


@CanarianGrow92
Follow
Another good week for these girls, they are getting more and more thc day by day, still some weeks to go as we are still on the week 5, this strain is a really easy to grow strain which dont require that much attention, i just provided some guanokalong powders and shes good to go 👍😁