Likes
Comments
Share
@Moxi57
Follow
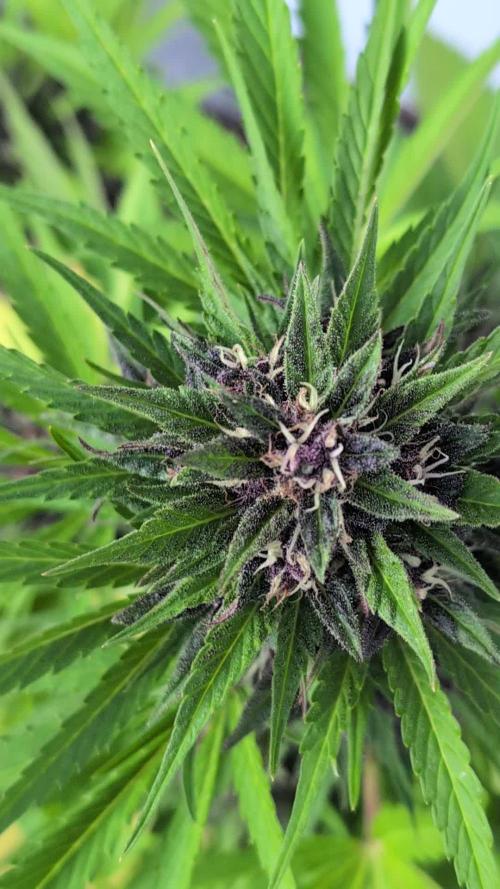
Hey growmies! My buds grow well, i found some pollen balls and immediately remove them, I guess the reason is temp fluctuations at night. But everything goes fine, the plants hungry for sulfur and this is normal for flowering.
Likes
155
Share
@deFharo
Follow
Bienvenidos cultivadores de marihuana clandestinos y también a los que tienen la fortuna de no serlo!🖐️👨‍🌾👍 Este es un diario semanal de técnicas de cultivo y Bio preparados orgánicos caseros, los cuales llevo experimentando dos años en cultivos de marihuana interior. Esta semana dos en uno: 1) ELABORACIÓN DE AUXINAS EN POLVO EXTRAIDAS DE ALUBIAS NEGRAS GERMINADAS. La primera vez que hice este preparado y lo publiqué en GD fue en Octubre de 2019, lo volví a hacer en Junio de 2020 y llevo dos años usándolo, me ha costado el precio de 2kg de alubias negras. INGREDIENTES: - 1kg de alubias o frijoles negros, porque son las semillas que más concentración de auxinas contienen, comparándolas por ejemplo, con lentejas o cualquier otro tipo de leguminosas, también se puede usar granos de maíz. Preferentemente, se deben usar semillas de alubias nuevas y cultivadas cerca de tu zona. - Agua pura. PROCEDIMIENTO: - Se cubren las alubias con agua y se dejan a remojo durante una noche. - Al día siguiente se separa el agua. Esta agua la puedes usar para riegos, contienen varios minerales. - Se mantiene la humedad en el recipiente de las alubias por unos días, hasta que germinen. Se pueden cubrir con un paño húmedo y compensar la perdida de humedad rociando agua. Se debe observar que la mayoría de las semillas hayan germinado. - Cuando las alubias, en su mayoría estén germinadas, se añade unos dos litros agua pura y se bate todo. - Ahora filtramos con malla y escurrimos los restos sólidos. (Reservamos esta materia para un segundo lavado) - Dejamos reposar el líquido durante dos días, hasta que se vea acumulación de materia en el fondo. - Retirar la mayor cantidad posible de agua clara. - Dejar al sol cubierto con una malla, hasta la completa deshidratación del producto. - Moler y guardar en un sitio seco y oscuro, en estas condiciones puede ser efectivo durante años. -- A los residuos sólidos recuperados del primer filtrado, les añado agua, los bato y los filtro con doble malla, lo embotello y guardo en el frigorífico (no más de 15 días, pues fermenta), lo uso para mezclas de riego. Los residuos finales se aprovechan, para aquellos que tengan tierra en exterior o hagan compost. QUE SON LAS AUXINAS Y USOS: - Las auxinas son un grupo de hormonas vegetales naturales, que regulan varios aspectos del desarrollo y crecimiento de las plantas, en la marihuana sobre todo en el periodo de crecimiento vegetativo y en el comienzo de la floración, después no hacen falta. - Uno de los aspecto más característicos es el efecto que causan en el desarrollo del crecimiento radicular, promoviendo sobre todo la formación de raíces secundarias y adventicias gracias a la estimulación celular que provocan las hormonas. - Otro aspecto de las auxinas es que distribuye su energía principalmente al ápice primario, reprimiendo el desarrollo de las ramas laterales, lo que provoca dominancia apical, pero esto es en el caso de plantas de marihuana sin corte apical y donde se quiere conseguir un cogollo principal monstruoso, su uso puede dar muy buenos resultados en cultivos SOG... pero ¿Qué pasa si hacemos un corte apical para promover el crecimiento de ramas laterales y que por ende, de buenos cogollos en cada una de ellas? Cuando se hace un corte apical al ápice principal las hormonas se reorganizan por la planta, ahora para mandar energía a todas las ramas y sus ápices, promoviendo el crecimiento!.. es un buen momento, después de un corte apical, aplicar auxinas para potenciar el proceso. - Finalmente os dejo un gráfico de la actuación de las auxinas en las diferentes etapas de un cultivo, también se ve la importante relación con otras hormonas (Citoquininas o Ácido Giberélico) y los nutrientes claves que no deben faltar para finalizar todo el proceso hormonal. Las Citoquininas y el ácido Giberélico naturales se encuentra en el agua de coco, y es muy interesante conocer como actúan, en la quinta semana de este diario hablo sobre las propiedades del agua de coco. Bien, una vez dicho lo anterior, yo uso las auxinas en polvo de las siguientes formas. - Como mezcla del sustrato donde germino las semillas y donde mantengo las plántulas hasta el trasplante a la maceta definitiva, para potenciar el enraizamiento. - Por la misma razón, lo espolvoreo sobre el cepellón de raíces de la plántula, en el momento del trasplante a la maceta final. - Lo uso como enraizante de esquejes, impregnando el tallo de polvo antes de enterrarlo. - 10 días después de realizar el producto, todavía tenía en la nevera un litro de auxinas líquidas, provenientes del segundo lavado de los restos de las alubias molidas... y entonces pensé que sería buena idea incorporarlo a un fermentado, y de aquí vienen esta segunda parte... 2) LACTO FERMENTO DE AUXINAS ENRIQUECIDO CON NUTRIENTES Y MINERALES En esta ocasión, para la fermentación anaeróbica, elegí hacerlo con suero de leche como base de microorganismos (Ácido láctico, Bacterias Acidolácticas BAL y Lactobacillus) que harán el trabajo de solubilizar los nutrientes y quelatar los minerales, es un preparado muy eficiente para riegos y aplicaciones foliares, en este caso lo hice enriquecido, mezclando diversos materiales orgánicos con otros minerales. Puedes ver la lista arriba. Sobre esto tengo que decir que después de dos años haciendo diferentes lacto fermentos, ahora los hago más específicos, sin mezclar tantos nutrientes, por ejemplo, si quiero solubilizar guanos, harina de huesos o algas, lo que hago es crear un lacto fermento con cada uno de ellos, en el caso de lacto fermentos con minerales, sigo preparándolo mezclando varios, este preparado es muy eficiente en quelatar minerales, y sobre todo en solubilizar fósforo. PROCEDIMIENTO: A veces consigo suero de oveja de un vecino que hace quesos, a veces hago suero de leche cruda de vaca y cuando no tengo ninguna de estas fuentes, hago suero a partir de leche pasteurizada, como el caso de este. - Mezclo el suero (1l) con la melaza y la miel, lo caliento a unos 30°C. - Peso los ingredientes. Como regla general, en el caso de componentes orgánicos usar del 8 al 10% como máximo, respecto a la cantidad de líquido. En el caso de minerales del 4 al 5%. - Añado la levadura al suero con la melaza y la miel. - Añado los componentes secos al barril. - Añado el suero con la melaza y la levadura al barril y agito. - Añado el litro de auxinas líquidas y agito bien. - Lo cierro hermético con válvula de gases. - Guardo el barril a oscuras al menos durante 30 días, pero cuanto más tiempo lo mantengas cerrado antes de abrirlo por primera vez el resultado será mejor. La fermentación comienza violentamente a los pocos minutos dura varios días así y después se hace más lenta. USOS: Este es un preparado que uso como complemento a las auxinas en polvo, lo uso para hacer riegos o aplicaciones foliares de disponibilidad inmediata. - Hago aplicaciones foliares en plántulas, en las primeras semanas de vida. - Lo uso al comienzo de la etapa de crecimiento vegetativo en conjunto con agua de coco. - Riego con este preparado después de hacer cortes apicales. - Lo vuelvo a usar en riego en conjunto con el agua de coco al comienzo de la floración, y esta es la última vez que lo uso en un cultivo. Una señal inequívoca de la actuación de las hormonas, es que las plantas son más susceptibles al fototropismo, esto se traduce en una respuesta mayor a la incidencia lumínica, las plantas, sus hojas y brotes se inclinan y se dirigen hacia la mayor fuente de luz. Yo lo he visto muchas veces después de aplicar auxinas. y esto es todo por hoy... 😅 Hasta la próxima semana... GRACIAS POR ESTAR AHÍ, CULTIVADORES!!🖐️👨‍🌾💧💦🌞💡 =================================
Likes
202
Share
Good afternoon everybody 😊 It's getting wild, really wild 😇 From last week everything start to be hmm... massive 🤔 😜 Update: Day 38 Original Cinderella 108 cm Bruce Banner 83 cm Purple Lemonade 78 cm Day 40 I have to provide a defoliation as girls start expanding wildly 😇 Original Cinderella 114 cm Bruce Banner 86 cm Purple Lemonade 79 cm All the best, You Lovely Girls Growers 💪 💪 💪
Likes
11
Share
4/5: Plant 1 — Let's go baybayyyyyy! We've finally gotten into our nute schedule and all is well. Let's hope for some growth explosion in the coming 7 days! 4/9: Growth baby. Growth. Taking to the nutes wonderfully. Great stem and leaf colors.
Likes
2
Share
I had to throw everything away because of mold. I'm sorry I would have liked to have taken more pictures of it.
Likes
26
Share
@B4niTa
Follow
Day 14 time for transplantation 🤗 first time with auto, but F1 should be resistant💪
Likes
17
Share
@Bobo_Zion
Follow
This week we did some more garden maintenance with some light pruning. Added some "Grower's Edge" to the help keep flying pest under control, and we did a quick demonstration on super cropping. Only issue we ran into last week was forgetting to water the plants for a few days so they looked droopy, but with a few gallons of water everything was back on track in a few minutes.
Likes
7
Share
Me e saltado una semana porque estuve de vacaciones.. perdonad compañeros.. Seguimos con la Semana 7 las fotos y el video son del dia 49 de vida, ya se empiezan a ver buenas florecillas y cada una de las cheese auto tiene un cogollo diferente, quizas ese es el principal problema de las autos a granel, pero que realmente eso me gusta porque huelen algo diferente cada una.. Como podreis observar las plantas estan un poco sobrefertilizadas, el Top Auto esta es la ultima semana que se lo voy a dar, en mi opinion tiene mucho Nitrogeno y mejor suprimirlo ya, lo tenia que haber echo la semana pasada o incluso la anterior. Si estuviesen en macetas seria diferente, pero al estar en el suelo no demandan tantos nutrientes porque esta tierra aunque parezca que no es muy buena en ella saco unas plantas muy decentes solo usando agua durante todo el cultivo. La pobre Titan al salir mas pequeña una planta que tengo detras una Sugar Black Rose de Delicious seeds le esta quitando horas de Sol estoy intentando doblar la rama que la tapa para que al menos saque una buena porra central. Creo que va a ser la primera en cosecharse, seguramente si la hubiese puesto en otro sitio seria diferente, pero tengo el espacio que tengo y la verdad que no me esperaba que la Sugar Black Rose creciese tanto, se esta haciendo un pequeño monstruito y eso que es fast version.
Likes
3
Share
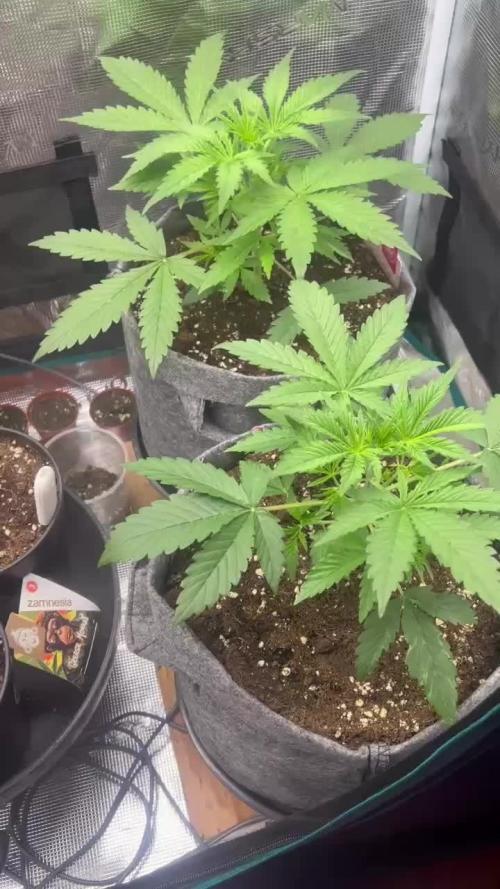
We don't hide behind a finger, nor behind a rolled joint nor behind anything, the Permanent Marker is the strain that has the most Hype at the moment in a few years and we also expect a lot from this one from Zamnesia. The cover of the seed pack alone is something spectacular, it seems to have been made by the best Street Writers. I know he is a master of Tattoo but here I see at least a minimum of past in Writing, in the hip hop sense of the term. If you only look at them a week ago it doesn't seem true, but when the plants start, they go and the Permanent Marker go like a rocket. In this diary you will find the plant that we will let grow straight, applying only a few techniques that do not involve cutting to preserve its characteristics of speed. After taking the first fertilizers the plant is really doing very very well at a great pace and we expect great things, the internodes are growing very well and we are practically almost in pre-flowering. The other one you can find in the next diary worked with Topping / Main Lining / Main Folding The comparison is the salt of the experience. We have started the Plagron fertilization program, we are in 100% organic configuration, the soil is recycled Promix + 1/3 fresh soil + 10% Perlite + RQS Mycorrhiza Mix (4gr in the mix, 1 gr under the small fiber pot). We are administering // 1 ml/l of Power Roots - 1 ml/l of Pure Zym - 1 ml/l of Sugar Royal - 3 ml/l of Alga Grow I have doubts about the compatibility of Pure Zym with mycorrhizae. If in doubt, ask the experts, don't mix too much at random. https://plagron.com/en Doubts about Pure Zym / Mycorrhizae compatibility have been dispelled, they can go well together according to Plagron experts. If someone tells you that enzymes eat mycorrhizae, which in principle may seem possible, explain to them that it is not true. https://www.royalqueenseeds.it/growing/452-easy-roots-mix-di-micorrhize.html Taste this strain a little bit, it's a cross of legendary strains ---- // https://www.zamnesia.io/en/10966-zamnesia-seeds-tangerine-dream.html Short Description Zamnesia // When legendary genetics are crossed, something exceptional can only be born. Tangerine Dream is the result of crossing classic strains. With citrus and sweet aromas and flavors, vigorous growth and euphoric and stimulating effects, Tangerine Dream by Zamnesia Seeds has it all. But don't take our word for it: order your seeds now and discover it for yourself. You can find the whole world of growing on Zamnesia and much more, take a tour of the site and you will find "all the best that nature has to offer" in various shapes and colors. The new strains are exceptional and the old ones are no less... p.s. for now zero Hermaphrodites, growers can you say the same? ---- // www.zamnesia.com
Likes
41
Share
Big plant going to develop big buds. It smells something like sweet floral.
Processing
Likes
24
Share
This week I'm going to be adding Rhino skin until I decide its no longer needed . I've also boosted Piranha to 1ml/l . Im not sure what the PPM is yet as I havent fed them . As soon as I do feed them the PPM on my diary will change . We are entering week 2 and they are going strong . Already working on a second node I figure by the end of this week they will be looking at starting their 3rd . A big thank you to everyone who stops in to check out the diary . Stay tuned lots more to come !!! Happy Growing! -V.G Day#8 Pushing really hard for their second nodes now , going to be looking to get them stalks beefy start some LST soon. Day#9 we got ourselves the first tri leafs growing slowly but surely ! Day#10 They're pushing for the next node !! Growing along smoothly Day#11 The leaves are small but they got tri-leaves now and they are almost ready to expand ! Day#12 Watered 1/4 cup each 355 ppm PH 6.04 everything going well and they are growing along . Day#13 Responding well to watering, growing along nicely Day#14 Pushing their next node now things are coming along ! Week Report : They are growing well , things have picked up for them for sure I find the rate of growth a little slower then the other part of my current diaries but they are still going . Nothing but love for these little plants :)
Likes
8
Share
The second week wasn't too problematic for Super Skunk #1. The seedling is steadily growing and I went forward with only feeding it distilled water. I recently came across some growing information and heard about the magic of bokashi so I figured I would incorporate it into my grow this time around to see the effects. I also decided that based on my experience last grow, I would switch over to a more kelp based nutrient during flower. What I came to realize (amongst other things) was that I had most likely underfed my plants during flower, and although my "no bottled nutrients" challenge got me through veg. without a problem, it appeared that my plants could have used a bit of a boost during flower. This time around I plan on sticking to: -rice water -coconut water -banana peel water -onion/garlic peel water during veg. and once I decide to flip to flower I will go back to using my trusty Green Plant "Medi-one" bottled organic nutrients. *the second plant that I replanted is looking pretty strange so I'm thinking I might need to germinate another seed*😑
Likes
48
Share
@Regenwurm
Follow
Klima durchweg sehr gut. Aufgrund von dem Umtopfen nur 2 mal reines Regenwasser und 1 mal Zusätze von Green Buzz. Den Ladies geht es auch ohne Dünger in dieser Phase hervorragend. Den Haupstamm HST um die Seitenteilen zu puschen. Lichtstärke auf 35 % erhöht bei gleichem Abstand von rd. 40 cm. Heute Licht auf 40 % erhöht. Ventilator im Zelt umgebaut um mehr Fläche zu generieren. In den nächsten Tagen wird das erste mal etwas grober entlaubt.
Likes
50
Share
@Blabina
Follow
And here we are... I washed my tent, I don't have time or money to have a new one, but I will change my extractor, too noisy. So I will put tonight my seeds in a glass of water then substrat. A wounderfull mix of 70 % coco 20% perlite and 20% clay pebbles mixed bymyself. 😍😍😍😍 Everything is in the video ☺️♥️☺️ Oh, and I really love my new pots ♥️ 👉👉👉Setup : 👉smartpot style 11L pots : NEW - Will love them I think. 3 off them ;D (and more hidden) Feeling about it ♥️♥️♥️ 👉Coco : 22L about + 6L perlite + 6L Clay pebbles = 7L coco + 2L perlite +2L Clay pebbles per pot buffered with 6.0 p.h water + citrus and 2ml/l. of calmag. I will let them in the mixture for this night (06.10.2021) Feeling about it ♥️♥️♥️ 👉Fan : Ø15cm 5w GardenHighPro Clipfan (Not super good...)Feeling about it :👿 👉Extractor : Pro Fan TT 125 from Garden HIGHPRO (Make noise but...)Feeling about it :👿👿 👉Carbon filter : ProActiv 250m3/H Ø 125mm. Garden Highpro (Not sure working properly)Feeling about it :👿 👉 Tent : Pro Basic Garden HIGHPRO 👿👿👿 I have light leaks at the zipper seam Feeling about it : 👿👿👿+👿👿👿 But will use it for this grow until i can change... 😐 👉 Mars SP 150 Mary Hydro : I love this light, and i had funny stickers with it. It seems definitly efficient and I am asking myself if they saved my dwarves. Probably. Feeling about it : 😍😍😍 Warming up at germ... Everything went too fast, I didn't expect to launch so early the second run, BUT HEY; QUICK QUICK QUICK ONE everything will be speedy right... 👉 6th of october 2021 / DAY 0 👉 Seeds in a lens cup full of water for 9 hours about... 23h00 👉 7th of october 2021 / DAY 1 👉 Seeds transfered in towel paper ... 10h00 👉 8th of october 2021 / DAY 2 👉 11h00 : i can see something white on seeds, In the hope it will work and start. Last time with dwarves I had super long root who where stuck in the paper, idea is to prevent it by simply check more often. Why the paper towel ? Bcse I want to see if seeds are alive. 16h00 : 2 seeds sprouted, I took the decision to transfer them into their futur nest for a long time, 3 of them. They have name now : QuickPink QuickBlue QuickGreen : the seed at the right side is inside Quickblue, Middle : QuickGreen And the for now not sprouted seed is in QuickPink (I love the name, I really hope she will sprouted. ♥️ 😄😁I love smartpots, I can use safety pins on them ♥️ First feed : Calmag (i messed up, only 1 ml per 3 litters, will do better tomorrow) 1ml + Alg-amic 1ml/3L. + Bio-Heaven 1ml/3L. Bio-Grow 1ml/3L. : 23.5° 3L /// p.h. 6.2 EC 0.7 And yeah, I created super fast fake dome to keep R.h. Up, I never did this so when i will se anyhting green I will take them out. And I have a doubt where I planted them so yeah... Like a dwarf with a pickaxe not paying much attention to details... Right ? 👻 👉 9th of october 2021 / DAY 3 👉 00h00 1L. Extra feed for the 3 quick 👽Calmag 1.2ml/1L + 👽 Alg-amic 0.3ml/1L. +👽 Bio-Heaven 0.3ml/1L. 👽Bio-Grow 0.3ml/1L 22.5° 1L /// p.h. 6.0 EC 0.7 16h00 👽Calmag 1.2ml/1L + 👽 Alg-amic 0.3ml/1L. +👽 Bio-Heaven 0.3ml/1L. 👽Bio-Grow 0.3ml/1L 22.5° 1L /// p.h. 6.0 EC 0.6 /// 500 ml run-off p.h. 6.9 EC 1.2 : run-off seems too high, I hope it will stabilize with time but run-off touch wood from plant roller made of fresh wood... No sign of them 😰 👉 10th of october 2021 / DAY 4 👉 18h00 : I scrached top of my coco (OH MY GOD COCO IS SO GENTLE, SO NICE SO CLEAN SO PERFECT To find my seeds... 💩 AND GREAT NEWS ! 👋Quickblue seems to be the first, I scratched angain, found QuickGreen AND BEST PART; QuickPink IS ALIVE 3/3 !!! TOmorrow will be the day, they will rize and I will open the veg phase. ♥️ 18h00 : 👽Calmag 1.2ml/1L + 👽 Bio-Heaven 0.3ml/1L. 👽Bio-Grow 0.3ml/1L : EC:0.6 I FORGOT TO MESURE AND REDUCE THE PH 😤😰😰😭 first time it happen, waiting to have Quickgreen and Quickpink up to change week. 👉 11th of october 2021 / DAY 5 👉 17h00 : 👽Calmag 0.7ml/1L5 + 👽 Acti-Vera 0.8ml/1L5. 👽Bio-Grow 0.3ml/1L5 : EC:0.6 👽Terra Aquatica Root booster (GHE) 5.0 ml/1L5 p.h. 6.2 EC : 06 👉👉👉 Feedback : I bought today a new nutrient : Terra aquatica root booster... I checked the E.C. EACH TIME i've added a nutrient into water. 👏 First step : Terra aquatica : 2ml : E.C:0.3 (my tap water EC) then + 3ml : E.C. : 0.3 : not affected EC 👏 step 2) Calmag : I reduced the ammount of Calmag : 0.8 ml : E.C. : 0.4 (perfect shot, i noticed that the calmag don't increase too much the E.C.) 👏 step 3) Acti-Vera 0.8ml ---> E.C. : 0.4 So... THis is exaclty what i aimed to start smoothly before increasing e.c... but you will see .... 👏 step 4) Bio-grow : really litteraly 0.3, no extra drops, really well mesured : E.C. 0.8 : Chock. Added 300ml of water : 0.7, an extra 200ml of water : 0.6. I am ok with that for now (and I forgot the bio-heaven but hey, roots first ;D) 👻👻👻 Why not bying biobizz root booster ??? 👻👻👻 😎👉 Because they are minerals, and not organic, mostly iron, zinc, bronz,... I asked to check T.A. nutrients, organic ! Bingo ! Enzymes ! Humic acid ! All the good stuf... So yeah, I betrayed biobizz... Other problem : T.A. propose less bottles, organic and bio products... Well, I may switch to T.A. nutrients or advenced nutrients, don't know yet but I have a good feeling about T.A., their system are used by NAZA, they are good in hydroponics systems... And I love my coco. 😎👉 Indeed, I am not using products specific for cocos but I know what I will neeed to fight : iron. 😎👉 Spoil alert : won't add any pictures for 2-3 days, making an experiment before starting week 1 veg. (only today's pictures...) They are ALIVE 😎👉 R.H. was around 71 % to 80%, now droped a bit, light is on for hours (you will understand why later....) droped after opening windows for fresh air : Temp 23.2° // 51 %
Likes
11
Share
We continue the flush! I’ll give them 2ml/l canna flush on next watering Purple tones appeared on dos si dos 33 ! Trichomes started to turn amber and buds are more denses ! Harvest day is for soon !!
Likes
11
Share
It’s bern roughly two months these guys have been growing! Lst’d Both but untied the gg because I wasn’t sure she was benefiting from it so I’m going to do it over. These ladies (I hope) will start their flower journey next week when I revive my new flower tent 😎..stay tuned for some epic buds..I hope!!
Likes
7
Share
Hey ihr Lieben! Nach 10 Tagen Trocknung habe ich das Curing begonnen. Die Äste haben geknackt und mir signalisiert, dass sie bereit sind. Nach 5h Handarbeit war ich dann fertig. Mega anstrengend :P! Aber hat sich sehr gelohnt :). Trotz das ich dieses Mal anstatt mit mineralischem Dünger mit einem ein Komponenten-Dünger gedüngt habe (Hesi Bio-Bloom), habe ich sogar mehr herausbekommen... Bin sehr zufrieden :). Nach dem Curing habe ich das Material in die Terplocbags gepackt und lasse sie nun dort schön fermentieren - das hat letztes Mal sehr gut geklappt und kann ich nur empfehlen. Danke an alle die mich bei meinem 2ten Run begleitet haben, ihr seid die Besten! Mir hat es auch mega Spaß gemacht und ich freue mich schon darauf, meinen 3ten Run mit euch zu teilen - mehr Infos dazu kommen bald.
Likes
2
Share
The seedlings in their rockwool cubes were planted into high quality soil in clear (to monitor root development) 140mm pots. The seed raising soil was first sterilised with boiling water and cooled then Mykos root enhancer was added. The clear pots were then placed into a black pot to keep light from getting to the roots. Each plant was then placed into larger white pot to reflect light and heat, with a clear dome placed over them to maintain humidity. The lamp used was a cheap 1400 lumen warm white LED spotlight from the local hardware, set to 16-8. No watering was done for many days as the soil was saturated from the sterilisation.