
Likes
Comments
Share


@whenindoubtsmokeitout
Follow
found a small bud rot site, we had to remove the whole cluster around, and sanitise with alcohol.

Likes
2
Share

@BeautyBudsVio
Follow
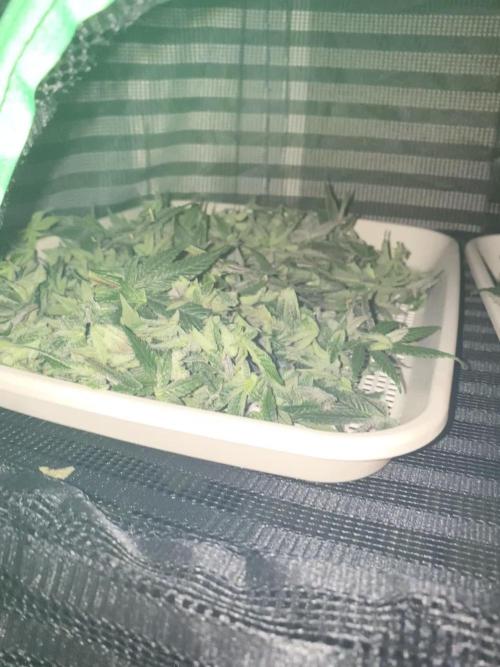
All Trichomes are milky and since we don’t want a Couch lock we decide to harvest it now.
2h33min whas the job.
3 scissors whas used
4 pair 🧤
Smell is gas and spicy
No sweet so far
Likes
80
Share


@Qlimax
Follow
All is well added some foil under plants tho,they kinda like it i think tho :)

Likes
15
Share


@STAYINGONMYMAINCBATORUNTWO
Follow
She’s a little shorter than the rest only by a couple of inches! I’ve opened her up by defoliating the bigger fan leaves and letting light get to the lower bud sites allowing better quality buds (non airy/popcorns) humidity hit between 50 and 56% and that’s perfect! Will lower in the last 2 weeks to 40% and hold during flush! Thanks for stopping by!

Likes
27
Share

@Z420Organics
Follow
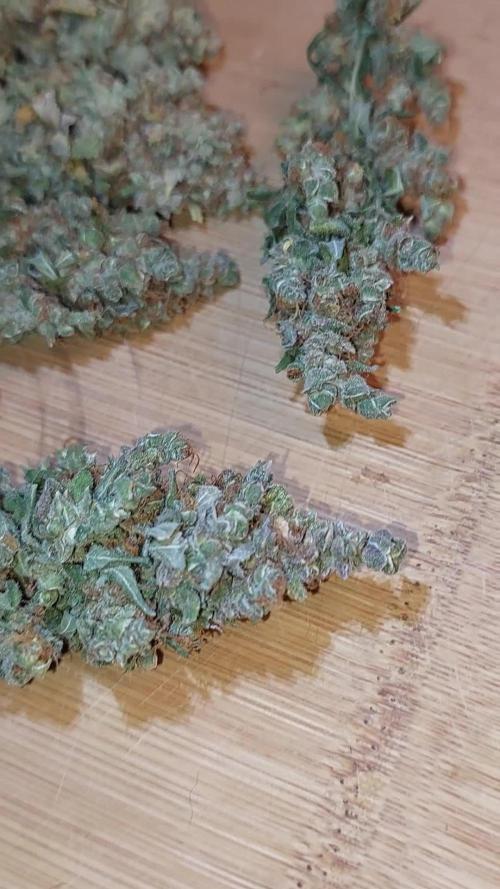
🦍 Monkey Grease — Harvest Report! 🦍
The first strain harvested from the grow was Monkey Grease, with one pheno coming down at 63 days.
Flavor & Aroma:
The first pheno gives dry nutty notes with a really unique chocolate milk vibe 🍫🥛 — such a distinctive taste!
The other pheno leans more toward a chamomile-like aroma, though I’m still not entirely sure 🌼. Very interesting!
Effect:
I’d classify it as indica-dominant vibes. Very clean, pleasant relaxation!
The aroma is super strong and fills the room.!

Likes
131
Share


@Wastent91
Follow
Eccoci qua con una ganja davvero ottima! Non ho dovuto provvedere a fare trimming, perché questa volta volevo provare a far seccare più lentamente la panta appesa intera, per avere un prodotto con un fumo più pulito e liscio durante la fumata, farò una pulizia dei fiori quando sarà mo secchi e vi saprò dire di più.. Per ora uno stupendo colore rosso violacea e un odore acido di cola e di frutti tropicali, invade tutta l area di coltivazione! Posso solo che ringraziare tutti voi che mi seguite e che vi piacciano i miei lavori, perché è sopratutto grazie a questa magnifica comunità se sono arrivato al livello che sono ora! Avere la migliore erba del mondo nella mia umile casa era il mio obbiettivo e si può dire che ci sono riuscito e mj sono superato! Grazie sopratutto ai mezzi che mi ha messo a disposizione Mars Hydro, è grazie a questa collaborazione. Che con le loro attrezzature professionali, ho raggiunto un livello di formazione su questa magica pianta, che superava ogni mia più rosea aspettativa! Grazie alla dea cannabis che lodiamo e lei ci protegge e ci indirizza sulla giusta via! Buon fine settimana a tutti voi e buon 420! 💪😸😺😽💖🌱🌿🌲💐🧑🌾

Likes
23
Share


@Piorkeed
Follow
Week 2 (23/03 - 29/03)
D8: glass of tap water.
D9: -
D10: glass of tap water
D11: 0.5 liters tap water with 1 ml of Biobizz Root-juice
D12: -
D13: glass of tap water
D14: -
Likes
24
Share


@TheGreenLeopard
Follow
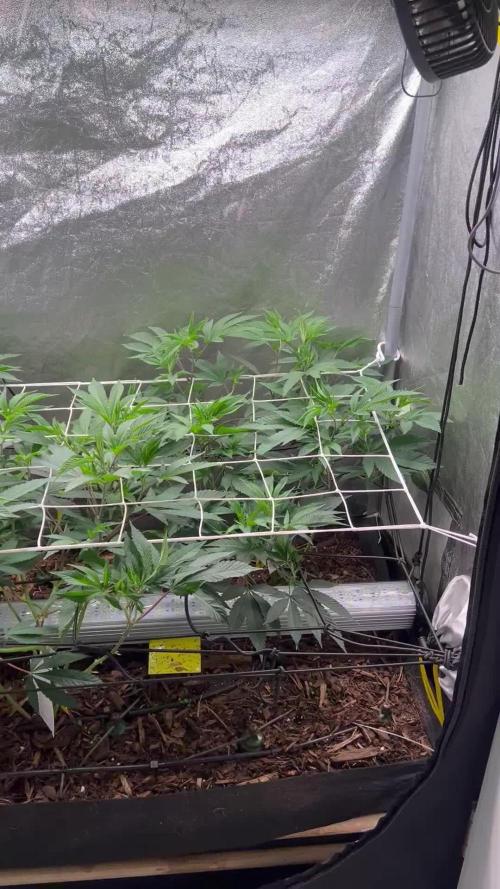
sound week on the soil. this grow is really lovely. starting to see some promising bud sites. I think i might trim too much but i want the buds to get the light. topped them and they recovered very fast. still yet to see some purple. dont want to mess with pH just yet

Likes
8
Share

@Organic_G
Follow
Wachsen, seit gestern wieder CO2 am Start für letzte VEG Woche und dann ersten 3 Flower Wochen

Likes
42
Share


@KrautFabrik
Follow
Day 41: nutrients like plan
---------------------------------------------
Added some non organic nuts. to boost the flower.
Can someone give me advise for an organic pk booster?
She is getting frosty ❄️🦍
Happy growing 🌱
Likes
10
Share


@Skinnytalls420
Follow
Day 8-19/12/21 she is looking healthy!!! Day 10-21/12/21 she is looking good!!! Day 13-24/12/21 everything is going well


Likes
1
Share


@Simon_Says_Smoke
Follow
( 3cm in height )
Looks very healthy with a thin fragile stem.
Only developed the first pair leaves.
( 3cm in height )
With the delay of the germination this lady has been slowed down.
First pair of leaves are developed but are still small.
Likes
8
Share


@Youngun
Follow
Very slow this week until I realised the timer was switching on for 15 minutes an hour into darkness, this has put me a couple of weeks behind schedule, should of been flushing for harvest this week instead I’ve been flushing for a couple of days to rid of nutrient lock, after 3 days of water I added just the pk and they’ve bounced back and the buds getting chunkier they’ve also needed a lot of defoliation throughout the week, 2 of the ladies are more a glue pheno in size, structure and a smell of pine, the other is a real chunky blueberry, hopefully I’ll get to the end with no more problems
Likes
26
Share


@MG2009
Follow
03/05/2021
Beginning of week 4 looking good, I think she will start flowering in week 5-6, so I might top her, she is growing fast so I hope it will not harm flowering time.
Ps.
I did top
And 24 hours later I can see all is well, where I topped her is healing, and side branches responding! I know she will be ready for flowering.
Check out video and see.
Likes
27
Share


@cheetah844
Follow
She's staying shorter, that's her genetics -good old NL. Very excited for the strain, the flower that I currently have is my favorite smelling strain ever. I hope this phenotype smells like that. It's one of those strains that you keep smelling over and over again, it just keeps luring me back with that beautiful smell.


Likes
34
Share


@Wadadli_Kush
Follow
Started flushing the end of week 6 and continued up until day 46 of flower. Allowed plant to dried and was harvested on day 48 of flower.
I was initially planning on giving her a few more days but due to a recent volcanic eruption in a nearby caribbean island, ash and other foul weather conditions pose a serious threat to crops so I decided to cut her just before ash and other things happened which would affect quality.
Very impressed with strain from start to finish. She definitely didn't have enough support for her colas but I got her a little over 1m2 So I'm expecting at least 450-600g of dried buds.
* Video was taken on harvest day. I was making space to put all this plant since I also harvested others recently so they were only hing in direct light for a few minutes before being transferred to their drying room.
Harvest weight and more pics to follow by 4/20
Overall she will have a fine mixture of buds. Some have at least 20-25% amber, others only milky and some with a tad bit of clear on the trichome.
Should be a delight to smoke and thank you for following my diary this far. Great appreciated and until next week............
#HappyGrowing
Likes
24
Share

@BunnyBud
Follow
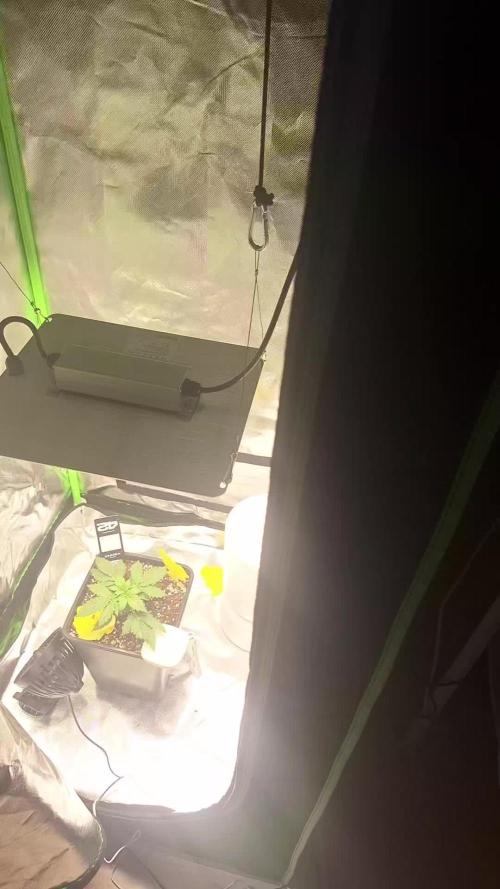
31 Aug. I start the third week of my autoflower. The plant is growing well, but I noticed small yellow spots on the leaf tips, which seem like a mild calcium deficiency. This is probably due to the fact that so far I have been giving water with a slightly low pH, around 6, while the ideal range would be 6.5–7.
At the beginning, to lower the ppm of the tap water (which was around 211 ppm), I mixed it with demineralized water. This brought the ppm down to about 109–140, making it harder for the plant to absorb the available calcium. Additionally, the soil I am using, Biobizz Light Mix, is lightly fertilized but does not contain enough calcium to correct this small initial deficiency.
For this week, I will not add any fertilizers. I simply want to raise the pH to 6.5 and use water with higher ppm, so the plant can better absorb the nutrients already present in the soil.
The lamp is positioned about 35–36 cm from the plant and so far there are no burn issues. Temperatures range between 25 and 30 °C depending on the day, while humidity in the room stays between 40–60%. The humidifier is always on because I keep the window open, but the dehumidifier is not being used, as it is not necessary at the moment.
I also have a new oscillating fan arriving to replace the current fixed one, and I’m waiting for a regulable extractor (90–145 m³/h), which will allow me to control the air perfectly during winter if needed.
This week my main goals are:
Increase the water ppm without overdoing it
Adjust the pH to 6.5
Keep observing the plant without adding any fertilizers
Everything else seems fine and growth is regular. With these corrections, I expect the new leaves to grow healthy and free of spots.
==UPDATE 31/08==
To control the calcium deficiency, I will administer an eggshell solution until I reach 300 ppm (I will boil some eggshells and administer the solution in tap water).