
Likes
Comments
Share


@artems
Follow
In the first week after switching to a 12/12 light cycle, the plant appears healthy and hasn't shown rapid growth yet, but its green mass is increasing rapidly 🌱. All seems promising for the flowering phase ahead! 😊

Likes
16
Share


@sunshinegroww
Follow
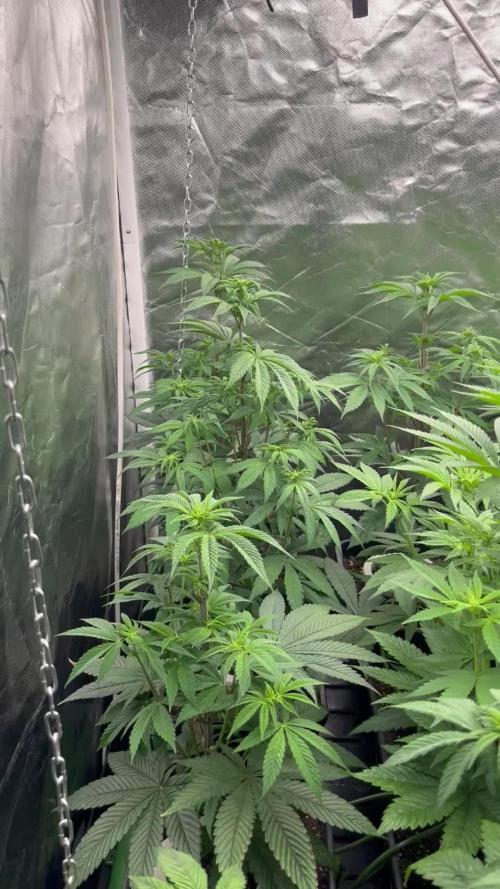
Slowly heading into flowering had to put 2 bends on too colad just to keep the canopy firm and open up the side branches ,pulled out few of the bottom leaves 🍁 so to get better air flow ,so far so good ,lets see how she’ll perform into flowering now 💚

Likes
1
Share

@Ribemarti
Follow
Las plantas estan creciendo como bestias, sigo regando 1250ml por planta cada 3 dias, ec 1200 PH 6,3 temperatura del agua de riego 23 grados, si los parametros son perfectos las plantas lo demuestran, la humedad ahora ya no pasa de 60, pronto empezaremos ya a ver cogollitos ya

Likes
1
Share


@thefrozenking
Follow
Day 56
these autos are running 12/12 because of the northern light being photo period

Likes
5
Share


@Funkyfreshgreens
Follow
More defoiliation. lower half of both plants almost striped.
Banana blaze almost finished alot of amber appearing :) 3ish weeks maybe. Without 2 pot changes and some issues this might have be ready now. smell has become more potent can't wait to smoke.
More defoiliation on the orange bud this week hopefully see improvements nxt wk. Main colas looking thick
Both plants got 500ml of feed this week with orange bud getting watered once 300ml with 1ml alg a mic.

Likes
48
Share


@Focus420
Follow
Den 78 - proplach samonakvétaček
ph 5.8
ec 0.36
Celoročky pohnojeny
ph 6.2 ec 2.1
Den 79 - kontrola proběhla v pořádku
Den 80 - kontrola mikroskopem,trichomy mléčné
Den 81- hnojení ph 6,2 ec 2.1
Proplach - ph 5.8 - ec 0.4
Den 82 - good work
Den 83 - jedeme dále
Den 84 -hnojení ph 6,2 ec 2,1
Proplach ph 5,8 ec 0,36
Den 85.
sklízení vrchů
Blackberry gum auto - 247 g mokrého
Brooklyn Sunrise auto - 154 g mokrého


Likes
27
Share


@Dunk_Junk
Follow
FastBuds White Widow!!
One of my first ever grows was a White Widow from another breeder. She was a lovely plant.
Lets see what the FastBuds version is like 😎
Planted in her forever home 20L airpot.


Processing
Likes
1
Share


@josh_meredith1235
Follow
They seem to be going into early flower so time to up the bloom nutes, seem to love there new light


Likes
3
Share


@brpet
Follow
Plants are exploding. Seeing the power of RDWC now :-) Also found some mutants - leaves are growing in the the middle of the fingers.

Likes
25
Share


@JeyGanesha
Follow
Queste korngarden seeds mi stanno stupendo di giorno in giorno.complimenti..
Cresce a vista d'occhio.ho dovuto pure piegarla in testa sennò troppo alta veniva
Likes
16
Share


@TooQuiikk
Follow
These babies are in full on coast mode. Feeding once a week, watering twice
cheese has some Nice THICK buds, everyday I notice more growth and density


Likes
119
Share


@Roberts
Follow
Divine indica is growing great. Plant is happy and leaves are praying. Everything is looking super good and going good. I been keeping up on lst and defoliation when needed. I will likely change her to 12/12 next update to start the flowering process. I am limited on space in the tent, and I don't want her getting too big. She is looking super good. Thank you Spider Farmer, and Divine Seeds. 🤜🏻🤛🏻🌱🌱🌱
Thank you grow diaries community for the 👇likes👇, follows, comments, and subscriptions on my YouTube channel👇. ❄️🌱🍻
Happy Growing 🌱🌱🌱
https://youtube.com/channel/UCAhN7yRzWLpcaRHhMIQ7X4g

Likes
23
Share


@SonomaSungrown
Follow
The plants continue to kick ass.
New French Macaron and Chem Brulee leaves are all 9-fingered now.
Crazy happy plants.
Sprayed with light BT spray (trying to avoid any caterpillar issues this year as much as possible) early in the week.
Sprayed with light Neem Oil / Castile Soap (no more dawn, no more issues!) late in the week.
Today, June 9, I also defoliated a bit.
Keep in mind that I don't want to do much this year as far as topping and training, so I've done one simple top on all of the plants, and essentially have created 4 main colas for each plant.
I only did this to create some airflow under the plant. I don't plan on doing a lot of this stuff.
Gonna let the sunshine do her thing.
Even though these girls have some hot-ass super soil in there, I'm still going to be doing some top-dressing.
Mixed this up and slathered it on there on Saturday, June 12.
------


Likes
49
Share


@masterofsmeagol
Follow
8/29 Knowing I was going to have to yo to the hospital er again this morning with my wife I got up early and watered. We are supposed to get an inch of rain tomorrow but the bags were totally light. If I was going to be around I might've held off watering. Instead I watered everything one gallon and figured the rain will make up for the other 10 percent hopfully that will do it.
8/30 Rained overnight. Plants were soaked. Flowers are swelling. I defoliated a shit ton of yellow leaves the other day. I still don't think I have anything fungal but I'm keeping an eye u e out and am considering doing an application of plant doctor. We are suppised to get an inch of rain tonight and tomorrow I guess. My biddy said i shouod cover my plants because next week is going to be "great growing weather" but with the rain and then the sun it could be a recipe for disaster since I have some large flowers. I got my father's leaf blower running but it was leaking gas. Brought it to the repair shop and a buddy let me borrow his for thus storm. I and hit the plants with it this morning. It is super strong though. I need to be careful not to blow it right out of the bag!!! Or break branches. Of course after u left it started raining lightly. A nice rain that plants like but it's stopped. I'm wondering if I should go over and blast them again to keep them dry but I know it's going to rain off and on and it'd going to rain tonight. I'll check the weather and decide from there. So far things are going good. Still have some yellowing leaves and a few normal pests but that is to be expected.
UPDATE: Stopped raining so I went over
and shook off the plants then put the leaf blower to them. I made sure to get the interiors before I went and had shook things again by hand. Storage us low bur i took a video. Cant upload toll tomorrow. Buds are growing at an insane rate but im losing some fan leaves that just yellow and die. Im sure its senescence but its still wortisome. We are supposed to have a real good week of growing weather coming so I hope that doesn't change. I'll update tomorrow. That leafblower works awesome though.
8/31 Went over to an extremely sunny windy morning. I didn't even need to shake plants or use the leaf blower since I did it after it Rained last night. I'm worried the wind night dry my bags out today so I'll be sure to keep an eye on them. I defoliated a shit ton of leaves but apparently it's just senescence. I need to check the last time I fed. Trich development is going good. The smell was incredible this morning! Each strain has its own unique smell to it. We are supposed to have a real good week for growing so I'm looking forward to it. May do a preventative plant doctor app but I think it will be alright. I'll keep this updated.
UPDATE: Went over around one and plants were bone dry. The wind was RIDICULOUS! I added a few individual stakes and tied a couple loose branches. I got my tarp out and considered covering the cagecto protect from the wind. However I didn't have time to sanitize if and they had already been through it all night and day alwuth no breakages. Plants are strong and supported well. At least I hope. Plus the tarp would block the rest of the direct sun the plants are getting right now. The wind looked like it dud its worst and the trellis and supports held. I did add extra supports higher up the plant to prevent breakages. Found a moth larvae (yellow) and squished him. Also found some aphids but a few lady bugs and three lady bugs larvae so I think I'll be OK. I am really excited for this year. Flowers are really exploding! FORGOT TO PUT THE MOST IMPORTANT THING. WATERED EVERYTHING TWO GALLONS EXCEPT THE 10. WHICH GOT ONE.
9/1 Forgot my phone on the daY I really needed it. It rained last night. The wind was the strongest i've seen in years. I would've tarped the cage but i couldn't find any of the bungee cords or zip ties. Probably good I didn't. No breaks. One plant had dark brown splotches ALL over the leaves! I picked them all off and took pictures and will consult my commercial buddy. I researched and asked a question on here. If it's septoria or something that could ruin my gorgeous garden I'd rather just junk the plant. It's big but it's the furthest behind flowering and I would not be heart broken if I had to get rid of that for the others. This week is supposed to be the best week we've had all summer so I'm expecting major growth. I'll update after conferring with other growers and making a decision. Looking online it seems like it could just be lack of nutes with the co dictionary we've been having. It IS time to feed and I haven't been feeding much. We'll see what he says.
UPDATE: AFTER RESEARCH AND CONSULTING WITH OTHER CONMERCIAL GROWERS I BELIEVE THAT THIS IS A NUTRIENT DEFICIENCY. I READ THAT RAPID TEMP FLUCTUATIONS AND HIGH WINDS CAN EFFECT THINGS LIKE THIS. IT DOES NOT APPEAR TO BE SEPTORIA (WHICH I'M EXPERIENCED WITH). I WAS THINKING ABOUT DOING AN APPLICATION OF PLANT DOCTOR BUT SINCE IT WAS SO FEW DAYS DURING THESE CONDITIONS IM GOING TO WAIT AND MONITOR THE PLANT. I DEFOLIATED ANY LEAF THAT WAS SUSPECT. FOUND AND KILLED A BUD WORM. I THINK THEY ARE STILL DIEING FROM THE BT. IT WAS LIKE STRETCHING UP FROM THE TOG OF A BIG NUG LIKE, "HERE I AM COME OUT ME OUT OF MY AGONY." ALSO FOUND LADY BUGS AND BEETLES AND THEIR LARVAE. IVE SEEN TGE VERY LOWER SECONDARY BRANCHES GET STRIPPED ON A COUPLE PLANTS BUT THATS WHY I LEFT THEM THERE. IF THEIR ARE EARWIGS THEY CAN HAVECTHE SHIT THAT I WAS GOING TO LOLLIPOP ANYWAY BECAUSE THATS WHAT THEY USUALLY GO FOR. THEY ARE DEFINATELY STRAIB DEPENDANT TOO. THEY LOVE ANYTHING BLUEBERRY BUT DONT TOUCH THE REST. MAYBE THERE IS JUST A COUPLE IN "THAT BAG". ILL HAVE TO GO AT NIGHT AND CHECK. IM EXCITED. MY FLOWERS ARE EXPLODING IN SIZE AND TRICHOME PRODUCTION. SEEIMG THAT I THINK THIS IS A NUTRIENT ISSUE AND MY FEEDING DAY WAS TODAY I FED EVERYTHING 1.75 PINTS OF NUTRIENT MIX TO EVERYTHING BUT THE 10 GALLON WHICH GOT LIKE 3/4 OF THE POWERADE BOTTLE. PLANTS SEEM HAPPY AFTER I FEED SO MAYBE I SHOULD UP THE FEEDING SCHEDULE. SINCE THE SOIL WAS ALREADY MOIST AND IT RAINED YESTERDAY I FED WITHOUT WATERING. HOPFULLY THAT WILL BE OKAY. I'VE DONE IT BEFORE.
Went back over at six and WOW! After this nice sunny day buds have swollen. Plants seemed to love the nutes. I think the nutes in my soil are fairly depleted so I just needed to adjust my feeding schedule. I didn't notice anymore calcium deficiency looking spots and I had defoliated a lot of leaves. Super excited moving forward. Pistols are changing color on one 10th p phenome and retracting into buds. This is is the fun time. As long as I can avoid the rot.
9/2 Says it didn't rain last night but my plants are dripping wet. If course the leafblower kept dying so I had to shake everything by hand. Hope that's good enough. Gonna be real sunny. Bags still had some heft to them. I'll check them later. Found a few leaves with what looks like the calcium deficiency on the sane plant and I just removed them. I really don't think it's anything to worry about. I'll update later.
UPDATE: Went back around 10 and everything looked good and was dry. Brought the leaf blower to be fixed. Should have it by the end of the day. Found and killed another pillar and some ants. Took a picture of a lady bug/beetle. This sunshine is making my buds explode!! I was thinking about checking again tonight but I think I can wait and water tomorrow. Bags are still fairly heavy. I did take another couple leaves off the plant that lopks like it might have a deficiency or something. The stalks are bigger than the bottom of a baseball bat. A couple almost like the fat end. Some 9f the best plants I've grown. I also took three short videos of a plant of each strain. Maybe if it's short it will upload quicker. Happy growing! UPDATE: I was back and forth today. I did some pruning and defoliation and then I noticed that my canary was light as hell. I waited until night and went back and had a couple starting to droop so i watered everything 2 gallons except the 10 and tub got 1. Everytime I see them it seems like they are bigger
9/3 Used the leaf blower this morning to get the dew off the buds. I shook them by hand before that. I'm noticing like a little army of lady bug larvae so any aphids I have are not going to be a problem. I have adults as well but is the babies that eat 10x what the adults do. I'm hoping they'll wipe put any bud worms. The weather is great this week all sunny. Making the buds explode in size and increasing terp production. This is the strongest smelling cannabis I've grown. Each strain. Has its own unique "funk" to it. Purple punch is really sweet and floral smelling. 10th planet is more gassy. I need to get some yellow sticky traps. I saw a couple fungus gnats on my canary. A late blooming blueberrycheese. It's the one that dries out the fastest but is more sativa leaning and drinks TONS of water. I have two that are that phenome. Losing yellow leaves but exploding with flowers. Noticed a couple more leaves with that calcium deficiency looking leaf. I just defoliated it. I'm really happy where I'm at right now.
9/4 Plants were covered in water this morning and the leaf blower wouldn't start. I shook everything off by hand. Each strain hasits own STRONG unique scent. One tenth planet phenome smells like bubble gum. I think I've got like two weeks and some of the flowers on ONE plant should be done. I'm planning to take the top half and then letting the bottom mature longer of its not whete I want it to be. The weather has been gorgeous. Sunny today. I'll need to water tonight I'm sure. UPDATE: WENT OVER AT 3PM AND PLANTS WERE DRY. WATERED EVERYTHING 2 GALLONS BIT THE 10 AND THE TUB. THEY GOT ONE. FLOWER DEVELOPMENT IS VISIBLE FROM MORNING TO NIGHT. I HAVE A TENTH PLANET THAT I BELIEVE WILL BE READY FOR HARVEST (AT LEAST THE TOPS) WITHIN A COUPLE WEEKS. PISTOLS ARE RETRACTING AND TURNING ORANGE ON THIS PHENOME AND RED ON THE OTHERS. I AM LOVING HOW THIS STRAIN LOOKS GROWING. I HAVE REAL HIGH HOPES FOR IT. I FAILED TOO MANY TIMES UPLOADING THE VIDEO AND PICTURES I TOOK SO ILL DO THAT TOMORROW. I CANT BELIEVE THE SWELKING GOING ON AND THE AROMA! THIS IS SUCH A WONDETFUL YLTIME OF YEAR. STILL FIND8NY SMALL SPOTS OF WHAT LOOKS LIKE CAL DEFICIENCY IN THAT ONE PLANT. IM STILL UNCERYAIN WHWT TO DO WITH THAT ONE.


Likes
67
Share


@HazeyBobby
Follow
The week ends Sunday Mar-1, being day 61 - week 8 of flowering since flipping the lights. From first pistils shown, it's day 45 which is a more accurate snapshot of where the plants actually are in their maturity.
Started the ripening feed phase for the plant. No other nutrients or supplements added (other than enzyme).
Lots of orange hairs covering the top buds and buds lower are beginning to also ripen. Trichomes are cloudy now across the canopy with a few amber. Will be monitored for any changes to initiate flushing for 2 days prior to harvesting the tops.
Not much change in the buds development on the plant. The CBD has dense nugget style buds with some swelling starting.
Light is maintained at 30cm above the canopy, with single daily fertigation at lights on - watering 3L per day. Fertigation pH target is 5.9-6.2 whilst flowering. Stopped the practice of fertigating at lights off due to the other pot developing a springtales infestation. Need to allow at least 2-4hrs of lights on period after fertigation. The coco is not dry but still damp on the surface after 24hrs from fertigation.
Seems the plant is slowing down the amount of water intake which is expected at this stage.
Trying to maintaining an average RH in the space at 50% but it's getting harder now with all flowers.
-----------------------------------------------------------------------------------------------------------------------------------------------------------------------------------------------------------------------
The grow setup includes;
- Secret Jardin DS120W tent (120cm x 60cm x 180cm) placed inside the bedroom. Passive & active intake of air is from a closed off section of the room where the central heating boiler sits - the intake is warm air (20 degC.) and fairly dry (40% RH) during the winter months.
- Mars Hydro SP250 LED light
- extraction fan - AC Infinity Cloudline T6
- ventilation fans
- aquarium heater
- small oil heater
- small dehumidifier
- 20L Airpots and 3.5L general pots for seedling stage
- Canna Coco substrate and nutrients
- GHE Flora trio nutrients
- pH and EC/TDS meters
- 2x Govee Thermo/Hygro meters (one at canopy the other at the roots level)


Likes
3
Share

@sunshinegroww
Follow
She is looking abit jealousy you can tell she didn’t have time but she bouncing back to life now ive cleaned her and some defoliation and lets see how she will perform so far so good thou
