
Likes
Comments
Share


@MiyaguiOkPolilla
Follow
Hola amigo!
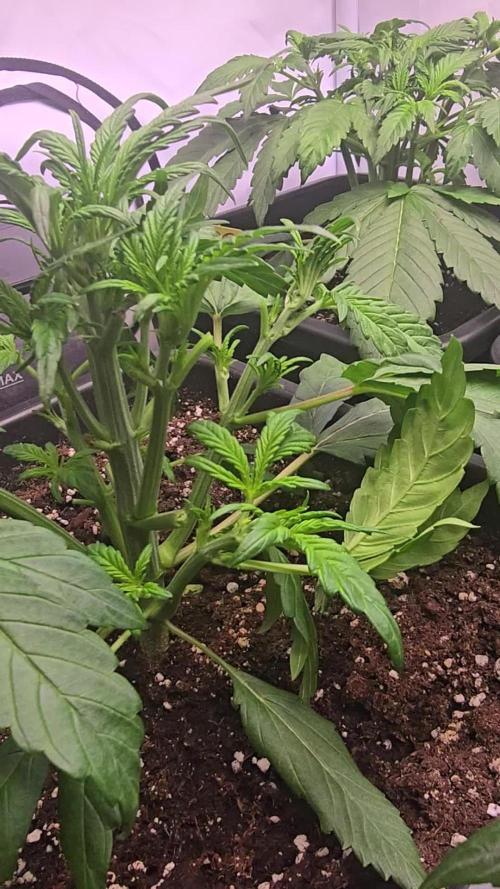
Una linda semana pasó para estas pequeñas, ahora ya se encuentran fuertes y muestran potencial en un hermoso tono verde. El sustrato orgánico les ayudó a adaptarse perfectamente!
Riegos cada 3-4 días.
Ph: 6.2-6.5
EC: 540 PPM 020+/020-
HR: 65% 5+5-.
C⁰: 19-26%
Grow yourself!


Likes
9
Share


@stone2345
Follow
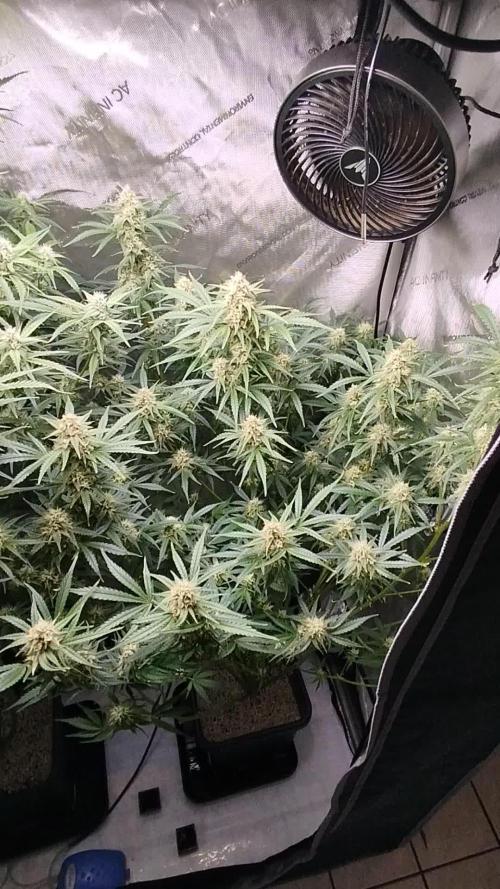
Seeming like we are going to be harvesting in the next week or so. So we are moving on to flushing. Watering twice a week with ph balanced water. No nutrients.

Likes
4
Share


@KannaGrowing
Follow
Comenzamos con la fertilización de nuestras plantas, correspondiendo con la semana 2 de la tabla.
Recordad que la semana de germinación no cuenta como vegetativo.
Mezclamos 4ml x litro de Grow-Soldier by JUJU Royal BioBizz y 1ml x litro de Green-Mystic by JUJU Royal BioBizz.
Total 10 litros, 5 de agua osmotizada y 5 de agua del grifo, mezclados con los 40ml y 10ml, de los fertilizantes.
Ajustamos el PH con reguladores BIO, en el caso que sea necesario y regamos todas las macetas.
De esta forma aportaremos los nutrientes necesarios para que nuestras plantas puedan comer en el sustrato de de coco.

Likes
9
Share


@Doctor_Gonzo
Follow
-3/26/23 Start of Week
--Week 1
-3/28/23 (day 10)
--Observations: spade leaves looking healthy and first set of shade leaver are coming in. has stopped growing vertically and has started focusing on leaf growth, leaves growing at a good speed.
--changes: sprayed with Miracle-Gro performance organics all purpose plant nutrients at a concentration of 1/4 Tsp to 10 oz of water.
--Diary Entry: still growing at a good rate, doesn't seem like much transplant shock if any at all. sprayed with nutrient water twice, the second time was just for the photograph. will wait two days before spraying again, will be looking for signs of nutrient burn.
-3/30/23 (day 12)
--Observations: has slowed down on vertical growth.
--Diary Entry: took the picture for today with a different lens than the last photo. watered without the nutrients, sprayed with the nutrient water.
-4/1/23 (Day 14)
--Observations: seems to have slowed down on growth rate, could have just been explosive early growth. firsty set of shade leaves are looking good, still seems to not be having problems with the nutrient spray given once to twice a day.
--Diary Entry: several close up photos this week and im glad that fast Buds made a comment on the fast flower contest about needing a video every week. would have been upset if I would have been disqualified at the end because of something as silly as not having any videos of the plant.
-4/1/23 End of Week

Likes
10
Share


@savvage61
Follow
it smells SOOOOOO sweet in my house im glad it is leagal the Black lebanon has so much resin its all most dripping you cant touch a leaf without your fingers sticking together Super Sativa Seed Club has nothing but top notch genetics My next Grow will feature Sour Tangie Chemdawg, and Bruce Lemon diesel. my current grow harvest date is DEC 3RD I can wait more to follow soon
Black Lebanon is one of the prettiest buds I have ever grown
gulp gulp nothin but H20 till dec 3rd


Likes
59
Share


@Rap_a_cap
Follow
Who says weed doesn't grow much above 30°C? This beast do it.
Another good week for PK, despite 4 days of storms. I have decided not to top her. Starting LTS. Smell will be a problem later. Healty and strong plant!


Likes
6
Share


@Organic473
Follow
I can only focus on one plant these days….this girl is stretching and I’m loving it I plant to veg her as long as I can.

Likes
6
Share


@DeepRootsGrowTrees
Follow
Week #10 Gnomo Auto By Kannabia
Week#10 Dec.30th-Jan.6th
Gnomo Auto had stayed true to the indica genetics she has she's a shorter plant that's stocky with tight dense buds that are covered in trichomes. She's been a easy grow due to her genetics No real issues. I highly recommend if you like to grow indica or have limited space!


Likes
11
Share


@Beedog
Follow
Every plant in garden day 56 Noticed yellowing mid week 7 don’t think it fade having some ph issues my run off is 7.2 after flush then watered again still up at 7 so hopefully going to water at like 6 6.1 from now till it goes down growth continues tho some buds getting big ☺️
Likes
2
Share

@Drehpaper
Follow
So letzte Woche, könnte sicher noch länger aber die Temperaturen spielen nicht mit. Hab jetzt fast 30 Grad im Zelt und Nachts kühlt es nicht mehr ab. Denk übern Winter ist es sinnvoller in meiner Umgebung.

Processing
Likes
22
Share


@Yiyis_Grow
Follow
He tenido unos problemas esta semana.
Una de las plantas no tiene orden jajaja. Al parecer sus ramas no están muy fuertes y se caen. Acá es donde me arrepiento de no haber usado scrog.
Otras dos plantas están presentando un poco de amarillo en las puntas de las hojas y una que otra un poco quemado justo en la punta color amarilla.
Por lo demás las veo bien, se hicieron un poco más gordas, pero no lo suficiente o lo que quisiera.
Necesito incorporar co2 y scrog en el próximo cultivo.
Espero resolver mis problemas y mejorarlas para la otra semana.
Buenos humos


Likes
42
Share


@gottagrowsometime
Follow
Hmmm. Was overall a very hard plant to grow for me. I hit a hard road on her & she's very difficult pheno to grow for me. I HST'ed her as her tops stretched really far away from the bulk of the foliage at the bottom. Was really weird. So, I had 4 top bud sites that were 20cm away from the bottom after her flip stretch before pre flower. So, HST'ed the tops and they gave back rock hard buds. At the end. That all finished really well.
Likes
37
Share


@Cheeba_Inu
Follow
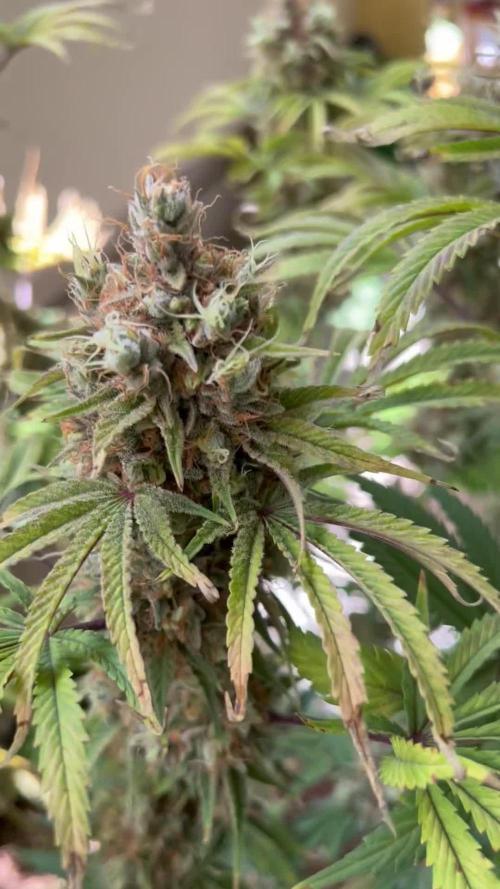
As of day 58 the grow is still going well! The buds are long, fragrant, and firming up. The blueberry aroma is getting stronger and stronger, and is just a fantastic terpene profile.
I have been dialing up my bloom nutrients, and added raw yucca as a wetting agent. The yucca will be essential for my auto feed setup next grow, so I want to use it a bit with my hand watering first.
The plant still has a ways to go, at least a few more weeks. But I have high hopes! Thanks for reading 👍
Likes
42
Share


@Roberts
Follow
After flush and 2 weeks of straight water to let plant fade, 48 hours of dark, now drying time. Does have a very nice smell. Curious to see what my dry weight will be. Thanks again for like and follows, plus YouTube subscribers.
Happy growing.

Likes
9
Share


@Cannabot
Follow
Love this plant,beutiful uniform growing.The smell is amazing,super sweet smelling.Found her sweet spot nutes wise.Very happy thus far

Likes
3
Share

@fabialien
Follow
semana del 21 de marzo al 27 de marzo 2026. debido a que tuvo estres por contaminación lumínica decidí en reducir una hora de luz, quedando en 13 horas de obscuridad x 11 de luz.
Likes
8
Share


@NoProbation4Weed
Follow
Very Nice looking and good Smelling Plant. Buds after Trim are medium dense but very tasty.
Flavourwise it goes into ripe Berrys with a hint of Citrus and Soapyness in the background.
The Plant looks exactly like on the pictures High-Giraffe-Seeds shows on their website.
All in all definetly a recommendable Plant to grow.