
Likes
Comments
Share


@Takeadab
Follow
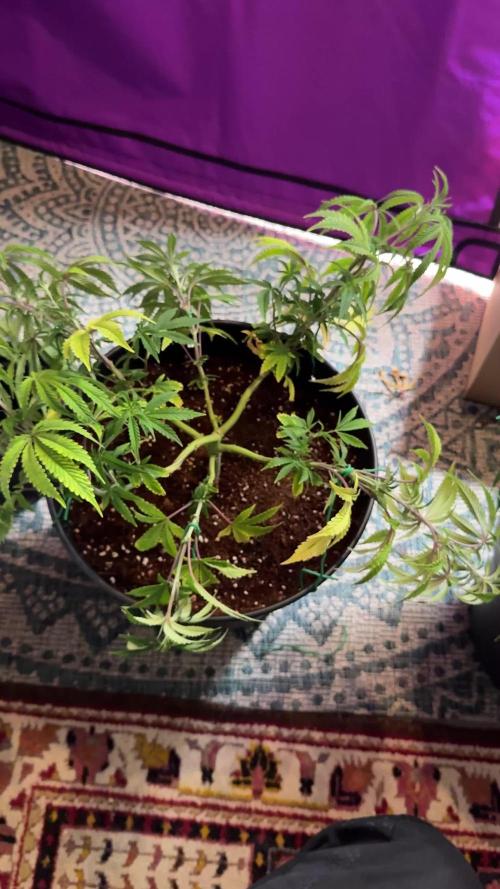
Transplanted with 70% living soil 30% worm castings and 4 tablespoons per gallon of soil all from Gaia Green

Likes
15
Share


@FishTankGrow
Follow
Everything going strong.
Baby Yoda spreading his ears.
One leaf started to curl a bit. Maybe too much water?
Starting nutes tomorrow.
The more leaves. Wanted to start nutes but soil is too moist.
Will hold off for another day. Just misting the surface.
Started with Fox Farm at 1/3 dosage as my soil had organic nutes in it already. Starting slowly.
Saw a gnat running around. Stopped water and misting. Put some packing tape in. Should be ok. 😁
Temperature is creeping up as I add more light. Maybe increase distance soon.
Increased the light distance. Leaves were looking a little baked. Maybe too hot as well.

Likes
22
Share


@MadeInGermany
Follow
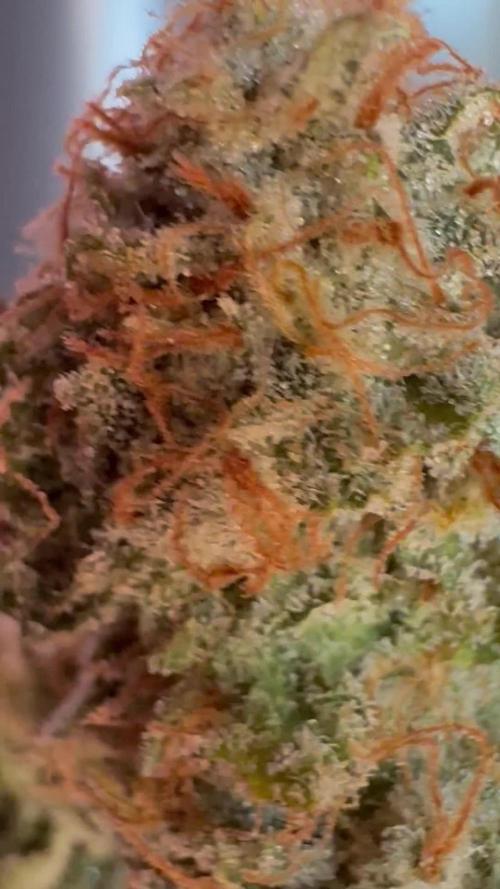
Flowering day 59
since time change
to 12/12 h.
Hey guys :-)
The lady is slowly coming to an end 😍.
The buds start to swell extremely .
The trichomes mature day by day.
This week she was given a very light flush with Clean Fruits so that she can use up her remaining nutrients in the coming days 👍.
It will be harvested in the next 6-10 days 😍.
I can't wait to try them all :-) .
Otherwise everything was cleaned and checked.
Have fun and stay healthy 💚🙏🏻
👇🏼👇🏼👇🏼👇🏼👇🏼👇🏼👇🏼👇🏼👇🏼👇🏼👇🏼👇🏼
A thank you for this wonderful strain goes out to
Herzog
https://instagram.com/herzog030?utm_medium=copy_link
and the Exotic Seeds team
You can buy this Nutrients at :
https://greenbuzzliquids.com/en/shop/
With the discount code: Made_in_Germany you get a discount of 15% on all products from an order value of 100 euros.
You can buy this Strain at :
https://www.exoticseed.eu/
Water: Osmosis water mixed with normal water (24 hours stale that the chlorine evaporates) to 0.2 EC. Add Cal / Mag to 0.4 Ec Ph with Organic Ph - to 5.8 - 6.4
👆🏼👆🏼👆🏼👆🏼👆🏼👆🏼👆🏼👆🏼👆🏼👆🏼👆🏼👆🏼
MadeInGermany

Likes
48
Share


@Roberts
Follow
Nice smell and taste. Buds were airy, but believe it is because I did not cut out lower portions good. Bud is potent and how dense it is does not bother me. Thanks again fastbuds. Thanks to everyone for likes, follows, and subscriptions on my YouTube channel. Happy growing.
To purchase seeds follow the link
https://myfastbuds.com/?a_aid=60910eaff2419
Update- made some gummies🙃🙃🙃


Likes
63
Share


@Ferenc
Follow
Day 72, 21st of November 2020:
Nice little chubby typical Indica plant...
She stopped streching and it was not significant....
Buds are coming nicely I am happy :)
Fertilization is the same every 2nd day with the mix and the ratio above....
All LST has been removed as the plant remains the same so no need to keep her in "chains".
The lamp is on 11.30 min and off 12.30 min.
Last week was 15 min longer light cycle....
So every week 15 min shorter light cycle until the 5th week. So far -30 min. It switches on at 6 am and off at 17.30 pm.

Likes
32
Share

@Roberts
Follow
Critical x Animal Cookies is growing good under the Hortibloom Solux 350. She is just behind the others in the run from being stunned at start. She is doing good now, and hopefully she should start developing very soon. Thank you Hortibloom, and Ripper Seeds. 🤜🏻🤛🏻🌱🌱🌱
Thank you grow diaries community for the 👇likes👇, follows, comments, and subscriptions on my YouTube channel👇. ❄️🌱🍻
Happy Growing 🌱🌱🌱
https://youtube.com/channel/UCAhN7yRzWLpcaRHhMIQ7X4g

Likes
4
Share

@deseed_uy
Follow
Muy rica la manguito f1, es bien dulce. No quedo tan limpia como esperaba pero igual quedo muy rica, ahora viendo las fotos me doy cuenta q coseche antes pero bueno estaba pasando horrible con la temperatura y ph bajo

Processing
Likes
7
Share


@Silverback_Guerilla
Follow
7/6:
Heavy thunderstorms last night and half the day today, so she won't be ready to eat again for a few days. I went out to the site about an hour after it quit raining today and saw HUNDREDS of tiny little green grasshoppers feasting on my girls!!! I immediately sprayed them all down with pyrethrins, and did it again right before dark.
I've got the fan blowing across the pots to try to dry them out faster.
I started using TPS One (one part nute solution) the other day, and the plants seem to love it. Really growing well, but I'm glad I amended their soil with some happy frog fruit and flower granular fertilizer this time. They get fed whether it's too wet or not.
7/7:
Rained again last night...and more hoppers again this morning, so i sprayed with pyrethrins.
7/12:
I tied down her main earlier this week and took about 5 or 6 cuttings from her today.
Sprayed with Bt-k again, with some fulvic acid and silica.

Processing
Likes
142
Share

@MadeInGermany
Follow
Hey everyone :-).
The last plants were also placed in the bloom chamber kammer.
Everyone has made great progress this week 🙏🏻.
There is not much to say about this week, I think videos and pictures say more like words 🙈😎.
I wish you all a good start into the week :-) Stay healthy and let it grow 🙏🏻👍


Processing
Likes
15
Share


@MG2009
Follow
09/06/2018
The Cherry Pie pollen did not look very good however, there was some residue which could be viable.
On the other hand the Mystery cookies pollen looked perfectly fresh!
I would like to also mention that I pollinated Cherry Pie branch first, and very carefully so as to have no cross contamination,plant was misted with water before pollination with the exception of pollinated branch. Mystery Cookies done the same way.
Likes
45
Share


@Robbaus
Follow
Ciao a tutti! C'è stata un'accellerata imprevista e così mi sa che raccoglierò una settimana prima del previsto! Tra 3 o 4 giorni taglio tutto! Ho svuotato completamente i vasi e ho messo solamente acqua liscia per far sì che le radici scarichino bene tutti i nutrimenti ancora presenti. Devo registrare purtroppo un piccolo problema di muffa, dovuto sicuramente all'umidificatore (purtroppo ho dovuto tenerlo acceso per tenere bassa la temperatura) in quanto si è formata sugli 8 apicali della pianta più vicina ad esso. Ho dovuto purtroppo tagliarli e buttarli via quasi per intero, ci avrò rimesso una ventina di grammi, anche 30. Post memoria per me: l'anno prossimo a luglio non devo avere niente e iniziare il ciclo a metà agosto con le temperature più accessibili. Comunque sta andando benissimo a parte l'imprevisto, non vedo l'ora di raccogliere e fumare! Ci vediamo la prossima per l'ultima settimana 🤣🤣🍀🍀💪🏼💪🏼
Likes
24
Share


@3lementa1
Follow
I had been feeding with a diluted solution and now after flushing with water last week I'm moving up to full strength.
The pistils of the plants on the ends seem healthier. The smaller plants in the middle seem a little more scraggly.
I'm making full use of the SCROG net. I also raised the light an inch or so and put it back to 100% from 75%. I'm going to see if I can keep it closer to 100 if I can balance the intake air temp.
Some of the leaves are damaged. I have a feeling it's from the cold nighttime air coming in the intake. I'm going to keep the intake fan off at night while it's this cold and damp outside. Hopefully not too much smell escapes. Maybe I should seal it at night.
Getting sticky now!
Likes
18
Share


@Grower_Of_Persia
Follow
my dry and cure style is this:
4 days of hanging upside down to get water activity lower to around 0.6 in 50% humidity and 26 C temp (i know its a little high but we are in a hot summer right now and i cant get it lower even with air conditioner) and then after 4 days of drying i remove leaves and stalks, trim buds and move them to jar for the rest of their life :D . and in the first 4 days of curing i open the jar door and let hem get some fresh air in the jar for about 5 minutes and close the jar door again, after 4 days of curing like that buds are smokable but they will get better as they getting cured about 1 month.
buds are one of the hardest as fucking rocks type of buds! very dense , compact , sticky , smelly , amazing at every aspect
growing stage was 56 days and flowering stage was 75 days total (harvested tops at day 64th)
the total weight of dry buds was : (plant #1 & #3 top buds 56 G + lower buds 22 G ) 78 G + (plant #2 top buds 47 G + lower buds 18 G ) 55 G + (plant #4 top buds 120 G + lower buds 67 G ) 187 G = 367 G

Likes
4
Share


@Growstopher
Follow
6.12.25
6th week flower started on 6.9. Just like my other 2 grows going right now this one got stunted really bad and started putting on flower way before recovery so here we have it another miniature plant, one of the smallest I ever grown maybe even seen!
Oh well excited for next grow!
Thank you for looking at grow I appreciate it!!!
Likes
7
Share


@CampaCavallo
Follow
1📆 Fioritura:
Uuu che bellezza la ciliegina perduta😍🍒 è cresciuta parecchio in dimensioni ed ha iniziato a produrre dei bei peletti bianchi🤪

Likes
57
Share


@Lukush
Follow
1 week of flower yeahhh 🌲🌲🌲🌱🌱🌱
So happy finally we are gettin in to the secret Moment of thes plants
Thanks all so much for the support , and if you check out mi diaries leave a comment of wut you think ✌️✌️✌️
Have a good one growmies 😎🌲❤️

Likes
16
Share


@GRow_M8s
Follow
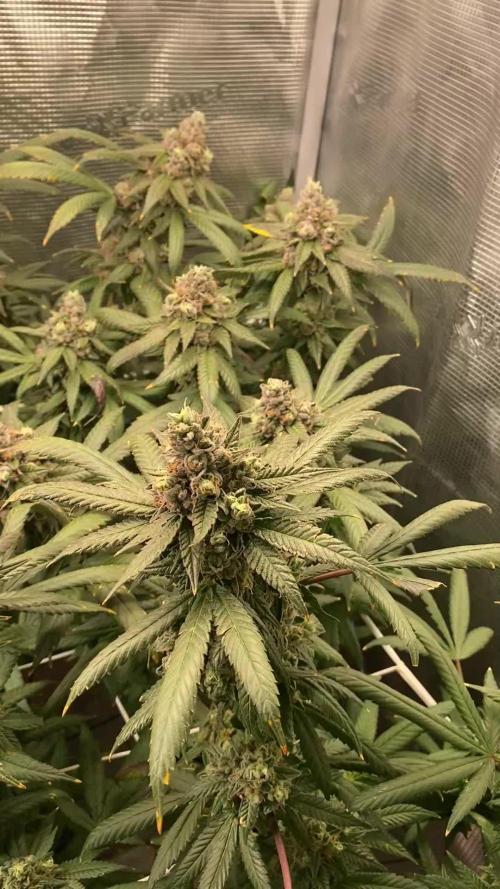
✂️ - The S. Stompers #1-2 & GWKs #1-2 harvested at Day 67 from sprout (mixed crystals).
- Buds in the dryer for 3 and a half days, then dry trimming.
- Room temps 24-25C° / hum 55%.
- SODK and Stomper #3 (stunned) are gonna harvest together (part 2) after 2 weeks.
* SODK started to drink all the nuts and fade out nicely.
- ⚠️ Start to update harvests 🔜 next week with the Sour stomper..!
📸 Sneaky pic from harvest (part 1). ☝️😎


Likes
4
Share

