
Processing
Likes
Comments
Share


@Island
Follow
Day 71 (65 for cindy 2) - Cindy 2 and Diesel gonna to flowering stage before Cindy 1 and Critical.
I will work on vegetation for 2 weeks more (maybe 3 😇)
I uploaded one video with few bugs, Can you identify what bugs are? Good? Bad? 😐
Day 77 - All plants are in 8.5 l pot (Cindy 1 its in 5 l pot).


Likes
4
Share

@Islandboi340
Follow
Some colors is starting to show going hit dem one more feeding and start my flush
Likes
1
Share


@Daniel_Tri95
Follow
Stunning Laides right here I will be pulling her early because more fastbuds are entering the tent ⛺️ remember
It’s 420 somewhere™️

Likes
5
Share


@GanjaGecko
Follow
Alle 5 Samen wurden in ein Glas mit Wasser und 2 Tropfen Seedbooster von Plagron für ca 20 Stunden eingelegt. Nach ca 20h im Wasserglas ging es für die Ladys in kleine Anzuchttöpfe. Nach 3 Tagen in den Anzuchttöpfen haben 4 Ladys und nach 4 Tagen hat dann auch die 5 Lady das Licht der Welt erblickt. Nächste Woche werden die Ladys dann in jeweils 8l Stofftöpfen Platz finden. Durch die kurze Vegetation sollten die 8L Töpfe ausreichen. Die 4 Ladys die den stabilsten Eindruck machen und sich am meisten im Wachstum ähneln werden behalten.
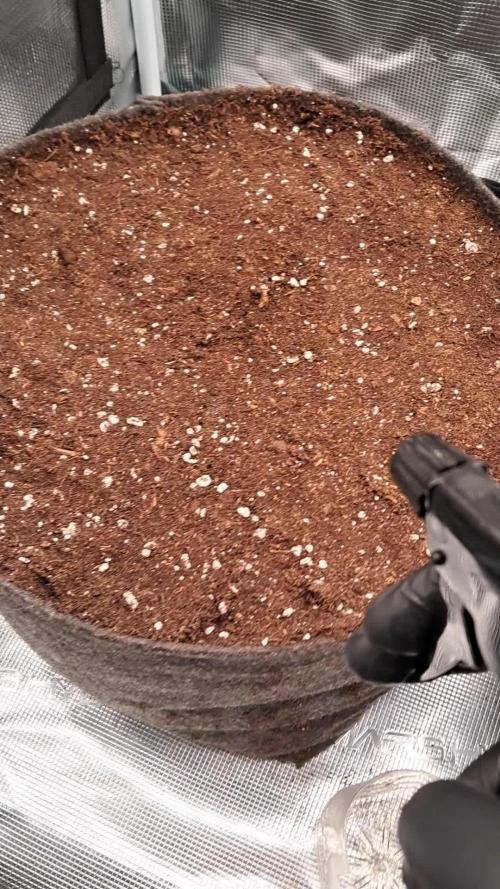
Das Substratgemisch besteht aus ca 70% BioBizz Lightmix und ca 30% Cocos mit Perlien. Ich gebe bei dem Run etwas mehr Cocos hinzu damit das Substrat noch etwas luftiger wird und die Ladys es etwas leichter haben ihre Wurzeln zu bilden und damit vielleicht einen kleinen Wachstumsschub zu erhalten.
Auf das ganze kommen dann noch ca 10% Megaworm von Plagron und ein wenig BioGrow das es den Ladys anfangs an nichts fehlt.
Die Ladys haben leider etwas weniger Zeit für ihr Wachstum, weil der Contest zeitlich begrenzt ist. Der letzte Grow hat leider auch etwas Zeit in Anspruch genommen. Mal gucken, ich hoffe das es reicht. Mit FarRed als Einschlafhilfe in der Blütephase kann man vielleicht ein paar Tage einsparen.
Ich hoffe auf das Beste. Am Ende muss man ja auch etwas Glück mit den Phenos haben.
Angegossen wurde mit 1g/L BioEnhancer und 1ml/L PowerRoots. Der ph-Wert wurde vor dem gießen auf 6.0 korrigiert. Jede Lady bekam für den Anfang ca 30-40ml in die Anzuchttöpfe.
Mit einer kleinen Heizmatte und den Kuppeln auf den Töpfen wird für das warm/feuchte Klima gesorgt, das die Ladys anfangs benötigen um zu keimen.
Am Tag an dem die Ladys das Licht der Welt erblickt haben, kamen die Kuppeln ab und die Ladys spüren dann auch ihre ersten Luftzüge.

Likes
44
Share


@ILoVeThiSpLaNt
Follow
Giorno 42
Avendo avuto problemi alla penna ph e relativi segni sulle foglie ho deciso di effettuare un flush e di passare ad Advanced Nutrient. Dopo 6 giorni circa la terra si è asciugata e ho ricominciato la fertilizzazione. Le piante sono un po' pallide ma sicuramente in questi giorni prima della fioritura si riprenderanno.
A settimana prossima 🖐️ ❤️


Likes
24
Share


@CovikLaFlaire
Follow
I found out that my ph was off too, so the plants look ok if we take all my f ups in count.


Likes
28
Share


@MadeInGermany
Follow
The Info:
Unfortunately, I had to find out that my account is being used for fake social media sites.
I am only active on growdiaries here.
I'm not on Facebook Instagram Twitter etc.
All accounts except this one are fake.
Have fun with the update.
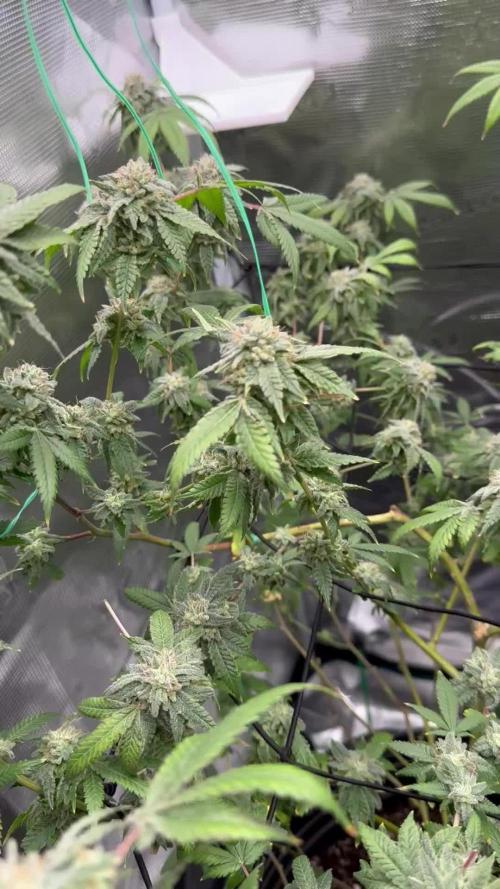
Flowering day 61
change from time
to 12/12 h.
Hello everyone ☺️.
Today the time has finally come and the penultimate week of flowering has begun 😍.
She looks beautiful and her buds smell very tasty 👍.
The trichomes are 60% milky, 30% amber and 10% clear.
The lady comes in total darkness for 48 hours before the harvest.
Of course, as always, there will be a small interim update of the crop before the last big update.
Until then, I wish you all a lot of fun and stay healthy 👍🙏🏻
You can buy this Strain at :
https://www.royalqueenseeds.de/feminisierte-hanfsamen/115-amnesia-haze.html
Type:
Amnesia Haze
☝️🏼
Genetics:
Original Amnesia Haze
👍
Vega lamp:
2 x Todogrow Led
Quantum Board 100 W
💡
Bloom Lamp :
2 x Todogrow Led
Cxb 3590 COB 3500 K 205W
💡💡☝️🏼
Soil :
Canna Coco Professional +
☝️🏼
Fertilizer:
Green House Powder Feeding
☝️🏼🌱
Water:
Osmosis water mixed with normal water (24 hours stale that the chlorine evaporates) to 0.2 EC. Add Cal / Mag to 0.4 Ec Ph with Organic Ph - to 5.5 - 5.8 .

Likes
5
Share

@Bunterbiber
Follow
What a difference a week of good weather makes! The sun has been blazing almost constantly, and the girls have absolutely loved every single ray of it. The growth has been explosive compared to those slow first couple of weeks!
Training & Mulching: 🌿
I’ve been staying on top of the LST for the ones I'm training, adjusting the ties to keep the canopy nice and even, which you can see in the updated photos.
Some are already showing first signs of pre-flowering.
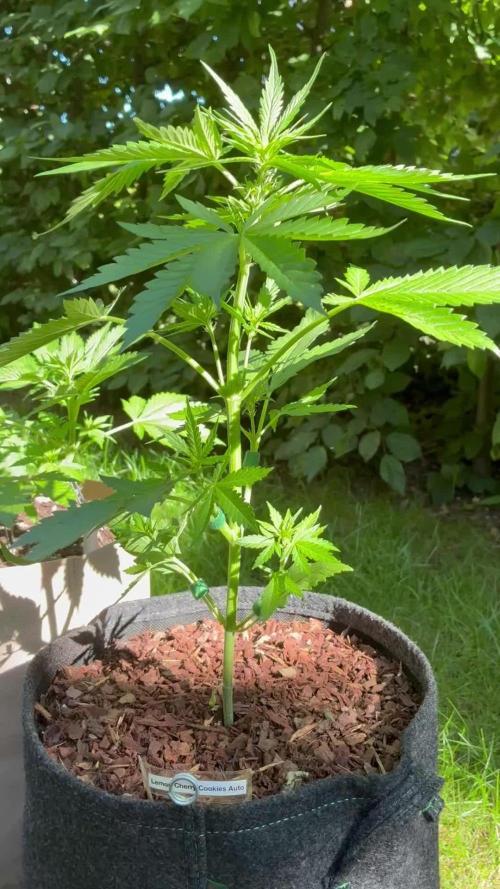
I also added a layer of pine bark as a mulch on top of the soil for all four plants. It’s a game-changer for keeping the upper root zone happy and preventing that top layer of soil from drying out too quickly under the intense sun. Because of this, my watering schedule is super dialed in—I’m currently only needing to water twice a week.
Feeding Check-In:
Team Mineral: Lemon Cherry Cookies and Bruce Banner are cruising along smoothly, receiving their regular scheduled ration of Hesi mineral nutrients + a bit CalMag.
Team Organic: Banana Purple Punch and Amnesia Haze are still thriving on just tap water + a bit CalMag, but I did add a tiny touch of CalMag to the mix this week just to make sure they have all the secondary nutrients they need to sustain this rapid growth.
Current Standings: 📏
Lemon Cherry Cookies: This girl is an absolute beast! Growing naturally without LST, she has shot up to a whopping 38cm and is easily the giant of the family right now.
The Rest: Amnesia Haze, Banana Purple Punch, and Bruce Banner are all averaging around 25cm along the main stem. It’s honestly getting a bit tricky to measure them accurately because of the LST angles, but they are looking bushy and robust!
With the weather holding up, they are in prime position to keep crushing it. Can’t wait to see what next week brings!

Likes
29
Share


@Basementganja
Follow
This C4 auto was very fast to flower, and stretched up to produce some very pretty, berry smelling/tasting nugs!
The buds didn't flower very dense, they formed as fox-tail shapes.
Yield is on the low-end of acceptable, but good considering the bud structure!
I'm growing another next run, to compare phenotypes!

Likes
8
Share


@DannyDank
Follow
Think they are done stretching not 100% but the hairs are showing it’s go time they are suffering a little light burn but I only have the light on 80% power any advise
Nope I was wrong they haven’t done stretching growing tall
All being feed a litre each

Likes
7
Share


@SamDo
Follow
Week 20 marks a transition phase for the Pineapple Upside Down, and the plant is now one full week into her new environment. The light cycle remains unchanged at 12 hours, and nutrition stayed stable. However, the major shift this week was the move from a 5000K veg light to a 3500K full-spectrum panel. This immediately triggered a visible reaction: the leaves, previously flat and perfectly extended, curled downward, showing a clear photonic stress response.
Structurally, the plant is beginning to adapt. The earlier LST work is starting to show again: the tops are lifting toward the light, suggesting that she is reorienting herself and gradually regaining balance. Externally, the structure indicates a slow recovery, even though internal metabolic adjustment to the new spectrum will take more time.
All environmental parameters were intentionally kept constant:
– PPFD maintained at 550 after a 72-hour acclimation at 300 PPFD,
– Temperature around 23°C,
– Relative humidity near 70%,
– No changes in nutrient formulation.
This week’s focus was stabilization rather than growth.
Given the current signs — partial recovery of the tops while the leaves still show stress — the plant will not be flipped to flower until she demonstrates a clear return of vigor. The upcoming week will be key. If the foliage regains posture and the stress diminishes, the transition to flowering can be considered. Until then, the approach remains minimal: no corrections, no boosters, only patience and consistency.
Week 20 closes on a cautious yet optimistic note. The plant is stressed but responsive. The next phase will determine whether she fully adapts to her new 3500K full-spectrum environment.”
Peace,,,

Processing
Likes
31
Share


@Peeman
Follow
I am at a loss with HSO blue fire. First of all the germination rate was poor and now my only blue fire plant has gone Herme. I removed her from the tent and put her in the corner of the room under a separate light which is going to cost me more money in the long run. I should probably just get rid of her but I don’t have the heart to. I’m not the only grower that has had this problem with blue fire. Very disappointed

Likes
293
Share


@Ju_Bps
Follow
Hello growmies 👩🌾👨🌾🌲🌲,
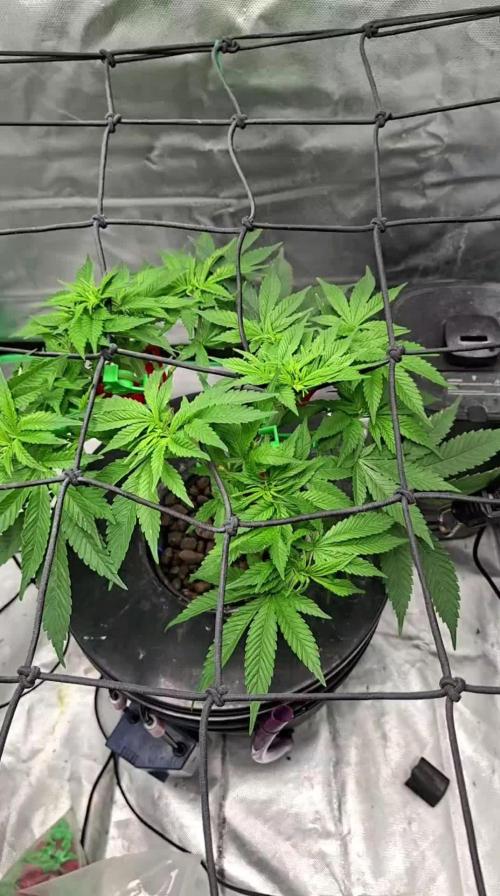
👋 Girls grow very well, much than expected, principaly on some stems of #2 and start to be very close to the lamp,
Hedgehogs coming along, litle start of overfert, only water this week
💪 Continuing scrog, will do a big def soon.
💧 Give water each 2/3 day
2 l Water Only
PH @6
💡Mars Hydro - FC 3000
50% 17 cm
Mars Hydro Fan kit
Setting 8
Have a good week and see you next week 👋
Thanks community for follow, likes, comments, always a pleasure 👩🌾👨🌾❤️🌲
Mars Hydro - Smart FC3000 300W Samsung LM301B LED Grow Light💡💡
https://www.mars-hydro.com/fc-3000-samsung-lm301b-led-grow-light
Mars Hydro - 6 Inch Inline Fan And Carbon Filter Combo With Thermostat Controller 💨💨
https://www.mars-hydro.com/6-inch-inline-duct-fan-and-carbon-filter-combo-with-thermostat-controller
Fast Buds - Gorilla Cookies FF🌲🌲
https://2fast4buds.com/us/seeds/gorilla-cookies-fast-flowering

Likes
10
Share


@Dunk_Junk
Follow
She's done!!
Super, super stinky!!!!!!!!
Covered in trichomes!!!!!!!!!!!
Will be harvested within 24h.
Likes
10
Share


@Elguacho420
Follow
Buenas a tod@s!!! Arrancamos con la primera semana de floración de está lemon cookie kush, con lo que respecta a la variedad va muy bien, la veo bien, vamos a ver q tal va floreciendo. Altura no mucha pero será x algún fallo mio como novato, pero bueno, de a poco se va mejorando, ya voy teniendo en cuenta varios puntos de riego y demás cositas... Bueno x el momento va la primer semana y vamos a ver q tal van las demás... Buen finde para tod@s y buenos humos... 🏻♂️👍🏻🇦🇷🤝🏻🇪🇦

Likes
12
Share


@WestieWeed
Follow
RUNNING OUT OF ROOM!!!!!!
light is sitting 12 inch from the top of the plants. Had to put another screen down to give me just a little more room. not to sound like im sucking my self off
but i really didnt expect these plants to grow so well so now its a mad panic to save some room. Getting cold during the day and night here so temp control is still and issue.
week posted a day early due to holiday obligations . hoping the stretch last another day or so before bud start producing
Update
but who the F$%^ knows this is all new to me
Update
Three days into week 10 and i had to push down a second SCOG net and push some of the stems down. showing signs of what i think is light burn .... even though im using leds. dont think its nute burn gonna add some pics and maybe you can see it. these little babies shot up fast one night after being pushed down. the white hairs are starting to really show still got 12 inches of room from the light. With everything ive read online my flowering phase seems to be a bit behind the what i would call normal time line but im guessing its just the strain im growing.
