


Likes
22
Share


@BruWeed
Follow
☘️30/09 - Se encuentra en Etapa de Enraizamiento.
☘️Este diario es para participar del sorteo "Best Rarest & Smallest Pot by seedman".
☘️Estoy utilizando una de las semillas que tengo de Dutch Passion, su genética es Blackberry Kush Auto.
☘️En esta planta voy a estar utilizando el método Fotoperiodico del calendario de Top Crop.
☘️Estoy utilizando una maceta que abarca aproximadamente 1L.
☘️01/10 - voy a empezar a darle Deeper Underground de Top crop empezando por 0,5ml por 500ml de agua.
☘️03/10 - Empieza su primer semana, agregue en una botella 500ml de agua con 0,5ml de Deeper Underground.
☘️10/10 - Empezó su segunda semana de enraizamiento y también agregue en una botella 500ml de agua y 0,5ml de Deeper Underground.
☘️17/10 - Empieza su primera semana en Etapa de crecimiento.
☘️En total van hacer dos semanas en Etapa de Enraizamiento, con 1ml en total de Deeper Underground.
☘️Estos días estaré subiendo más imágenes de como va su crecimiento.

Likes
17
Share


@AwfulBuddy
Follow
It was interesting, my first growing from beans.
I knew this is a strain that stretches, but I never expected 150cm of girls.
Incredibly resistant, during the whole vegetative phase I did High Stress training mistreating them but without scratching them
I did schwazze defoliation to counteract the heat and too much humidity but the girls continued bulking, really strong!
First experience with co2 from the next diary everything will be documented.
Goal set at 500g ... let's see at the end of the treatment ...
Keep it growing gromies 🍀🍀🍀


Likes
12
Share


Likes
61
Share


@Hou_Stone
Follow
✌️👨🚀🍊
C'est partis pour la floraison ! Mes lemon orange se développe excessivement bien, je croise les doigts pour que ça continue en espérant avoir de gros bourgeons savoureux dans 2 mois 🤞🍊
J'ai ajouté environ 25gr de poudre BioBloom par pot de 8L soit environ 3gr/L.
J'arrose chaque pot avec environ 1.5L tout les 5 jours. J'ajoute du biohenhanceur 1 fois sur 2
Intensité de la FC3000: 90%
Ventilation : 2 ventilateur oscillant ( ON 12/24H) + Extracteur pouces mars hydro power : 2/10 (24h/24h)
👋👨🚀🍊
Venez me voir sur instagram ! 🤩
https://www.instagram.com/hou_stone420/


Likes
26
Share


@darb35
Follow
Day 50 - 1L water with calmag (ph 6.5)(91-95 cm)
Day 51 - 1L water with half dose according to biobizz schedule (ph 6.3)(91-95 cm)
Day 52 - 1L water with calmag (ph 6.4)(91-95 cm)
Day 53 - No water (92-96 cm)
Day 54 - 1.3L water with half dose according to biobizz schedule (ph 6.3)(92-96 cm)
Day 55 - 1L water with calmag (ph 6.4)(92-97 cm)
Day 56 - 1L water with half dose according to biobizz schedule (ph 6.3)(92-97 cm)


Likes
8
Share


@AERO_Grower
Follow
5° Semana- Aeroponía - Están muy bellas las raíces, están 100% sanas. Se realiza poda apical al quinto nodo,una pequeña defoliación y luego se aplica LST a las más grandes, muy contento con el crecimiento actual.
---------------------------------------------------------------------------------------------------------------------------------------------------------------------------------------------------------------------
5th Week- Aeroponics - The roots are very beautiful, they are 100% healthy. The fifth node is topped, and a little defoliation and then LST is applied to the largest ones, very happy with the current growth.


Likes
7
Share


@Nikkov
Follow
Well, another week has passed and they are growing very well, now it's a matter of two to three weeks for me to change them to flora, this week I did a little defoliation on the plants and watered them again with top crop top veg fertilizer and I also did some bindings known as low stress training. =D
Likes
67
Share


@Ageddd
Follow
Hello GD !!!!
This week things went complicated... Both cheese started preflowering and flowering right now, imma put you in the whole context of this .. Im really confused at the moment
Both plants showed preflowers, over developed pre flowers ? ....
Then hairs appearing, and i started to worry about this..
Temperature was good at 10/5 so put the plants outside, topped the girl and removed a few lower branches
Couple of cloudy days and .......more hairs... maybe more like a first stage flower
Talked about this with a more experienced grower, he told me that the plants should re vegetate when noticing longer days..
I have been researching and many people coincide with the revegetation, but.... maybe some grower or skilled revegger can help me out ? I mean im feeding the plant with BioGrow ph 6.5, yesterday with Green Explosion and BioGrow to seeif this helps the plant ....
My plan was to make a monster plant this year, but things are not going as expected.
Got a Jack Herer waiting if i need to germinate a new plant now but would be a mess of Cheese
Thank you for your time guys !!!!!
EDITED 22/05 : The other cheese which have a slowly develop in comparision, has developed flowers too but are smaller, and seems she is showing ReVegetation Signs !!!! with more leaves in the popcorn buds and new growth, so we are waiting a few days to take a decission.
Thank you so much for the advice mates !
EDITED 24/05: The buds are getting frosty .... wtf, temperatures are low, this is a really weird year... Winter come later than usual, and still here..
Likes
92
Share


@DogDoctorOfficial
Follow
Week 9 - First Week of Flowering 🌸
The dark period has ended, and these ladies came back into the light fully energized and ready for action! It’s just the first week of flower, and they’re all praying, stretching, and absolutely thriving—filling up every inch of the tent. This grow space is officially packed from wall to wall, with each plant competing for its share of light and showing off some of the biggest, healthiest leaves I’ve seen yet! 🌱
A few strategic plucks here and there have kept airflow smooth and light penetration balanced. Those big leaves? They’re a sign of happy, healthy growth. Large leaves help the plant capture maximum light energy, essential during this stage, especially as they start focusing on developing those flowers. When plants grow huge, vibrant leaves like these, it means they’re well-nourished and content in their environment—a true testament to the well-balanced conditions we’ve got going in the tent!
Flowering Parameters 🌡️
Room Environment:
• Temperature: 26.7°C
• Humidity: 63.3%
• CO2: 960 ppm
• VPD: 1.29 kPa (prime zone for flowering health!)
Lighting:
• Light Intensity: 835 PPFD (ideal for boosting flower growth)
• Solution: pH 5.96, TDS 460 ppm, temp 21.1°C
• Medium: Moisture: 100%, TDS: 520 ppm, Temp: 21.6°C
Carbon Filter Installation & Smell Management 🌬️🌱
With the transition to flower, the scent profile is already starting to kick in—crazy for the first week, right? 🌸 To keep everything fresh and under wraps, I’ve set up a carbon filter system. Here’s how it’s working: I’ve connected the filter to my Aerofan, which pulls air directly from the tent. This air is cleaned by the filter and released into the main room, where it then passes through another filter before exiting my space. This dual-filter setup means no scent escapes into the wild, keeping things stealthy and the grow room a peaceful, scent-contained environment. Perfect for anyone concerned about keeping their home free from that telltale aroma! 🕶️🌬️
Enhanced Lighting with Emerson Effect 🌞
This week, I’ve introduced an extra 15 minutes of red light at the beginning and end of each light cycle. Why? Well, this red boost taps into the Emerson effect, enhancing photosynthesis efficiency, especially during the flowering stage. By stimulating a little extra wake-up and wind-down light, we’re mimicking the natural sunrise and sunset experience for these plants, which can help reduce flowering time. Not only does it encourage smoother transitions into day and night, but in theory, it’ll help these ladies finish a bit faster, while giving them a little nudge to build more substantial, quality flowers. 🌇
Nutrient Adjustments 🌱
Now that we’re in flower, I’ve swapped out the Start Booster for P-Boost and TopBooster to specifically support flowering needs. Here’s why:
• P-Boost brings in additional phosphorus, vital for energy transfer and cell division as the plant channels more resources into budding sites.
• TopBooster supports the flowering phase by improving flower quality and density, helping to build those big, aromatic buds we’re after.
These changes bring the nutrient mix in line with what’s most beneficial at this stage. All this precise dialing in is easy to manage thanks to the TrolMaster system. From pH to nutrient scheduling, the TrolMaster ecosystem and ThinkGrow LEDs have been the ultimate teammates in this grow journey, giving me real-time data, fine control, and peace of mind. 💯
(Not introducing UV light just yet, but stay tuned as that’s coming soon for an added boost!)
Looking Forward 🌟
Next week, we’ll be upping the reds, giving us an even greater chance of activating those flowering signals for a smoother, faster transition through the cycle. I’ll keep tweaking and fine-tuning every parameter to make sure these ladies get exactly what they need to thrive.
Big thanks to the TrolMaster system for keeping everything in balance and optimized, along with the supportive Grow Fam following this journey! Your enthusiasm, advice, and support are a huge part of this grow’s success. Keep following for more updates, and stay tuned for what’s next! 🌿✨
P.S. Deep Dive: TrolMaster’s MBS-S8 CO₂ Sensor & Smoke Detector 🚨
The MBS-S8 CO₂ Sensor from TrolMaster is a powerhouse for growers, especially when it comes to optimizing plant growth and efficiency in a controlled environment. This sensor continuously monitors CO₂ levels and integrates directly with the TrolMaster ecosystem, giving you real-time data on CO₂ concentration. Ideal levels of CO₂ can significantly boost growth and yield during certain stages, so understanding and managing CO₂ is key. With the MBS-S8, I can control CO₂ levels precisely, keeping them within the optimal range for photosynthesis. This sensor is a game-changer because it adjusts CO₂ delivery automatically, giving plants exactly what they need without any extra monitoring from me.
Meanwhile, TrolMaster’s Smoke Detector is an essential safety device, especially in spaces with electrical equipment, lights, and heat-generating components. This detector can be set up to alert me instantly via the TrolMaster app if any smoke is detected, allowing me to respond immediately to any potential issues. Fires and smoke are rare in controlled grow setups but having this safety measure provides peace of mind and lets me focus on the plants without constant worry. It’s an incredible tool for any grower prioritizing safety and proactive monitoring.
Discount Codes so you can save big on your next check out 💚💚💚
Kannabia - DOGDOCTOR 30% off
SeedsmanSeeds - DOGDOCTOR 10% off
CannaKan- DOGDOCTOR 15% off
terpyz.eu - DOCTOR 15% off
The Neutralizer - PORKIT5-DOG 15% off
As always thank you all for stopping by, for the love and for it all , this journey of mine wold just not be the same without you guys, the love and support is very much appreciated and i fell honored and so joyful with you all in my life 🙏
With true love comes happiness 💚🙏 Always believe in your self and always do things expecting nothing and with an open heart , be a giver and the universe will give back to you in ways you could not even imagine so 💚
Friendly reminder all you see here is pure research and for educational purposes only
Growers Love to you all 💚💚💚


Processing
Likes
26
Share


@Char23
Follow
Hi everyone,
Buds are swelling nicely on the blueberry and gorilla. The gorilla is starting to smell amazing.
I am hoping that all 3 will have been cut down within the next 4 weeks.
The zkittlez hasn't seemed to have done too much and I have kind of given up on the buds fattening up at this stage.. I'm putting it down to this being my first run and the fact that I should have raised them closer to the light earlier as the others were so much taller.
I'm thinking to feed the zkittlez plain water for the next 2 weeks to flush before harvest and feed the other 2 for a further 2 weeks before doing the same. what do you think?
I'm going to have to make a drying box for outside the tent and fix this to the tent via ducting to create an environemnt for the zkittlez to dry. Does anyone have any advice here seeing as my tent is still going to be in use?
Thanks for reading :)

Likes
58
Share


@GreenHouseLab
Follow
Look 👀 at my bush! Probably the one I’m most excited about BF combined with blueberries god damn how can’t you be. Few days waiting on her sister to grow up and flower here we go.
Drinking around 2.3L per day it’s ridiculous when you control all environmental factors added with Mycorrhizae its a deadly combination.
Automatic watering system would be welcomed with recommendations, Stay safe and keep it green!

Likes
141
Share


@Golden
Follow
Being away over the new years I was unable to tend to the ladies. However, we received an update from friend
Likes
26
Share


@BlackForestGrower
Follow
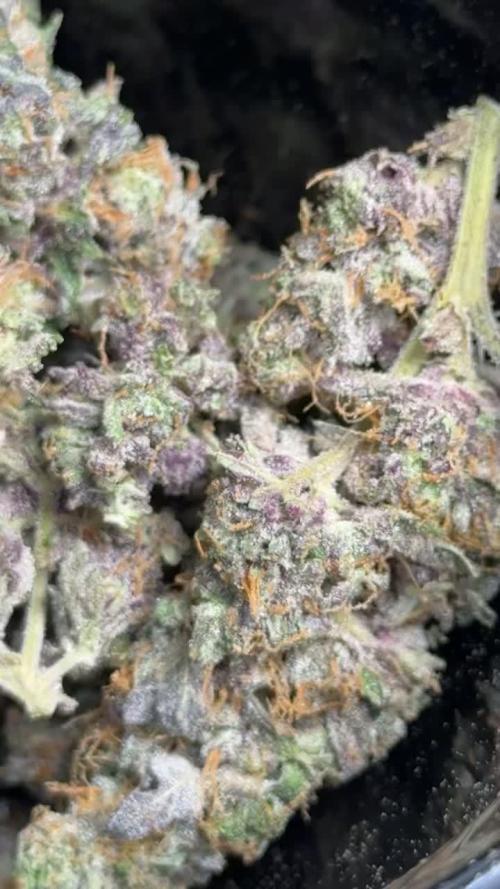
Plant 1 is ready the other two get another 12h and 24h in dark tent
Taste fruity and berrys
White Ash


