


Likes
Comments
Share


@Ultraviolet
Follow
I dunno I just work here. This week I have mostly been eating Death Stars.
If you have grown morning glories you know how indiscriminate they are to wreath and coil around as they grow, I had expected to be fighting off and hacking at it to leave the Mary J alone, but to my surprise...... it's as if they have an understanding, leaving it alone.
The ladybug I found outside in the cold a few weeks back happened to be a female, I have only seen 1 larvae so far which is now a light orange ladybug with spots and all. From what I read up on lady beetles they dump eggs and are done with it and can lay several dozen at a time. I could have sworn she and her baby were working in tandem though I had seen them one morning on the vines, they seemed quite content to live here, the tent being wide open for long periods, and they seemed uninterested in flying anywhere. Seems odd she only had 1 beetle baby though, maybe I just haven't seen more than 2 at a time. I love them though, efficient little Duracell terminators that never cease, apparently, the main breed that many garden stores sell is a species prone to flying away.
Thank you Terrance for all your diligent work in helping to keep the garden clean and pest-free.
It turns out, the ladybug isn’t named for any particular female trait it possesses. Rather, it is named for a specific lady- the Virgin Mary.
Why? This isn’t precisely known. One of the leading theories is that the name came about as a result of the ladybug’s bright red shell, which is not too dissimilar from the red cloak Mary is often pictured wearing in biblical paintings. There’s also an old European legend that states that farmers many hundreds of years ago prayed to the Virgin Mary asking for help to save them from the pests devouring their crops and in return she sent a swarm of tiny beetles bearing her trademark coat to eat them.
In truth, ladybugs are known to dine almost exclusively on insects we humans consider pests, like aphids, something old-timey farmers without pesticides or other easy means of keeping their crops protected from destructive creatures were no doubt incredibly thankful for. Since back in those days it was common to thank God for almost any good fortune, it’s not hard to see how this legend popped up, and perhaps this gratefulness really did contribute to the name.

Likes
4
Share


@MistaOC
Follow
**************
13.03. Day 1
**************
🤞🏼😎
I have new cuttings. Sour Frootz from Karma Genetics. I planted the cuttings in 0.2 L pots. I only applied fertilizer to the large pot.
So Let’s grow again 💚💯
*******************************************
18.03. Day 6
sprinkled with bactrex and transferred into the large pots
*******************************************


Likes
6
Share
@Chrisandweed
Follow
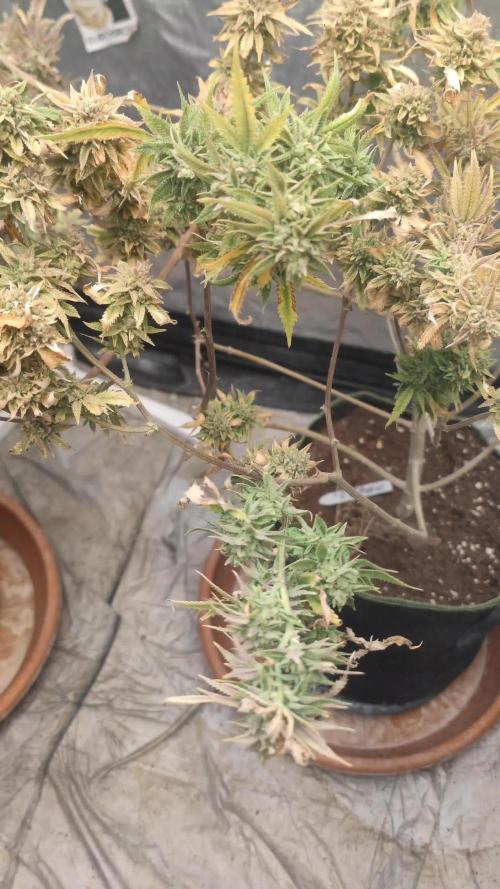
Bueno, ayer hice el ultimo riego, mas cantidad de lo habitual, y ya cuando seque, se corta, supongo que actualizaré fotos, conforme avance la semana, del corte y posterior proceso ya que dado que hubo araña y ciertos problemas, voy a hacer el budwashing que habitualmente hago.
En el video se ve algún cogollo con telaraña de araña roja, de ahí el budwashing. Dentro de lo malo, no son todos los cocos los que la tienen pero bueno, un buen lavado no jode nada.
Edit 12-02-2026: CORTADA! ya puesta a secar en el tendedero xD dado que en el armario había algo de araña aunque no habia afectado a todas las plantas, he decidido hacerles budwashing a todas no sin un petique que me centre y buena música 😁. Normalmente subía fotos del proceso, en esta ocasión, aunque sea un poco mas tedioso, he subido un video del proceso.
Cuando seque finalizaré el diario y subiré las fotos de los cogollos manicurados.
Aclaro, la he puesto a secar en el tendedero pero metido al armario ya sin luces y tal XD solo ventilador oscilante y extractor con el filtro, que solo con el corte la he liado en la calle 😅😂😂😂
Pues la vd es que ha salido mas de lo que pensaba, como la tenía ahí esquinada, era la mas inaccesible, me costaba mas verla bien. Algunos cogollos están cubiertos de telarañas y los enfoco en el video para que se vea, pero otros no, por lo que entiendo que pese a mis fallos, la resistencia es mas media, ya que otras o han sufrido mas, o casi no lo han sufrido, pero en definitiva, siento que muy buena variedad pero no para cultivarla como yo he hecho, esta tiene pinta de ser una de esas que pones en exterior y tira a los 3 metros. Buuueno, pa'so stánnn pa probaah y exsusperimentar xD
Likes
31
Share


@Untergrownd
Follow
Week Eight
Impressed by the stretch (first time grower…) no problems but funghus nats. The older plants got into stretch faster, the fastbuds are still behind and take longer to transition, only the orange sherbet kept up.
They got a last feeding, so nothing much to do except watering and keeping the nats population down.
Still waiting for defoliation as it get very full
And I can’t keep the rh below 70%


Likes
7
Share


@Ninjabuds
Follow
The OG kush is coming along great the leaves got a little burnt but the buds are super dense and have a black hue coming in to them they look so awesome

Likes
42
Share


@cheetah844
Follow
It's doing it's normal tall Jack Herer growing. Definitely have to start training soon, she'll be going outside but I want to keep her shorter almost bush like. We'll see how that goes with a tall girl?!

Likes
12
Share


@Cannabot
Follow
Very satisfied,candy smelling buds.Thick colas,final week flush atm.Sweet seeds have some serious fire man thats for sure. Looking forward to harvesting this girl

Likes
11
Share

@MaryJaneJo
Follow
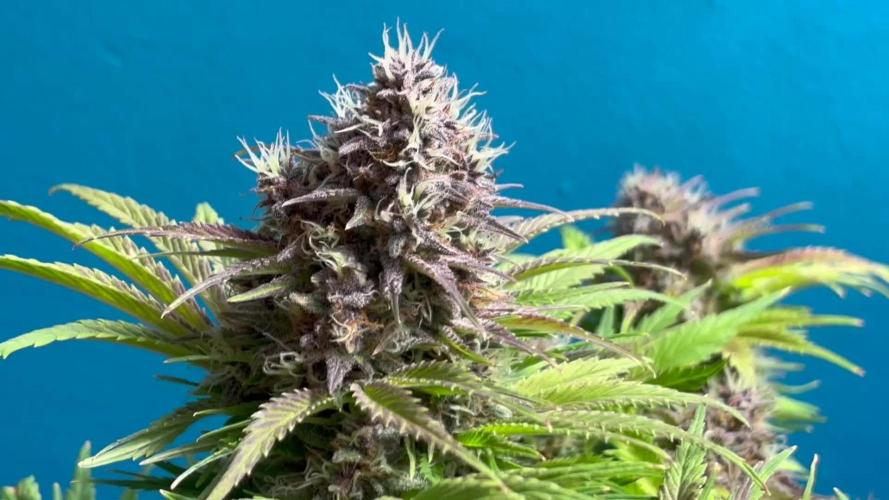
This video was taken just before the chop. It took me forever to cut the first branch __she seemed too pretty to touch with scissors.
Feelings aside now.
Time slipped again and it turned out to be her 9th week. Trichome checks were tricky because of the side lighting, often too close to the plant, so they were not consistently filling up__mea culpa. If I only had more space… & had not damaged the main stem…
As for patching up the broken stem, I am not sure it was a great idea. She grew OK, but the stem at the patch spot looked like it had maybe 40% living tissue left.
BAK__ more in a jiff.👽
Likes
10
Share


@Sundance
Follow
This week continues with nice flowering with strong smell. One plant is light green, I don't know why. I also added on more light to my grow tent.
Likes
105
Share


@Coopmc
Follow
5 weeks 12 on 6 off over I have switched her over to 12/12 and put her on week 4 feed I think it is closer to where she is at on flowering.
Yep she flowering

Processing
Likes
6
Share


@Grass_slinger
Follow
This week was a slow week due to my lack of attention as I’ve been extra busy sorting my outdoor garden,ready for the guerilla grow This summer.
Anyway I’ve decided to transport these to perky little plants into the final pots , one being the OFFICIAL ZAMNESIA POT. The other pot was just once of the many I have laying around. They’ve both got the same mix in them consisting of coco, perlite, Monster bud mix sachet and ph water to around 6.2. Should be able to start some training off soon as they take to their new homes.
Likes
6
Share

@I_roll_my_own_420
Follow
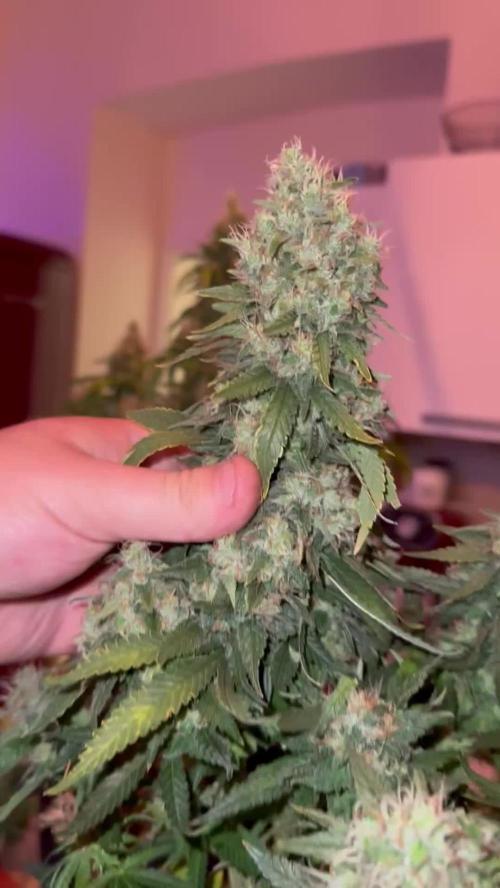
After 10 days of flushing, time to harvest. End of week 8 of flower. Smells amazing. Im drying in tent, cant get the temp under 23 celsius. Thats why Im drying plants without a lot of trim. Buds are full of trichomes, 30h of darkness before harvest. Almost all buds are pretty big, so far sooo good 😅.


Likes
22
Share


@valiotoro
Follow
I’m in love with the straw gorilla 😍🤩🍓
All the top buds ready✂️
The colors & the smell pouaaah out of this world !!
One more week for the lower buds and finito bye bye
Likes
11
Share

@WeedWagon
Follow
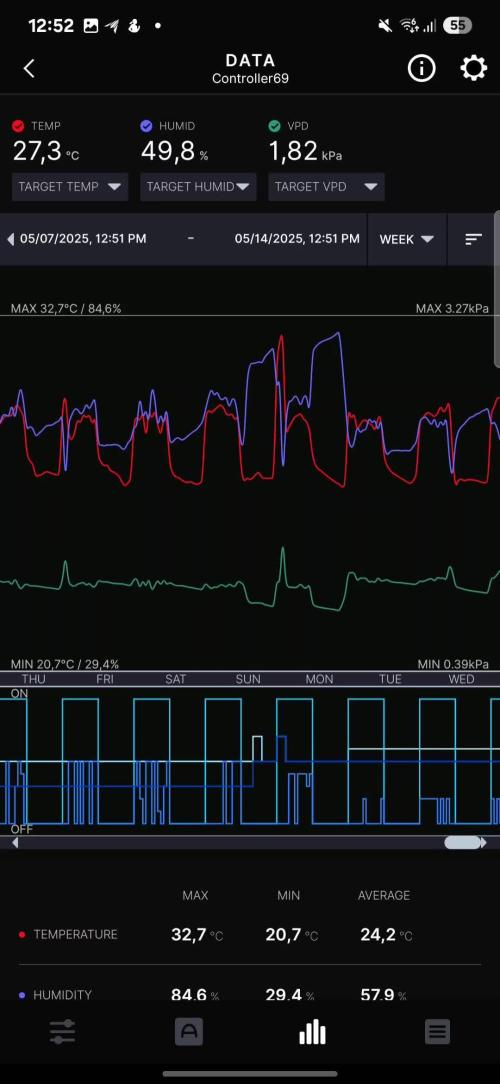
Day 30 - 37:
- first week of flower
- no signs of flower yet
- Day 36 Transplantation into 15 l Pots
- lst all the way (could be better every 2-3 days)
- 2l every 2-3
Likes
149
Share


@CBD_Sweden
Follow
Hi all the happy people here in GrowDiaries.
This is my second cultivation ever and it will be fun to try a bigger space than my closet grow.
First, I'm just going to say I'm done with the construction of my new growroom.
I put some pictures on the construction here in week one.
The room is 2.14 meters by 1.7 meters and has a ceiling height of 2 meters.
It provides a floor area of 3.6 square meters.
I use a 54 Watt Lightwawe T5 for germination and 2 Pcs 400 Watt HPS lamps.
I have a channel fan that replaces the room air about 40 times an hour to get a comfortable theme in the room, the air enters a fresh air intake from the outside.
The air is purified through a carbon filter to then leave the room to the rest of the basement.
Then I use that heat to heat the rest of the basement.
I will use 8 pcs 15 liter Autopots to grow with and a 100 liter water tank that supplies the pots of water and nutrition.
I will grow completely organically in soil and will watercure my buds to get the best possible medicine for me.
But there are no cultivation rooms to be displayed here, so I continue with what is most important.
Today I have put my seeds in my moisture dome and hope the seeds have germinated within a few days.
I am very excited to see how the new growroom will work and how this Blue cheese Auto from Royal queen seeds will turn out.
Blue Cheese automatic cannabis seeds are a cross of Blueberry Automatic and Cheese Automatic that has been perfected over five years of breeding and careful selection. The result is a feminized, autoflowering strain with superior yield, flavor, and effects to either of its distinguished parent strains.
THC: 16%
CBD: Low
Yield Indoor : 325 - 375 gr/m2
Yield Outdoor: 60 - 110 gr/plant
Height Indoor: 40 - 70 cm
Height Outdoor: 60 - 110 cm
Flowering: 7 - 8 weeks
Harvest month: 9-10 weeks after planting
Genetic Background: Blueberry x Cheese x Ruderalis
Type: Sa 35% In 40% Ru 25%
Effect: Cerebral and uplifting
Climate: Mild
..............................................................................................................................................................................................................................................................................................................................................
Update 2017-08-15. All 4 seeds have germinated and planted in small pots inside the humidity dome.
I'm so glad it worked so well and now it's just hoping they'll start growing and become 4 big healthy girls :)
...............................................................................................................................................................................................................................................................................................................................................
Update 2017-08-16. I have mixed my own soil today. Its 40% sieved peat harrow H2-H4 0-30 mm, 45% sieved peat harrow H4-H6 0-30 mm. 5% sand and 10% of compost soil. And i use 15% of perilite and mix it all together.
................................................................................................................................................................................................................................................................................................................................................
Update 2017-08.20. Nr1 and 2 grow and thrive.
Number 3 just got rid of the seedpod and is folding out the sheets.
Number 4 is a bit shy and can only be seen if you look carefully into the soil.
.........................................................................................................................................................................................................................................................................................................................................
Update 2017-08-21. Nr 1 and 2 is doing well. Nr3 is trying to catch up and Nr4 is still shy.
--------------------------------------------------------------------------------------------------------------------------------------------------------------------------------------------------------
2017-08-23. Transplanted 2 girls from humidity dome and the small germinating pots to 15 liter autopots. The other 2 girls have to wait a little more before transplant to the autopots.
................................................................................................................................................................................................................................................................................................................................................................................
2017-08-27. The girls have settled in to there new home of the 15 liters autopot after a little transplant chock. Now the real week 1 starts for me and the girls.
--------------------------------------------------------------------------------------------------------------------------------------------------------------------------------------------------------
2017-08-28. New pic and movies.
---------------------------------------------------------------------------------------------------------------------------------------------------------------------------------------
2017-08-28. Nr3 is transplanted in 15 liter autopot.
-------------------------------------------------------------------------------------------------------------------------------------------------------------------------------
2017-08-29. New movie of the girls. Its no water for 3 days now for Nr1 and 2 so the roots develop more and match the plant above the soil. The temp controlled fan is awesome, its easy to set what temp you like to have in the room. Right now its 28 celcius. And humidity is 56%.
------------------------------------------------------------------------------------------------------------------------------------------------------------------------------------------
2017-08-29.
Hello to you who read my diary, I just want to say that I am pleased that you have chosen to check in with me and in my diary.
I just want to say that I do this for myself and for a steady flow of my medicine.
Everything you read and see in my diary is 100% honest and I will never distort or beautify anything here.
I document my crops so that I can learn from my mistakes and also to look back at those different crops.
I try to update with pictures every day and with text if something special has happened in the garden.
This is my strainhunt for the best medicine and the beginning of my journey with cannabis and the cultivation of it.
-----------------------------------------------------------------------------------------------------------------------------------------------------------------------
2017-08-30. Cleaned the room this morning, just vacuuming and cleaning with chlorine solution. Im testing the fan to control temp and humidity, it works great.
Added some pics with measurements and movie. Everything is looking great right now.
---------------------------------------------------------------------------------------------------------------------------------------------------------------------------
2017-08-31. New pics and videos.
---------------------------------------------------------------------------------------------------------------------------------------------------------------------------------
2017-09-01. New pics and videos. Gave each of the girls with 2 ml Alg-A-Mic, 4ml Bio-Grow, 4ml Bio-Heaven and 10 ml Formulex mixed in 2 liters of water.
I hope they like it :)
-------------------------------------------------------------------------------------------------------------------------------------------------------------------------------------------------------------------------------------------
2017-09-02. New pics and the girls liked the water and nutrients yesterday.
-------------------------------------------------------------------------------------------------------------
2017-09-03. New videos of the girls this morning. Nr1 and 3 looks great and nr 2 is looking a little funny, maby a little stressed.
Kl. 16.00. Did some defoliation on the girls. Added video.
Kl.. 23.00. New videos, defoliation and leaftucking.
-----------------------------------------------------------------------------------------------------------------
2017-09-04. Kl. 11.00. Week 3 starts. Trying to LST the girls and defoliate/leaftuck. New picks.
KL 23.00. New video.
--------------------------------------------------------------------------------------------------------------
2017-09-05. KL 08.00. Cleaned the room this morning, just vacuuming and cleaning with chlorine solution.
KL 12.00. The girls got 2 liters of water each with nutes in it, added a video.
----------------------------------------------------------------------------------------------------------------
2017-09-06. KL 08.00. The girls woke up after their beauty sleep, the leaves are always a bit down after 6 h of darkness, but they will stretch now when the HPS lamp starts.
Everything looks good and I keep trying to tuck the leaves so they get the maximum amount of light where needed. Added pics and video.
The Nr 3 girl is still a little bit behind the other 2 girls and all the 3 girls look like there 3 different pheno of the same plant.
KL 23.30. Did some LST.
----------------------------------------------------------------------------------------------------------------------
2017-09-07. Day 21 from sprouting, Nr3 is 17 days from sprouting. I have never tested PH in my grows, when growing organic in soil iv learned that it adapt PH by it self. But im curious by nature so i had to test.
Kl 10.00 Tested PH in the soil, it was 6.9 and tested my tap water and it was 6.8. Added a video of the girls, its 10 H after defoliation, LST and leaftucking. I think its looking good.
Kl 22.30. New pics.
Likes
4
Share


@Angelgrows
Follow
She is smelling so strong and stacking nicely, the buds are dense and super shiny and covered in tricombs. So far there’s more cloudy than clear but no Amber yet will keep y’all updated :)
Likes
24
Share


@nonick123
Follow
Día 101 (09/09) Riego con 500 / 1000 ml H2O pH 6,5
Parece que se ha parado un poco el amarilleamiento que subía tan rápidamente por las plantas!
Día 102 (10/09) Riego con 500 / 1000 ml H2O pH 6,5
Excepto LemonPaya, todas las plantas empiezan a llenarse de tricomas! 😍
Día 103 (11/09) Riego con 500 / 1000 ml H2O pH 6,5
Estoy emparanoiado con que la floración va lenta...
Día 104 (12/09) Los cogollos no se están formado correctamente... Algo pasa... Los pistilos tienen un extraño color verde y no engordan...
OnionOG #1 es la única que tiene un ritmo normal...
Riego con 250 / 500 ml porque las temperaturas empiezan a bajar a 25 ºC diurnos / 22 ºC nocturnos y está bajando el consumo de agua...
Día 105 (13/09) La deficiencia empeora... Solo se salvan OnionOG #1 y KS1 #2...
Día 106 (14/09) La deficiencia sigue empeorando... Solo se salvan OnionOG #1 y KS1 #2...
Día 107 (15/09) La floración se ha ido al traste! (Excepto OnionOG #1 y KS1 #2)
Tras preguntar a Lurpe, GD e IG concluyo que el super soil tiene un bloqueo de nutrientes
Debido al bloqueo, se ha detenido la floración en 4 de las 6 plantas
Siguiendo las recomendaciones de Lurpe, hago flush hasta que el agua de escorrentía tiene una EC 2,5 (1250 PPMs)
A ver si les da tiempo a recuperarse...
💦Nutrients by Lurpe Solutions - www.lurpenaturalsolutions.com
🌱Substrate PRO-MIX HP BACILLUS + MYCORRHIZAE - www.pthorticulture.com/en/products/pro-mix-hp-biostimulant-plus-mycorrhizae

Likes
28
Share

@Brujha77
Follow
Sooo,
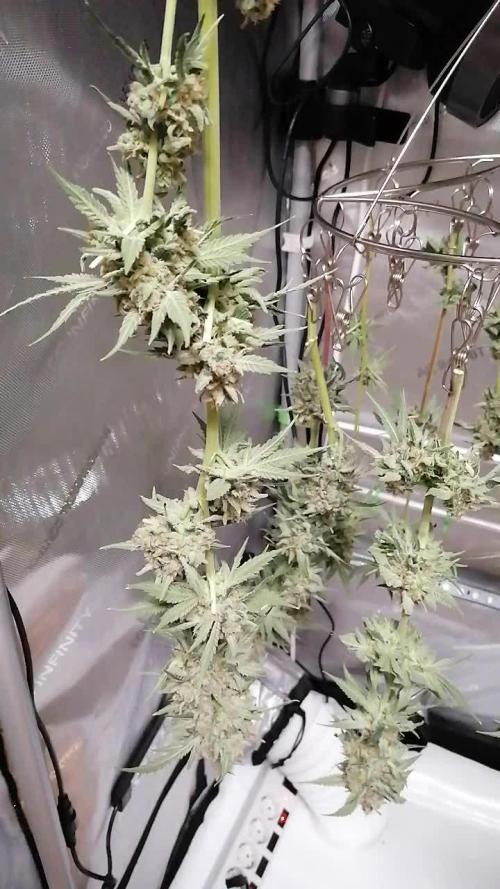
Die beiden haben es nun auch geschafft. Punktlandung, genau 9 Wochen Blüte.
Muss sagen der Run war absolut entspannt. Gerade in Verbindung mit dem Blumat...
Gewogen wurde nicht...
Hängen nun zum Trocknen im Zelt bei ca. 21°C und ca. 48-55% Rlf.
Likes
17
Share


@420DeepGrow
Follow
📆 Semana 6
La Variegated Sour GPP está avanzando con personalidad propia.
Aunque no ha mostrado variegación en esta ocasión, se está expresando de forma muy peculiar: los cogollos tienen una estructura apretada y densa, con una forma que recuerda a una pequeña coliflor —compacta, nudosa y muy distinta al resto del jardín.
El plan nutricional sigue siendo el de XpertNutrients, que está funcionando sin pegas. Esta planta está comiendo bien y sin quejarse. El ritmo de riego lo mantengo ajustado a su consumo real, evitando saturaciones y permitiendo que respire entre riegos.
Los Adlite siguen haciendo un trabajo excelente, y se nota sobre todo en cómo ha desarrollado las puntas: la iluminación pareja ha ayudado a que los cogollos se formen de manera simétrica y con buena producción de resina.
A nivel climático, seguimos con temperaturas en torno a los 22-25°C y una humedad del 55% que, aunque no es ideal, no está generando problemas gracias a una buena ventilación y movimiento de aire constante.
Los aromas comienzan a destacar con una mezcla ácida y ligeramente especiada, fiel al perfil Sour. Los tricomas se están volviendo lechosos, sin señales de ámbar todavía, así que aún queda margen para que siga cogiendo cuerpo.
No tiene la variegación que esperábamos, pero sí una expresión floral única que la convierte en una candidata interesante para seguir observando.
¡Seguimos creciendo fuerte! 💪
Likes
4
Share

