
Likes
Comments
Share


@Huckleberry39
Follow
I am loving this plant!! Her buds are deep deep purple and super dense and covered in trichs!!! The smell is awesome....sweet and fruity with gasseyness, pretty sure that's not a word. This is going to be a great grow!! Thank you @

Likes
20
Share


@Divs_darkroom
Follow
The alien vs Triangle has been putting on some weight this last week. Doing my version of the nectar flush. She is very resinous and is definitely the biggest auto that I have grown. Even her lowers look great. Fading out nicely from the bottom, up.

Likes
20
Share


@DreamIT
Follow
-Sponsored by:
🎆ANESIA SEEDS🎆-💡VIPARSPECTRA💡-💐GREEN BUZZ LIQUIDS💐-🛠️WEDRYER🛠️
8/7 After several days of Growdiaries making it difficult for me to write and respond to comments, I found that I can still update the journals. I apologize to everyone for the non-replies but I have replaced the main email and the email to confirm the account never arrives, and Growdiaries' customer service seems to be non-existent.
10/7 one of them does not seem to want to grow as well as it should. I'll see how it goes in the next few days
12/7 we are in development, but the smallest seems to show signs of malformation. we will see how it goes
__________________________________________
Personal advertising (contains affiliate links)
__________________________________________
🦄 The varieties of Anesia seeds all have an extremely high content of THC and cannabinoids. They were bred specifically for the effect and therefore find wide applications for medical purposes as well.
✅https://bit.ly/Anesiaseeds_
__________________________________________
Did you know that Green Buzz Liquids fertilizers are 100% vegan? A complete line of products ready to give the best to each of your plants! Visit the site and see my journals to see how they work 🦄
🤯 And with the code "dreami t" you will immediately receive a 15% discount on your purchases
✅https: //bit.ly/GreenBuzzLiquidsPro
__________________________________________
👀 Are you looking for a good lamp to start with? 👀
🌞Viparspectra has something more than the others, take a look at their site.
⏩ Use "GDVIP" for an extra discount on amazon or "DREAMIT3" for an extra 5 %% discount
👀 Search for it on Amazon
✅Amazon USA: https://amzn.to/30xSTVq
✅Amazon Canada: https://amzn.to/38udUVe
✅Viparspectra UE: bit.ly/ViparspectraUE
✅Viparspectra USA: bit.ly/ViparspectraUS
______________________________________________
🌈 Tired of blowing on your weed hoping it dries quickly? Check out the Wedryer website! You will find a well-made accessory that will help your weed dry in just 8-10 days without the annoying risk of finding mold or other annoyances! (no affiliate links)
✅https: //bit.ly/Wedryer_
______________________________________________
📷🥇Follow the best photos on Instagram 🥇📷
https://www.instagram.com/dreamit420/
Backup
https://www.instagram.com/dreamit4200/
🔻🔻Leave a comment with your opinion if you pass by here🔻🔻
🤟🦄💚 Thank you and good growth 💚🦄🤟

Likes
5
Share


@ROY4L_GU4RD
Follow
7/29/24 week 8. Flipping is around the corner. I have to defoliate before the flip. I added recharge nutrient this week to help the ladies have a quick recovery. I'm only feeding recharge with a 3 gallon res fill. I usually fill up by at least 6 gallons. What are yalls experiences using recharge?


Likes
10
Share


@PrinceOfHerbs
Follow
Started with flushing pure water.
Trichomes getting milky and amber colored
Flowering Day: 78


Likes
Comments
Share

@shwable
Follow
Welcome to week 9!
Everything looking good, I removed the net and let them grow for themselves from now on.
Only using some LST clips.
Have a great week guys, see yall at Mary Jane!
Likes
20
Share


@Canadian_Bud
Follow
4-2-2021
Now starting 2nd week of flower.
Look at her grow would you expect anything less from a Crop King Seeds seed No Way!.
She is far behind the others but doing great just the same. So easy so far to grow this strain so not sure what the fuss is all about.
I did manage to bend her under the string so technically she is a Scrog. I just did that so to spread her out might get a few more larger buds out of her.😎
Love how she is doing so far.
Keeping the PPM'S Steady for now and added some Seaweed stuff for root growth. We will see how she reacts.💪

Likes
5
Share


@Krissci
Follow
This week I have separated the plants into 2 tent, to allow for wider canopy per plant.
Day 5 - LST and defoliation needed


Likes
21
Share


@Staffedition
Follow
Привет друзья. Моей растихе сегодня 48 дней.
Начал применять LST технику на 19 дне и продалжаю применять её через день, а 18 августа добавил ДЕФОЛИЗАЦИЮ
С 20.08 ДЕФОЛИЗАЦИЮ делаю каждые 3,4 дня
С 20.08 LST технику делаю каждые 4.6 дней
На сегодняшний день влажность 50%
Три дня назад заметил высокий Ph 7.9
С сегодняшнего дня Ph 5.8
Заказал погладитель влажности, отпишусь в следующем репорте.
Не смотря на высокую влажность и высокий Ph, растение растёт хорошо, генетика радует.
Всем мира и добра!
https://t.me/smail_seeds
#Smail_Seeds

Likes
14
Share


@NorthernChemist
Follow
We had approx 4 inches (10 cm) of rain this past week which is a lot for this area. Soil has a lot of moisture but not too wet. Excellent growth in veg stretching a fair bit and starting to show signs of early flower development. Preflowers have a bit of resin: smells quite skunky and a bit like burned rubber, or mercaptans/thiols. Need some sun and heat.
Likes
11
Share

@Chubbs
Follow
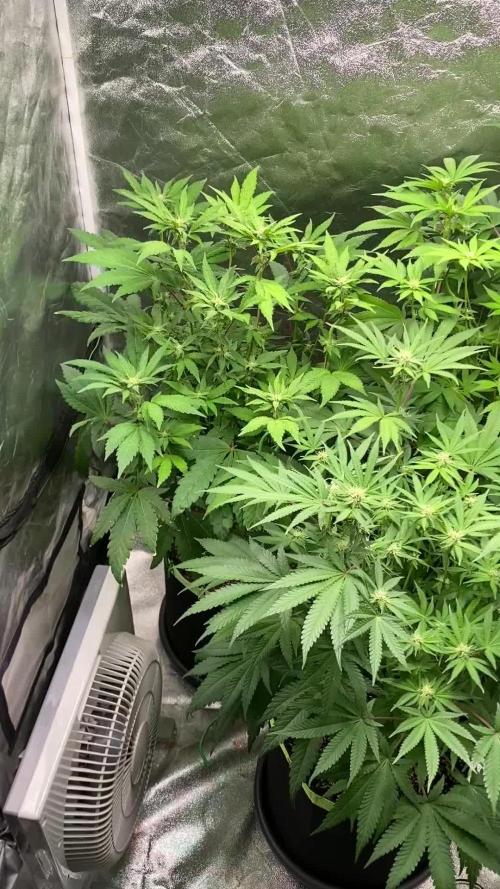
This week has been wild. I had to cut the sides of the greenhouse as the plants had it bursting at the seams. These girls are all flowering beautifully and starting to frost up. Happy
Likes
50
Share


@Fibro_Witch
Follow
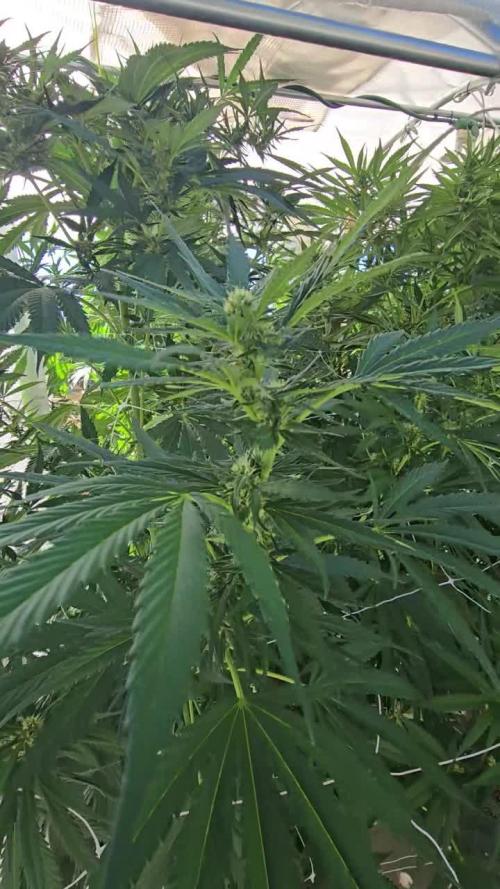
Another Veg week down and heading into flowering...
'Good Girl' is looking great. She has good color and pre-flower development so I'm really happy with where she's at since she's basically on par with the Euphoria as far as size and shape.
'Problem Child' however is... Well you guessed it, having problems😜 I made a short video this week to show you what's going on. If anyone has any recommendations that would be appreciated, otherwise I'll give her more dolomite lime and some trace minerals to see what that does, since she seemed to respond well to the Lime before. I would just like to get her sorted since this is a crucial time. It's very frustrating since both of these plants are the same strain raised in the same soil given the same nutrients and the same environmental conditions and the difference between them😩
I think more than one factor may be causing the problem. She did get a little heat stressed early on just like Euphoria, but unlike Euphoria she never quite fully recovered from it. Some might argue that it's nute burn but I don't think so given her chlorosis. I think it's likely a nute ratio that's off, and after doing a little research it may very well be a Potassium Deficiency. Therefore adding kelp meal would be a good bet and I was already planning on starting to add in molasses now that we're switching over to flower.
I just hope I can get her figured out and into a decent groove so that she'll produce some nice flowers🙏
Likes
9
Share

@Anonymus420
Follow
Start to flowering well
lollipop technique get off 25/30% of the low plant for biggest bud on top after


Likes
55
Share


@budsfromthesix
Follow
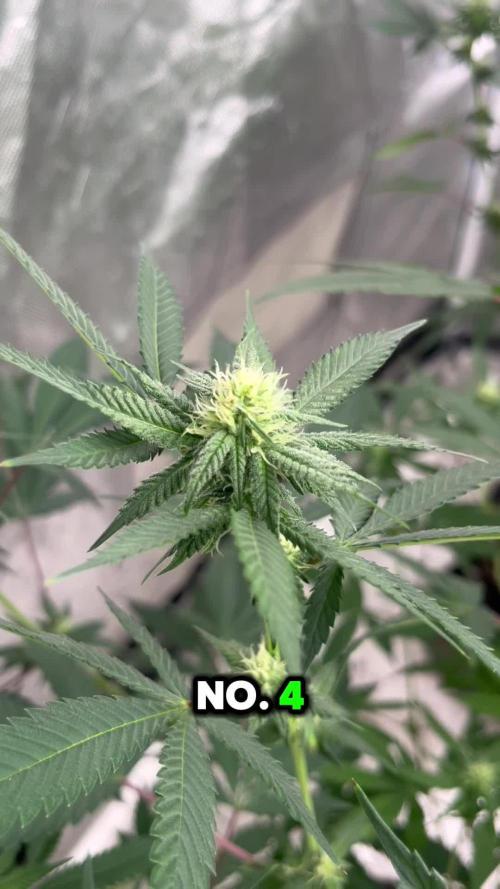
Day 43 of flower and no issues so far. Pheno #2 is stacking beautifully and is actually getting decently fat and she’s caked in trichromes. Pheno #1 is behind on the stack, colas are half the size which might be due the fact that she was topped 7 times, who knows. Super happy with the results so far. It smells like berries in there. I definitely feel this strain needs longer than 8 weeks. I’m aiming for 65 days of flower. Let me know if you guys think I should run her longer.
Update at Day 45:
White pistils have started reversing a bit and starting to grow brown. They seem to be doing pretty well. Pheno #1 is suffering from calcium deficiency but it’s too late inflower for me to try to do anything to fix it and the plant is pretty happy so I’m not worried. I’m still aiming to harvest at day 65.
Did a squeeze test today just to get a feel of what the terpenes smell like. Pheno #1 is leaning more towards emerald headband as it just smells like gas and I love gas despite her being a finicky bitch to grow I’m excited lol.
Pheno #2 is leaning towards blackberry kush as it just smells like fruity berries.

Likes
77
Share

@TruTraTri
Follow
Too stinky to make pictures during harvest .. so wet = just before choping them down.
Everything else mentioned and/or shown in pictures and videos.
Overall, still sad about the missing looks / Pheno variation. Still traumatized by the smell 👽👻😂 Don't have the looks I wanted, but the trichome density on my phenos are also insane.
Buds are okay to smoke... rosin popcorn pressed very well... dry sift out of bad material was also fine.
510 g wet (everything)
310 g dry (poor plants, seems like they were dried out😂) = ~200g buds + 2g 120µ Rosin (14g Popcorn)+ 2g 72µ Rosin (11g Popcorn) + 4g dry sift (melts if you stare at it - 85g leftovers mostly out of the tumble trimmer)
Thanks again for the great growers who showed this interesting genetic and @OriginalSensible for the seeds 😎
Thanks to all growers who joined me on this grow. 😎 Watch the series!
“I am sorry Stanley. It's too late. I cannot go back.” — Lexx
“Then we will have something in common. And I will return, 790.” — Kai
“So, I guess this is goodbye.” — Stanley Tweedle
“I’ll miss you Stan.” — Zev Bellringer


Likes
29
Share


@Momentum
Follow
I'm growin' on,
and i'm prepared to gorwin' alone. 🎺
Sehr schöne Pflanze, hat sich quasi verdoppelt zum letzten Update. Macht einen guten Eindruck.

Likes
151
Share

@yan402
Follow
🌸🍊✨🍭🌸🍊✨🍭🌸🍊✨🍭🌸
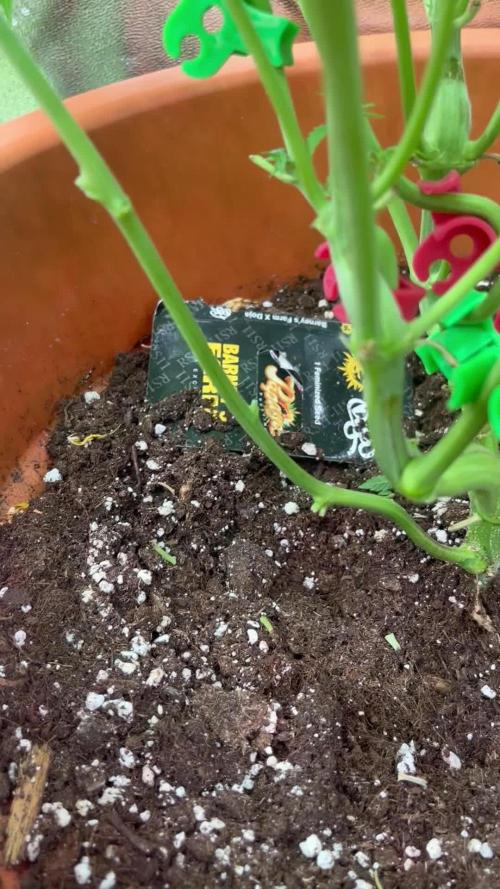
Back at it with Kannabia — huge thanks for the NEW EXCLUSIVE Upcoming Kannabia's seed Launch 🙏🍨🍊
Grateful for the trust and for everyone following along, I’ll run her clean and showcase what she can do.
Dessert-party goals: berry–citrus sherbet terps, creamy finish, tight stacks, easy trim, zero drama.
Veg 24/0, clean manifold + LST, flip on a happy, even canopy.
Coco’s fresh, seed goes in now. 🚀
Added on 12.10.2025
🌞 Light conditions: Limited direct light for the first 4 weeks — ~4 h/day on weekdays and ~10–11 h on weekends due to tent sharing and work schedule.
🌸🍊✨🍭🌸🍊✨🍭🌸🍊✨🍭🌸
💭❗💭❗💭❗💭❗💭❗💭❗💭
❗Events & thoughts worth noting❗
💭❗💭❗💭❗💭❗💭❗💭❗💭
10.08.25 GW1 Sowed seed, soaked starter pot with #1
12.08.25 GW1 Seed popped hip hip hurray
28.08.25 VW2 Stopped using GreenBuzzBloom, took it out of the schedule.
01.09.25 VW3 TriPartMicro 10→30ml, TriPart bloom 10→30ml
12.09.25 VW4 Applied nemadodes against thrips and fungus gnats.
20.09.25 VW6 topped and trained for first time, decided against a full manifold as I lost a few weeks already.
26.09.25 VW7 Topped her one more time for 8 mains
27.09.25 VW7 Topped up the pot with perlite instead of clay pebbles this time, just trying things out, TriPartMicro 30→40ml , TriPartBloom 30→20ml
10.10.25 VW9 have her a haircut, umm be trimming the side shoots tomorrow, rest in the video 📹
12.10.25 VW9 done some extra trimming to clean up a bit and chose two extra side shoots to nurture info mains, so kept the 8 original mains plus 2 rest in the video 📹
17.10.25 VW9 FfJ/fpj fish mix 30 → 60 ml
20.10.25 VW10 Feed tweak: added 3 g Calcium Nitrate/ 30 L (≈ 15 ppm N + 10 ppm Ca)
24.10.25 VW11 did a defoliation and trimming session 📹
27.10.25 VW11 Epsom Salt 0 → 2.5, Calcium Nitrate 3 → 9 g
01.11.25 VW12 CalMag 60 → 30ml, TriPartBloom 20 → 30ml, Magnesium 2.5 → 3.5g
02.11.25 VW12 Did a cleanup in preparation for flowering, rest in the video 📸
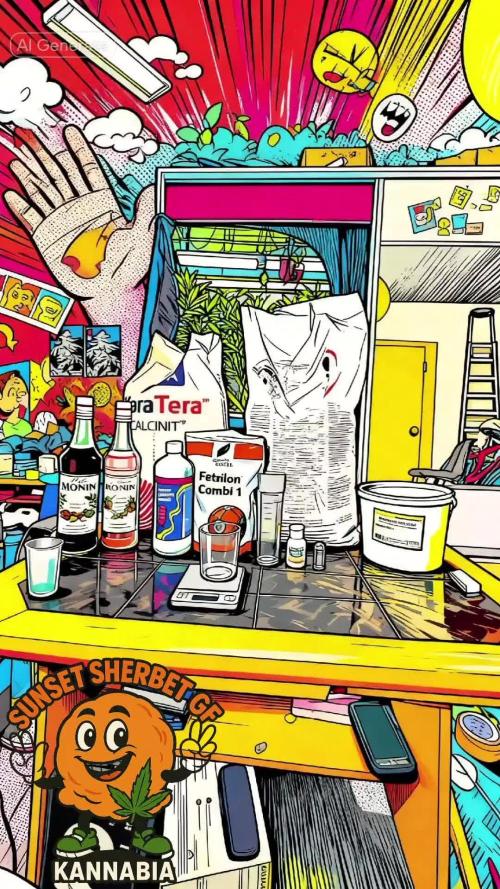
12.11.25 VW13 Did another cleanup in the tent 🎥, also switched to the FERMAKOR PK Micro schedule, (10.11.25) added Phosphoric acid as a pH down in preparation for flowering
14.11.25 FW1 FERMAKOR PK Micros 40 → 50 ml
🌱💦🌱💦🌱💦🌱💦🌱💦🌱
🌿 Day to day tasks & actions 🌿
🌱💦🌱💦🌱💦🌱💦🌱💦🌱
21.11.25 FW1 – Fed 5l of #1 → 2l runoff
(*RUNOFF reused for tomato plants)
🍶💧🍶💧🍶💧🍶💧🍶
💧 Nutrients in 30 L #1 Veg — FERMAKOR
🍶💧🍶💧🍶💧🍶💧🍶
💧 Calcium Nitrate (Calcinit / Nitcal): 45 → 40 g
= 1.33 g/L → 207 ppm N + 253 ppm Ca
🍶 PK Concentrate (FERMAKOR Base): 30 → 40 ml
= 1.00 → 1.33 ml/L → balanced 1:1 P:K + light micros (from extract)
💧 Home-made FFJ/FPJ (Fish + Veg): 30 ml
= 1.00 ml/L
🍶 Epsom Salt (MgSO₄·7H₂O): 8 g
= 0.27 g/L → 26 ppm Mg + 35 ppm S
💧 Fetrilon Combi 1 (Micros): 0.5 g
= 0.017 g/L → Fe 0.7 ppm • Mn 0.7 ppm • Zn 0.3 ppm • Cu 0.3 ppm • B 0.1 ppm • Mo 0.02 ppm
🍶Phosphoric Acid (pH down) + Citric Acid (chelation): as needed
→ First set pH with phosphoric acid, then add a little citric only if you want extra chelation
💧 Target pH: 5.8 – 6.0 (drop test yellow-green)
📦 TOTAL: 60 → 70 ml / 48.5 g inputs per 30 L
= 2.00 → 2.33 ml/L + 1.62 g/L
⚙️✂️⚙️✂️⚙️✂️⚙️✂️⚙️
✂️ Tools & equipment ✂️
⚙️✂️⚙️✂️⚙️✂️⚙️✂️⚙️
✂️ 2× MarsHydro SP3000
⚙️ MarsHydro 150mm ACF Ventilator
✂️ Trotec dehumidifier (big unit)
⚙️ Mini no-name dehumidifier
✂️ Kebab skewers (LST – stainless)
⚙️ Wire + roast skewers (LST assist)
✂️ Scissors (HST)
⚙️ Vacuum (for spills & cleanup)
✂️⚙️✂️⚙️✂️⚙️⚙️✂️⚙️✂️⚙️✂️⚙️
---
🍊🍧🌬️🍬🍊🍧🌬️🍬🍊🍧🌬️🍬 Mystery seed (Kannabia Seeds) — NEW EXCLUSIVE
🍊🍧🌬️🍬🍊🍧🌬️🍬🍊🍧🌬️🍬
Species: Hybrid (GF / swift-flowering line)
Genetics: TBA (breeder sheet pending)
THC: TBA
Effect: Euphoric, relaxed, creative (target profile)
Flavor: Berry–citrus sherbet, sweet candy, creamy finish
Flowering (indoors): ~6–7 weeks target (GF)
Resistance: High (aim: no drama)
Indoor yield: TBA
Outdoor yield: TBA
Structure: TBA
Notes: Brand-new exclusive from Kannabia’s GF line — I’ll update specs when the breeder card drops. Goal is rich sherbet terps (berry–citrus + cream), low leaf-to-calyx, easy trim. Stage harvest stays on the table if tops finish early.
YouTube Link: https://youtube.com/-m8h?si=A7x4Zlr2kj-_ga31
