
Likes
Comments
Share


@Ross4Twenty
Follow
Nearly there, will start to add overdrive soon. Pistils turning orange real
Fast. Maybe this isn’t a long strain???

Likes
2
Share


@Organic473
Follow
I will make a guess at the males in this bath based of the fast growth and experience. Time will tell I love the progress thus far.
Likes
3
Share

@PhinolaGreen
Follow
4. Woche
Sie erholt sich langsam wieder und bald kann ich mit dem Training weitermachen 😊

Likes
Comments
Share


@AestheticGenetics
Follow
5/6/25 beautiful dang plant. Nice stretchy indica structure. She will produce very nicely. Excited to see how the bud structure is later in her life
Likes
3
Share


@CalGonJim
Follow
6/9 12am MONDAY. They look great, went to 4mL per L of Con Grow looking great
6/10 9am. 1130pm loo
GC 🚨🚨 TOP REDSIGN. NODE 5 & 6 HAVE 2 EXTRA BUD SITES.... I USUALLY TOP AT 3 OR 4 AND THEN TRIM OFF NODE 1 DEPENDING ON MAIN STALK HEIGHT, EASIER TO WATER AND MAINTIAN. BUT I CUT OFF NODE 1 THRU 4 AND LEFT MAIN COLA. INVERTED TOP??? SHE IS GIVING ME IDAS.... I WILL TOP GOAT AND GROW AT NODE 5 & 6 GOAT 2 WILL BE TOPPED AT NODE 3 & 4.....🚨🚨⚡️⚡️
6/11 330am new air assist exit fan design prot


Likes
14
Share


@Black_Widow
Follow
Привет садоводы
седьмая неделя и растение становится все больше
цветки стали еще морознее
цвет листьев хороший ,воду и питание впитывает хорошо


Likes
31
Share


@squalino
Follow
🗓️ Les Chroniques de l'Oasis : Marque Blanche – 12 mars 2026
📊 État de la Culture
Âge : J+22 (3ème semaine)
Croissance : 14 cm
🏜️ État de l'Oasis
Climat : Jour 24°C / Nuit 21°C (La douceur d'une brise marocaine).
Humidité : 60% (Le souffle protecteur de la vallée).
Énergie : Intensité 50% (Lampe actionnée à 90 cm pour guider sa nouvelle forme).
Vigueur : Structure robuste, prête à déployer ses branches autrefois cachées.
L'Élixir de Vie (Nutrition Sacrée)
Pour soutenir la Sultane dans cette métamorphose, je lui ai offert un élixir puissant :
Hydratation : 1 Litre d'eau pure (Ajustée à un pH de 6,3).
Rituel : Un mélange de 5ml d'Orgatrex . 1 comprimé de fertilisant Biotabs. délicatement enfoncé dans la terre à 5 cm environ
Le but : Diffuseur une force vitale constante au cœur de la terre, nourrissant ses racines pour qu'elle puisse s'élancer vers les étoiles.
🖋️ L'Appel des Étoiles : Premier LST
C'est un départ vers l'inconnu. Tandis que je courbe sa tige avec la précision d'un artisan nomade, elle semble fixer cette marque blanche qui scintille au-dessus d'elle, telle une étoile suspendue au zénith d'une oasis nocturne. Elle s'incline pour mieux se déployer, cherchant à rejoindre les astres par des chemins détournés, transformant sa fragilité de jeune pousse en une force nouvelle.
Et moi, tel un voyageur solitaire dans les sables du Maroc, je marche vers un horizon dont j'ignore tout. Je me laisse aveugler par cette lumière lointaine, cette promesse incandescente qui brille au bout du chemin. Mes mains agissent, mais mon esprit s'évade dans cette clarté qui nous appelle. Nous progressons ensemble : elle, guidée par son instinct vers la cime des étoiles, et moi, avançant sans boussole vers cette lueur qui, seule, sait où nous allons vraiment.
Note de culture : À ce stade de 3 semaines, le tronc est encore souple mais robuste. Le palissage aujourd'hui va forcer la plante à distribuer l'énergie aux branches secondaires, créant ainsi une structure beaucoup plus dense et équilibrée pour la suite. Aucune carence visible. J'ai coupé les deux feuilles simples de tout en bas et une feuille à 3 ( elles touchaient le sol . Pour éviter les risques de moisissures. ) Le feuillage est sain sans carence ou brulure. superbe plante pour le moment .
Saviez-vous que…
Anecdotes du Rif
Dans les montagnes du Rif au Maroc, la récolte du cannabis était souvent un moment collectif. Les familles se réunissaient pour tamiser les plantes séchées afin d'en extraire la résine qui deviendra le haschisch.
Pendant ces journées, les anciens fumaient parfois le kif dans une longue pipe traditionnelle appelée sebsi, pendant que le thé à la menthe circulait et que chacun racontait des histoires. Pour beaucoup de villages rifains, la récolte était autant un travail qu'un moment de partage et de tradition. 🌿.
à bientôt et merci du fond du coeur à tous pour vos commentaires et likes .
MUSIQUE : HÉ SEXY WOW ( Lord Kossity )

Likes
38
Share


@Cariboo_OG
Follow
Utopia Haze is a rare heavily sativa dominant hybrid (90% sativa/10% indica) strain created through back crossing Brazilian Sativa strains. This tasty little bud took home 1st Place for Best Sativa in the 2008 High Times’ Cannabis Cup and for good reason – with its potent 18-22% average THC level and long lasting cerebral effects, Utopia Haze is one powerhouse smoke. The Utopia Haze high comes on soon after you finish your first toke, hitting you with a strong cerebral lift that infuses you with a sense of hazy relaxation.
Type: Feminised/Photoperiod
Cultivation: Indoor/Outdoor
Flowering Time (days): 70-75
Indoor Yield (g): Up to 650
Feminised Outdoor Harvest Month: October
Feminised Outdoor Harvest Month Week: 3rd-4th week
Aroma: Citrus, Woody, Pungent, Mint
Effect: Cerebral Lift, Hazy Relaxation, Sleepy
Welcome Everyone to the Final Entry of my Utopia Haze Grow !
There is so much to discuss ! I have been extremely busy as of late trying to get this Harvest together, but i am happy to have it here for you now !
I Seriously under estimated the amount of time, help from others, and my own necessary skills to pull this off.. and i still kind of screwed it up lol !
But its worth noting i have never actually done this before and trying to document it during....was extremely hard.
It is next to impossible to work an iPhone with rubber gloves on !
First I want to discuss everything step by step so before you jump straight into the comments on how the end product is so small in "quantity"
Rest assured i am happy with its"quality"...and thats all that matters to me because Life is a journey not a destination! and i have learned so much from this grow that I couldn't be any happy even if i messed some things up :)
But at the very least I hope you read through this entry in its entirety with an open mind and focus more on the process, rather than just the outcome!
I ran out of Ice & i was only able to wash three times..(normally I've heard you should go sometimes 5-6 washes)
Preparation is Key & things will be much better next round :)
Photos 1-22
These are pretty self explanatory but for those of you just tuning in now.. this is what happens to a very happy plant when you don't have the necessary tools to monitor key components of growing cannabis.. Ph, as well as EC levels play a very key role in the outcome of your grow lol that being said I was just able to save this plant by purchasing both tools but that doesn't mean the plant didn't suffer because of the prior events.. This was a Huge reason behind me choosing to turn this harvest into what i would consider
"Solventless Hash Rosin" from "Ice water extracted Bubble hash".
Pictures 23
The idea here is the process of using "fresh Frozen Cannabis" this has been discussed many a time online on such sites as instagram and here on grow diaries as well.. I personally have Never tried the process so i decided to try it out and make a judgement for myself..
Video 24
The Cannabis has now been in the freezer for 72 hours making it very well frozen.. as you can tell i struggled getting it all into the 25u Screen Wash Bag. One thing of note i would do differently is i will de-stem my next batch as i also believe this played a part in the amount of plant matter that escaped through the sieves.
Photo/Video's 25-28
The idea here is "ice water Seiving" & especially with the bags that I am using here that are only have screen material on the bottom portion of the bag it is very important to have spaces in-between the screens to allow the water to pass directly through the screens into the bottom bucket with the least amount of resistance.. because the hash is so extremely temperature dependant if it gets warm on the side of the bag.. it will stick there and not make it to the bottom to become use able product..
29
You do not need to use as much Ice as i used here lol... the idea is to keep everything very cold..i certainly achieved that but at the sacrifice of using so much that i ended up grinding product and producing "contaminants" but in the end they are just plant matter that i would be smoking when i rolled up my joint either way so.. I'm not super disappointed..
But it should be noted that what you want to achieve here is a Layering effect where you have the wash bag between two small layers of ice while the "water current" washes the Trichomes away allowing them to be separated by the screens setup below :)
Before Starting the machine you should allow some time (i.e.;10-12minutes pre soak to allow the product to become saturated) before the first cycle.
By video 32 I have just ran out of ice lol..
Video 33-34
Here I have a tip for you.. to separate the screens that you sieve through.. cut 5 gallon buckets to stretch them across nice and tight.. it'll make scooping your Bubble that much easier ! i learned this from the many "Frenchy" videos I have watched :)
Picture 35
Here in lays the problem for most people.. drying your hash without loosing vast amounts of "Terpenes" whilst also stay ever vigilant against mold !
Thanks to all those videos I've watched on youtube.. id like to think this was one of my most successful parts of this process..
Things to Note; Terpenes start to seriously evaporate at temperatures 68F or 20C
you need to stay as cold as possible whilst bringing the Relative Humidity in the space down into the 40-30% to stay away from that nasty mold !
I used my cold storage room in the basement.. with a dehumidifier running to keep the space at 45% RH & staying at a constant 15c.
All while spreading the hash as thin as possible across parchment paper, on top of the white screens with a fan moving air across both sides of the paper.
Pictures 36-38
These are some macros i took in the middle of my drying session I fell in love with the colour.
Yes i know the black spots are plant material but they will get caught when i bag the hash & squish the oil out.
Thing to Note; at this stage it is important to ensure you 'micro plane" the hash down as fine as you can whilst staying weary of the temperature... any "chunks" will hold pockets of moisture.. that lead to potential problems..ie; mold ...
Picture/Video 39-41
Successfully planed bubble hash ready to be bagged and Squished !
Picture 42
Ive decided to follow Pedro.. from Pedros Grow Room and double bag to be on the safe side so i don't have any blow outs.
So thats One 25u bag inside one 160u bag ! :)
Pictures 43
This is almost 3 grams of the bubble hash from above, already melting in the bag.. this is where i ran into trouble again lol things started getting to warm in the house and i was only able to get one of the three squish's i did on video :( things started getting sticky.
Picture 44
This is basically just a photo of the equipment I'm using; 3x5 LowTemp Cage in the frame I built myself, with a 20Ton bottle jack.
Something to note here is this is an older Lowtemp model with only a single heating zone which is which i have it closed here heating Both sides of the press :)
As well as the importance of having adequate pressure on your plates.. my rig is very overkill for the size of hash bags..lol
Video 45
Here is the lovely press video.. its didn't quite work the way i wanted either lol my directional folding wasn't quite tight enough for a big "drip" :)
&the Press was set to 65°c
Photo's 46-50 are pretty self explanatory :) I had a blow out.. but still managed to pull an 80% return from the hash once squished...& yes it tasted amazing :)
Was it worth it in the end... that could be debated.. for some..i understand..its not your thing, but for those of us that are interested in making our own concentrates.. free from Solvents...
I wouldn't make it any other way :)
If even ONE of you reading this diary finds it helpful to reference for ANYTHING.....even if its "what not to do" ill consider it a success !
Thanks again for tagging along on this garden adventure.. its been one heck of a journey !
Much Love from B.C. Canada,
Until Next time,
Cariboo

Likes
68
Share


@Hawkbo
Follow
Updating this 2 days late today is day 23 but the pics were taken on day 21/22. The leaf strip was a bitch, took me a day and a half to do the 5x9 and I'm still workin on the 4x8. I would have paid someone atleast $400 to do this for me it was brutal my back is toast. Hopefully it will pay off in the end 🤦♂️ everything looks promising tho.


Likes
39
Share


@Proto420
Follow
Pretty good week, no problems. Added a dehumidifier yesterday (Saturday). And also bought a new light. The light should arrive on Tuesday. Looking forward to that because then I’ll be able to spread them out further so they’ll all have as much room to grow as they need.
I believe they’ve started flowering, that happened like day 24 when I first noticed the white hairs coming out of the bud sites.
They really took off growing mid way through the week. Like twice the growth as the prior week.
I haven’t been defoliating per se, I have been tucking & tying leaves down. Many of the secondary flowering nodes have actually surpassed the main cola’s of my plants height wise. Those that did I tied slightly back down.
Really wish I could cut a few branches off them without stressing them out. Oh well. Such is the bane of autoflower growing.
The new light I bought is a Colofrog 2021 CF 2400 LED w/Samsung LM301H Osram Diodes. From what I gathered online, it’s a better light than the Mars hydro tsw 2000 I currently own. I’ve got my ts 1000 in the tent currently just to get through until the new light comes Tuesday.

Likes
4
Share


@Osavv_OTGUK
Follow
Seeing these buds produce is amazing big up to barneys farm for these amazing genetics. Also big up Zamnesia for the seeds

Likes
5
Share


@Virginia_Nugz_540
Follow
Okay so I’ve been slacking a bit on the grow-diaries, only because I’ve had a lot going on and also because I don’t feel obligated to do so because this isn’t a sponsored grow. It’s been nice to have a little break but I think I’m ready to come back at it full force again.
These girls are living their best lives, they are all the same age and they are all thriving. Floraflex nutrients, as well as some Silica, Regina-root, and a trichome enhancer called “Grease”!! Seems like the real deal. Watering every other day and let me tell you these girls are very thirsty. Defol as needed!
My new HLG Blackbird lamp fixture is out of this world. My 3 autos that you can also find in my profile absolutely blew up. I typically fit 4 autos in my 3x3 but now it’s essentially one Purple punch from Fastbuds and I had to cram 2 more inside basically because they are going crazy. Unfortunately I had to move them from under the blackbird and put them under a HLG350R and they are still going crazy. Basically what I’m saying is HLG Lamps=Crazy growth and amazing lamps!! HLG has a lifetime customer!
That’s it for now but check in next week to see the progress!
Thanks for tuning in. Until next time and as always, Stay Smokey my Friends!!! 💨💨💨
Instagram: Virginia_nugz_540
Sponsors:
Horticulture Lighting Group
HLG-Blackbird
HLG-600RSpec
HLG-350R Diablo (X2)
Discount code: Virginia_Nugz
Petra Tools
LTPRO 2.0 Backpack Sprayer
Trimbag
Standard Trimbag
Discount Code: Virginia_nugz
Fastbuds
Fastbuds Genetics
Goat and Monkey
Hydrokulture Store
4x4 Gorilla Tent
Likes
Comments
Share

@clicknflash
Follow
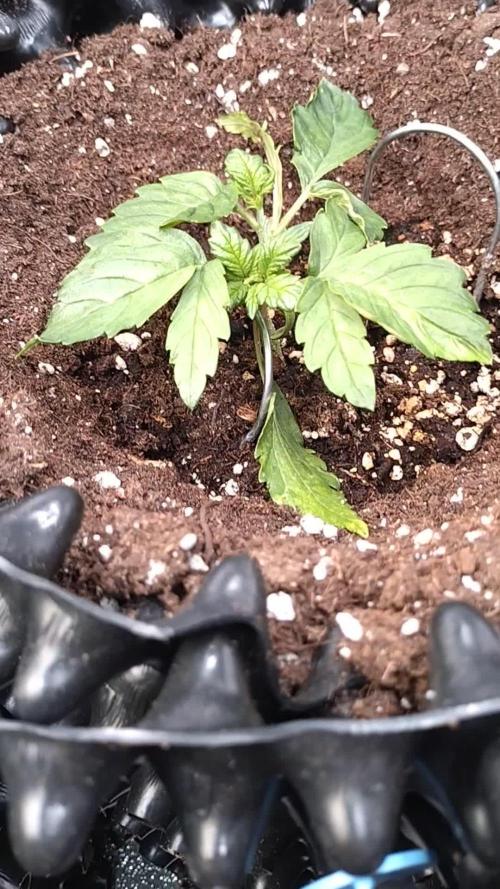
Hello everyone, this is my first project. I hope all goes well and according to plan. Wishing you all a successful grow!
Week 1 preflower
Likes
203
Share


@Still_Smoq
Follow
📆 Week 10, 14-20 March 2024
14-20 March - Let the plant grow and observed.
📑 The flowers continue to form and grow as expected with trichomes and resins building. The smell is very prevalent of citrus/lemon scents with sweet floral undertones. Some shades of purple are beginning to appear in the upper buds (see picture).
🍽️ 14 March nutrient solution changed
🐲 14 March feeding schedule updated
🌊 Using reverse osmosis water with EC/TDS at 0
🐉 Nutrient solution EC 2.3 at 61 degrees F
💡 Light power at 75% , DLI 45-50 canopy coverage at 18hrs
That is it for this week. Thanks for the look, read and stopping by.
Likes
5
Share


@CzAlmighty
Follow
brothers sisters. this journey was wonderful. From the first month I knew this was going to be a wonderful experience and I was right. with the flower was not lead time no problem. I would recommend this model to anyone who likes fragrant flowers. and especially giant flowers. thank you for watching. and many thanks belong mainly to the @originalsensibleseeds . 💚💚💚


Likes
2
Share


@HappyOne
Follow
The lavender cream is best plant in that room easily!
Barneys farm blue cheese is very good as well
Royal queen critical is nice
But Lavanda Cream is surely better!

Likes
3
Share


@tangie
Follow
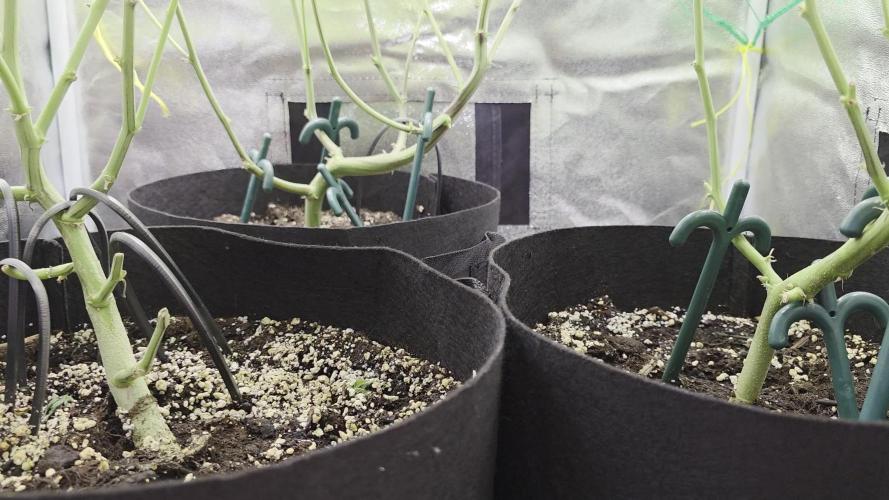
She doesn't fit in the box lol, will use ScrOG to restrain her vertically. Streeeeettttchyyyyyyy!
Accidentally snapped off a funky 10-bladed fan.
Likes
10
Share


@FrulaFrulaki
Follow
Some more training nothing special. I can really see the difference with one of my plants as its less dense and has some yellowing on its leaves, so I added Bloom and Top-Max to the nutrient mix as I suspected a Zinc deficiency, but to be safe I went with the full spectrum. The soil was probably depleted of nutrients anyway,
