Likes
Comments
Share
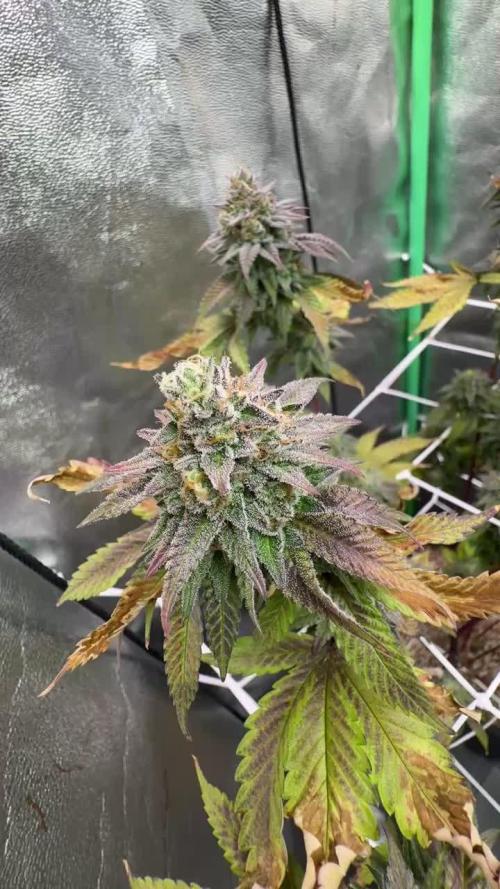
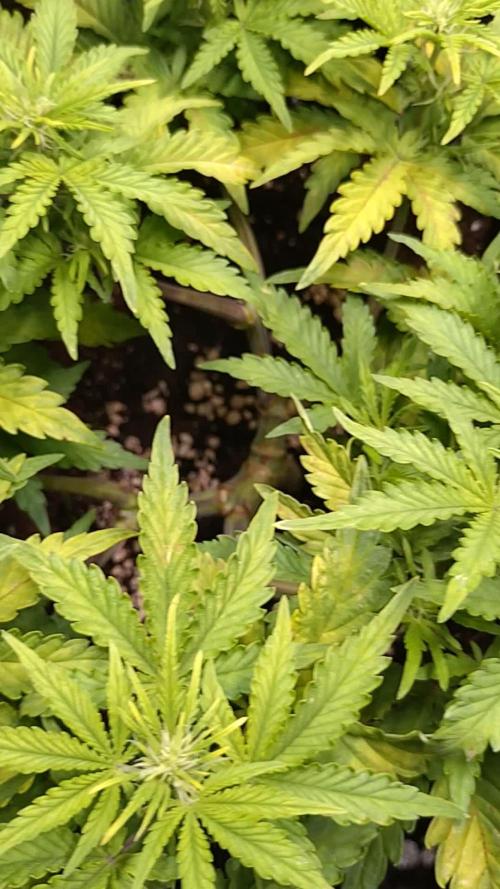
I used overdrive fertilizer again this week. My God, girls get more beautiful like this. The last weeks make me very happy.😍🌷💐💥⚘️👽👽🎍 From now on, I will be very careful because the more I improve the conditions, the better results I get Especially the temperature difference between night and day. humidity Box ambient temperature 👊👊💧♠️
Likes
2
Share
cheesy fridge is home to a new plant now. the amnesia (or is it?!) is looking damn fine!
Likes
72
Share
23/03/26 -29/03/26: this will probably be the last entry for the blueberries as they're close to harvest. Cloudy trichomes with some amber, will probably give them another 2-3 days. Vanilla Créme Pie and Chicken n' Wafflez also have a couple of amber trichomes but they'll need a bit more time. My guesstimate is 7-14 days. So I guess we're nearing the end of this diary, always a happy-sad moment. You take care of them for months and then the tent is empty. But not for long 🙌🏻 Thanks for stopping by and see you next week!
Likes
Comments
Share
@hfwbr420
Follow
Everything is running beautifully. The plants are showing their first buds. Had to remove a lot of leafs because there was a humidity problem I couldnt get rid of. Any tips for improvement are allways welcome! :)
Likes
19
Share
I finally broke a pound with a single autoflower! Couldn’t have done it without AGLEX cob led’s, Remo Nutrients, and coco coir. They’ve changed my game completely! This grow started off as a pretty standard grow. I did absolutely no training until the veg period was winding down, and pre-flower was beginning. As the SCROG net went in, a little later than planned, numb fingers due to cervical spinal issues, and a poorly time muscle spasm, I snapped the main stalk...disaster right? Apparently not! They’re tough plants! Within a day or so she was perked up and sending up new colas from all the growth nodes now exposed to the 2000w AGLEX cob led’s. These lights have transformed my grow process, and increased my yields by over 300% compared to my old led’s, and only draws 408w from the wall. 1.23g/w is quite satisfactory I didn’t have much tucking to do this grow after the original SCROG. Due to the fact I was a little late getting the SCROG net in place, she didn’t have too much stretch left in her, she certainly fattened up quite nicely though, almost too much so in places. The front left side of the SCROG net got awfully crowded with huge buds packed tightly together. Lesson learned...keep the branches spaced apart slightly further, and maybe allow slightly more vertical growth of the colas to allow slightly better light, and air flow penetration. My issue is I only have 6 foot ceilings in my tents. The ceiling in my grow room is only a little over 6’2”. I managed, through SCROG techniques, without topping or fimming, to keep the top of my canopy 24” from the floor. This allows plenty of space above for the AGLEX cob, and exhaust fan. After last feeding I flushed with just Ph’ed water for 5 days, then gave the plant 48 hours of darkness, to rid itself of chlorophyll before harvesting on November 4th and hanging in a drying rack. It’s still curing in jars but after trying a few samples, it’s an awesome strain, and hits hard. It’s not as hard as it sounds to fill a 4x4 tent with a single autoflower, and still pull 18 ounces (504g) out of that tent. With simple SCROG technique, defoliation, quality grow medium you can achieve the same results. Of course you’ll need an AGLEX 2000w cob, but for an 18 ounce return on a $300CAD light, in 3 months, it’s a no brainer folks! You won’t find a better light under $300 Canadian. You’ll also need a quality nutrient line, and it’s hard to go wrong with the Remo Supercharged Kit. The proof of those 2 products quality are in my harvest. I hope this has helped improve your own grows somehow :) Head over to YouTube and visit my channel, just search for Scrog Freak, or click the link below. Drop a like and subscribe, more videos and logs to come! Recently entered a Gelato OG Grow Off and will be posting updates and instructional videos there. Check it out! Thanks and good growing! ScrogFreak https://www.youtube.com/channel/UCDFY6EjqIMqv2peq1d1eM1Q
Likes
2
Share
@Ninjabuds
Follow
Skunk apple runtz I'm probably only going to keep 1 of these guys seeing the 2nd just has really bad growth so far. I'm sad about this I made this cross out my last grow and was hoping for the better end of things. The other plants is decent but we will see I hope it has the growth pattern of the lit farms Rick bobby and the bud structure of the obama runtz I grew It's looking like a good start to a week the plants are strong they are getting to the point I can let the dried dry out completely. I'm thinking by the end of this week the plants will be starting to be sold. Last week I put all the plants into my bigger 2x4 tent with my medicgrow mini sun 2 the 500w version. Only a few of the plants were ready for that light. Seems like the only plants that really have good resistance and have a strong start are the weedseedsexpress.com seeds. Shout out to weedseedsexpress.com for the strong plants. I ended up putting all the plants back into my 2x2 tent with the 55w amazon light it has alot more blue light in its spectrum. It's kinda weird b4 I switched the plants to the 2x4 tent they were getting 220umol under my amazon 55w led then when I put them under the 500w light 25% strength about 50in from plants and they were getting only about 195umol in that tent but it was stressing most the plants. I assume a larger light has more side lighting hitting the plants. I think when useing larger lights it's good to measure umols from the top but also coming from the sides. I think durring seedling stage they only need about 50% the umols coming from the side the plants as the top is receiving. When I put the plants back in the small tent about the same umols as they were getting b4 the switch and they were still a little stressed. So for a few days I put the small light at the top the tent giving them 100umols for a few hrs then 130umols the rest the day.
Likes
41
Share
@Arcadium
Follow
Hot and dry all week, boy the forest fires are bad in BC this year, knock on wood no major fires on Vancouver Island, no smoke either. Smooth sailing, stretch is slowing, budlets forming nice for sure week 2+ so looking like a Sept finish for sure. Quiet week as I was busy enjoying summer, nothing but drip 45min a day, 2.5hr once a week, diablo maxx, Silica and a weekly spray of LCPT. Had a MASSIVE mushroom at the base of the Hugel, which means the fungal network under there is for sure in overdrive. This time of year it's so hot and dry it's hard to keep the outside of the hugel most being a big hill, but obviously there's epic moisture deep inside it. Compost tea this week, looks great, super simple, 6cups compost, 4tbsp molasses, 4tbsp Epsom, 50ml kelp, little bit of coir, aerate 24hrs and use immediately. Probably toss on trellis net next week and zip tie her to the frame, next week another top dress, and then the final push! Most of the harvest will go to the freezer fresh, maybe wash, hang dry and cure an LB for flower rosin and edibles, then I'll make bubble hash when it cools down over Christmas.
Likes
27
Share
Not much has really changed this week from last week. They are starting to swell up a bit more. Next week I think will be the time to start flushing them.
Likes
38
Share
Hi :) it’s 10th week in my happy grow :) girls looks lovely, Smell is awesome I think terminator does it’s job :)generally I’m so proud of my girls, of course it was not without mistakes but it is my second indoor experience so still learning from mistakes :) this way we will come to perfection :) new project from fastbuds is on the way! check what’s coming! :) happy Sunday for everyone, peace! Day 66 update resulting decision of defoliation. I treated them well but in my opinion they can catch a big breath now :)
Likes
51
Share
@nonick123
Follow
Día 15 (04/11) Las plantas se muestran esplendidas después del 1er riego e introducir la 1ª Bio Tab! 😍 Subo a DLI 35 Día 16 (05/11) Las plantas se muestran espectaculares y radiantes! Un color verde intenso y sano! 😍 Día 17 (06/11) CBD Auto 20:1 #1 tiene un crecimiento increíble! El resto tiene un desarrollo perfecto para sus días 17 días de vida! Día 18 (07/11) Mudanza y riego! Las plantas se mudan al armario definitivo de 60 x 120 cm por varios motivos: - CBD Auto 20:1 #1 está empezando a tocar las paredes del armario pequeño - CBD Auto 20:1 #2 ha tenido una ventilación menos adecuada que sus compañeras, ya que el ventilador quedaba justo encima de ella, y el flujo de aire era inadecuado Esto ha provocado que la maceta de CBD Auto 20:1 #2 no se seque a la misma velocidad que el resto. Espero que no afecte a su crecimiento - Las plantas pasan a tener dos lamparas a su disposición (230W + 100W) ajustadas con el regulador al 60% - Mantenemos DLI 35 tras varios ajustes (tener 2 lamparas simultaneamente es más complicado de ajustar!) - Colocamos dos ventiladores oscilantes para que el flujo de aire sea adecuado dentro de la carpa Riego: 4 días después del 1er riego, las macetas se muestran "ligeras" excepto CBD Auto 20:1 #2 por la falta de ventilación comentada arriba Riego con 750 ml de H2O RO excepto CBD Auto 20:1 #2 Día 19 (08/11) Las plantas se muestran esplendidas y creciendo mucho! Día 20 (09/11) Macetas poco pesadas, pero no lo suficientemente ligeras para regar Día 21 (10/11) Introduzco la 2ª Bio Tab a 5 cm de profundidad, lado izquierdo Riego con 750 ml de H2O RO a todas excepto CBD Auto 20:1 #2 que se riega con 1 Litro Aplicación foliar de Boom Boom Spray 5 ml/L. Aplicar justo después de encender la iluminación. Aplico LST a CBD Auto 20:1 #2 💦Nutrients by Bio Tabs - www.biotabs.nl/en/ 🌱Substrate PRO-MIX HP BACILLUS + MYCORRHIZAE - www.pthorticulture.com/en-us/products/pro-mix-hp-biofungicide-plus-mycorrhizae "GDBT420" 15% DISCOUNT code for the BIOTABS Webshop https://biotabs.nl/en/shop/
Likes
5
Share
Likes
24
Share
@Buerofrau
Follow
They smell very strong, but good 😎😍😬 I think this is the last diary week before harvest. i can´t wait to enjoy this buds!!! 😁😁
Likes
16
Share
Que pasa familia, estamos otra vez actualizando la quinta semana de floración, y es que ya van cogiendo unos colores que ya van apeteciendo y todo, el aroma se noto esta semana la sala está llenándose de un aroma bastante dulzón. Quite ya el big bud y empecé aportar un poco de overdrive así se van acostumbrando, y tengo que añadirles algo de Pk que tendré por el cajón esta semana que viene sin fallo lo añado. El ph está siendo controlado y ahora mismo está regulado a 6.5 yo creo que es buen ph para que la planta absorba el Maximo de nutrientes, hasta aquí es todo nada nuevo sin problemas con este proyecto. Buenos humos 💨💨
Likes
10
Share
This strain is awesome, 2nd time i grow this strain and close to one of my favorites. I grew 2 plants and we have one very sweet plant with nice fruity touches, the other plant reminds me of the sour gumballs i ate when i was a little kid! Nice sticky and extremely hard buds, these buds exploded in THC! Totally recommended, a true gem 💎 of Dutch Passion seeds
Processing
Likes
10
Share
@kush14
Follow
Healthy grow ! Excellent genetic strong and easy . Hope all fine in the end can get a big flowers
Likes
5
Share
@Kickdrum
Follow
The Mars Hydro FC-E1500, the Inkbird dehumidifier, and the auto-draining pot stands have all arrived this week. I will set up the pest control, nutrients, and the Exhale CO2 bag when I return from Italy. I will be leaving for 9 days next week, and I must admit, it makes me quite nervous to leave the house for a trip. However, I have tested the automation system, and it should take care of the light cycle and feeding/watering remotely. It is surprising to see that the "normal" leaves are already twice the size of the round cotyledons (or "seed leaves") after just 4 days. This indicates that my autoflowering plants have already entered the vegetative growth stage. It's a positive sign that the autoflowering genetics are taking effect and the plants are progressing rapidly, even at this early stage. The DLI (Daily Light Integral) of 18.6, which I have set, is ideal for supporting this quick transition. Providing sufficient light intensity and duration during the vegetative stage is crucial for autoflowering strains as it fuels their accelerated growth and development. I have been watching the size and appearance of the leaves to track the plants' progress. Maintaining the optimal environmental conditions I have been going for including an 18/6 photoperiod, a temperature range of 24-28°C, and a relative humidity (RH) of 55-70%, which should theoretcially enable my autoflowers to continue thriving in the vegetative stage. The fact that my plants have reached this milestone within the first 3 days is a promising indication of a fast and productive growth cycle.
Likes
19
Share
@Aleks555
Follow
We are true fans of what we do. We call ourselves growers with dignity. Back in 2023, we kept growing indoors even when there was no electricity for months and power was only available for a few hours a day. We used generators, and when they broke down during winter, so our beauties wouldn’t freeze, we heated water over open fires, filled plastic bottles with it, and used them to keep the temperature stable until we could repair the old generator or buy a new one. We did all of this within just a few hours, over and over again. But what happened this year, just one day ago, was something truly horrifying. I posted the video here showing how it happened and how lucky I was to survive. We are not giving up, and we are trying to stay strong even though it is incredibly hard. Even now, after everything that happened, we are still trying to save the plants. They were ripped out by the roots and wilted badly, but they are photoperiod plants, and we still hope they can recover. I uploaded the video of what happened — you can watch it in the diary. And I want to wish everyone peaceful skies above their heads. Value and support each other. Watch the security camera footage with sound on.💥💥💥💥💥💥💥