


Likes
23
Share


@HideAndFly420
Follow
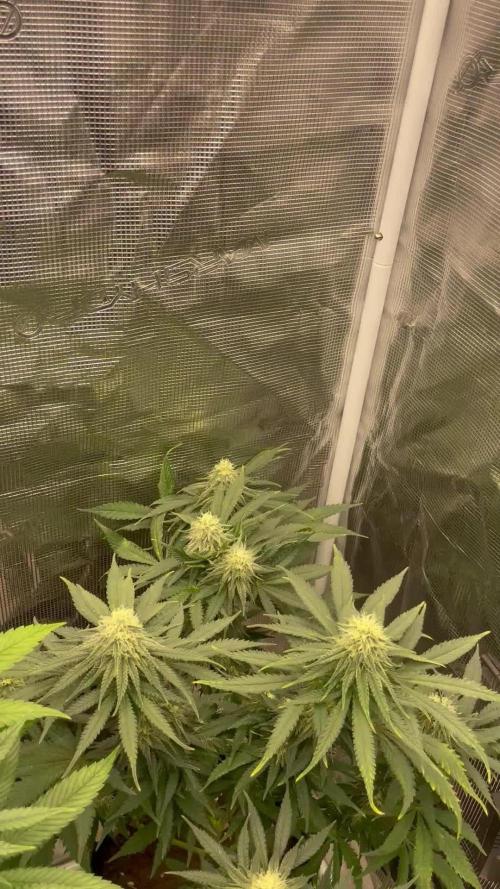
I’ ve been really really excited in growing this 🍊. I really loved it to do ti in grow diaries. Community helped me and I hope I’ll be doing always better.
I think next time I’ll do a foto to play a little bit more with structure of the plant.
Buds smells like orange and cotton, chocolate pinus. Can’t wait to try it.
I’ll update in some days when I’ll have some nice buds a also le to sm
oke🕹️
Thanks to all the people the followed me and that helped me with important suggestions

Processing
Likes
3
Share


@Intence
Follow
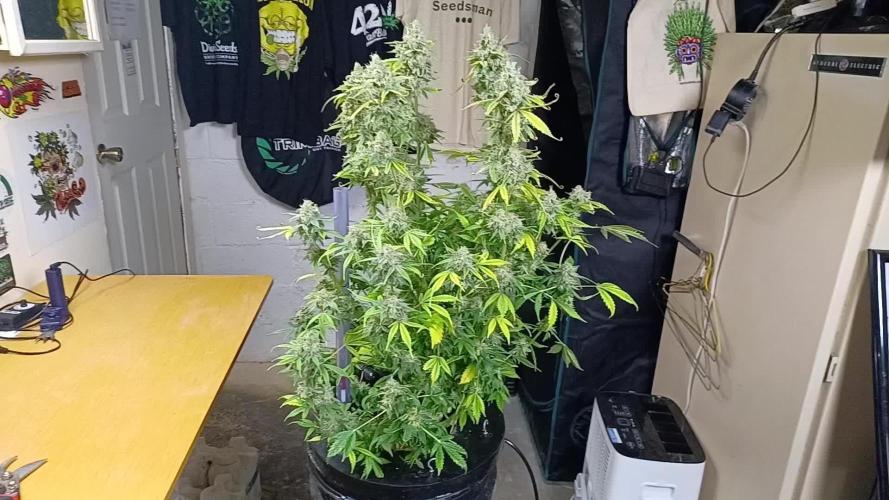
Night humidity is getting up to 78% will need to buy a dehumidifier.

Likes
3
Share


@The_Chef_420
Follow
Well here goes nothing! Only one seed so this is do or die lol, but at least it looks quite healthy. Going to start it indoors until it sprouts, it's only 45°F for a high during the day and 29°F for a low at night so there's no way to get her outside today. I have a 10ft x 10ft pop up greenhouse that I plan to have functional by the weekend.
Update*- Smoothie sprouted on 4/22 yesterday and is looking like a healthy girl. So stoked!
Likes
51
Share


@Freddd
Follow
Finally starting to look like she might be finishing, but every time I think that, a bunch of new pistils shoot out. Trichomes are getting more cloudy but still a lot of clear ones. Lots of stacked calyxes now packing on. Remember this plant has already had 5 zips of dried bud removed at 11 weeks!
I have not changed the reservoir for 4 weeks, I topped it up with a little bit of extra nutrient after two weeks but there seemed no reason to do anything else, she has not been using much recently ppm is constant at about 800. Only now beginning to see some leaves dying. I'm going to let her go for as long as she wants.

Processing
Likes
7
Share


@GanjaFarmar
Follow
So heres the heavyweight Fast and vast. Id say im abit disappointed for the false advertisement on the heavyweight seeds range. It states that in good conditions the plants will be ready in 8-9 weeks with outstanding yileds. But fingers crossed, i cant talk big. Never know what these will produce!
Day 35 from seed now and it’s already showing its pre flowers. I will update week 6 on tuesday!
One Love

Likes
13
Share


@Yiyis_Grow
Follow
Bestva Quantum Board LM301B / Mr Hide seeds
Semana 8 desde germinación
Semana 4 de floración
En 6 plantas tengo 3 tiempos diferentes.
Dos empezaron a engordar de forma veloz y se les ha aplicado PK durante la semana.
Dos están un poco más retrasadas, tal vez el equivalente a una semana. Hoy se empezará con PK para ellas.
Dos están aún más atrás.
Se ven sanas.
Buenos humos

Likes
28
Share


@Salgeezi
Follow
Ended up cutting all of the front left plant this week and majority of the back two plants. Guna let the lowers get some light for a few more days. Really noticing all the tiny ass buds. Hopefully I'll make something out of them. First run with a net and I just left way too many branches/bud sites for this size of plants they were. Buds look good though. Flushing last plant and will be cutting in a few days.


Likes
76
Share


@CHILLING_RACOONS
Follow
at the first day of this week i started the flowering stage.
Use for the first time the scrog net, hope well...
Runtz is amazing, super fast and one of the strongest strain never tried *.*
I continue with veg stage fertilizers.
Plants drink a lot now :)

Likes
48
Share


@Theia
Follow
I am very happy with the Chiquita Bananas in the end. Clones were total seed factories but I think we may have a go at making some hash with those as the foot long buggers are caked in crystal.. 62g and 63g .
Plant 1 is just a monster for me 365g wet. Long dense buds thick dank smell of tropical sweets. Not as much seed as I thought there would be so glad I was convinced to push her a bit more.
Plant 2 is smaller but has taken a pure turn in the last week.i don't think she was stressed at Al. I did switch to just water for last 10 days but apart from that I dunno. I don't think she has any thing with pure in her genetics but either way she looks beautiful. 169g wet from her.
Everything is drying for the next 10 days when I shall report back.
Happy grows.🌿🌱👊
Stay safe.😷

Likes
5
Share


@negyhusztv
Follow
Still trying to push them back to the box look like a jungle in real. The plants needs every day 2 x 10 l osmo water with 2 x 0,9 ml / l TA NovaMax Bloom.

Likes
5
Share


@Mr_nugs_lover_David
Follow
I have had a very nice journey growing her, she has given a great quality and quantity pf buds, very hard dense flowrs with a clasic strong amnesia smell that I enjoy a lot specially for the happy energetic buzz that provides you.

Likes
15
Share


@NaturalMystic
Follow
Days. 99 F15 Lolipoping!
Days.102 F18 Bad news!. My medium raise to PH 7.0 but now no sign of any problem fast producing bud form. ☺️i will give her ph5.8-6.0 for next watering thank you all advice from my grow question. THANK YOU <3

Likes
82
Share


@BigBadLion
Follow
Heeeere we go! Sorry for the late update!
This is when I start the flush! I believe the plants are pretty much ready at this point and doing this will just improve the final product!
Doing this took me a good chunk of time, mostly because I didn't know exactly how much of water I was going to need (it was a loooot 😫) and how hard/tiring it was to pH it as well. In the end my calculations were off, as I needed far more water than what I had (lol) so I didn't manage to do a full flush... but I still managed to lower the amount of salts and residues to a "decent" level (around 850 to 1500 ppm). I also used flawless finish so I suppose than even when I didn't use enough water that solution alone was enough to help!
Besides that the rest of the week was quite calm and relaxing.
Thanks everyone for reading! 😍
Likes
6
Share


@Headies
Follow
this is weeks 5 and 6.I topped them and trained the branches out to the side. Plus I broke one... I tried to save it but it broke again later


Likes
18
Share


@cheetah844
Follow
I'm super thrilled for this one. I've been wanting to get my hands on it for about a year now. It's a great night time, migraine removing, sleep inducing strain for me. I hope the phenotype I have works just as well.
I topped and defoliated every plant. I'm trying to form them into canna-bushes. Hopefully I'm doing the correct training procedures to make them all grow that way both indoors and out.


Likes
31
Share

@Roberts
Follow
She did get huge, but she has some berry fruity smelly flower on her. Loaded with trichromes and looking like they will be dense and delicious. Thank you Athena, Spider Farmer, and Divine Seeds. 🤜🏻🤛🏻🌱🌱🌱
Thank you grow diaries community for the 👇likes👇, follows, comments, and subscriptions on my YouTube channel👇.
❄️🌱🍻 Happy Growing 🌱🌱🌱
https://youtube.com/channel/UCAhN7yRzWLpcaRHhMIQ7X4g.
