
Likes
Comments
Share


@Bread_n_Buds
Follow
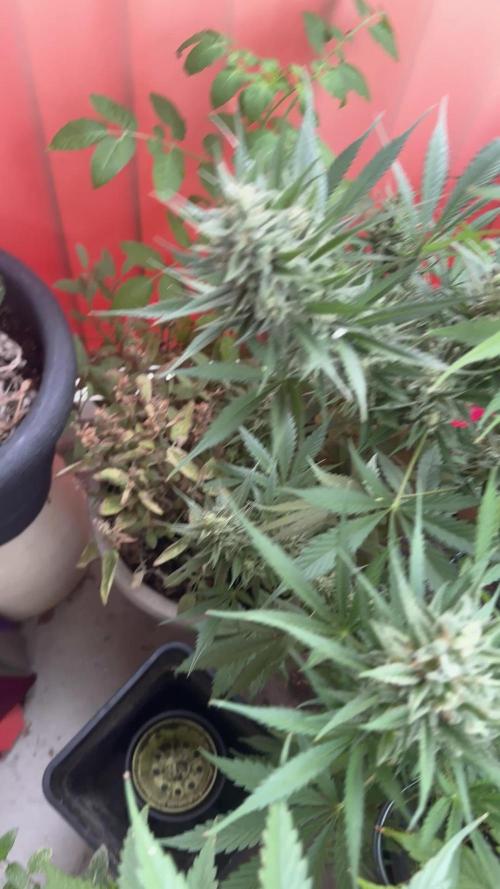
And here we are in full swing. We have only reached day 19 and our Watermelon Candy F1 Hybrid is truly very very competitive.
It grows well, regularly, the internodal distance seems average but we're waiting for another couple of floors to rise, as you can see for a day 19 we're in great shape... You'll say similar reviews, and guys the F1s are very similar, the differences will come soon with the beautiful buds.
We're keeping our fingers crossed because there's no word soon but our f1 Hybrids seem to keep what our trusted breeder says.
As feeding we are giving the Plagron Alga Grow 2 ml/l and Power Roots 1 ml/l in the plants with Aptus Pellet.
Come on gentlemen, I can't wait to see the flowers.
Zamnesia is the best online shop in the situation, you can find everything from seeds, to mushroom kits, through vaporizers and a thousand other things https://www.zamnesia.io
Watermelon Candy F1 seeds specifically
https://www.zamnesia.com/10666-zamnesia-seeds-watermelon-candy-f1-automatic.html
Site Description
ZAMNESIA SEEDS - WATERMELON CANDY F1 HYBRID AUTOMATIC: BUDS BURSTING WITH FLAVOR
If you've been looking for a flavorful strain with superb genetics that's effortless to cultivate, the hunt is over. Thanks to reliable F1 hybrid genetics, Watermelon Candy F1 Automatic showcases the highest degree of productivity and efficiency. This strain takes everything you know and love about the original, and packages it in a plant with even greater potential.
GROWING WATERMELON CANDY F1 HYBRID AUTOMATIC
Derived from Watermelon, Candy Kush, and ruderalis, Watermelon Candy F1 Automatic is a finely tuned medley of genetics. This cultivar is fast to flourish and reliable to grow, no matter where you choose to grow. Taking just 9–10 weeks from germination to harvest, she provides a uniform growing experience culminating in a huge haul of buds for her size.
Reaching heights of 65–80cm, Watermelon Candy F1 Automatic stays pretty grounded, making her perfect for smaller growing areas where space is a commodity. It also means you can fit more plants in if you have the room! Once ready to yield, growers will see a return of 400–450g/m² indoors and up to 100g/plant outdoors. Moreover, Watermelon Candy F1 Automatic is highly resistant to pests and disease, making it an ideal strain for newcomers and fans of low-maintenance cultivation.
AROMAS, FLAVORS, AND EFFECTS OF WATERMELON CANDY F1 HYBRID AUTOMATIC
If we haven't already sold you on the power of F1 hybrid genetics, the proof is in the pudding. Watermelon Candy F1 Automatic is teaming with terpenes and cannabinoids, making for a lively high coupled with huge flavors. Just one hit is all it takes to sample rich fruitiness mixed with sweet candies and a slight earthiness to back it up. And with an average THC content of 23%, the effects are euphoric at the start but settle into deep relaxation soon after. Whether you're chilling alone or with friends, Watermelon Candy F1 Automatic will see you right.
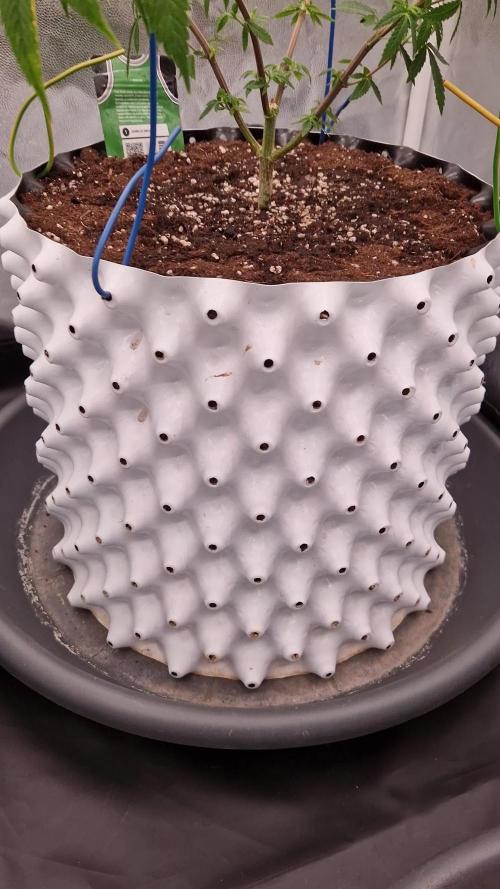
As for fertilizers, I'm doing a small comparison experiment to finish off the fertilizers I had at home, it's not 100% indicative, it's only on two specimens but given the stable genetics I decided to try to compare the results of Plagron Vs Aptus , both excellent brands which they will certainly produce beautiful plants which are already of excellent stable genetics. In the next few weeks the comparison will be more evident now the seedlings are still very small and just potted.
So seeds of all brands, in addition to these great F1 Hybrids and the entire Zamnesia line, fertilizers and everything related to the world of cannabis, you should buy them from the best online store in the sector www.zamnesia.io

Likes
2
Share


@Smokwiri
Follow
Welcome to week 8 of my Northern Lights XL Auto diary
Did some LST, and she seems to like it very much.
Development did slow down a bit as it seems, but the plant is taking the training very well
the lower branches did grow quite a bit and are moving upwards to the light
overall performance is very good, no insects problems, also no problems with rain (yet)
Waiting for more bud development, let the plant take it's time

Processing
Likes
19
Share


@lukavega
Follow
This is more of an equipment gathering project-first grow so I want to keep it simple and budget friendly, I ordered autos for my first grow but Oregon Elite Seeds sent a free gorilla Girl from Sweet Seeds. Super psyched for my first grow!
Day1. Soaked seeds for 4 hours in bottled water, used paper towel method with 100% sprouts within 18 hours inside dark tent at 80 degrees (heater and air purifier) and 40% humidity. Hoping to plant directly into prepared soil (6.9 ph currently) in 24 hours.
Day 2. Planted Critical OG Kush and Blackberry Autos 1/4 directly into 8 gallon cloth pots (these are the wrong pots-they are wax lined but the pandemic made getting the aeration pots unavailable-I may have to transfer later). Very lightly watered. i prepared my soil mix and had it acclamated to the grow room. I opened the air vents at each end of the grow room and set heat to 78, placed a bowl of water for humidity and started oscillating fan for airflow. Planted Gorilla Girl in a tupperware dish till i can get something more suitable. I really need another light but shipping just isn't working out.
Day 4: 1 OG Critical was culled do to lack of progress. Gorilla Girl hs been repotted and looks fine. The Blackberry are much leggier than the others at this point. I'm watering just enough to get to the roots with bottled spring water.
Day5 : the girls just woke up-posted pics. 1 light and 6 plants is not ideal. I'm not sure if I should put the strain that is naturally shorter under the light directly or focus on the tall ones getting enough light to not stretch. Comments appreciated.
Day 6: Ligthts off after a 20 hour on cycle. I was concerned that my light insn't adequate spacially. I dropped it down to 15 inches above the seedling and got it tropical in the tent. I also used a 6500k 15 watt shop light for added light color and they enjoyed it, except for 1 had a bit of yellow. I will post photos when they wake up to see how they look after this light/heat/water boost for 20 hours. My Gorilla Girl is the only one that isn't above 2 inches. That one was planted deeper (1 inch instead of1/4th like the others. I did have some "seed helmets" so next time I will go a little over 1/4 inch deep. Qweeby's roots grew like a wad instead of down. I've had to readjust her placement twice because the roots act like they want to be on the surface. I'm excited to see them in 4 hours. I may cull one and start a different seed. The Blackberry Kush is stretchy which seems nice for a new grower like me. I am trying to limit the stretch so they match the Critical OG height but they are hearty toddlers.
Day 7: Added a 3000w LED off ebay. I didn't account for the rise in heat but it only got up to 84. Raised it from 18" to 20" and got more air flowing through. One plant has a little yellowing from the inside of the main leaves (inside to out) but it's barely there so I'm going to check PH meter and easy watering since yesterday I did water more then I have thus far-so it could be a little root lock from too much water.


Likes
4
Share


@eldruida_lamota
Follow
Que pasa familia, vamos con la tercera semana de floración de estas F.U.H. feminizadas de Seedstockers.
Vamos al lío, las plantas se trasplantaron a macetas de 7 litros.
El ph se controla en 6.5, la temperatura la tenemos entre 24/21 grados y la humedad ronda el 50%.
El ciclo de crecimiento puse 12h de luz, el foco está al 70% de potencia.
Me gustaría estar más encima este cultivo pero la salud me está impidiendo un poco estar 100% con el proyecto.
- os dejo por aquí un CÓDIGO: Eldruida
Descuento para la tienda de MARS HYDRO.
https://www.mars-hydro.com
Hasta aquí todo, Buenos humos 💨💨💨

Likes
86
Share


@Tropicannibis_Todd
Follow
ALRIGHTY THEN
REMINDER I DO 2 UPDATES PER WEEK 👉WEEKLYROUNDUP👈👉MIDWEEKLY UPDATE👈
At this very moment , hint of Grape Crush Soda smells 😛 Which is awsome
We just hit week 7 and all is well , for the most part , still having a little Cal/Mag issue but hopfully with some adjustments I got under control 😃 .......
Middle of last week I have decided to start with her little sister and started a little training by pulling her over to the side 👌 And will continue to LST this week👈 And she's also showing Cal/Mag problem but like her big sister I have made adjustments and hope that works she's already begun next faze by flowering 😲 They are so quick 👈 Baby Sister Plant #2 Is 5 weeks 35 days from seed
rain water to be used entire growth👍
Lights being readjusted and chart updated .........👍
I GOT MULTIPLE DIARIES ON THE GO 😱 please check them out 😎
👉IF ANYONE IS LOOKING FOR A PLACE TO HANGOUT VIA GROWDIARIES AND TALK GROWING AND JUST CHILL AND WHATEVER .....👈
👉I CREATED GROWDIARIES DISCORD SERVER !!!!!!!!!!!👈
LINK IS 👉
https://discord.gg/zQmTHkbejs
AND SEE HOW IT PLAYS OUT !!!!!!!
Likes
20
Share


@SKUDUDUBAW
Follow
As you can see my ladies are growing well. The pistils are starting to get purple on the runtz muffin. It starts smelling a little bit and they drink a lot of water!
Happy growing :D


Likes
23
Share


@sellem
Follow
She is stretching, and budding up alright!
She also took nicely to the scrog. Let's see how long i will keep it this time before getting annoyed by the reduced handling capabilities 😬
Waterin still 6L at 6PH, reducing grow and introducing bloom, currentl 3ml/L grow 2ml/L bloom, next watering will be 3 Bloom 2 grow, 4-1, to 5-0. This has worked nicely with the Whiteberry so i will keep this up. Before whiteberry i always hard-switched, but this seems fine as well.

Likes
2
Share


@High_Grade_Dadli
Follow
Week started off pretty rough but you kno how it is fittest of the fittest...had some down pour in rain LD didn't make it and MCM OG took a beating..by the end of the week MCM OG has started to bounce back n the galato still flying
Likes
2
Share


@Scannr
Follow
It was harvested slowly. First up bud and 3-4 days later down bud harvested. Very nice harvested
Likes
4
Share

@PrinceOfHerbs
Follow
The plants look optimal 80% milky 15% amber and 5% transparent trichomes
The plants were harvested and hung up.
Likes
27
Share


@Lordshiva83
Follow
Olá, companheiros de cultivo, as minhas meninas estão no último dia da semana 12, fim da 7 semana de floração e a runtz muffin parece estar pronta para a colheita os tricomas parecem estar bons alguns leitosos outros já âmbar, e as flores estão super compactos, duros como pedra, o que dizem?? A BlueBerry OG continua em grande a engordar muito, e a shyscaberry está a começar a engordar também com um fabuloso cheiro. Acham que faça a colheita da runtz na próxima semana?


Likes
9
Share


@GOSHIN_GROWS
Follow
Took some clones 1 week before flipping to flower but forgot to take pictures. The video of the clones are from oct 1st.
The Turnt smelled like chocolate cover strawberries but now are smelling of garlic and pepper with a bit of undertone of strawyberries.
The Diesel smelled like lemon pinesol but now smells of citrus mixed with gas.
The Banana Clipz smells of berries mixed with skunk.
Paradiso smells of citrus mixed with fruit.
Lung Buster smelled lightly sweet at first but now smells like berries mixed with a undertone of garlic,funk, and gas .
Spilt Paint smells of berries mixed with diesel and funk.


Likes
6
Share

@TrickzGrowz
Follow
Echt kräftige Triebe bekommen, bin gespannt wie sie sich jetzt im großen Topf ausbreitet.
Likes
9
Share


@StickyFingah420
Follow
Día 77 y final para esta Wedding Glue que ha brindado unos frutos hermosos!. Manicura y cosecha para posteriormente secar y curar estas densas y rocosas flores bañadas en brillantes tricomas, fragancias dulces tipo torta cubren todo el ambiente y una pegajosa capa de resina me impide abrir mis tijeras con facilidad, realmente una sabrosa cosecha!
Volveré después del curado para dar un informe de cosecha detallado.
Buenos Humos! 👽


Processing
Likes
41
Share


@Hawkbo
Follow
They grew pretty well. Obviously 1 had alot more veg time and extra training where the other 2 had no training. Could have been better if I had both arms and didnt have the one bad feed where my meter was off and burnt the tips. Easy strain to grow I highly reccomend to any level grower.

Likes
35
Share


@BrediniGreeny
Follow
1st WddngCake is under a SpiderFarmer SF 1000D 100W but an older model. The 2nd WddngCake is under a MarsHydro FC-E1500 LED 150W.
They also receive on the sides UV (total per day 2 and 1/2 h ) exposure and IR (total per day 2h)
From a Secret Jardin Cosmorrow UV 40W and one Secret Jardin Cosmorrow IR 40 W.
UV 1h in the morning starting with main light, 1h in the afternoon and 1/2 h just before the main light goes off.
IR 1/2 h in the morning before any lights even start then letting it another 1/2 h with all the other lights.Total 1h
IR 1/2 in the evening right before all the lights go out and let it smooth out 1/2 alone without the other lights. Total 1h
1/13/25
The girls are starting the week ok.
1/14/25
1st WddngCake,
She is older, is happier after the flush, still has a little bit of alkaline soil but i don't want to stress her out to much.
Gave her a little BioBizz CalMag aprox 3,5 ml ; TopMax 5ml and 5 ml BioBlom . All mixed in 3,3 l PHed Water at PH 5.0 ppm 290. Runoff PH 6,8 :( ppm 1100.
Also took like a handful of inter buds leafs :D . I think she will be ok. Seeing signs of buds fattening, new pistils. Frosty :D
2nd WddngCake
Is very strong starting to fatten up the buds because she is younger and just now entering that stage.
Like I already said her smell still resembles a tropical sweet creamy hoppy IPA.
I think she is good, no major problems. Gave her 3,3 l of PHed water.
Also mixed in CalMag 2,6 ml; 4 ml TopMax and 5 ml BioBloom. PH 5,4 ppm 207.
Runoff PH 6,08 and ppm 302. I think is a good sign that i flushed a lot of nutrients from the soil and she also used a lot of them.
Should keep and eye on that. Took 5 inter buds leafs off.
1/15/25
They are doing ok, both are fattening their buds and coming around good.
The 2nd WddngCake better then the 1st one because I didn't make so many mistakes with her 😬
The tent is smelling great the Temp is at 23 C at night 20 C and RH at 50% (+- 3%) .
1st WddngCake stand at 47 cm and the 2nd WddngCake at 74 cm at their highest. New Photos! 😍😃
1/17/25
Back with some updates. The girls are doing wonderful. Shades of pinkish darkish greenish on both.
The 1st Wddng Cake Auto,
is older and showing this colors also on the very small sugar leafs.
Gave her 4,2 l of PHed water, going in PH 5,6 and ppm 95. The Runoff is at PH 6,4 ppm 205 and I feel like now she is a little bit happier.
Soil PH at 7,3 but not measuring precisely have a cheap tho rod measure stabby thing.
The 2nd Wddng Cake Auto
is younger, starting to forming her full flowers, bursting with mass .
She also displays the colors mentioned above on the leafs closer to the main buds and also here and there on other sugar leafs.
Gave her 4,2 l PHed water , going in PH 5,4 ppm 110. Runoff at PH 6,5 ppm 195 .
Her soil PH is also at PH 7,3 kinda of. :))
I can see she is happier. I think is because i didn't make mistakes at the start.
I also had 2 other Autos that aren't on here. But none of them grew like this one. Until now :)).
Also took from both some leafs here and there. I think like a hand full total. Half a handful a plant. :D
In the new photos you can see the "between the fingers roll" 😁 like i call it. That I only do twice in the life of an Auto, not to stress her to much.😨
Temp in the tent at 24 C when day +-2 C. At night time 21 C +- 1 C . Rh 50% +- 3% all of the time.
Ventilators on for wind, and the grow must go on 👽🙌
1/18/25
So just 1 day until end of the week. I just got a Microscope.
Very good actually recommend Andonstar AD203 Portable, 4' Screen also metal holder.
A microSD Card 32Gb is also included and the data cable.
Has a battery. Handels good. for the money i am surprised 😍.
1st Wddng Cake
Took some pictures of the thricomes and I see a lot of milky one, some clear ones too. No amber ones.
I think the harvest window is open but , I don't have time to harvest now.
I also prefer also to let it a few days. Also must see for an extra tent to do 2 "days" of darkness.😥
2nd Wddng Cake
is doing good, starting to fade in nuances of pink dark green just on the leafs of the top. and just a little bit of yellow.😢
But tomorrow she will get another feed to push her further the 2 weeks or so she has got to go😍
Seems i forgot to set the clock of the Microscope:))), i just went to town because it was half battery full :)))).
Also Pictures from under the Microscope 😍😁
1/19/25
Sooo end of week. I think we are fine. All the things that should be happening are happening :)).
Sorry i messed up the timelines. But the older one smaller one will be 10 weeks old in 2 days.
And the younger one is gonna be 9 weeks in 3 days. Or something like that. Chaotic start like i said :)).
1st Wedding Cake Auto is starting to open her harvest window. Very much thanks to all that answered my grow question.
She got 4,9 l of water PH 5,4 ppm 92; Soil Ph aprox 7; Runoff PH 6,6 ppm 305.
I will keep an eye on her because she will be done in like about a week or maybe 2. Must see how next week goes.
Continue to give PH water no nutes 😁
She is aprox 10 weeks old.
2nd Wedding Cake Auto changed color more on the leafs. Purple dark green. Some little bit of yellow. But today i feed her.
She got 4,2 l water with CalMAg 3,5 ; Activera 5 ml ; Algamic 5 ml; Bio Heaven 5 ml; BioBloom 5ml; TopMax 6ml.
Going in PH 5,7 ppm 315; Soil aprox PH 7; Runoff PH 6,9😢 ppm 610.
She is younger then her sister so i think 3 - 4 weeks. We will see. 😆
New pics 😁

Likes
12
Share


@chronicon
Follow
they have had 4 days of extended darkness, i left the nutrient info there but i did flush for a week and a couple days extra
(many experts say you only need to flush for a week but i like to do a week plus another 2-3 days just to make sure it's well flushed)
if it doesn't display there is a video if you open the last picture and click the right side arrow button on it (next picture button) or i think you can click the little play button icon where it should display, they usually don't display properly for me on the page (also video upload is extremely slow i will add)
Likes
Comments
Share


@Mr_nugs_lover_David
Follow
She looks absolutely asimétricband gorgeous so beautiful producing very good resin,stinks very sweet and strong,but the aroma it's not well defined yet. Can't wait to see this girl in all her glory! 😍🤤💚🌱


