
Likes
Comments
Share


@BudMedic
Follow
Love love this strain!! Humboldt Seed Org is my top breeder choice right now. Keeping those California genetics alive and clean!


Likes
12
Share
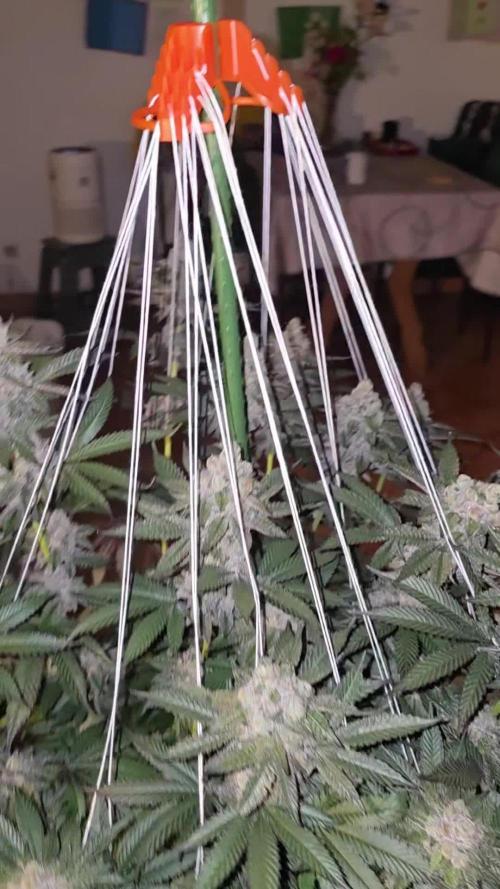

@all_about_420
Follow
Der Tag der Ernte ist offiziell gekommen, und die Blue Lobster von Cipher Genetics präsentiert sich zum krönenden Abschluss in ihrer absoluten Pracht. Die harzdurchtränkten, kompakten Blütencluster verabschieden sich mit einem atemberaubenden Farbspiel aus tiefen Blautönen und dunklem Violett, das unter der dichten, weißen Kristallschicht regelrecht leuchtet.
Neben der optischen Dominanz ist es vor allem das Terpenprofil, das den Raum komplett einnimmt: Beim finalen Schnitt verströmt die Pflanze den weltbekannten, unverwechselbaren Blue-Lobster-Geruch. Ein intensiv süßes, fast schon künstliches Blaubeeraroma vermischt sich hier perfekt mit einer schweren, gasartigen Diesel-Note. Durch die Genetik der Kreuzung schlägt zudem die Blueberry-Banana-Linie voll durch, was dem Ganzen eine cremige, reife Bananennote und einen dezenten Unterton von spritziger Traube verleiht. Diese extrem klebrige und geruchsintensive Kombination macht sofort klar, warum diese Genetik einen solchen Hype genießt. Die Struktur ist steinhart, die Qualität makellos – ein absolut erfolgreicher Cut, der nun perfekt vorbereitet in die Trocknung geht.
Likes
18
Share


@TheGreenLeopard
Follow
Endish week 8 - taken for safety - shame not to run to good trichomes - weight wise ok, don’t like too post weight very little leaf as you see


Likes
2
Share


@Cannaapeace
Follow
Hey
Nothing Much to say, she smells very good and is happy.
I have a lot to do at the moment, which is why there is not so much to say this week.
I have a problem with humidity but I can fix it
Cannaapeace

Likes
Comments
Share


@Laylowandgrow
Follow
Start of week 8 and the plants are crowning all over the place, except for the sativa dominate pheno. All plants will get water only for week 8 and 9 , looks like they will be ready for harvest at 9 1/2 weeks. Pheno number 2 looks to be the only one fastest to mature.
So far the gavita pro 1700e is out performing 1000 watt hps hands down had to plug in the hps on days when outdoor temps is in the mid 80 degree just to get grow room temps to hit 83 to 84 degrees so co2 gets used more efficiently. Looks like the gravitas will crush it in dry weight too.

Processing
Likes
34
Share


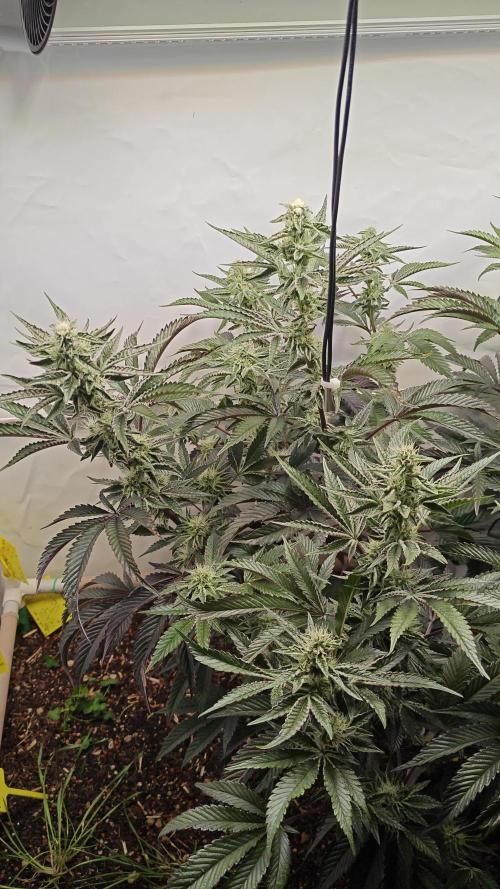
@rhodes68
Follow
12/20 Week 7
Happy with the growth and the smell is so sweet, minty, and berry so terps are doing just fine.
Backed off nuets ever so slightly
12/21 new pics and backing off the nuets more tonight - 10ml each see if I can get rid of those white tips
Helps if you upload the right files 😎
12/23 pics
12/24 All is good but think I am going to continue reducing the nuets and checking EC of runoff as still getting some small issues on leaf tips.
Maybe I am chasing ghosts we will see
12/25 White tips under control, runoff checked at 1600ppm unadjusted 950ppm unadjusted in, adjusted for water thats 1400 and 750 so ok now.
Buds building fast swapping positions in the tent tonight.

Likes
290
Share


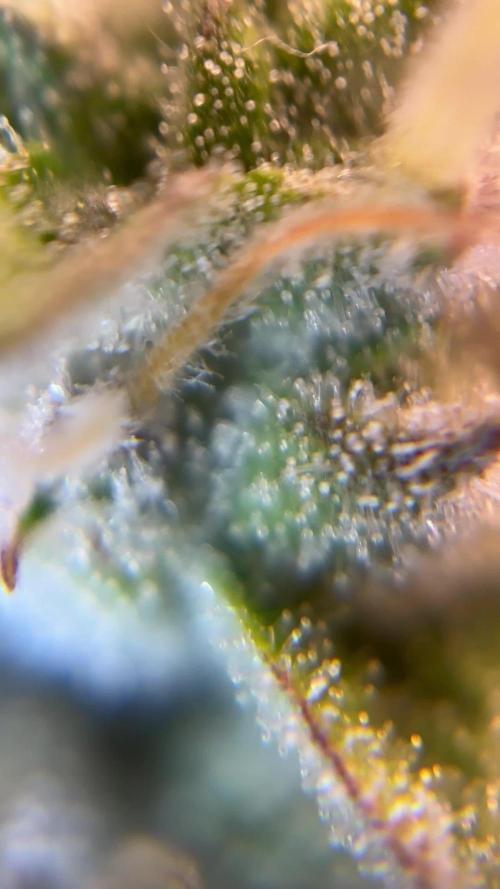
@Ferenc
Follow
It has been raining and raining since whatever... 2 weeks....checked the trichomes nice milky white.
Based on the fact the the weather won't be better and also the temperature is lower day by the now usually 6 Celsius degrees in the evening and 13-16 during the day or less, I decided to harvest next week.
I was thinking to let her out 3 more weeks just to have more amber trichomes but she is OK, ready but this weather is not ...
She is sativa dominant as I saw in the breeder's description so totally cool.
So she ain't gonna be maturing that much she reached the point.... especially because no sun....
... but compare to that she has som nice colas so I am excited let's see soo guys. Thanks all of you checking this progress out.
Beautiful lady, large LST made her really nice literally she looks like more plant but yes ONLY ONE PLANT IN THE PICTURE AND THE GARDEN :)
Have a lovely day :)

Likes
52
Share


@Salokin
Follow
The High intensity was to strong (clearly my fault) in the beginning which stunted her overall stretch, she however still delivered super dense, terpene and trichome loaded buds.

Likes
2
Share
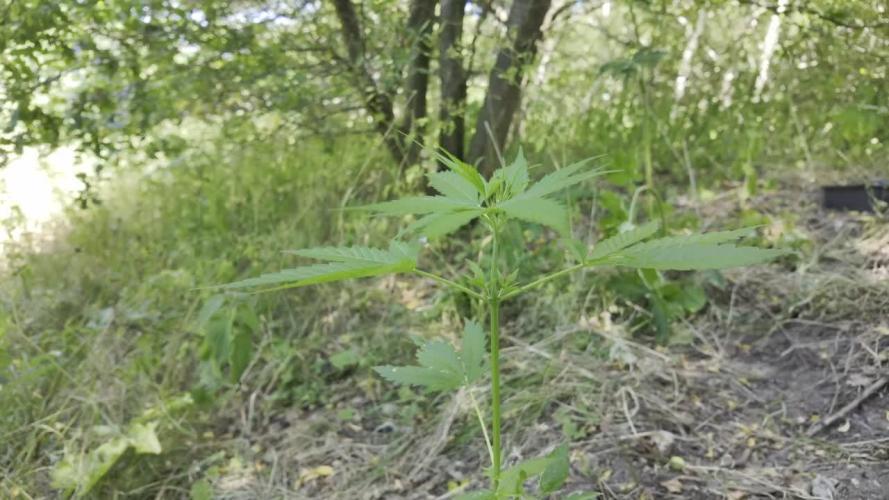

@Jesperado
Follow
The Goblins are developing painfully slowly, almost certainly because this spot doesn’t get enough sunlight. I know moving them would probably improve their chances, but I’m not willing to compromise my two other guerrilla locations by placing more plants there. For now, they’ll have to stay where they are.
It’s frustrating because I know exactly what they need, but secrecy and ideal growing conditions don’t always go hand in hand. Sometimes the safest location simply isn’t the most productive one.
I’ve added guano as a top dressing and continue watering with molasses, so now I’ll have to see what they can manage with the limited sunlight available.

Likes
5
Share
@Lavaground
Follow
:)
Day 72 ~2.25L per plant
- 56ml Sensi Bloom A / 56ml Sensi Bloom B / 28ml B-52 / 28ml Bud Candy / 28ml Overdrive - 14L Mix ~ 2.25L per plant
Day 75 ~2.5L per plant
- 56ml Sensi Bloom A / 56ml Sensi Bloom B / 28ml B-52 / 28ml Bud Candy / 28ml Overdrive - 15L Mix ~ 2.25L per plant
Likes
105
Share


@BioBuds
Follow
And another week has passed, they are bigger but didn't do the growing I expected them to do. I think something stressed them for a couple of days, where the XL Runtz took the stressing factors a bit better.
I'm trying to find out what it could have been and preventatively softened the light, lowered temps and it seemed to recover.
Maybe I pushed the SP-3000 by Mars Hydro a bit too hard... We also had some white pointy bits...
With a lot of trust in this growing method, after the previous grows, and the plants look overall happy I'm not too worried.
The soil will balance out if just don't push the lights too hard. It's a matter of adjusting and finding sweet spots and limits.
So I started bending a little and this week will bend over the tops, to further the LST which is about the only thing ill do and maybe some defoliation after 3rd week of flower....
Thank you for checking out my diary again!
Likes
Comments
Share

@3rnest
Follow
Draußen ist es nachts noch zu kalt, aber es wird wärmer und die Tage länger.


Likes
8
Share


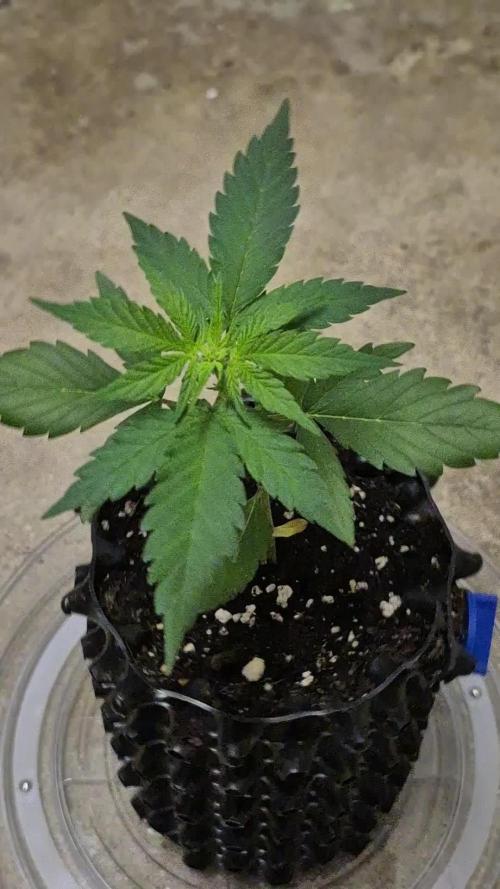
@MaxGrowCanada
Follow
These plants are loving life.
Upped the food a bit this week, the dinamed was looking a little hungry.
I will snip clones clones tomorrow.
Hopefully I will have the flowering setup finished soon so I can move these girls over.

Likes
7
Share


@Adam22
Follow
Flushed for 3 days so far so good. No yellow tips on the leafs yet but I may just have to pull this plant down today I have just 1 plant in the tent it doesn't seem worth running this just for 1 plant so I will pull down later today I think and upload pics and remember where I went wrong for next time. I have some new seeds just been delivered I think next time I will try to have an additional tent slightly bigger so I can have 2 different strains growing at the same time. Definitely using feminised seeds also as don't have time to waste vegging for 6 weeks a plant to just end up with balls. Next run will be:
4 x cookie dawg
3 x velvet moon
1 x sherbert punch
I will be looking for a decent led light for the next tent also I would like to run the same strain in both tents and see what the difference in the results are using my hps light vs led
Harvested plant 1
5oz budd
14g popcorn buds and leaf trim
Likes
3
Share


@hinterhofgrower
Follow
.
📹 : Full Video on YouTube @hinterhofgrower
🌱 : soft topping on day 17+20
💧 : 2l day 19
💡 : Dli: 20 mol/m²/d
🤔 : Finally, a plant is growing with wider internodal spacing, even though it's supposed to be Indica dominant.
There was the usual overwatering discussion on YouTube.
The soil I'm using consists mainly of peat with added perlite. It's also not compacted. In my last grow with this soil, it settled by about 5 cm in the 20L pot. The measured soil moisture reaches about 60% when saturated, but with my current watering pattern, it only reaches a maximum of just under 30%. I think there's always enough oxygen in the soil. I did, however, wait longer before watering this time.
The removal of the bottom pair of nodes was also hotly debated. In my opinion, it was exactly the right thing to do. I would have had to remove the large pair of leaves above them to give the two branches full light. I would have had to trim the next pair of branches down significantly to bring them to the same level. In my previous grows, this resulted in small, bushy plants. This meant the buds were very close together and therefore susceptible to mold. Furthermore, the lower parts weren't fully developed. This was something I wanted to prevent in this grow.
No more energy needed to be invested in the small branches, allowing the plant to focus on photosynthesis with its large leaves. The result is a uniform canopy.


Likes
10
Share


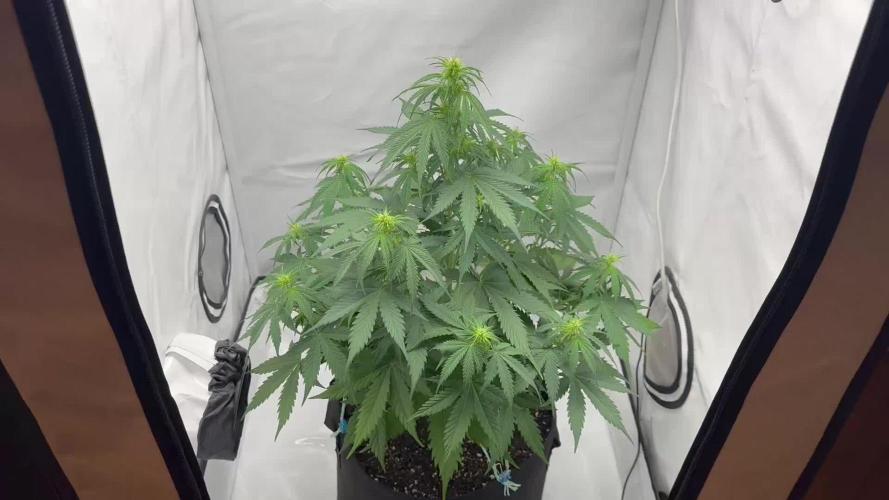
@byte_me
Follow
Further progress has been made in my cannabis cultivation journey. I've been meticulously working on spreading the canopy over the entire surface of the tent, ensuring each plant gets equal light exposure. The aim is to create an environment that allows for optimal growth and an abundant yield.
Later today, I plan to install a net. The net will provide support to the plants as they grow taller and heavier, especially as they enter the flowering phase. It will also help maintain the even spread of the canopy, ensuring that light penetration is maximized across all plants.
In about a week, I will be shifting gears by switching the light schedule to a 12/12 cycle - marking the transition from the vegetative phase to the flowering phase. Concurrently, I will also start administering bloom nutrients. This tailored diet will provide the plants with the essential elements they need to produce bountiful, high-quality flowers.
A noticeable change that has been happening recently is the increasing intensity of the aroma emanating from the plants. The scent of cannabis is becoming more and more pronounced, serving as a reminder of the transformative journey these plants are going through and the lush buds they will soon produce.

Likes
12
Share


@OGbros
Follow
I hung all the branches upside down in the closet. Thanks to the help of an air conditioner I keep the temperature at 23C and the humidity at 50%. When after a bending the branches will break (prematurely bend) then the drying will be complete and the tanning phase will begin. Initially I had problems with Ca and Mg deficiency, in fact the plant has grown less than the other, but I am still satisfied with the result. I usually don't weight buds when they are wet because it's just a waste of time. When they are dry I will update the diary with the precise weight.
PS the same day I harvested my country rejected the decriminalization of cultivation of weed (referendum of popular origin). I want to say to my politicians: You will never stop me from doing what I love most. that said, see you soon for the upcoming updates😈

Likes
35
Share


@Roberts
Follow
Well the plant died on me during the flush period. So it started drying up. So I am harvesting her. She never was super healthy during the grow. I also had her in a cold room as she grew. So it was far from a perfect environment. Its frosty and looks potent. I will try another Jack Herer at some point. Thank you Spider Farmer, Athena, and ILGM. 🤜🏻🤛🏻💪🏻❄️🌱
Thank you grow diaries community for the 👇likes👇, follows, comments, and subscriptions on my YouTube channel👇. ❄️🌱🍻
Happy Growing 🌱🌱🌱
https://youtube.com/channel/UCAhN7yRzWLpcaRHhMIQ7X4g
