The Grow Awards 2026 🏆 


Likes
Comments
Share
@Dennis_Bong
Follow
!!!!!!!!!!!!!!!!!!!!!!!!!!!!!!!!!!!!!!!!!!!!!!guckt euch letzen Report an !!!!!!!!!!!!!!!!!!!!!!!!!!!!!!!!!!!!!!!!!!!!!!!!!!!!!!
Blüte hat begonnen:
Edit:11.05
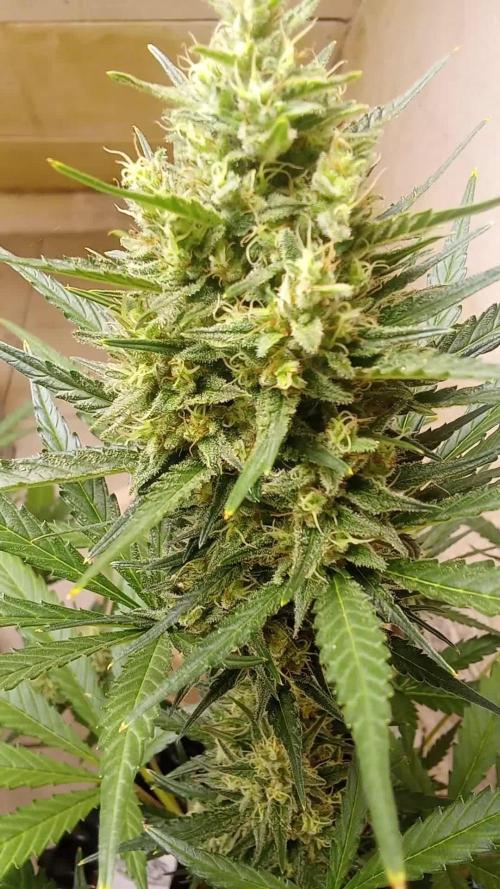
Die Pflanzen sind innerhalb von 2 Tagen explodiert. Ich habe das Licht nun auf 75 Prozent gestellt und noch einmal Cal-Mag nachgegeben, da die letzte Gabe nur eine halbe war. Die beiden Titan sehen fast identisch aus. Die beiden Epsilon sind circa 3 Tage unterschiedlich, eine ist etwa 5 cm kleiner als die andere und hat noch kaum Blüten. Ich denke, in 3 Tagen wird das der Fall sein. Die Cosmos F1 ist im Umfang circa 50-50 cm, kaum Blüten bisher. Ich hoffe, sie wird nicht noch viel größer, da der Platz langsam eng wird. Ich bin von dem Wachstum dieser Pflanze absolut begeistert. Mal gucken, was die Blüte bringt.
Edit ende
Ich habe alle Blüten entfernt, die nicht im direkten Licht sind, und alle Blätter, die die Blüten bedecken.
Die Pflanzen weisen einen Cal-Mag-Mangel auf, was bei der Blüte normal ist, gerade bei diesem Licht.
Ich habe dem Gießwasser etwas Cal-Mag hinzugefügt.
Die Pflanzen sind drei Tage älter als im letzten Report.
letzte Woche :
Die Pflanzen sind seit der Keimung auf diesen Fotos genau 30 Tage alt.
Ich habe eine Pflanze ausgetauscht, da es sich um eine Epsilon F1 handelte, die vermutlich Mutationen aufwies. Sie hatte verkümmerte Blätter, die nicht wie die ihrer Artgenossen aussahen, und wuchs deutlich langsamer. Daher habe ich sie nach 2,5 Wochen ausgetauscht. Der kleine Mann(die ausgetauschte Pflanze) leidet natürlich jetzt ein bisschen unter Lichtstress, deswegen werde ich wohl nur eine sehr gestauchte Pflanze erhalten. Aber besser, als die Fläche leer zu lassen.
So viel zu dem, was nicht funktioniert hat:
Die Sanlight stand die ersten 2 Wochen auf 20 Prozent.
Dann habe ich sie teilweise mit dem Dimmer höher gestellt: 2 Stunden auf 25 Prozent.
Eine Woche später bin ich auf 30 Prozent und 2 Stunden mit 35 Prozent gegangen.
Für Woche 4 habe ich 40 Prozent und 2 Stunden auf 45 Prozent gewählt.
Ich erhoffe mir, die Pflanzen so schneller an die starken Lampen zu gewöhnen.
Im Nächsten grow soll bei jeder Pflanze die TDS per Infrarot gemessen werden. Da werde ich dann ein Experiment zu machen, wie die Lichtsteigerung am besten umzusetzen ist.
Zu den Lampen kann ich bis jetzt nur Positives sagen. Im Gegensatz zur dazugehörigen App, diese ist wirklich nicht sehr gut umgesetzt. Das Menü und die Einstellungen sind teilweise irreführend und nicht sehr durchdacht. Ich muss mir immer wieder die Tutorials in der App ansehen, da diese immer wieder angezeigt werden.
Noch dazu hätte ich gerne die Möglichkeit, mehr Einstellungen treffen zu können. Das ist aber Meckern auf hohem Niveau, weil auch die App das macht, was sie soll, nur eben meiner Meinung nach nicht sehr gut umgesetzt.
Die Pflanzen wurden von mir mit Klipsen aus dem 3D-Drucker gestützt. Diese Klips kann man Stück für Stück im Winkel verstellen, so dass man die Triebe damit neigen kann. Das habe ich von Tag zu Tag im Winkel verstellt, so dass ich am Ende einen 45-Grad-Winkel habe. Das habe ich insgesamt über 6 Tage gemacht.
Die Pflanzen haben an sich ein sehr gleichmäßiges Wachstum. Die Cosmos F1 wächst so optimal, dass kein LST mit den Klipsen nötig ist. Ich habe an den Pflanzen keine Mängel entdecken können und auch keine Anzeichen von Mutationen.
Die Pflanzen haben im Durchschnitt eine Höhe von 35 cm, wobei eine etwas stärker abweicht mit 22 cm (wieder eine Epsilon F1). Der Umfang mit LST bei der Cosmos F1 liegt ohne LST bei 20 cm im Durchschnitt, wo wir wieder die Epsilon im Negativen haben mit 14 cm.
Die Pflanzen wurden alle entlaubt, das eine Woche vor der Blüte. Morgen werden die Pflanzen erneut entlaubt und ge-lollipoppt.
!!!!!!!!!!!!!!!zusätliche infos werden morgen ergänzt + Fotos !!!!!!!!!!!!!!!!!!!!!!!!!!!!!!!!
*1. Foto Mutation:
Dieses Foto wurde nur 5 Minuten nach dem Umtopfen der Pflanze aufgenommen. Vorher stand sie in einem größeren Topf, in dem sie genauso aussah. Ich habe sie umgetopft, weil ich den Topf brauchte, aber die Pflanze nicht wegwerfen wollte. Der Pflanze geht es gut, aber sie sieht im Moment etwas mitgenommen aus. Bilder folgen

Likes
8
Share
@ZoobZoob_farmZ
Follow
😈💪🧑🌾🌱🌲☀️👌Hellriser Skunk’97 x Black Lebanon.
Hi everyone 👋 for the smell 👃 this one gives off a smell of kaki 🍑on a fruity skunky background And slightly peppery👌.
Useful links👇👇👇
https://geneseeds.eu/plant/black-hell/
https://marshydro.eu/products/mars-hydro-ts-1000-150w-led-grow-lights/?lang=fr
https://shop.greenhousefeeding.com/4-bio-nutrients
https://www.royalqueenseeds.fr/47-growing
https://biotabs.nl/fr/produit/bio-pk-5-8/
.

Likes
13
Share
@Rungood
Follow
La plante grandit de jour en jour et ses bud commence a faire des superbes filament orangé ,aucune carence pour le moment... wait and see
Likes
26
Share
@CannaBoy7
Follow
#myseed.ge
#soil-N1
#mysun.ge
#GROWROOM
#MYSEED-GROWROOM
she lies on the ground 😂 we chose LST/TOPPING

Likes
35
Share
@Ganjagrandaddy
Follow
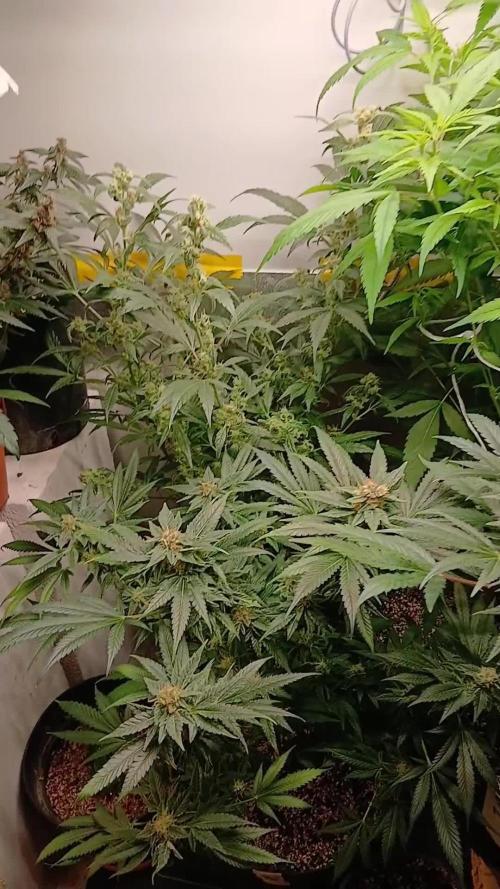
Day 28 Flowering: Hi all. Another week passes and the bud building goes on.
Red hot cookies is a beautiful little bonsai still tiny but looks such a great colour on the Purples . Sods law that they are this pheno so early on.
Sweed Afghani Delicious is still building herself up into a long cola. She took a lot of damage early on.
Amnesia Haze is a whole different picture. She has begun forming some nice thick stacked colas that have a minty sweet smell to them now as does the whole room.lol
Her buds are nice and compact with close nodes forming a whole tip to base cola. Health is looking good but a lighter green is noticable now as she feeds from the soil. I added a feed of Megacrop to see how this could help , also gave a little calmag too as i noticed a couple of tell tale rust spots.
I am so impressed with this strain and can only wait to see the end results she can put out.
Thanks for the visit. be safe.

Likes
78
Share
@Basementganja
Follow
On cruise control until harvest!
She's very sticky, and smelly!
2.5 gallons dosage of the above listed nutes, every 4 days!
Flush next watering, and then just water 'till harvest.

Likes
21
Share
@cadur
Follow
Nothing much to report. Vertical growth has stopped, happy it has as no tent left to grow into.
Trichomes building up and have done some sporadic defoilation.
Likes
11
Share


Likes
13
Share
@HowtoBubatz
Follow
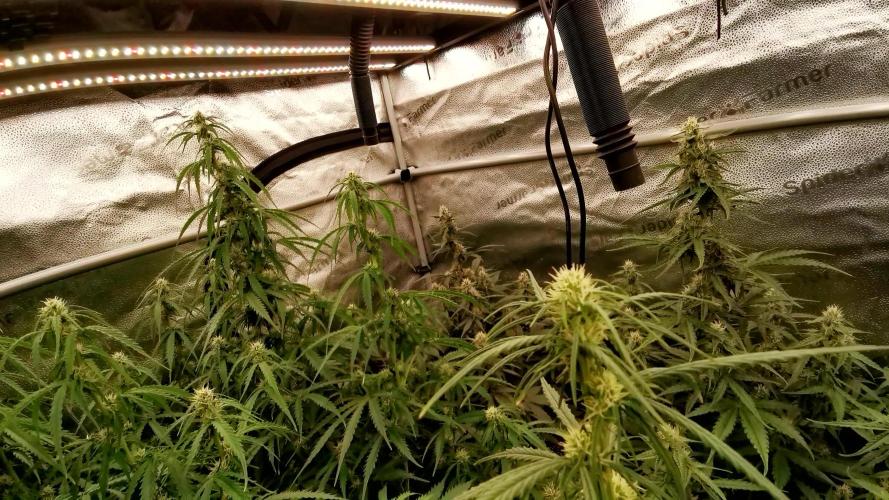
The Bruce Banner girls are growing strong and full of energy this week.💪🔥
They’re all at slightly different stages, but overall doing great:
#2 is the most advanced one, she’s already done stretching and started to produce trichomes early in the week.✨
#1 is still the biggest plant in the tent and finished her stretch around mid to late week, also showing the first trichomes by now.🌿
#3 kept stretching until the end of the week and is a bit behind in flower development, but she’s almost as tall as #2 now and catching up nicely.🚀
All three plants look healthy, rich green, and well-balanced, no signs of any issues.
They were watered as usual with RO water + CalMag, and got one feeding of Orgatrex this week.💧
Environment stayed on point:
24.8°C, 55% RH, and PPFD around 900–1000 µmol/m²/s under the Spider Farmer SE5000, controlled by the AC Infinity AI system 🌡️.
The stretch is almost over, trichomes are forming everywhere, and the tent is starting to smell amazing, everything’s moving in the right direction 😎✨
Likes
4
Share
@MasterKush714
Follow
What up gang update for Week 10!!!
Let's get into itttt
Just chugging along bout to flip to flower manana let's goooooo!!!!!

Processing
Likes
3
Share
@ThatZimbo
Follow
Week 5 | Day 40
Start Date: 9 May
Veg Days: 35
Flower Days: 5
All plants are well underway in flower. They have reacted well to the flush and new nutrient volumes I put in. I will leave it for about two weeks before I do another nutrient top-up, planning on lowering the grow and increasing the bloom as the plants start sucking up more potassium.
I took a series of clones, but they didn't even make a dent in the amount of nodes that have started stretching. Will have to clear up a few stems to get light in amongst the trees.
The two strains are starting to show their true colours- the orange sherbert isn't growing particularly tall and the blur gelato seems to definitely be the strong er of the two strains, but only final yield will tell! The BG plant closest to the fan is thiiiiiic. Stem is looking amazing an cannot wait to see what it yields.

Processing
Likes
4
Share
@Andres
Follow
she grows healthy ... she is in her last weeks outdoor ... the days are cloudy most of the day ... with the substrate made by me .. she feeds every 10 days with red guano and earthworm humus
Likes
1
Share
@Kadash368
Follow
Almost ready to harvest, 7 weeks in flowering, lets see how many more days left. What do you think?
Processing
Likes
15
Share
@No_Clout
Follow
27/02/19 - Cant wait for these to be done as I’ve never had gelato before so I feel like I’m missing out 😂 but yeah other than I let them stretch abit taller than I usually prefer it’s all going well, new genetics/nutrients/medium seem to be doing the job.
02/03/19 - Just transplanted all into their final pot, just in time I think as it looked like the roots were starting to circle at the bottoms of the pot, sprinkled half a tea spoon of Mykos on each hole prior to the transplant & fed them 2.5 litres each. I was going to saturate the whole pot but I’ll do that next feeding.

Likes
152
Share
@EBxAH
Follow
Week 6 started yesterday, July 11. Final step for bruce banner is now done!!! A little sloppy but whatever, lol. I'm still learning and definitely having fun 🍀😎😁👍✌️
UPDATE: July 14th, did some tie down/guiding on the sky og. Also the bruce banner is still a few days from that step but is doing quite well. They both are. Happy lady, happy life ✌️🍀
UPDATE: today is July 17th and things are going great! I added some more pics. Almost all the arms are guided to the edge for the sky og! Still a bit to go for banner though. I gotta say, this has been AMAZING to do and see for myself instead of drooling over pics on google, lol. Hope you all are having a good weekend and blessed growth ✌️🍀


Likes
7
Share
@OwlGang_Uk
Follow
Week 7 - The Bounce Back - The Plants Bounce Back Quite Nicely From Last Week’s Defoliation. You Can See Drastic Growth Day By Day Everytime The Lights Go Off And Comes Back On.


