
Likes
Comments
Share


@GorkedOut
Follow
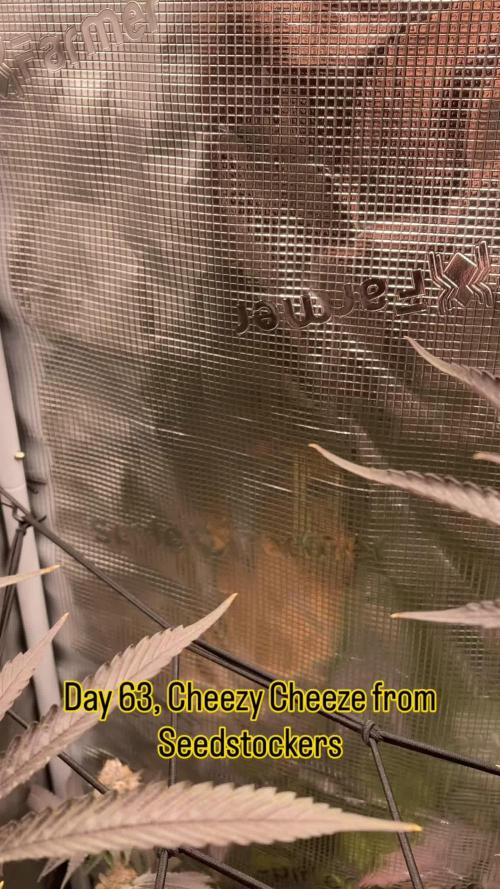
Smells of STRAIGHT GAS. Bit of a skunk smell but the gas smell is overwhelming. Can't get enough of it.
143 grams (roughly 2.55 ounces per plant of good buds). Hoping the quality is amazing..

Processing
Likes
13
Share


@GrowGuy97
Follow
1 of the bubba kush & 2 of the gorilla zkittlez are a little behind but over all everything seems to be going good so far!
Day 10 update transplanted all the ones in smaller pots to 5 gallon pots except 1 of the bubba Kush it still needs a few more days! Everything else seems to be going great!


Likes
19
Share


@Budha420
Follow
Day 45: just a quick vid. Been busy soz for posting so little.
Day 46: Buds are densing up and mutant is doing mutant things. Lightburn is an issue
Day 47: today i tried to fix the mutant problem. Its growing wayy to big for my small 180cm tall tent. Broke one of my light hangers when i tried to tighten it😑 also did some lst but i think the battle might be Lost on this one. Any advice is taken! Other than that, #1 n #2 are doing pretty well. Buds are densing but not at the rate i would want. Might be Bcos my light only draws 200w from wall.
Day 48: these ladies are getting frosty swear to god if my light doesnt pull enough watts to dense the nugs, im callbombing spiderfarm till i get new light🌚

Processing
Likes
5
Share


@Mikeygrows
Follow
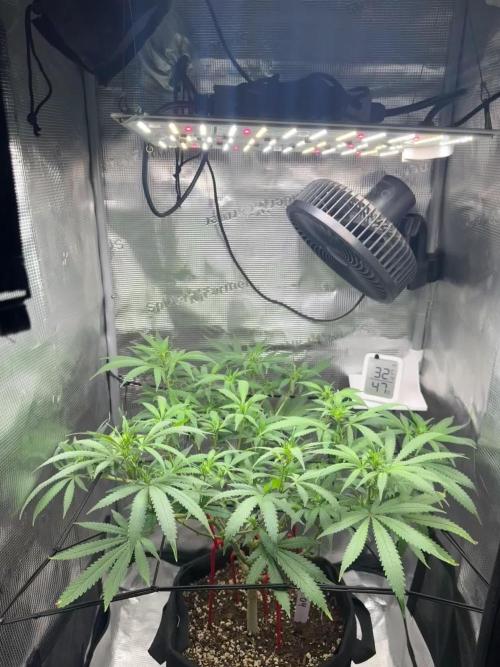
Loli popped my plants and installed a new screen. New veg light for my other tent arrives next week and plan to flower this tent.
6/5/2019
So bubba kush (back right plant that is tallest) decided to flower before light cycle changed. Im not surprised because all the other bubba kush seeds i got from growers choice did the same thing, but much faster flowered at like 3-4 weeks. This happened during my last outside grow. Worried a little that the 18hrs might be stressing ms bubba kush dont want a herm. Starting last night I am taking away one hour of light because i plan to flower next week when my new light arrives

Likes
13
Share


@FlavoursUk
Follow
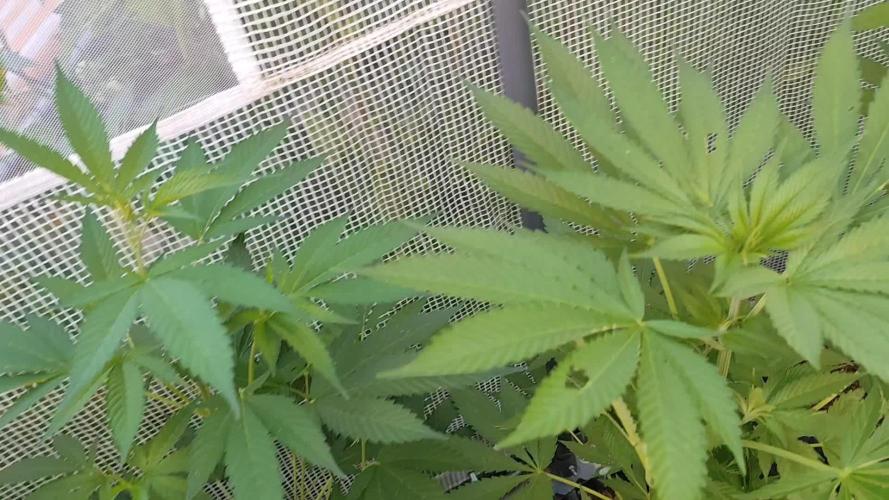
Start of week 5, the girls are looking promising. Trichome production is in full flow now, leaves and buds getting very frosty. Slowly increasing the EC in 0.1 increments to avoid overfeeding and nutrient burn but still push the genetics.
Also added a dehumidifier to help keep the humidity down and in range. Although not a whole lot to do, pH and EC parameters are still very important. Will be checking in, the next few days.


Likes
4
Share


@mawintinner60
Follow
request light Mars Hydro The cable is loose, causing the light to become loose, causing the light to go out, so I use 850 W instead
Likes
19
Share


@Comfrey
Follow
Tropicana had to go back indoor because the temperature outside is the opposite of tropical. I took off two leafs and gave her time to relax after.
Everything is fine and I can already smell something when I‘m near to her. 🤭☺️
Where is the sun? Preparing for sun storm!
Likes
Comments
Share


Likes
51
Share


@Seldom_Seen
Follow
I hung the full plant upside down for 24hrs. I then hung the individual branches. I left the branches big and I didn’t trim the buds as I wanted to dry slowly. They hung in the dark room with temperature at 21 degrees and humidity at 58% for a week. I then removed the buds from the branches and placed them in a drying net for another few day before jarring. Smell isfantastic.

Likes
119
Share


@DogDoctorOfficial
Follow
I love growing and i love the GD community, we are like a big canna family and its a pleasure and an honor to be part of this all. Thank you all for being here , for growing and believing in this beautiful healing plant . Growers love to you all

Likes
5
Share


@Ninefold
Follow
Same as week 15, missing a lot of pictures in the timelapse :(. I was starting to see a decent amount of amber, and unfortunately a few bananas seemed to start growing as well, so it was time to chop.
Processing
Likes
6
Share


@Frosty905budz
Follow
Everything looking great .
Got new lights today Mars TS 1000w
Never mind all the mixed reviews online regarding these lights .. they are great ! No notice and there is not much heat off these lights.
Also LTS tieing down branches at this point to get an even canopy later .. I prefer to have more smaller colas then one big cola
Likes
3
Share

@Pepe_Ramone
Follow
Just a little video I put together. Still waiting for trichomes to turn cloudy.
Likes
142
Share


@MadeInGermany
Follow
Hi people 🤗
A lot has happened this week 😄
The 3 Blue Cheese and 2 Kosher Tangie Kush which have been in the flowering tent for 1 week have become very bushy 👍
Unfortunately I just noticed that I completely forgot to take pictures of the Blue Cheese Phenotype # 3 🤦♂️🏻
The picture will be given later.
The rest of the Vegi tent is also progressing very well.
They are repotted in 11 liter pots this week, and then come to the flowering chamber die the following week
The next week there will be new pictures, until then I wish everyone a nice start into the new week 🙏🏻💪🏻
Let it grow 🍀🌱


Likes
Comments
Share

@WMinerva007
Follow
3 weeks into flowering and she has stretched nicely to a strong and rigid structure. Shes starting stack budsites and producing more pistils to start her bulking next week
To prepare her for mid flowering, I have defoliated her and increased her bloom feed to give her full flower power - so excited!!
The heatwave where I live has affected my the overall temperature in the lung room and the tent, but with automations, I was able to stabilize the right VPD range with the humidifier. Next, Bio Heaven and speed controller for the exhaust fan :)
Likes
4
Share


@The_Projexx
Follow
Welcome to week 3 of flower for these fine ladies! As the stretching period comes to and end in about a week or so I'm excited to see the plant's develop their flowers. Some of the plants have already developed quited the frost for their age and as the cycle continues its just going to get more pronounced. Some of the plants are giving off a faint smell now mostly the Banana Smoothie smelling of cream and bananas so far. Overall I'm really pleased with what's going on so far and can't wait for further development of the flowers!
Huge shout out to both Hidden Vault Genetics as well as @MarsHydroLED for all the work they put in to make growing a breeze
Extra special shout out goes to all my followers and people who stop into the diary alike. Keep inspiring to grow!
-The Projexx
Day#15F Ladies continue their stretching, will be looking to remove some leaves to open the plants up soon.
Day#16F Watered ladies 4L each at 550PPM. Things are moving along as the plants keep stretching like crazy
Day#17F Ladies are producing more and more size on their cotton balls while stretching up and stacking hard.
Day#18F Ladies are producing quite the frost levels for their age. Watered 4L each at 550PPM.
Day#19F Pictures N/A. Plants continue to stretch and stack.
Day#20F Ladies look like their slowing down on their stretch hopefully haha. Watered ladies 4L each at 550PPM.
Day#21F The plants are still stretching abit while putting mass on their flowers slowly. Wont be long till we see some giant flowers covered in trichomes!
Recap: Things went very well this week, some of the plants are starting to put out a smell and everyone's pumping trichomes like crazy! With about a week or so left on the stretching period I will be looking to place my secondary nets very very soon. I'm looking forward to seeing
what the plants smell like and how they continue to develop their flowers!
Processing
Likes
5
Share


@Mr_nugs_lover_David
Follow
Amazing clasic amnesia smell, very strong, very sweet and citrus at the same time, cannot wait to to see this buds fully developed what a pleasure to work with this strain. Stay tuned for more of this wonderful strain!! 💚❤️💛👨🌾

Likes
10
Share


@Canna96
Follow
Hey now, hope everyone is having a great weekend and staying safe. Another great week for the ladies, as they are now about 2 weeks into flower, and the stretch is winding down. I am still feeding them silica, cal mag, and flower nutrients maxi bloom by GHE. I will start to add a PK booster this week. I also will be switching to light from V1 to F1 sometime this week, and also integrating the UV/IR bar into the light cycle later this week. I will run the UV/IR bar for approximately 30 minutes prior to lights off to get started.
The 5X5 is really starting to fill up nicely, I am running two dehumidifiers outside of the tent and I am able to maintain around 50% RH in the tent during lights on, and around 55% RH with lights off.
Still very happy with the Spectrum X from Medic Grow. I am running her at 90% in the V1 cycle and will be transitioning to the F1 cycle later this week. Overall, the plants seem very happy and healthy. The temperature and humidity is significantly dropping so that helps keeping the tent cool and not overly humid. This is by far the best time of year to be flowering plants in my region.
I hope everyone has a great weekend, Thanks for stopping by, Stay Safe and Blaze On!!! 💪
Website: https://medicgrow.com/
https://growdiaries.com/grower/medicgrowled

Likes
60
Share

@Growbody
Follow
Meine lieben Freunde und Freundinnen, Brüder und Schwestern im Geistigen und Tatkräftigen, herzlich Willkommen zum Greenhouse Summer Outdoor Grow 2026.
Der erste Strain des Outdoor Grows den ich Euch vorstellen werde ist die Purple Lemonade FF von 2Fast4Buds, eine 60% Sativa die laut FastBuds etwas nebulös als eine Kreuzung aus purple und citrus Cali Genetik beschrieben wird. Egal, sie soll sehr fruchtig und zitronig schmecken und könnte schöne Farben bekommen. Außerdem soll Sie eine kurze Blütezeit haben. Hier ist die URL:
https://2fast4buds.com/de/seeds/purple-lemonade-fast-flowering#description
Der zweite Strain der im Set mit dabei ist, ist die Mimosa x Orange Punch fem. von Barney's Farm, die ihre Genetik und den Taste bereits im Namen trägt, eine 65% Indica, die laut Barney's "ein wirklich sensationelles, zitrusähnliches und mandarinenartig-süßes Aroma" haben soll. Auch sie könnte interessante Farben bekommen. Hier die URL:
https://www.barneysfarm.de/mimosa-x-orange-punch-552
Last but not least, der dritte Strain ist die Chocolate Sherbet fem. von Grower's Choice, eine 70% Sativa, deren Eltern Chocolope x Sunset Sherbet sind. Auf den Geschmack bin ich schon jetzt gespannt, cremiges Haschisch. Mit bis zu 240cm könnte sie die größte im Greenhouse werden und würde dann bis zur Decke wachsen. Hier ist die URL:
https://www.growerschoice.nl/de/chocolate-sherbet.html#description
EDIT:
Nachdem die oben aufgeführten Pflänzchen nicht so recht loslegen wollten, habe ich mich entschlossen, fertige Stecklinge von Hanfgarten aus Österreich dazuzubestellen. Die Stecklinge kommen in die Mörtelwannen, die selbst gezogenen kommen in die bereits bewährten 15 und 20 Liter ROOTiES. So kann ich die auch mal direkt in die Sonne stellen.
Der erste Steckling ist die Blueberry von Hanfgarten, eine 80% Indica, einer Kreuzung aus Afghan Indica x (Thai Sativa x Mexican Oaxacan Sativa), die nach 8 Wochen Blüte Mitte Oktober fertig sein soll. Außerdem soll sie fruchtig, beerig und süß schmecken. Auch hier gibt es eine URL:
https://www.hanfgartenshop.de/blueberry.html
Der zweite Steckling ist die Runtz, ebenfalls von Hanfgarten, ein Hybrid aus Zkittlez × Gelato, die auch nur 8-9 Wochen Blüte hat, mal sehen. Wenn sie ein ähnliches Aroma hat wie die Wurlz bin ich happy. Die URL:
https://www.hanfgartenshop.de/runtz.html
Der dritte Steckling ist die Super Lemon Haze, eine 80% Sativa von Greenhouse Seeds, deren Genetik von Lemon Skunk x Super Silver Haze stammt. Mit 9-10 Wochen Blüte steht sie wohl mit am längsten im Greenhouse. I💖Haze und hier sind die URL's:
https://www.hanfgartenshop.de/super-lemon-haze.html
https://shop.greenhouseseeds.nl/feminised-cannabis-seeds/1-seed-pack/super-lemon-haze/?variation_id=604
Auch dieses Jahr gibt es wieder etwas Neues:
Mir ist vor einigen Wochen im Baumarkt ein Foliengewächshäuschen begegnet. Die Aussicht, meine Schätzchen immer im Trockenen zu Wissen, lies mich sofort (also sofort nach einem Recall mit meiner Liebsten) zuschlagen. Danach war nur noch ein teilweiser Umbau unseres Gartens nötig, einen kleinen Weg anders verlegen, ein Fundament ausheben, Bordsteine zersägen, 2 Zentner Beton verbuddeln, Löcher bohren, verdübeln und verschrauben ohne das der Beton ausplatzt, einen haufen Astwerk vom Wein opfern und viel Rasen neu anlegen, das war's schon fast.
Neu:
Sind auch die zwei 90 Liter Maurerbottiche, in denen sich meine Pflanzen wohlfühlen dürfen, 4x soviel Platz wie im letzten Summer Outdoor Grow. Zur Drainage habe ich Rheinkiesel 9-18 verwendet. Da drauf kam mein altes Erdmischungsrezept mit frischem Kompost von Piluweris, Lehm, den die Wühlmäuse ständig in unserem Rasen aufwerfen und Sand aus'm Kieswerk mit gaaanz viel Staub drinne, praktisch Gesteinsmehl. Auch hier gab's was Neues: Hornmehl zusätzlich, hatich früher schon verwendet und ganz vergessen. Der erste Sack Sonnenerde Hanferde wurde mit der oberen Schicht meiner Mischung vermischt. Der zweite Sack kam dann blank obendrauf.
Neu:
Für mich ist auch die angewendete Keimmethode noch neu, die Samen zuerst in einem Marmeladenglas mit temperiertem Wasser mit Zusatz von Wasserstoffperoxyd keimen zu lassen. Das ist jetzt das dritte Mal, dass ich diese Methode anwende. Der Vorteil daran ist die superschnelle Keimung, der Keim schaut tatsächlich bereits am nächsten Tag aus der Schale und nach ein oder zwei weiteren Tagen haben sich die Keimlinge von der Samenschale befreit. Das weitere Vorgehen bereitet mir noch Probleme. Ich verwende immer noch die SmartStart Plugs von Zamnesia die ich praktisch halbiere, also von oben nach unten einmal Mittendurch. Dahinein lege ich jetzt den Keimling und klappe die zwei Hälften dann zusammen und pflanze den Plug in den Topf.
Neu:
In die Wannen kommen zusätzlich Gäste als da wären erprobte und neue sowie überwinterte Chilisorten, verschiedene Basiliken oder -kums, Weiße Melisse, Roter Klee, paar Blumen und so.
Tag 71: Im Greenhouse hat es tags bis 40°C bei 24% RLF, heiß und trocken. Die Mörtelwannen bekommen jeden morgen 10 Liter, die Töpfe ~2 Liter Brunnenwasser. Abends gibt es noch eine kleine Erfrischung. Nachts hat es 16°C bei 89% RLF, bisle kühl und 6 Liter/m² hat's geregnet.
Tag 72: Tagestemperatur im Greenhouse heute 41,5°C bei 24%RLF. Nachts kühlt es auf 18°C ab, bei 90% RLF.
Tag 73: Die Sonne brennt, 42°C bei 20%RLF, Nachts 18°C bei 87%.
Tag 74: In der Nacht ein wenig Regen, 15 Liter/m² und am Tag war es wieder heiß.
Tag 75: Die Blueberry von Hanfgarten ist mittlerweile 91 cm, hat einige lange Seitentriebe und wächst schon vorne aus dem Greenhouse. Die Runtz von Hanfgarten, 69 cm hoch, nutzt jeden Raum, den sie auch bekommt, die Zebrange ist nach hinten ordentlich gestutzt. Die Super Lemon Haze Hanfgarten/Greenhousseeds ist mit 60 cm die kleinste im Greenhouse, bekommt aber demnächst mehr Platz und mehr Licht. Die Purple Lemonade FF von 2Fast4Buds hat mit ihren 63 cm einen ziemlich dicken Stamm entwickelt, da kommt noch was. Die Chocolate Sherbet von Grower's Choice kommt auf 86 cm, ebenfalls mit dickem Stamm und die Minosa x Orange Punch ist mit 108 cm die größte. Wenn man im 2. Video genau hinschaut, sieht man ganz kurz oben auf der Purple Lemonade einen kleinen grünen Grashüpfer. Der war für etwas Blattfrass verantwortlich und lebt jetzt auf der Streuobstwiese.
Tag 76: Es hat etwas abgekühlt, 34°C bei 44% RLF, Nachts bleibt es bei 18°C und 96% RLF. Hab mir ein Schwerlastregal besorgt um meine Erden besser lagern zu können. Jetzt bekommt die gebrauchte Sonnenerde Hanferde Zeit und Ingridenzien um sich zu regenerieren.
Eins kann ich versprechen: It will take a very, very long time 😃 Schön das du es bist, der mich begleitet 👍😎


Likes
28
Share


@Nickeluring
Follow
She's about ready to go down now. I'll chop her in a few days time. The heat is stressing her out badly and she needs to be hung. Aiming for a few weeks of dry time.