Likes
Comments
Share
@MrJones
Follow
OSS Ghost Train Power 🔹⊱╮🔹╰⊰🔹 GROW Started 03.10.24 INFORMATION 🔹╰⊰´🔹⊱╮🔹 
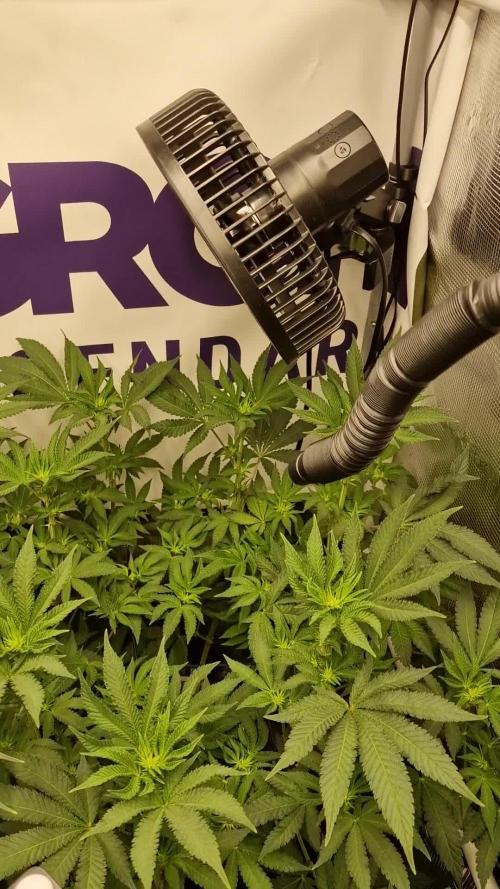
🌞Environment - Maintaining 80F and 65%Humidity 🌾Training - The girls are recovering from last week's Pruning and Defoliation, ⚱️2-Gallon 📊6.2 PH 💧 Feeding - Using Horti Bloom and Horti Cal 12-0-0 🌞Medic Grow Smart 8 760 Watts 🕷️ IPM - CannControl from Mammoth and Mosquito Bits as needed 🔹⊱╮🔹╰⊰🔹 PLANT UPDATES 🔹╰⊰´🔹⊱╮🔹 📝 Notes - On 🗓️05.11.24, This week, we are on Auto-Pilot and just Fertigating as needed; the ladies are stacking up nicely, and the leaves have grown back not sure if it is the genetics or the new nutrients; I would like to see less and will evaluate if more defoliation will be needed. 📝Fertigation injects fertilizers into an irrigation system to supply dissolved nutrients to crops. 🗓️05.11.24 Just feeding daily, sometimes twice; today, fed with Hort-Bloom @ 2.7 GRMS Per Gal and Horti-Cal @ 2.5 GRMS Per Gal. 🗓️05.12.24 Just feeding daily, sometimes twice; today, fed with Hort-Bloom @ 2.7 GRMS Per Gal and Horti-Cal @ 2.5 GRMS Per Gal. 🗓️05.13.24 Just feeding daily, sometimes twice; today, fed with Hort-Bloom @ 2.7 GRMS Per Gal and Horti-Cal @ 2.5 GRMS Per Gal. 🗓️05.14.24 Just feeding daily, sometimes twice; today, fed with Hort-Bloom @ 2.7 GRMS Per Gal and Horti-Cal @ 2.5 GRMS Per Gal. 🗓️05.15.24 Just feeding daily, sometimes twice; today, fed with Hort-Bloom @ 2.7 GRMS Per Gal and Horti-Cal @ 2.5 GRMS Per Gal. 🗓️05.16.24 Just feeding daily, sometimes twice; today, fed with Hort-Bloom @ 2.7 GRMS Per Gal and Horti-Cal @ 2.5 GRMS Per Gal. 🗓️05.17.24 Just feeding daily, sometimes twice; today, fed with Hort-Bloom @ 2.7 GRMS Per Gal and Horti-Cal @ 2.5 GRMS Per Gal. ╰⊰🔹╰⊰´🔹⊱╮🔹╰⊰🔹╰⊰🔹STRAIN INFORMATION🔹⊱╮🔹╰⊰🔹╰⊰🔹╰⊰🔹⊱╮ Powerful West Coast genetics Ghost Train Haze x Pellezino combine to create this exceptional Cali weed strain Ghost Train Power. This exceptional strain exhibits dominant terpenes like Limonene, Linalool, and Terpinolene that produce a tempting citrus, herbal, floral scent with a fruity taste that is a flavor sensation. Ghost Train Power comes from powerhouse parentage and produces extreme levels of THC up to and over 30%, and when you consider her substantial production, this strain is unprecedented. The potent effects are surreal and intoxicating, and the harvests are a treat. Indoors, this beauty will reward you with a generous 650 gr m2 of tantalizing frosted bud; outdoors, she can produce more than 1 kilo per plant. Ghost Train Power is USA genetics that will live up to its acclaimed reputation and have you coming back for more over and over again.
Likes
16
Share
@Prop207
Follow
Touch it sticky fingers. Smell is amazing, fire!!! 30 G 20 Micro 10 B 15 cal 15 sb
Likes
69
Share
@Natrona
Follow
*****DIVINE SEEDS ***** *****FRACTAL***** SPONSORED GROW Week 5 This week 5/5-5/11 Germination April 6. Vegetation Week 1 water only Week 2 water only Week 3 added recharge and TPS1 increased ppm to 570. Week 4 continues with recharge and TPS1. I added Fox Cal mag increasing ppm to 685 - 805. Week 5 TPS1 9ml/gal Recharge 5 ml/gal Fox Cal-mag 5 ml/gal This was an exciting week for my ladies. It started out with the usual feed and defoliation and training. With my upcoming vacation, I am going to be hardening off these ladies to relocate to their outside location. I checked the expected weather forecast for the week. Looks good to start hardening off. Partly cloudy with temps in the low to mid 80s just like in their tent. So that’s good. Night temperatures were in the 50-60s. This is much cooler than what they are used to as our house is at 73. They need to get used to what mother nature will provide. Our summers are hot and humid. I had planned to bring the plants back in the sunroom but since conditions were similar, I let them stay outside every night. And every night but 2 it rained. I did not water or feed nutrients this week. I am attempting the scrog technique on all plants. I am using a peony cage as the support structure. The cages are about 2 feet high. This may not be enough side or top support as she grows and may have to resort to tomato cages. Took pics May 6, 9, & 11 Fractal is a vigorous gal and gets very bushy after defoliation & training. Divine Seeds recommends keeping its Fractal profile wider and flatter. To achieve this, I am aggressively pinning down each branch coming off the main stalk while defoliating regularly to keep the top open. Today she has a beautiful, mounded canopy showing multiple bud sites. Her nodes are close but starting to spread out a bit. They remain even and balanced. Thank you @DivineSeeds Thanks for the visits, likes and comment, I appreciate all the plant love💚. Have fun & love what you grow 💚 Sending you good vibes of love, light and healing 💫 💫Natrona 💫 ***FRACTAL*** Rating: Fractal is an especially psychedelic strain that Divine Seeds developed for esoteric and mystical experiences, meditation and creativity. A potent and vivid landrace variety from Southern India was crossed with a sticky leaning Indica (mostly Afghani), then Skunk #1 joined this company. Their progeny underwent multiple selection experiments, until its massive built, resin concentration and hypnotizing powers reached an ultimate level. The result is now known as Fractal – resinous, spicy and productive. Best choice for commercial growing: a compromise between bigger yields and fast ripening! A great source of hashish that has something incense-like to its musky smell. Indoors expect 170 сm height, out of doors plants grow up to 200 сm. Fractal fits for all types of growing environment: grow boxes, hydroponic or aeroponic setups, outdoor plantations, balconies, terraces and green houses. For more weight it is recommended to train Fractal plants to broaden their structure and limit their vertical growth. For that purpose use ScroG or SoG, LST, FIM or topping, supercropping or mainlining – there are no limitations for the strain itself, but certainly low-stress methods are recommended to smaller samples. Fractal has an inherent immunity to molds and insect pests, but since its colas are thick, protect your plants from stale air. Also during rainy weeks your plantation may need to be covered. Ready for outdoor harvesting in October. Big and dense buds the color of olive, hunter green heavily coated with crystals. Whole Fractal buds smell hashy and earthy, while cedar and fruity hints are noticeable on breaking. Measure your portion carefully: the potency is above average! With Fractal you experience an overall stoning that either keeps you put or slows your motion down, also vertigo is possible. However, in moderate dosage the impact is described as a pleasant sensation of well-being and placidity. Perfect for spending a night by a bonfire without talking, therefore is more often enjoyed as a solo smoke. Efficiently relieves muscle spasms and seizures, inflammations, combats insomnia and increases your appetite. Up to 3 hours of altered state of mind can be expected. Best consumed at night time. Pots: 5gallon Air pots Soil Fox Farm Happy Frog Amended with worm castings, dolomite lime and mychorihiza Seeds provided by Divine Seeds Divine Seeds breeding company The link to Fractal Feminized Seeds Fractal - Divine Seeds breeding company The link to Fractal Auto Seeds Auto Fractal - Divine Seeds breeding company ================================= Equipment: AC Infinity CLOUDLAB 844 – Advance Grow Tent 48”x48”x80” CONTROLLER 69 PRO – Grow Tent Controller CLOUDLINE LITE 6 - Inline Fan 6" IONBOARD S44 – LED Grow Light Board 400W CLOUDRAY S6 – Oscillating Circulation Clip Fan Carbon Filter 6” Nutrients: Total Plant Solution TPS1 Canopy Signal
Likes
12
Share
These girls are getting close to harvest. Calyx closed & swelling up, most of the pistills turned orange/brown & are starting to curl in. Waiting on delivery of a new 60× microscope to check the trichomes , buds are very frosty. Have stopped feeding nutrients & have started flushing with plain ph'd water. Then reduced watering to twice a day so there not taking in as much moisture before harvest. Probably starve them of water completely for a couple of days to bring out more moisture, & apparently THC. A lot of smell about them. Very sticky!
Likes
25
Share
@BudHaks
Follow
Week 13! I have decided to stagnant harverst her in two parts as there is fresh growth in her lower half that the light cannot reach and the top buds are mature now and at the optimal cloudy trichomes I'm looking for are present. Look at all those trichomes heavy leaf and buds! She is heavy and smelling amazing with hints of fruit and cookies. I will also be flushing her next week! What an amazing journey, coming to an end!
Likes
14
Share
@Loco11
Follow
Bin sehr glücklich über das Resultat. Die Sorte ist mir richtig gut gelungen, nicht nur vom ertrag auch die Kompaktheit der Buds. Ich glaube mein nächstes Projekt wird Runtz Muffin sein. :))
Likes
Comments
Share
@TyRun
Follow
Started to feed gradually (that was wrong, should start to feed at least 3ml/l of base) from 1ml/l to 4ml/l at the end of the week 3. Runoff EC was very low (0.4EC) and pH too high (6.7) Adding more nuts solve this, now it is more stable (EC 0.8 pH 6.2). Still using CalMag foliar but got some burns, applied it too early (20 min before lights off) Anyway the growth is vigorous.
Likes
21
Share
@Siriuz
Follow
This one is for you Apollo @sweetseeds Check it out! Thanks for all my brother Peace and good vibes Til 127 Days and ahead after partially harvest Will show you guys soon Stay tuned
Likes
70
Share
All feeds with nutes use either a whole ratio or combination of "Veg Mix" and "Bloom Mix"concentrates DILUTED in water until a total ppm of add in is reached using a (Total Dissolved Solids)TDS Meter measured in PPM (parts per million). The "Veg Mix" concentrate will eventually be added in smaller ratios and "Bloom Mix" concentrate what will eventually replace the "Veg Mix" concentrate entirely with the ppm and ratios listed when I feed. Veg mix recipe is on week 3. Bloom Mix recipe is on week 5. Day 77/7 PPFD is between 470 and 700 again with little vertical growth after all the HST/LST over last few days. I used 15 minutes of UV mid day with 15 minutes (30 total) IR before and after main light timers. VPD was better today with 73F/55%RH/40%ILV Turning off the humidifier was the key this time. All in all she looks fine for the day, I am hoping to get the new tent up tomorrow and will see if I can get her to fully stretch out again to allow each cola enough space to bulk with light and wind Day 78/8 Tent conditions improved today because I was able to fix the sizing issue - I now have a Spider Farmer Pro-Grade Grow Tent, 48"x48"x80" VPD is harder to get the humidity down in so I may have to put in a second de-humidifier or open another vent port, currently I have a 6" ILV pulling against a 4" open air vent hole. I would have tinkered with it a bit more but I was getting close to lights out so I left it. VPD for most of the day was 74F/55%RH/40%ILV in the Mars Hydro Tent. I current have 68F/65%RH/40%ILV for overnight. Lights are about the same as yesterday with 80% power I am getting 470 to 700 ppfd from 42" from soil to light and since the plant is about 20" that gives her about 22" leaves to light. Im currently using the same 2x4 Bloom Plus LED light centered in the tent but I have another 2x4 Bloom Plus scheduled for delivery on Monday or Tuesday. - She had 20 minutes of UV and 30 minutes total of IR (15/15) I am hoping this allows her to spread out and receive full light/air on each cola - So I also placed 2 more fans in the tent at plant level to help circulate the air better. Day 79/9 PPFD was little changed since yesterday as was vertical growth (I think she's trying to spread back out again.) - ppfd was between 480 and 710 with 25 minutes of UV and 30 of IR (18/18) VPD was a struggle to get under 60 - I now have 2 de-humidifiers in teh tent witht the ILV set to kick up anytime she hits 62%RH. Mostly though I was able to get it down to 55 to 61 - Temps are easier to control with 4 fans and the ILV triggers. Day 80/10 VPD was 74 to 77F today with humidity still pushing 62% with 2 humidifiers today when the tent was closed. Otherwise I was able to reduce the humidity to 35 to 45% with the door open long enough (in MN fall with temps are around 30s) So I had my door open for a bit today because I installed my second Bloom Plus XP2500 LED lights today and had to reroute most of the wires. PPFD after completion ranged from 550 at lowest to 750 - I only did 20 minutes of UV since yesterday was her first day at 20. I also increased the IR to 30/30 with 15 before and after lights on/off - so a total of 1 hr total at lights on/off Feels dry so I plan to feed tomorrow morning with about 3 gallons of 6.3ph de-chlorinated tap water feed in a 10:90 ratio of Veg/Bloom mix Day 81/11 I fed her today with 3 gallons of 6.4ph de-chlorinated tap water with a 25:75 ratio of Veg/Bloom mix at 500ppm. Runoff showed a ph of 6.5 and 1750 ppm. VPD was more stable today after I opened another open air vent hole on another side of the side. 76F/55%RH with ILV on auto when needed. PPFD ranged from 550 to 750 again with the lights at about 42 and she's now 34x28wide x22 tall, so about 20 inches from lights. Still only hit her with 20minutes of UV and an hour of IR with 30/30 at main light schedule with 15/15 before and after. Day 83/13 Almost two weeks since flip. Turning the lights down yesterday seemed to help, little to no new burn progression on those identified yesterday and new growth with no new burn. Will continue to monitor. Nute transfer seems to also slowed progression with the leaves only turning brown where they yellowed before and little to no new yellowing. VPD doing better as well - I turned the heat down just slightly so now avg temps are about 73 - 75F and humidity under 59%RH with the OLV set to auto for limit controls PPFD most unchanged after I started the day with a little LST on the center cola that was getting ahead of the rest. I also released teh last branch being tied - now all colas are simply help by the tomato rings. Once it was leveled PPFD was 750 at highest and about 550 for the lowest.
Likes
71
Share
@Krisis
Follow
04/26/24. Orchids. Going into week 6. I have #1 just where I want her. #2 isn’t exactly how I’d like but much MUCH better than where she was. A little uneven still, but I can’t complain. She’s still VERY dark and I’m emphasizing an issue on her leaf which I still haven’t figured out if it was caused from nutrient burn or ph. Either way, still haven’t fed either girls since the tea ONE time awhile back. #1 has lightened up a LOT and looks about right to me now. Transplanted both on the 21st, I believe it was. I’m not sure if I’ll flip them to flower now or wait until they’re 8 weeks. Guess we’ll see. Until next time
Likes
39
Share
@MisterZ
Follow
Bonjour les amis. Cette semaine les fleurs ont pris du volume et surtout l'odeur est est nettement plus forte. Dès que j'ouvre mon placard une odeur terrible se répand. Ma femme est terrifiée. C'est la dernière semaine théorique mais il faut encore quelques jours, je pense récolter la semaine prochaine. Les 2 grandes plantes ont une forme et un volume normal, je vais les libérer de leurs liens très rapidement. La petite semble encore plus chargée en résine. Je n’arrose que à l'eau pH ~6.8. Led 80%. Bon grow à tous. M.
Likes
29
Share
Week two shes a fast grower right behind my gc feed made me foliar spray and the second fan has been excellent getting me sum plant ties and a carbon filter weds this my first grow so can any one help me wit a question how early can you start lst ion want to start too early or wait too late and also like. And i like back follow and i follow back all that good stuff peace good peeps
Likes
41
Share
@MaxMo8
Follow
I transferred it to a half-gallon pot and I mixed the organic fertilizer with the soil.
Likes
9
Share
Man oh man,without noticing I just found a new favorite strain man.Love the strong fruity and floral aroma coming from these flowers I can't wait to grow her Photoperiod version,it's been a pleasure to grow her,unfortunately I lost her four sisters,I would love to get a lot of full jars of this amazing haze 👃🔝🔝💚
Likes
6
Share
This week is sunny 🌞 . Started giving Big bud. Watering 2-3 liters per plant.
Likes
5
Share
@BigGGrows
Follow
This was 2 weeks into flush...only molasses and TPS signal was given; mixed within tap water ph 6.0.
Likes
39
Share
@Velk1
Follow
expect high super high levels of frost , be sure to start your training early on this plant and defoliation of lower growth will help out a lot, with care you can have beautifull massive grapewalker kush's glad ivesaved some for the vault , thanks for sticking around for this journey now for the next =)0
Likes
6
Share
@GrowHero
Follow
Hi guys growing is going good, i think i can enjoy them ciured for December, smell is good, already can smell lemon cheese mixture its ver skunk, chocolate has most trichome production and the durban is the biggest plant. Lemon cheese is weak for feedeings i made little overdose on franko and ia had to flush, it feels good right now but i think i lost one cola (( a didnt cuted it but a cant see the difference in growing and the color is also yellowing, can anyone recommend something what to do with that cola, thanks guys, Happy growing
Likes
4
Share
@Ensign420
Follow
|»» LOG DISCLAIMER: Not intended as a grow guide. Grow log entries are usually posted 3 weeks later and are for my learning reference. ««| Introduction - Week 26 Summary - Ensign's log, stardate 17608.3, Wow what a week! Drying is always pretty simple and been checking daily. Buds are drying nicely and terps are smelling pretty dank!! Most of the week has been in the veg tent with tissue culture! Mixed another batch of establishment media and took proper explant cuttings. Also super-cropped the mothers to even out the canopy. Ahh yea! Getting hyped for trim day next week! Next week will also be the last week for this grow log, but am already planning out the next cycle. Anyways! Onwards to next week! [START OF WEEK 26] ========================================================== ---------- [ 4x4 MAIN TENT ] ---------- Heady OG BX1 #1 [Round4 ~Wk19] - WEEK 26 - Dry Wk1 ----------- [ 3x3 VEG TENT ] ------------ TKO - WEEK 09 - Full Veg Gorilla Goat #1 - WEEK 05 - Full Veg Heady OG BX1 - WEEK 09 - Full Veg Garlic Budder OG#1 - WEEK 05 - Full Veg 10/13/25 → 10/19/25 This Week's Estimated Goals ---------------------------------------------------------------------------------------------- DLI: ~0 mol/m²/d PPFD: ~0 μmol/m²/s VPD: ~1.5 kPa This Week's Meter Readings & Averages ---------------------------------------------------------------------------------------------- Light On/Off: 00:00 - 00:00 | Wattage: ~000.0W [LV00] Distance From Canopy: ~00” DLI: ~0.00 mol/m²/d PPFD: ~0 μmol/m²/s VPD: ~1.17 kPa Soil %: [47.4, 34.1, 35.0, 55.7, 43.7, 43.6, 44.0, 43.3] ========================================================== Day 01 - Monday - 10/13/25 - Total Days: 183 ----------------------------------- Daily Averages ~[+01:00] - Temps: 78.8°F [26.0°C] - Humidity: 64.4% - VPD: 1.19 kPa - Soil %: [49, 34, 35, 57, 44, 44, 44, 42] ----------------------------------- - [22:05]: Night check on the 4x4 tent. --- Ca-Caw!! Looking great! --- Heady OG BX1 #1 is drying along and no signs of mold. Also airflow and RH is stable and within the 60-70% range. --- Getting stoked! Trim day is 9 days away! - [22:09]: Checked the Ecowitt soil moisture sensor data: ------------------ [ 4x4 MAIN TENT ] --------------- ------ 48% - [CH01 FT » G30 - Heady OG BX1 #1] ------ 35% - [CH02 FB » G30 - Heady OG BX1 #1] ------ 35% - [CH03 BT » G20 - TKO] ------ 56% - [CH04 BB » G20 - TKO] ------------------ [ 3x3 VEG TENT ] ---------------- ------ 46% - [CH05 BL » GR7 - TKO] ------ 40% - [CH06 BR » GR7 - Gorilla Goat #1] ------ 40% - [CH07 FL » GR7 - Heady OG BX1 #1] ------ 40% - [CH08 FR » GR7 - Garlic Budder OG#1] --------- Veg: 38% - 45% | Flower: 45% - 55% --------- General: 30% [Dry] «| 45 - 60% [Moist] |» 70% [Wet] - [22:18]: Checked the 3x3 veg tent. --- Looking healthy in the veg garden! --- All of the vegging mothers are looking great and the canopy is starting to even out. --- Also clones look healthy and no need to water yet. --- The stems, err, I mean, explants, don’t show any signs of contamination. --- Staying positive, glad the growth media is sterile and the overall procedure was successful. --- Anyways! Plan to create more establishment media and cut proper explants soon! - [22:21]: Checked the humidifiers. --- Tanks are still full and no leaks found. Day 02 - Tuesday - 10/14/25 - Total Days: 184 ----------------------------------- Daily Averages ~[+01:00] - Temps: 76.9°F [24.9°C] - Humidity: 64.8% - VPD: 1.11 kPa - Soil %: [46, 34, 35, 56, 43, 43, 44, 43] ----------------------------------- - [21:44]: Night check on the 4x4 tent. --- Looking good in the dry tent! --- Heady OG is drying along and humidity levels look great! --- Nothing to do but maintain and wait to trim in 8 days! - [21:55]: Checked the Ecowitt soil moisture sensor data: ------------------ [ 4x4 MAIN TENT ] --------------- ------ 45% - [CH01 FT » G30 - Heady OG BX1 #1] ------ 34% - [CH02 FB » G30 - Heady OG BX1 #1] ------ 35% - [CH03 BT » G20 - TKO] ------ 56% - [CH04 BB » G20 - TKO] ------------------ [ 3x3 VEG TENT ] ---------------- ------ 41% - [CH05 BL » GR7 - TKO] ------ 40% - [CH06 BR » GR7 - Gorilla Goat #1] ------ 47% - [CH07 FL » GR7 - Heady OG BX1 #1] ------ 46% - [CH08 FR » GR7 - Garlic Budder OG#1] --------- Veg: 38% - 45% | Flower: 45% - 55% --------- General: 30% [Dry] «| 45 - 60% [Moist] |» 70% [Wet] - [21:59]: Checked the 3x3 veg tent. --- Looking healthy and growth is raging! --- All mothers are looking beautiful! --- Clones are getting taller and looking healthy! --- Gorilla Goat #2 needs watering. Let’s go Ensign! - [22:03]: Here is the starting initial watering range: ------ Gorilla Goat #2 » 255.4g → 300.3g and was last watered 4 days ago. --------- General Solo Range: [Dry] «| [Initial Cup Weight] + ~55-100g |» [Wet] --- Took the starting weight before watering, ------ Gorilla Goat #2 » 230.8g --- While on a scale, --- Gently misted her straw mulch with RO water. --- Tried to keep the top growth dry. --- Misted 5-10 sprays. Waited a few seconds, then misted again. --- Made sure to reference the watering weights. --- Repeated this process until the cup weighted at least 300g. --- There was no runoff. - [22:23]: Took the saturated weight after watering, ------ Gorilla Goat #2 » 345.7g --- Marked the watering date on the side of the cup. Also marked the saturated weight on the back. --- Placed her back into the tent. --- Decided to train and super-crop both clones. --- Bent the taller branches to lower the canopy. - [22:38]: Checked the humidifiers. --- Tanks are still full and no leaks found. --- Onwards Ensign! Day 03 - Wednesday - 10/15/25 - Total Days: 185 ----------------------------------- Daily Averages ~[+01:00] - Temps: 75.6°F [24.2°C] - Humidity: 63.8% - VPD: 1.09 kPa - Soil %: [48, 34, 35, 56, 44, 43, 44, 42] ----------------------------------- - [+01:33]: Quick night check on the 4x4 tent. --- Looking great in the dry tent! --- Also starting to smell dank! --- 7 more days until the big trim! - [+01:37]: Checked the 3x3 veg tent. --- Veg garden is healthy and growth is green! --- Both the Heady OG BX1 #1 and TKO mothers will need another topping soon. --- Clones in the propagation tray also look great and no need to water. --- The explant media is still looking sterile with no signs of contamination. --- Easy night in the garden. Nice! - [+01:40]: Checked the humidifiers. --- Tanks are still full and no leaks found. --- Okay! Tomorrow plan to dive back into tissue culture and prep more growth media. --- Onwards Ensign! Day 04 - Thursday - 10/16/25 - Total Days: 186 ----------------------------------- Daily Averages ~[+01:00] - Temps: 74.6°F [23.7°C] - Humidity: 62.2% - VPD: 1.11 kPa - Soil %: [46, 34, 35, 56, 43, 44, 44, 45] ----------------------------------- - [11:41]: Alright! Back to tissue culture and time to start another batch of establishment media! --- Took the plant growth regulators out of cold-storage (my fridge). ------ [ » SMOKES A BOWL « ] --- While the products warmed up, gathered the necessary supplies and setup my workstations. --- Currently, focusing on: ------ PHASE 01 » ESTABLISHMENT --------- » DAY 01 » MEDIA - PART 01 - Mixing the growth media --------- » DAY 01 » MEDIA - PART 02 - Sterilization of media and tools [via autoclaving] --- Going to use the same establishment formula, but doubling the yield. --- Also using RO water instead of distilled water. --- Here's the establishment media formula: --- [» VER.0001 |» INITIAL TROPICAL PLANTS FORMULA |» 0.5L (500mL) RO WATER «] ------ MS [Muashige & Skoog] --------- » 2.22g ------ Sucrose [Cane Sugar] --------- » 15g ------ BAP [6-Benzlaminopurine | Cytokinin] --------- » 0.5mg » 0.5mL » 500μL ------ IBA [Indole-3-Butyric Acid | Auxin] --------- » 0.05mg » 0.05mL » 50μL ------ AGAR [Jelling Agent] --------- » 3.5g ------ PH [Potential Hydrogen] --------- » 5.7 --- [» 1mg/mL CONCENTRATION ratio | 1mg = 1mL | 1mL = 1000μL «] - [12:59]: Time to prep the growth media! --- Made sure to turn OFF the lung-room's oscillating fan. --- Filled a measuring cup with 400mL of RO water. --- Dropped a clean magnetic mixing bar into the measuring cup. - [13:05]: Placed the measuring cup on the magnetic stirrer. --- Turned the unit ON and have the unit on LOW. - [13:11]: Using a precision scale (sensitive to 0.01g) along with a micro-pipette (1000μL capacity along with tips) and disposable (100mL) weigh boats, ------ Added 2.22g of MS [Muashige & Skoog] ------ Added 15g of Sucrose [Cane Sugar] ------ Added 500μL of BAP [6-Benzlaminopurine | Cytokinin] ------ Added 50μL of IBA [Indole-3-Butyric Acid | Auxin] ------ Added 3.5g of AGAR [Jelling Agent] ------ Then filled the measuring cup to the 500mL line before covering the top with plastic wrap. --- Alright! - [13:46]: Let the media mix on the magnetic stirrer for a bit. --- Have the unit set to LOW with a steady vortex. ------ [ » ~20 MINUTES LATER « ] - [14:09]: Okay! Time to pH the establishment media! --- Gently removed the bottom cap of the AC Infinity PH Meter PRO [AC-PHM7]. Placed the cap in the storage case for later. Covered the top with plastic wrap (KCL solution still inside the cap). --- Swirled the probe in a cup of RO water to rinse off the storage solution. --- Shook the excess water out and wiped the unit with a clean paper towel making sure all mineral buildup was removed (kept away from the very tip of the probe). --- Temporarily placed the meter back into the cup of RO water. --- Removed the plastic wrap of the establishment media. - [14:13]: Using the AC Infinity PH Meter PRO [AC-PHM7], --- Took the establishment media's initial pH reading. --- The pH was at 5.14 --- Using the micro pipette, ------ Added pH Up solution. --- Made sure to let the media solution mix for a bit before checking for pH readings. - [14:21]: Adjusted the media's pH until it stabilized to 5.58 --- For this batch, tried to go for a range of 5.4 to 5.8 pH. --- Also glad that I did not need to add PH down. - [14:43]: Poured the pH'd establishment media into separate polypropylene containers. --- Made sure to re-mix the media solution between container fillings. --- Ended up splitting the media solution into 12 containers. ------ 8x » 125mL Polypropylene Bottles [with screw cap lids] ------ 4x » 236mL (0.5pt) Glass Mason Jars [with polypropylene jamming lids] --- Have the lids of all vessels loosely on and set each aside for later autoclaving. --- Also filled 12 empty polypropylene bottles with RO water and placed the lids on loosely (4 bottles are re-used). - [14:58]: Prepped the tools for sterilization. --- Took a new 5.25in x 10in sterilization pouch and added the following tools: ------ 3x stainless steel forceps ------ 3x stainless steel scissors --- Before placing into the pouch, wiped each tool with a paper towel sprayed with 70% isopropyl alcohol. --- Sealed the bag and marked the date. --- Time to autoclave everything in the pressure cooker! --- Filled a Presto 23qt-Pressure Cooker with 12 cups of RO water. - [15:06]: Added a few aluminum foil balls to the bottom of the pressure cooker. --- Placed the first rack on top of the foil. --- Made sure the rack was level and stable resting above the water. --- Gently placed the containers of media into the pressure cooker and onto the first rack. Lids are still loose. --- Made sure to give space for each container and kept them away from the sides of the pressure cooker. --- Placed a second pressure cooker rack on top of the containers of media. --- Placed the containers of RO water onto the second rack. Lids are still loose. --- Placed the third rack on top of the containers of water. - [15:16]: Lastly, placed the sterilization bag of tools on top of the third rack. --- Took the pressure cooker lid and made sure the release vent was clear of debris before placing it on. --- Sealed and secured the lid. --- Pressure vessel has been sealed! --- Alright! Time to sterilize! --- While keeping the vessel level and straight up, moved the sealed pressure cooker to the kitchen for heating. - [15:23]: Placed the pressure cooker onto a butane-gas stove. --- Turned the stove ON and set it to HIGH. ------ [ » ~20 MINUTES LATER « ] --- Once steam was venting out of the release vent, --- Placed the metal rocker onto the vent. --- Shortly afterwards, the pressure top-lock sprung up to indicate the vessel was under pressure. --- Then the pressure gauge started to rise. ------ [ » ~10 MINUTES LATER « ] --- At 15psi, the metal rocker started to rock! - [15:56]: Turned down the stove down to LOW. --- Set a timer for 15 minutes and began monitoring the pressure gauge. --- Maintained the 15psi by making minor adjustments to the stove. ------ [ » ~15 MINUTES LATER « ] - [16:12]: Turned the stove completely OFF and waited until the pressure cooker's top-lock dropped down which indicated that pressure levels were safe to open. ------ [ » ~40 MINUTES LATER « ] --- Once the pressure cooker was at safe levels (0psi) and the top-lock was down, - [16:48]: Moved the pressure cooker into the lung room. --- The pressure cooker was still quite hot so was careful to keep the vessel straight up and level during transport. --- Used towels for insulation. --- Rested the hot pressure cooker onto a stack of 5-gallon buckets covered with layers of towels and folded paper bags. --- Gently opened the pressure cooker and set the lid aside. - [16:57]: While wearing nylon gloves, sprayed my hands with 70% isopropyl alcohol. --- Gently removed the bag of sterile tools placed it onto a Pyrex dish. --- Removed the top rack and set it aside. --- Then one container at a time, --- Gently tightened and secured the lids of each bottle of sterile water before placing onto the Pyrex dish. --- Removed the middle rack and set it aside. --- Then one container at a time, --- Gently tightened and secured the lids of each bottle and jar of sterile media before placing onto the Pyrex dish. --- Throughout the entire process, kept the gloves on and sprayed my hands regularly with 70% isopropyl alcohol. --- Decided to store all the bottles in the Pyrex dish. - [17:16]: Have the dish resting on a shelf in the lung room. The jars of media are set right next to the Pyrex dish on a towel. --- To prevent dust, covered everything with towels. --- Done for now and will check on the growth media tomorrow. --- If all goes well, should be taking new explant cuttings in a couple days! - [17:39]: Night check on the 3x3 veg tent. --- Looking beautiful and healthy in the veg garden! --- All moms are getting bushy and getting pretty close to the grow light. --- Since I plan to take explant cuttings soon, not going to top or train quite yet. --- Clones also looking healthy and seem unaffected by the super-cropping. Nice! - [17:57]: Checked the Ecowitt soil moisture sensor data: ------------------ [ 4x4 MAIN TENT ] --------------- ------ 45% - [CH01 FT » G30 - Heady OG BX1 #1] ------ 34% - [CH02 FB » G30 - Heady OG BX1 #1] ------ 35% - [CH03 BT » G20 - TKO] ------ 55% - [CH04 BB » G20 - TKO] ------------------ [ 3x3 VEG TENT ] ---------------- ------ 43% - [CH05 BL » GR7 - TKO] ------ 45% - [CH06 BR » GR7 - Gorilla Goat #1] ------ 42% - [CH07 FL » GR7 - Heady OG BX1 #1] ------ 44% - [CH08 FR » GR7 - Garlic Budder OG#1] --------- Veg: 38% - 45% | Flower: 45% - 55% --------- General: 30% [Dry] «| 45 - 60% [Moist] |» 70% [Wet] - [17:59]: Checked the 4x4 main tent. --- Ca-Caw!! I got Headies! --- Wow! Heady OG BX1 #1 is drying along beautifully and she is smelling dank! --- Also no signs of mold and RH levels look stable! --- 6 more days until the big trim! - [18:11]: Checked the humidifiers. --- Tanks are still full and no leaks found. --- Wow what a day! --- Still gots more to do! --- Let’s go! Let’s grow! --- Onwards Ensign! Day 05 - Friday - 10/17/25 - Total Days: 187 ----------------------------------- Daily Averages ~[+01:00] - Temps: 76.0°F [24.4°C] - Humidity: 62.0% - VPD: 1.16 kPa - Soil %: [48, 34, 35, 55, 44, 44, 44, 42] ----------------------------------- - [22:57]: Night check on the 4x4 tent. --- Ca-Caw! Headies is smelling dank! --- RH levels are getting a bit dry, but are okay. --- Wow buds are frosty with trichomes! --- With 5 days until trim day, getting stoked! - [23:04]: Checked the Ecowitt soil moisture sensor data: ------------------ [ 4x4 MAIN TENT ] --------------- ------ 47% - [CH01 FT » G30 - Heady OG BX1 #1] ------ 34% - [CH02 FB » G30 - Heady OG BX1 #1] ------ 35% - [CH03 BT » G20 - TKO] ------ 55% - [CH04 BB » G20 - TKO] ------------------ [ 3x3 VEG TENT ] ---------------- ------ 46% - [CH05 BL » GR7 - TKO] ------ 40% - [CH06 BR » GR7 - Gorilla Goat #1] ------ 45% - [CH07 FL » GR7 - Heady OG BX1 #1] ------ 50% - [CH08 FR » GR7 - Garlic Budder OG#1] --------- Veg: 38% - 45% | Flower: 45% - 55% --------- General: 30% [Dry] «| 45 - 60% [Moist] |» 70% [Wet] - [23:11]: Checked the 3x3 veg tent. --- Looking healthy in the veg garden! --- Mothers are getting bushy and tall! --- Super-cropped and trained the taller branches down to lower the canopy. --- Plan to take tissue culture cuttings tomorrow so glad there are plenty of tops to choose. Still deciding on which mother to preserve next. --- Clones in the propagation tray look healthy! --- The original Garlic Budder #2 clone needs watering. - [23:26]: Here is the starting initial watering range: ------ Garlic Budder OG#2 » 256.4g → 300.2g --------- General Solo Range: [Dry] «| [Initial Cup Weight] + ~55-100g |» [Wet] --- Took the starting weight before watering, ------ Garlic Budder OG#2 » 258.9g --- While on a scale, --- Gently misted her straw mulch with RO water. --- Tried to keep the top growth dry. --- Misted 5-10 sprays. Waited a few seconds, then misted again. --- Made sure to reference the watering weights. --- Repeated this process until the cup weighted at least 300g. --- There was no runoff. - [23:40]: Took the saturated weight after watering, ------ Garlic Budder OG#2 » [000.0]g --- Marked the watering date on the side of the cup. Also marked the saturated weight on the back. --- Placed her back into the tent. - [23:45]: Checked the humidifiers. --- Tanks are still full and no leaks found. Day 06 - Saturday - 10/18/25 - Total Days: 188 ----------------------------------- Daily Averages ~[+01:00] - Temps: 76.8°F [24.9°C] - Humidity: 60.3% - VPD: 1.25 kPa - Soil %: [47, 34, 35, 55, 44, 44, 44, 47] ----------------------------------- - [15:19]: Decided to decrease the VPD level a bit. --- Within the AC Infinity App, --- Changed the schedule name from 'Flower [12/12]' to 'Drying [0/24].' Oops. --- For the Main Tent [4x4] controller, --- Adjusted the 'Drying [0/24]' Schedule for the exhaust fan. ------ Decreased the VPD LOW trigger value from 1.5kPa to 1.4kPa --- Adjusted the 'Drying [0/24]' Schedule for the humidifier. ------ Decreased the VPD target value from 1.5kPa to 1.4kPa --- This should increase the relative humidity a bit and will maintain a 60-65% range - [16:59]: Evening check on the 3x3 veg tent. --- Wow the veg garden is raging with healthy growth! --- Even with the lower veg temps, growth has been perky and bushy! --- The TKO mother has been looking a bit on the purple-side, but I plan to increase the temps back after trim day. - [17:23]: Okay! Time to continue the tissue culture journey! --- Checked on the sterilized media, water, and tools. --- Ooo yea! The growth media in the glass jars have solidified nicely! --- The media in the bottles also look great! Found only one that did not gel properly. --- Hmm. The sterile water bottles are not looking sterile. Unlike the first batch (using distilled water), each RO bottle had tiny white particles floating in the water. --- I think this was due to the water source. The RO water used was from the plant reservoir. For the next sterilization, will try using water straight from the tap. Will discard the entire batch and try again later. - [17:34]: Anyways! Time to cut and sterilize another batch of explant cuttings. --- Using the similar protocols as last time, but with a few changes. --- Instead of distilled, using reverse-osmosis (RO) water. --- Also simplifying the workflow and will not be using the sterile water. --- Only taking cuttings from one cultivar. --- Today, attempting to preserve Heady OG BX1 #1 --- Unlike the last attempt, going to be cutting apical nodes and will leave all leaf growth on. --- Last attempt was more for monsteras and not cannabis. - [17:35]: Made sure the lung room's oscillating fan was OFF during the entire process. --- Put on a fresh pair of nitrile gloves. --- Okay! Let's grow Ensign! - [17:47]: Filled a glass beaker with 180mL of RO water. --- Using a micro-pipette, ------ Added 20mL of Clorox bleach --- Mixed the solution. - [17:52]: Poured the bleach solution into a glass mason jar. ------ Added 1 drop of Dawn dish soap. --- Dropped a magnetic mixing rod into the jar before setting it onto the magnetic stirrer. --- Turned the unit ON and set it to a low setting. --- Placed a polypropylene lid loosely on. - [18:02]: Rinsed and filled the glass beaker with 70% isopropyl alcohol. --- Filled another glass beaker with RO water before adding a drop of Dawn dish soap. Mixed the solution. --- Okay! Time to take the cuttings! --- Using a clean pair of trimmers, - [18:09]: Gently cut two clone cuttings from the Heady OG BX1 #1 mother. --- Stripped each cutting down to 2-inch apical nodes making sure to leave about 0.5 inch of stem growth for planting. ------ Prepared a total of 2 nodal cuttings. --- Dropped the nodal cuttings into the cup of soapy water. --- Swirled the cuttings in the soapy water for a bit. --- Opened the jar containing the 10% bleach solution. --- Using clean tweezers, --- Took each cutting out of the RO water and carefully submerged it into the beaker of 70% isopropyl alcohol for about 30 seconds. --- Then transferred the cutting from the isopropyl alcohol straight into the jar of bleach solution. --- Once both cuttings were in the jar, sealed the top with the polypropylene lid. - [18:23]: Flipped and set the entire bleach jar upside down onto the magnetic stirrer. --- Started using the magnetic stirrer. --- But the cuttings were getting hit by the bar so ended up turning the unit OFF. --- Instead, made sure to swirled the bottle every few minutes to agitate the cuttings. --- For a proper sterilization, the cuttings should be agitated in the hypochlorite (bleach) solution for at least 20 minutes. --- While waiting for the explants to sterilize, prepped the still air box. - [18:39]: Unfolded and placed a Safloga still-air box onto my desk. --- Thoroughly misted the inside of the air box with 70% isopropyl alcohol making sure to coat the entire chamber. --- Then isopropyl misted and placed the following items inside of the still air box, ------ x1 » Jar of Establishment Media ------ x1 » Bottle of Establishment Media ------ x1 » Glass-Bead Sterilizer ------ x1 » Roll of Plastic Wrap [pre-cut] ------ x1 » Sterilization Bag Containing: --------- x3 » Stainless Steel Forceps --------- x3 » Stainless Steel Scissors --- Made sure to fully coat the outside of the tool bag and each of the containers with 70% alcohol. --- The bag had a torn corner (Oops), so made sure to spray the inside with a few mists of isopropyl alcohol. --- For the glass-bead sterilizer, ------ Wiped the entire unit with isopropyl alcohol. ------ Before filling the unit with the included beads, misted the heating chamber with a spray of isopropyl alcohol. ------ Misted the glass beads again with a spray of isopropyl alcohol. --- Set the cleaned glass-bead sterilizer into the still air box. - [19:02]: Still air box fully prepped for explants! --- Okay! Explant nodal sterilization complete! --- While still wearing gloves, --- Misted the outside of the explant jar with 70% isopropyl alcohol before placing it into the still-air box. --- Turned the glass-bead sterilizer ON. --- Made sure to re-seal the chamber. - [19:05]: Okay! Finally time to start the tissue culture transplant! --- Let's go Ensign! --- Sprayed my gloved hands with 70% isopropyl alcohol (also put on a pair of cloth arm sleeves), --- Placed my hands through the arm holes and into the still air box to begin the process. --- Started by laying out my initial workspace: ------ » Far Left Quadrant » Jar of Sterile Establishment Media ------ » Far Center » Bottle of Sterile Establishment Media ------ » Far Right Quadrant » Glass-Bead Sterilizer ------ » Mid Center » Bleach Jar with Explant Cuttings [Main Workspace] ------ » Near Left Quadrant » Empty [Trash Area] ------ » Near Right Quadrant » Bag of Sterile Tools & Roll of Plastic Wrap --- Opened the bag of tools and placed the forceps and scissors into the pre-heated glass-bead sterilizer. --- Set the bag in the trash area (near left quadrant). --- Loosened the lids of both containers of sterile media but did not remove the lids. The lids were resting on top and could easily be lifted. --- Also took lid off of the bleach jar and gently set it on the table. --- Took the jar of sterile media and set it in the center of my workspace (to the right of the bleach jar). --- Using my left hand, took a set of scissors from the glass-bead sterilizer and gently cut the bottom of the first cutting. --- Once the bottom cut was made, placed the scissors back into the glass-bead sterilizer. --- Using my left hand, lifted the lid off of the jar of sterile media and inserted the trimmed end of the cutting straight into the growth media (using my right hand). --- Covered the jar with the lid and placed the forceps back into the glass-bead sterilizer. --- Tighten the lid of the jar and set it aside. ------ [ » REPEATED THE ABOVE PROCESS FOR THE BOTTLE OF GROWTH MEDIA « ] --- Once the last cutting was transferred from the bleach jar into the sterile media, --- Turned the glass-bead sterilizer OFF. --- Cleaned up my workplace and placed the scrap stem tips and bleach jar out of the way (near left quadrant). - [19:28]: Wrapped the lid of each explant container with plastic wrap before setting it in the center of the workspace. --- Explant transplant completed! - [19:59]: Using a label printer (Brother DT410), made a set of labels for each container: ------ Heady OG BX1 #1 | 04.24.25 | Photo | Reg ------ Formula: v0001 | ExBatch: 0002 | Lot: 01 | Pod: 01 ------ Establishment Media | Sealed On: 10/18/25 --- Opened the still air box. --- Then one container at a time, took an explant out and wrapped the lid with a label. --- Set the labeled containers onto the propagation tray (in the 3x3 veg tent). - [20:07]: Done! ------ The explants are around 37 μmol/m²/s which gives a DLI of 2.40 mol/m²/d under an 18/6 light cycle. --- Will check daily for contamination. --- Ca-Caw!! Ahh yea! --- Heady OG BX1 is now officially my first true attempt at cannabis tissue culture! --- Using this new workflow, I may try reusing the TKO media. Do plan to take new cuttings soon. May even try using the liquid media. --- Shout out to microclone and Bill Graham! His 'Tissueponics' video contains tips and tricks of the trade that have straight up changed the way I think of DIY cannabis tissue culture. --- Plan to further refine my process and will continue to refine the workflow with each attempt. - [20:15]: Checked the Ecowitt soil moisture sensor data: ------------------ [ 4x4 MAIN TENT ] --------------- ------ 54% - [CH01 FT » G30 - Heady OG BX1 #1] ------ 34% - [CH02 FB » G30 - Heady OG BX1 #1] ------ 35% - [CH03 BT » G20 - TKO] ------ 55% - [CH04 BB » G20 - TKO] ------------------ [ 3x3 VEG TENT ] ---------------- ------ 43% - [CH05 BL » GR7 - TKO] ------ 48% - [CH06 BR » GR7 - Gorilla Goat #1] ------ 42% - [CH07 FL » GR7 - Heady OG BX1 #1] ------ 45% - [CH08 FR » GR7 - Garlic Budder OG#1] --------- Veg: 38% - 45% | Flower: 45% - 55% --------- General: 30% [Dry] «| 45 - 60% [Moist] |» 70% [Wet] - [20:56]: Checked the 4x4 tent. --- Ca-Caw! Looking great my ladies! --- Humidity levels are still a bit on the dry side, but still okay. - [21:08]: Checked the humidifiers. --- Tanks are still full and no leaks found. --- Wow what a day! --- Oh yea, 4-more days until trim day!! Ca-Caw! Let’s go! Day 07 - Sunday - 10/19/25 - Total Days: 189 ----------------------------------- Daily Averages ~[+01:00] - Temps: 76.7°F [24.8°C] - Humidity: 59.4% - VPD: 1.27 kPa - Soil %: [48, 35, 35, 55, 44, 43, 44, 42] ----------------------------------- - [07:08]: Quick morning checked on the 3x3 veg tent. --- The veg garden is healthy and perky! --- All moms and clones are healthy and raging with growth! --- Both Heady OG BX1 #1 explants also look alive and green! - [19:26]: Night check on the 4x4 tent. --- Ca-Caw! We got MENDO DOPE in the trunk! --- Wow terps are getting loud and buds are drying along nicely! --- Looking frosty and coated in trichomes! --- Three more days until trim day!! - [19:33]: Checked the Ecowitt soil moisture sensor data: ------------------ [ 4x4 MAIN TENT ] --------------- ------ 46% - [CH01 FT » G30 - Heady OG BX1 #1] ------ 35% - [CH02 FB » G30 - Heady OG BX1 #1] ------ 35% - [CH03 BT » G20 - TKO] ------ 54% - [CH04 BB » G20 - TKO] ------------------ [ 3x3 VEG TENT ] ---------------- ------ 40% - [CH05 BL » GR7 - TKO] ------ 43% - [CH06 BR » GR7 - Gorilla Goat #1] ------ 47% - [CH07 FL » GR7 - Heady OG BX1 #1] ------ 41% - [CH08 FR » GR7 - Garlic Budder OG#1] --------- Veg: 38% - 45% | Flower: 45% - 55% --------- General: 30% [Dry] «| 45 - 60% [Moist] |» 70% [Wet] - [19:35]: Checked the 3x3 veg tent. --- Vegging along beautifully in the garden! --- Mothers are getting taller and probably could train, but will wait until tomorrow. --- Clones and explants also look healthy and green! --- Gorilla Goat #2 needs watering! - [19:44]: Here is the starting initial watering range: ------ Gorilla Goat #2 » 255.4g → 300.3g and was last watered 5 days ago. --------- General Solo Range: [Dry] «| [Initial Cup Weight] + ~55-100g |» [Wet] --- Took the starting weight before watering, ------ Gorilla Goat #2 » 244.9g --- While on a scale, --- Gently misted her straw mulch with RO water. --- Tried to keep the top growth dry. --- Misted 5-10 sprays. Waited a few seconds, then misted again. --- Made sure to reference the watering weights. --- Repeated this process until the cup weighted at least 300g. --- There was no runoff. - [20:04]: Took the saturated weight after watering, ------ Gorilla Goat #2 » 345.6g --- Marked the watering date on the side of the cup. Also marked the saturated weight on the back. --- Placed her back into the tent. - [21:41]: With a few days before the big trim, decided to sample a few buds! --- Cut and trimmed branch for sampling and wow she’s got terps! --- Buds are dense and have a gassy diesel funk! Ca-Caw!! Wow! --- Without even curing, pretty sure she’s the one! --- Plan to grow out another cycle (in clone of the same pheno), but I think I found my female for my first breeding project! - [22:01]: Checked the humidifiers. --- Tanks are still full and no leaks found. --- Ahh yea! Three more days until the big trim! --- Also next week will be the last for this log. --- But already stoked for the next! --- Planning on popping more seeds and continuing the pheno hunt for another female! --- Since I lost TKO this harvest cycle, plan to grow a clone cutting of the same pheno (#2). --- As for seeds, popping more regulars and going to attempt to grow some of Mr. Grow-It’s Chillout OG! --- Got a pack of F3s and am stoked to give them a try! --- Also going to sprout some beans of Dead Ops OG from Zaza Genetics! --- Chillout OG, Dead Ops OG, and another round of TKO! Let’s go! Let’s grow! --- Hunters of the dank! Ca-Caw! --- Anyways! --- Onwards to next week! [END OF WEEK 26]