


Likes
Comments
Share


@MrJones
Follow
OSS Cheese XXL
🔹⊱╮🔹╰⊰🔹 GROW Started 03.10.24 INFORMATION 🔹╰⊰´🔹⊱╮🔹
🌞Environment - Maintaining 80F and 65%Humidity
🌾Training - These ladies are Pruned and Defoliated and ready for flower.
⚱️2-Gallon 📊6.2 PH
💧 Feeding - Using Horti Grow 8-11-21, Bloom 5-15-26, Late Bloom 0-24-26, Cal 12-0-0
🌞Medic Grow Smart 8 760 Watts
🕷️ IPM - CannControl from Mammoth and Mosquito Bits as needed
🔹⊱╮🔹╰⊰🔹 GROW Started 03.10.24 INFORMATION 🔹╰⊰´🔹⊱╮🔹
🌞Environment - Maintaining 80F and 65%Humidity
🌾Training - The girls are recovering from last week's Pruning and Defoliation,
⚱️2-Gallon 📊6.2 PH
💧 Feeding - Using Horti Bloom and Horti Cal 12-0-0
🌞Medic Grow Smart 8 760 Watts
🕷️ IPM - CannControl from Mammoth and Mosquito Bits as needed
🔹⊱╮🔹╰⊰🔹 PLANT UPDATES 🔹╰⊰´🔹⊱╮🔹
📝 Notes - On 🗓️05.11.24, This week, we are on Auto-Pilot and just Fertigating as needed; the ladies are stacking up nicely, and the leaves have grown back not sure if it is the genetics or the new nutrients; I would like to see less and will evaluate if more defoliation will be needed.
📝Fertigation injects fertilizers into an irrigation system to supply dissolved nutrients to crops.
🗓️05.11.24 Just feeding daily, sometimes twice; today, fed with Hort-Bloom @ 2.7 GRMS Per Gal and Horti-Cal @ 2.5 GRMS Per Gal.
🗓️05.12.24 Just feeding daily, sometimes twice; today, fed with Hort-Bloom @ 2.7 GRMS Per Gal and Horti-Cal @ 2.5 GRMS Per Gal.
🗓️05.13.24 Just feeding daily, sometimes twice; today, fed with Hort-Bloom @ 2.7 GRMS Per Gal and Horti-Cal @ 2.5 GRMS Per Gal.
🗓️05.14.24 Just feeding daily, sometimes twice; today, fed with Hort-Bloom @ 2.7 GRMS Per Gal and Horti-Cal @ 2.5 GRMS Per Gal.
🗓️05.15.24 Just feeding daily, sometimes twice; today, fed with Hort-Bloom @ 2.7 GRMS Per Gal and Horti-Cal @ 2.5 GRMS Per Gal.
🗓️05.16.24 Just feeding daily, sometimes twice; today, fed with Hort-Bloom @ 2.7 GRMS Per Gal and Horti-Cal @ 2.5 GRMS Per Gal.
🗓️05.17.24 Just feeding daily, sometimes twice; today, fed with Hort-Bloom @ 2.7 GRMS Per Gal and Horti-Cal @ 2.5 GRMS Per Gal.
╰⊰🔹╰⊰´🔹⊱╮🔹╰⊰🔹╰⊰🔹STRAIN INFORMATION🔹⊱╮🔹╰⊰🔹╰⊰🔹╰⊰🔹⊱╮
Cheese XXL cannabis seeds are a unique blend of Afghan Kush x Super Skunk, producing the most pungent dank weed. Cheese XXL is the third commercially available edition released by Original Sensible using and developing these Afghan and Skunk genetics. The first release of these genetics was their Skunk Afghani. The second improved version was Stinkin' Bishop, which had an enhanced and more potent THC content and was more intense in terms of smell. The third and improved release on a similar theme is this Cheese XXL, which has a similar THC content but an enhanced heavier yield. The smoke is incredible, with an outstanding flavor of pungent skunk and spicy, extra strong mature cheese created by the dominant terpene myrcene with its earthy solid scent accompanied by caryophyllene and pinene, which combine to create a peppery acrid cheesy odor. THC levels are exceptionally high in this Cheese strain, and the effect is well-balanced, developing mental and body relaxation with a remarkable alleviation of stress and depression.
The intense solid aroma starts early in the flowering period; if you're growing Cheese XXL indoors, you'll need plenty of ventilation to disperse these babies' stinky "road kill" aroma! Cheese XXL is a cheese strain suited to indoor setups and thrives outdoors well. These feminized marijuana seeds are incredibly resistant to mold and disease and produce a substantial harvest that professional and amateur growers can quickly achieve. These Cheese weed seeds are outstanding. Break open the buds ready for use, and you'll see why the stench will make your eyes water!
Cheese XXL from Original Sensible Seeds is a great choice to break into the commercial market of growing cannabis, so if you're looking to buy something special with extreme yield, potency, and flavor, Cheese XXL cannabis seeds are simply the best choice.

Likes
2
Share


@Boomdrawfyah
Follow
Foto 1 dia de germinación 05/06
Foto 2 dia 16 trasplante a maceta definitiva 21/06
Foto 3 1 semana después del trasplante empiezan a crecer .
A la glowstarz le hemos echado living rizos de terranabis un nuevo producto para enriquecer el sustrato y a las raices

Likes
3
Share


@zZzfromspb
Follow
это был первый запуск системы и тут была допущена ошибка слишком рано были высажены в систему на 3 день после сброса каски...

Likes
93
Share


@Roberts
Follow
Auto Opium has been making progress since her rough start. She got lst early in the week and some more today. She is looking really good this week. She is due for a solution change soon. Thank you Medic Grow, and Divine Seeds. 🤜🏻🤛🏻🌱🌱🌱
Thank you grow diaries community for the 👇likes👇, follows, comments, and subscriptions on my YouTube channel👇. ❄️🌱🍻
Happy Growing 🌱🌱🌱
https://youtube.com/channel/UCAhN7yRzWLpcaRHhMIQ7X4g

Likes
2
Share


@Albanymedicinalgarden
Follow
Skywalker rounding the corner. Harvested 8/7 @ Day 76 from sprout
Blueberry bulking up.
Glueberry og done stretching and bulking up now


Likes
20
Share


@Mr_nugs_lover_David
Follow
She's looking extremely healthy enjoying lactobacillus made by me and florians living organics full of 10 types of mycorrizae,humic and fulvic ácidas,aminoacids,vegetable hormones and beneficial fungus,also guanokalong extract which is also full of life man! She's just an organic happy girl in a soil full of micro life,thank you everybody peace ✌️ 💚 ❤️ 💛

Likes
32
Share


@Totogrowuk
Follow
Another week has gone by. She’s stacked pretty good and fairly dense buds. Be interesting to see if they fill out or frost up more. We shall carry on waiting it out. ✌️🏻👊

Likes
20
Share


@Excalibur
Follow
2nd October 2018 -
Day 99
Burn slows down
Third day of flush and she starts to thicken up.
Day 100 -
Sweet smell begins as she starts to mature.
Day 103 -
Begining to mture and dense.
Day 104 -
Water added and pH balanced 5.4
Day 105 -
Last week of Flush
Likes
9
Share

@ThatsmyGrow
Follow
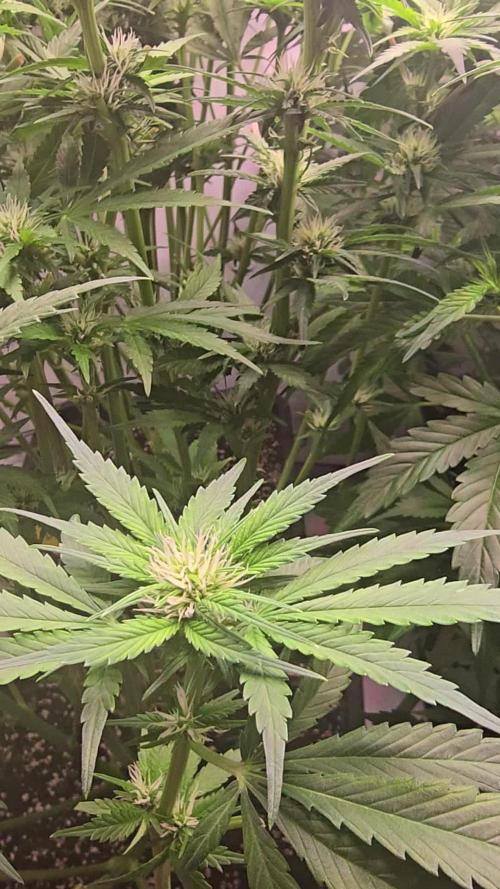
I've done lollipopping after 20 days of flowering, and I've now stopped using root fertilizer. I love how fat the buds have already become.

Likes
26
Share


@pifflestikkz
Follow
Day 29
29/07/24 Monday
Nice feeding today with De-chlorinated tap water pH 6.
Gave her 300 ml and she had a small run off.
Getting chunky in the stem now 💪💚
Day 31
31/07/24 Wednesday
De-chlorinated water pH 6 today with Plagron pk13-14 5ml to 5L
Plagron power buds 5ml to 5L
Used 300ml of the 5L solution.
I will be using these on water days from now on as they are advised to be used every irrigation.
We'll see how they perform 💪💚
Day 32
01/08/24 Thursday
Another feed today using de-chlorinated tap water pH 6, there now taking 300ml every evening.
Day 35
04/08/24 Sunday
END OF WEEK 😁
De-chlorinated tap water pH 6 today with Plagron products. 300ml each.
Had a issue with leaf invaders this week, I have treated and am checking every 48 hrs so far seems ok and not progressive.
All plants look great, very healthy, one of the Overdose is way behind and due to space maybe culled at flower I'll see how she gets on.
Likes
2
Share


@viggagrow
Follow
After a few days of supplementing with co2, the plants grew very quickly
Likes
25
Share


@MotherNaturesSon
Follow
Got environment mostly dialed in thanks to an additional cool air intake fan, can get 450w mh nice and close for good penetration. Beginning the process of Lst, I’ve wrapped some plant straps around the base of each plant to anchor them, and straps at the top of their stems, giving them a slight bend. I’ll slowly increase the bend over time in order to avoid possible damage. The Gelato OG seems quite vigorous compared to the Widow so far. Starting to bump up nutes, runoff @400ppm -10/28

Likes
28
Share


@Yamiii
Follow
Well i washed it together with one of my nuggz and maaaan the rosin ist damn tasty

Likes
16
Share


@sunshinegroww
Follow
Starting week 3 with some nice buds formation realy nice and compact plant need very little att
Likes
2
Share


@levensfiets
Follow
So there's a few things going on here.
First, im not entirely sure if this is amnesia. I started 3 grows at the same time and have forgotten to label them when i've repotted them. This is the most sativa out of the batch of 3 (others are girl scout cookies and monster skittlez) and its supposed to flower for 12 weeks or something like that.
However, this is week 7 of flower (or possibly 8, still finding it difficult to pinpoint that) and looking at the trichromes i have a feeling that she is ready for harvest.
I'm hoping you guys can help me out here - so theres two questions id like to ask:
- does this look like an amnesia fotoperiod plant? and,
- according to the trichrome shots : is she about ready for harvest?
thanks!

Likes
8
Share

@Growfather1
Follow
Hello everyone,
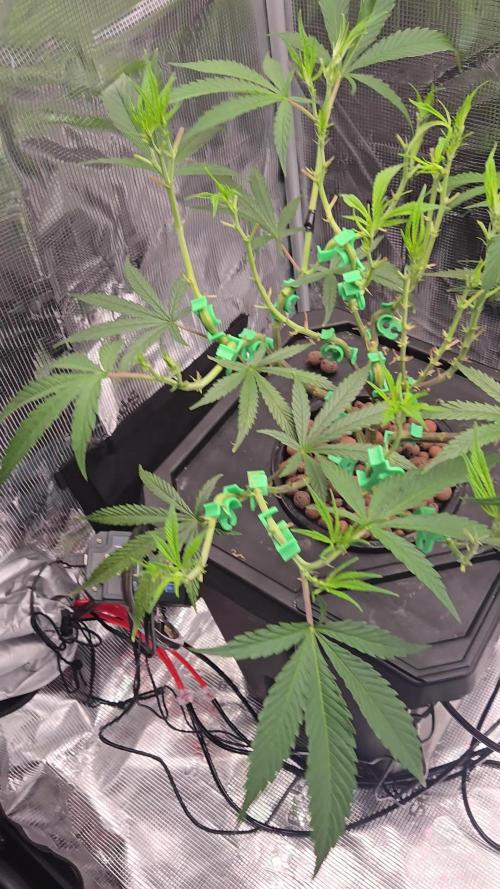
The plant is looking good for the roots i can't see the same, i see much new healthy roots but i see
leftovers from the rootrot.
I expect to go into flower next week first i need to setup a new tent for her.
Thanks for stopping by and have a nice weekend.
Growfather

Likes
19
Share


@Ezzjaybruh
Follow
Excellent strain from Gnostic
((Forum GSC x Black Raspberry Trainwreck) x Gorilla Wreck)
Gorgeous color on both of these - more so shined thru on the pheno 2.
Pheno 1 leaned more sativa as far as stretch and airyness of bud, structure of bud. Yielded 70 grams dry
Pheno 2 had insanely tight buds, more trich density.. terps a bit stronger on this one too. Raspberry shining thru
Likes
18
Share


Processing
Likes
13
Share


@Dunk_Junk
Follow
5cm vertical growth this week.
Flowers starting to plump up.
Likes
170
Share


@Master_weeda
Follow
Bonjour à tous les padawans et maîtres jedis
Quel plaisir mes amis tout y est dans ce diarie !
À par le rendement 😁 mais bon ce n'était vraiment pas le but car je me suis rendu la tâche encore plus difficile en tentant l'expérience solo cup challenge avec main-lining sur une autofloraison.
Merci pour tout vos compliment votre soutient et votre gentillesse.
Je me suis vraiment amusé et j'ai pris beaucoup de plaisir avec ce diarie, mais j'ai surtout beaucoup appris. Que la force soit avec vous 💪
Likes
4
Share


@Krissci
Follow
Day 4 - light LST training. This window is very small to Train correctly and not lost any main stems..the knuckle tends to solidify quite quickly and begins to swell if feed properly...making bending by the knuckle risky