Likes
Comments
Share
Processing
Likes
33
Share
@Darksoul
Follow
beginning of the sixth week of flowering and I see many fat flowers. The pistils are still white, but resin production is strong. The flowers themselves do not give off a very strong smell, but it leaves a very strong smell on the fingers, a very sweet citrus aroma
Likes
39
Share
@wolfvb
Follow
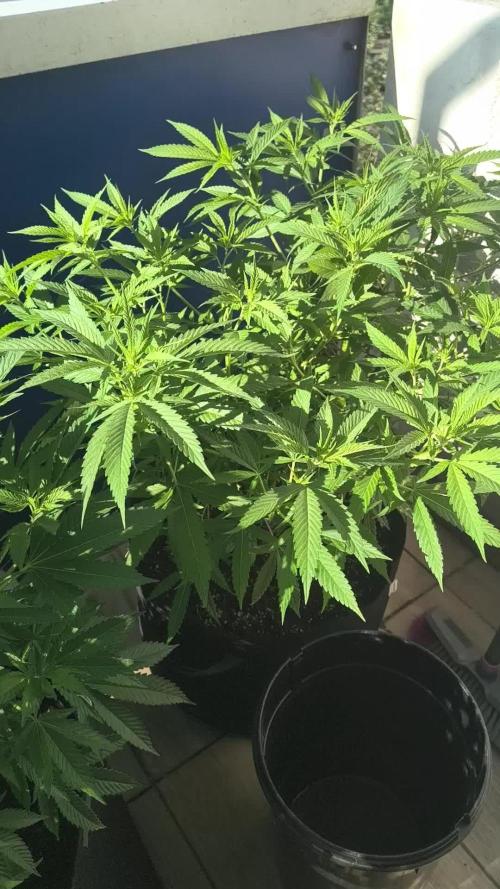
🌿 RS11 "C" - The Balcony Giant Keeps Reaching! πŸ™οΈπŸŒ² Let's go! Week 14 is here, and this girl just does not know when to stop stretching. She is an absolute monster out on the balcony right now! πŸ“ˆ The Details: Endless Vertical Stretch: She is still reaching for the sky! The internodal spacing is looking great, and she is building a super thick main structure to support all that height against the wind. Lush Canopy: Just look at those close ups the fan leaves are absolutely massive and praying hard to the sun. The foliage is a deep, vibrant green with zero signs of pest damage or nutrient issues. She is completely thriving in the outdoor elements. πŸƒ Pre-flower Ready: We are getting right to that transition point. The tops are looking healthy and tight, and she is prepping to shift gears and start throwing out some serious pistils soon. 🌸 πŸ’§ Next Steps: With her being this incredibly tall, wind support is still the number one priority. I'll just keep her well-fed, make sure she is securely tied down against any strong balcony gusts, and wait for the real flower show to start. She is looking like a total beast! Let's keep it growing! πŸŒ±πŸ’¨
Processing
Likes
5
Share
Missed this week somehow. Will try to get some more pics or just comment for info
Likes
2
Share
@Ninjabuds
Follow
The Bubble OG plants are looking really good. They're all pretty big and have a similar structure. It'll be fun to see how they develop their own personalities as they keep growing. Well, another year has come and gone. Yesterday was New Year's Eve, and I want to wish all of you a happy and healthy 2025. May this year bring you all the things you've been wishing for. Let's make this the best year yet!
Likes
19
Share
@Little_E
Follow
Day- 22 Repotted and fed them ph water that read 6.35. Fed 1ml of ph down with 1 gallon of water. Gave each plant a half gallon of the ph water. Day- 23 Added another half gallon of ph water to both plants. I think they were being underwatered. Or not watered thoroughly. We will see how they look tomorrow at 3. Expecting a big growth spurt. May have to look into topping them. Day- 24 I’ve topped both plants. I assume I did it correctly so we will see how that goes. Blacked out the windows in the room. Opened the door and now have a fan blowing all the hot humid air out. I’m thinking that will cool the room a lot and bring down internal tent temps. Day- 25 Ended up trying to do some LST got the biggest leaves on the bottom tied back and the top main two where I topped them. I’m going to water them again today. 1/2 gal each of ph water. Waiting to see how much run off I get. If not enough, I will do another half gallon. Day- 26 Soil is still moist so I will not be watering today. Day- 28 Last day of veg week 3! Video will speak for itself 😎
Likes
12
Share
3/23: I flushed the shortie for the first time today with about 10 gallons of warm filtered water and Sledgehammer. I'll flush her again in several days, let her dry back out a bit and stick her in the dark for a day before I sneak up on her with my lopping shears. I had let them go totally dry for a few days, so I fed the taller one with about 3/4 gallon including terpinator, signal, sweet & sticky, cal-mag, armor si, cha ching, tiger bloom, big bloom, and humic acid. This was her last feeding with any nutes, but I'll probably water her with some sweet & sticky and terpinator once more before flushing. 3/27: She wasn't completely dry yet, but I went ahead and flushed the shortie again today with about 8 gallons of warm filtered water. That's it for her....I'll give her another few days in the 'sun', and I've put a 12w MiracleLED blue bulb about 4 inches away from her, along with a 22w blue panel above her and the other shortie to make her think it's wintertime and maybe get her to put on a thicker coat of trichomes before she finishes. I gave the bigger one about 3/4 gallon including sweet & sticky, signal, terpinator, cal-mag and a little bit of cha ching. She'll get flushed for the first time once she's dry. This strain smells amazing!
Likes
12
Share
@reirrac1
Follow
The thickening is complete! Into the ripening stage we go smelling like sweet bubblegum candy and chemically skunk cologne. Although she ran into some N tox late veg into early flower, she didn’t seem to care! Extremely thick and relatively dense buds, next level trichome coverage, and lowers that look like some of my tops when I first started growing πŸ˜‚ Super satisfied with these results, and I have 4 more beans of this strain to run! She’s ready to chop now, but I want to allow my Cookie Monster (SamOG x FS) to finish drying first before harvesting this one.
Likes
16
Share
So the only thing I wish couldve been different about this grow is that I wish she didnt stutter/stall with the flowering in the begining. She shot out pistils but stalled for like 2 weeks or so. So if she wouldve been flowering for the full time, I thibk I couldve gotten better product(I'm still impressed) but I feel like I couldve done something better with her. 7/26 Day 2 of drying. Everything's still wet. The room is 75 Β°F with 50%humidity 7/27 day 3 of drying. Everything felt crispy and dense. Humidity was 40% and temp was 75F 7/29 weighed and put into jars with stems the weight was 51.2 grams and without stems 45.5 grams.
Likes
47
Share
Hello and thank you for stopping by, this is the start of week 4 of flower for this Sour Diesel Auto from Fast Buds. Everything seems to be going just fine still waiting on my beneficial nematodes to come in the mail so we can take care of the gnat larvae issue that I have going on. I am planning on getting some yellow sticky pads as well. This Sour Diesel Auto is starting to pack on some frost and some gassy smells. I am top dressing with 484 and worm castings every 7 to 10 days and watering with a pH of 6.5 of dechlorinated tap water. Nothing much else to say as everything is going smoothly with little to no effort thanks to my organic style of growing. Stay tuned for some more gassy frost next week! ✌️
Likes
8
Share
Hello Diary, The third week of vegetation has ended, which is also the beginning of flowering. As you can see in the photos, Milky Way has started to form flowers which is normal for automatics after 3 weeks of vegetation. Milky Way is developing nicely, it grew about 10 cm in a week and got a lot of new leaves. The bright spots that were on some of the leaves have disappeared, which is good news. I started to feel a slight smell, which also makes me happy :). This week I also did minimal defoliation, I removed only the lowest leaves to make it easier to water and improve the air flow through the plant itself. When it comes to watering, it is not frequent, about every 4 days. This week I added one tablet of Easy Grow Booster. The conditions on the farm are excellent I would say, the temperature is around 26 degrees while the humidity is around 50%. Here's how it looked this week. 16/05/2023 - Day 17. Watering. I prepared 7 liters of water, lowered the pH. to 6.0 and dissolved one Easy Grow tablet and with that amount of water I watered all three plants equally. 19/05/2023 - Day 20. First, I did a minimal defoliation, removing only the bottom leaves to make watering easier and improve air flow through the plant a bit. After that I watered all three plants. 20/05/2023 - Day 21. Measuring the height of the plants and taking photos at the end of the third week. Milky Way F1 - 27 cm. That's all for this week, see you soon. Thank you all for your support and comments.
Likes
11
Share
Flowering day 19 since the time change to 12/12. Hey all together πŸ˜€. This week she has developed beautifully ☺️. I poured it 3 times with 1.2 l this week. Tomorrow I will add the 2 g GHSC Powder Feeding Bio Bloom because the first blossoms are coming :-). I checked all the leaves thoroughly for pests or diseases and everything is fine ☺️. Next week I'll look at your roots as soon as the coconut is completely rooted. As every week, the tent was cleaned and the entire technology checked. The humidifier was also refilled every day πŸ‘. In the next few days I will remove the bottom shoots so that the energy doesn't end up being wasted in the small popcorn buds. I wish you a lot of fun with the update. Stay healthy πŸ™πŸ» and let it grow πŸ€ You can buy This Strain at : www.Zamnesia.com ☝️🏼☝️🏼☝️🏼☝️🏼☝️🏼☝️🏼 Strain Gelato clone from mother (Zamnesia ) ☝️ Genetics: Wedding Cake x Gelato x Gelato 33 Vega lamp: 2 x Todogrow Led Quantum Board 100 W πŸ’‘ Bloom Lamp : 2 x Todogrow Led Cxb 3590 COB 3500 K 205W πŸ’‘πŸ’‘β˜οΈπŸΌ Soil : Canna Coco Professional + ☝️🏼 Fertilizer: Green House Powder Feeding ☝️🏼🌱 Water: Osmosis water mixed with normal water (24 hours stale that the chlorine evaporates) to 0.2 EC. Add Cal / Mag to 0.4 Ec Ph with Organic Ph - to 5.5 - 5.8 .
Likes
7
Share
Hello Growers & Tokers! As you can see the girls are looking alive and well! Very healthy green colors so I went ahead and topped all of them. Some at the seventh, others on the sixth node. My plan is to have as an even canopy as I can but I know the two tallest ones are gonna give me some trouble. Looking to have about 6-10 colas per plant. That's about it for this week. Take care out there and happy growing!
Likes
8
Share
Likes
3
Share
This week went beautiful some lovely growth and looking healthy in the leaves nice and thick feeding at 400 PPM of expert nutrients line pH at 5.8 . She is doing very well and cannot wait for next week. Thank you for looking at my diary and always remember it's 420 somewhere πŸŒ±πŸ‘
Likes
14
Share
The plants completely stopped from going up, but the buds are getting bigger and the smell is stronger and stronger. I continued to play classic music for one hour everyday. Did anybody tried this before? Being the first experiment I am very happy with the results so far.
Likes
30
Share
Hello Diary! This time on the "Farm" there are two new strains from Royal Queen Seeds, Watermelon Auto and Purple Punch Auto. In this diary we will dedicate ourselves to Watermelon. πŸ˜€ I would like to thank James of the Royal Queen Seeds for sending me these strains. πŸ™ LET'S START FIRST WITH THE FARM SET-UP: Box - Secret Jardin DS120W 120x60x178 Lights - MIGRO 200+ Ventilation - Blauberg Turbo - E 100 Filter - Primaklima filter PK 100/125 Fan - Oscillating Koala Fan Humidifier - Beurer LB 45 Soil - BIOBIZZ Light - Mix Pot - 11L AirPot Seed - Royal Queen Seed Nutrition - BioBizz and RQS Organic nutrition A few words about Watermelon Automatic. The breeders from RQS set out with the intention of crafting a strain that lights the taste buds on fire. To achieve such a tantalizing terpene profile, they selected two of the most flavorful parent strains available: Tropicanna Cookies and Lemon OG. Both of these varieties are packed full of limonene, myrcene, and other fruity and earthy molecules. Watermelon Automatic emerged with a genetic makeup of 75% indica, 20% sativa, and 5% ruderalis. The speedy autoflowering strain managed to inherit all of the tasty terpenes from her ancestors. These are the characteristics, we will now see what it will look like on my small farm. LET THE DIARY START OFFICIALLY: 14/01/2021. Planting. After cleaning the Farm (GrowBox), I prepared everything I needed. Soil is a Light-Mix from BioBizz, Air-Pot's, Organic Additives that I mix with soil. From the beginning of this hobby, I use only organic fertilizers. I used 11L pots, to which I added 50g Easy Boost Organic Nutrition, 10g Easy Roots Rhizobacter and 5g Easy Roots Mycorrhizza Mix to the soil and mixed everything well. After that I soaked the soil well with water, made a small hole, laid the seed inside and lightly covered it with soil. After planting is completed, they enter their new home. As I wrote earlier, in addition to Watermelon, there are two more Purple Punch Auto on the Farm to keep him company. The temperature in the Box at that time was 23 degrees and the humidity was slightly below 45%, so I will have to put humidifier to raise humidity. I set the lights 35cm from the pots as Migro recommends. 14 - 17/01/2021 I sprayed the surface of the soil with water a couple of times to keep the soil moisture at the surface. 17/01/2021 Watermelon Automatic sprouted. There was a seed coat left on the stalk so I had to remove it by hand, but a nice photo motif. 22/01/2021 I watered the plants with a small amount of water to which I only regulated p.H at 6.4. Farm: 24.7 degrees - 55% humidity I'm quite late with the publication of the diary, the reason is the large number of photos I take and then I need to find time to put everything in a pile, along with the notes and type everything nicely. No matter how much time I spend on the diary, it relaxes me and makes me happy. See you soon.
Likes
Comments
Share
All caught up. Transplanted into 3 gallon pots. Lightly watered with some calmag and recharge Roots were good and just about ready for the upgrade. No pics but I’ll keep this in mind for my next grow and take some. I know I looked on here and watched YouTube videos to see how was done and it has been very helpful