
Likes
Comments
Share


@BLAZED
Follow
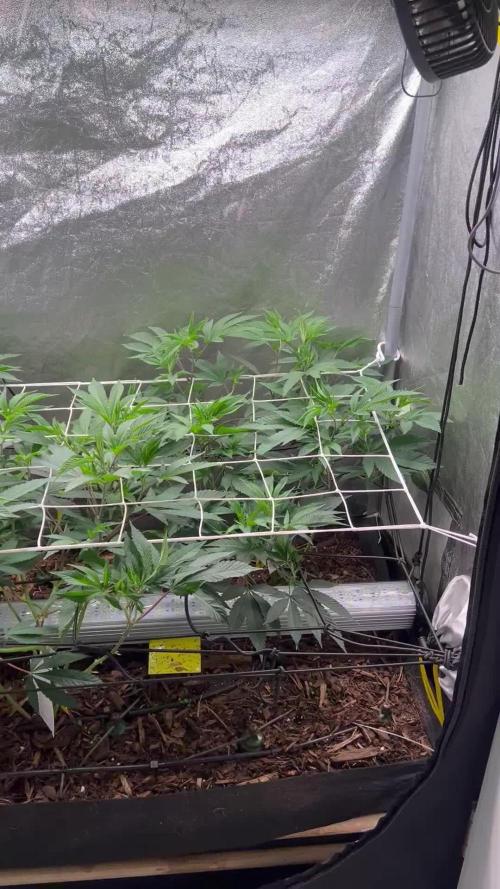
W16 (15-5 to 21-5)
15-5
Temperature: 27.4 degrees (lights on) 21.2 degrees (lights off)
Humidity: 58% (highest) 43% (lowest)
As its very hot outside i decided to turn down the light's strength to 50% so the temps will not be so high anymore.
Opened the reservoir for a couple of minutes.
16-5
Temperature: 26.7 degrees (lights on) 20.5 degrees (lights off)
Humidity: 60% (highest) 47% (lowest)
Dry weight:
Kush #1: 4.9 kg.
Kush #2: 5.1 kg.
17-5
Temperature: 26.4 degrees (lights on) 21 degrees (lights off)
Humidity: 60% (highest) 51% (lowest)
No pictures.
18-5
Temperature: 26.7 degrees (lights on) 22.6 degrees (lights off)
Humidity: 56% (highest) 43% (lowest)
No pictures.
Dry weight:
Kush #1: 4.3 kg.
Kush #2: 4.6 kg.
19-5
Temperature: 27.5 degrees (lights on) 19.2 degrees (lights off)
Humidity: 59% (highest) 42% (lowest)
No pictures.
Opened the reservoir for a couple of minutes.
20-5
Temperature: 27.8 degrees (lights on) 21.8 degrees (lights off)
Humidity: 58% (highest) 44% (lowest)
No pictures.
21-5
Temperature: 27.4 degrees (lights on) 21.2 degrees (lights off)
Humidity: 58% (highest) 47% (lowest)
Dry weight:
Kush #1: 4.5 kg.
Kush #2: 4.9 kg.
Opened the reservoir for a couple of minutes. (Only watering the Gorilla Kush #1)


Likes
16
Share


@TerpTurtle
Follow
Hang dried for 3 weeks in tent. Goal was to be more patient with the dry & start cure hanging on branch in a tent, my dry tent ranges from 58-61RH & 64-69F


Likes
26
Share


@Growbody
Follow
I am very pleased to be the first to describe the cultivation of the “Kitsune Kush Automatik First Edition” variety from Zamnesia Seeds.
The URL of the strain is https://www.zamnesia.com/uk/11404-zamnesia-seeds-kitsune-kush-auto.html?tab=use-points
The Kitsune Kush Auto First Edition from Zamnesia Seeds comes in a very beautiful, elaborate packaging. The seeds are in a small glass bottle with a cork stopper. The kitsune cannot be purchased yet, you can only select them in the Zamnesia Tribe program. This makes the Kitsune very exclusive.
Day 98: The Kitsune Kush Automatic First Edition from Zamnesia Seeds is entering its final week. She's become a real beauty. The flowers are thick, sticky, and firm, and they smell very sweet. I read somewhere that organically fertilized plants don't need to be flushed, so I'll try it right away. All plants in the apartment received SF nematodes today to combat fungus gnats, and the lacewing larvae to combat tripe and various aphids are hanging exclusively in the cannabis.
Day 100: Here are the promised trichome pictures. As expected, there are hardly any clear trichomes left. The day after tomorrow is harvest day.
Now I'll tell you where I get my knowledge about the optimal activities for my plants. It's from "Aussaattage from Maria Thun 2025," ISBN number 978-3-928636-80-3, now in issue 63, which is now published by Maria Thun's son Matthias. You can also order it directly from thun minus verlag dot com, it's inexpensive, and it's even available as an app (I don't have it). Unfortunately I don't know if there is an English edition right now. You can ask me, if you have questions about the calender. The Aussaattage are based on the actual planetary events that everything on Earth is exposed to. So if you want to do something good for yourself and your plants, make sure your weed receives the right care at the right time.
With the code ZAMMIGROW2024 you get 20% discount on your order of Zamnesia seeds. 👍
Thank you for being interested in my progress. Check back if you want to see how things are going. 🙏😎
++++++++++++++++++++++++++++++++++++++++++++++++++++++++++++++++
Ich freue mich sehr, der Erste zu sein, der den Anbau der Sorte „Kitsune Kush Automatik First Edition“ von Zamnesia Seeds auf Growdiaries dot com beschreibt.
Die URL der Sorte lautet https://www.zamnesia.com/uk/11404-zamnesia-seeds-kitsune-kush-auto.html?tab=use-points
Die Kitsune Kush Auto First Edition von Zamnesia Seeds kommt in einer sehr schönen, aufwendigen Verpackung. Die Samen befinden sich in einer kleinen Glasflasche mit Korkstopfen. Die Kitsune können noch nicht gekauft werden, Sie können sie nur im Zamnesia Tribe-Programm auswählen. Das macht die Kitsune sehr exklusiv.
Tag 98: Die Kitsune Kush Automatic First Edition von Zamnesia Seeds geht in die letzte Woche. Sie ist eine richtige Schönheit geworden. Die Blüten sind dick, klebrig, fest und sie riechen sehr Süß. Hab wo gelesen, dass organisch gedüngte Pflanzen nicht gespült werden müssen, wird gleich ausprobiert. Alle Pflanzen in der Wohnung haben heute wieder SF-Nematoden gegen Trauermücken erhalten, und die Florfliegenlarven gegen Tripse und diverse Läuse hängen exclusiv im Cannabis.
Tag 100: Hier sind die versprochenen Trichomebilder. Wie vermutet sind kaum noch klare Trichome zu dehen. Übermorgen ist Erntetag.
Jetzt sag ich Euch mal, woher ich mein Wissen über die jeweils optimalen Tätigkeiten bei meinen Pflanzen beziehe. Es sind die "Aussaattage von Maria Thun 2025", ISBN-Nummer 978-3-928636-80-3, mittlerweile Ausgabe 63, die jetzt von Maria Thun's Sohn Matthias herausgegeben werden. Kann man auch direkt bestellen auf thun minus verlag dot com, kostet nicht die Welt und gibt's sogar als App (hab ich nicht). Die Aussaattage richten sich nach den tatsächlich vorliegenden planetaren Ereignissen, denen alles auf der Erde ausgesetzt ist. Wenn Ihr also Euch und Euren Pflanzen etwas Gutes antun wollt, schaut, dass Euer Weed zur richtigen Zeit, die richtige Zuwendung erhält.
Mit dem Code ZAMMIGROW2024 erhälst du 20% Rabatt auf deine Bestellung von Zamnesia Samen 👍
Vielen Dank, dass du dich für meine Fortschritte interessiert hast. Schau mal wieder rein, wenn du lust hast hier zu sehen, wie es weitergeht. 🙏😎


Likes
8
Share


@AustinRon
Follow
Week 9 - Flower 5
Sangria - by Twenty20 Mendocino
4Q 2022
Flower Week 5: Wednesday 01 March - Tuesday 07 March 2023
Start of Week: [ 2022-03-01, SA20 64:F:9:1]
End of Week:
[ 2023-03-07, SA20 70:F:9:7]
HeightWeekStart: [ 14, in]
HeightWeekEnd: [14, in]
Start Date: 28.12.2022 # Seeds Wet
Harvest Window: 17 - 27 March 2023, 79 - 89 Days
EnvironmentGermination
- LightDistance: [ 14.5, in]
- LightStrength: [911, 505, µmol/m2/s]
- Temp: [ 79, 85, °F]
- RH: [ 73, pct]
- HumidifierTrigger: [ 69, %]
Fertigation
(BioAg, Mammoth-P)
__________________________
Wednesday 01 March 2023
SA20 64:F:9:1
- BluMat dumped, Temperature lowered (Chilled Water), humidity stabilized. Showing water stress, expect to fade by tonight.
Thursday 02 March 2023
SA20 65:F:9:2
Friday 03 March 2023
SA30 66:F:9:3
- USB Fans Failing - either the connectors (Hate USB-B!) - rotating replacements. Need a long term solution.
Saturday 04 March 2023
SA20 67:F:9:4
- LightIntensity: [ 898, 549, µmol/m2/s]
- Replaced fan - charging two others. Minor defoliation to remove fans blocking mains.
- Pot still has MAJOR HEFT


Sunday 05 March 2023
SA20 68:F:9:5
- [ ] Refill Reservoir: [1.5, gal]
- [ ] Mammoth-P: [ 9, drops]
- [ ] Ful-Power: [ 30, ml]
- [ ] SLF-100: [7 .5, ml]
Monday 06 March 2023
SA20 69:F:9:6
- Still struggling w/ Fans
- Temp Reached 85 °F - Raised Fan to 4 (from 2)
- Set BluMat 1/2 pt back - Petiole droop. Let’s see if cooler better . . .
Tuesday 07 March 2023
SA20 70:F:9:7
- BluMats Dumped Overnight (1.5 Gal)
- Removed some fans blocking airflow
- No Humidifier Runoff
- Reduced Light to Reduce MAX TEMP
- LightStrengthPeakMin: [ 1031, 534, µmol/m2/s]
_____________________

Next week (Nominal Flower 10)
Wednesday 22 March 2023
SA20 71:F:10:1

Processing
Likes
4
Share


@Majormolasses
Follow
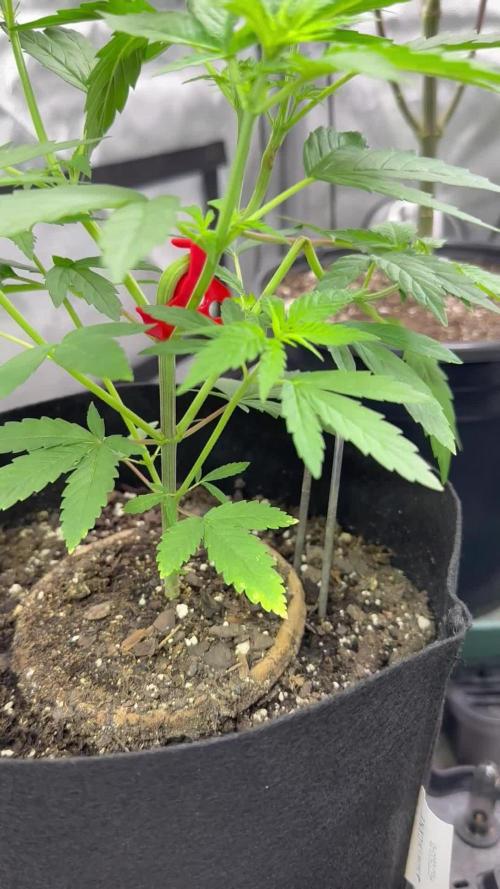
This little lady is a little slow growing but thats fine by me she’s doing a great job and looking very nice I’m splitting the main arms very nice and her under nodes are starting to really get the light and flourish how they should be :) 🌱 💜💜

Likes
8
Share

@Organic_G
Follow
Wachsen, seit gestern wieder CO2 am Start für letzte VEG Woche und dann ersten 3 Flower Wochen


Likes
25
Share


@Brebzzz
Follow
I top one to see What happened, i gave her 8 liter per week to respect the cycle dry/wet hôpe all its good
4/12 end of the 4 week
Begin of a good and weak smel
Likes
Comments
Share

Processing
Likes
11
Share


@MR_FASTBUD
Follow
Buds r getting fat ass fuck!, super excited! Keeping defol and lst going to ensure bud sites getting hit properly for growth.. the lights were only changed to 12/12 because i have three big ones in the same room.. bummer.. but still getting nice results from the auto


Processing
Likes
4
Share


Likes
43
Share


@MadeInGermany
Follow
Hey guys .
A wonderful week goes by with a super growth :-).
After I topped it for the first time last week, it recovered very quickly and showed great growth.
I don't think I will use topping again on the lady because I should slowly blossom with a few other women :-)
think it will be ready in the next 7-14 days for Flowering 👍.
This week it was poured 3 times with 1 l each time
(for nutrients, see table above).
The tent was cleaned and the health of all women was checked :-).
After the photos she was sprayed again with neem oil so that the last little tripse disappeared.
Even if you can't see any more trips I will spray it one last time next week to make sure :-).
I wish you all a happy new year 2022 ☺️.
Stay healthy 🙏🏻
👇🏼👇🏼👇🏼👇🏼👇🏼👇🏼👇🏼👇🏼👇🏼👇🏼👇🏼👇🏼
You can buy this Nutrients at :
https://greenbuzzliquids.com/en/shop/
With the discount code: Made_in_Germany you get a discount of 15% on all products from an order value of 100 euros.
👇🏼👇🏼👇🏼👇🏼👇🏼👇🏼👇🏼👇🏼👇🏼👇🏼👇🏼👇🏼
You can buy this strain at :
https://www.exoticseed.eu/
Water 💧 💧💧
Osmosis water mixed with normal water (24 hours stale that the chlorine evaporates) to 0.2 EC. Add Cal / Mag to 0.4 Ec Ph with Organic Ph - to 5.8 - 6.4
MadeInGermany

Likes
17
Share


@LockDownGrow
Follow
Really starting too fatten up and even signs of ripening I gave her one week at the beginning of this week and am now just feeding water,


