The Grow Awards 2026 🏆
Likes
Comments
Share
@Hou_Stone
Follow
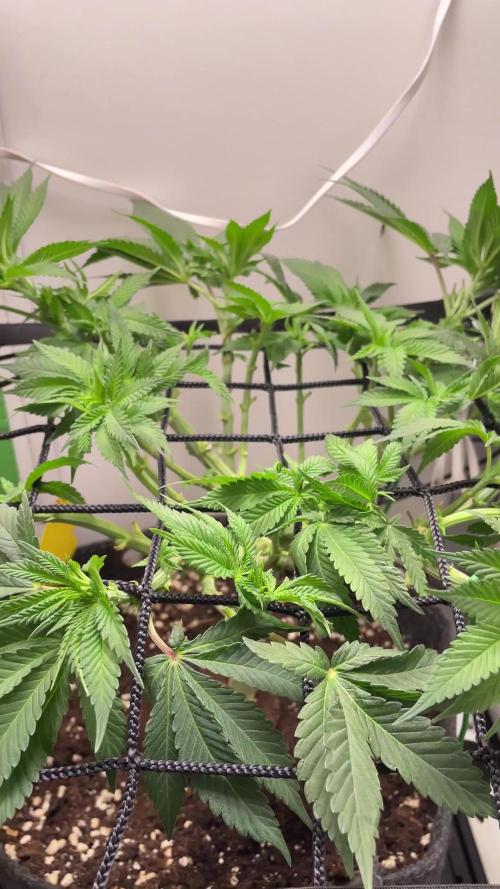
Let's start flowering! 🌞🙌 Just watering this week, i don't want to stress her out 😉 ------------------------------------------------------------------------- 💧Water & Nutrients🍄 : 💧I use tap water and let it sit for 24 hours in a container so that it rises to room temperature and some of the chlorine evaporates 🔥 💧At this water i add a bit of PH- to rise 6. And approximately every 14 days I add bioenhancer 🍄BioGrow and BioBloom were added to my soil as an amendment 🍄I added it a first time, after germination. With approximately 70 grams Bio Grow and 28 grams BioBloom 🍄 Then I added a second time while I was transitioning into flowering. With 65 grams BioBloom ------------------------------------------------------------------------- 📜Links : 🌱Persian Pie seeds 🥧🍋🍌: https://shop.greenhouseseeds.nl/feminised-cannabis-seeds/persian-pie/ Food for your plants 🔥🔥👍 https://www.greenhousefeeding.com/ 👨‍🚀My Instagram 🌱❤️️: https://www.instagram.com/hou_stone420/ ------------------------------------------------------------------------- ☮️Thanks for your visit ! ☮️💚
Likes
26
Share
! this is my current status, gonna upload my last veg weeks within the next week - got a bit busy around Spannabis - thank you for your understanding! 💚 Welcome to Bud Boutique Grow Diary - really appreciate all your love and support :) Dont forget to check out my other current grows! 🗓️ This Week: - Day 24: attaching once a week APTUS Foliar with Regulator & Nutrispray with the amazing CannaFogger by Petra Grow - Day 28: bud development is super beautiful and praying up Thank you for still staying with me 💚 ___________________________________________ --- 🌱 Strain (Sponsor) --- 🏷️ Blue Cinderella 99 FF by MSNL https://www.marijuana-seeds.nl/blue-cinderella-99-fast-flowering --- 🥗 Nutrients and Feeding (sponsored by APTUS: APTUS Ambassador) --- 🍸 APTUS: full nutrient schedule extreme -- Regulator, N-Boost, P-Boost, CaMg-Boost, K-Boost, Allin1 Liquid, Startbooster, Topbooster, Enzym+ every feeding -- Fulvic-Blast, NutriSpray as Foliar each once a week 🔗 https://aptus-holland.com/ --- ♻️ Grow Control (Sponsor) --- TROLMASTER: TENT-X + LM14 Light Adapter to dim/sunrise/sunset lights + Temp & rH Sensor all remote on App 🔗 https://www.trolmaster.eu/ --- 🚿 PetraGrow (Sponsor) --- CannaFogger Foliar Spray 🔗 https://www.petratools.com/product/petragrow-cannafogger-atomizer-new-mini-fogger --- 🏭 Grow Setup --- 💡LUMATEK Zeus Pro 600 * 🏠🌿 Indoor: Homebox 120x120x200cm (4x4) * 📐🌀 PrimaKlima exhausting Fan 1180m3/h (running on 60-80%) * 🌀 Can Light Filter 800m3/h & 1x Fanbox 1x Dyson fan for Air circulation 🔗 https://lumatek-lighting.com/zeus-600w-pro-29/ 🔗 https://primaklima.com/de/shop/ventilatoren-de/ec-ventilatoren/pk160ec-tc/ 🔗 https://canfilters.com/products/filters/ All Likes and comments are highly appreciated!!! 👨‍🌾 don't forget to check out my Instagram for daily educational content: budboutiquee - Bud Boutique
Likes
65
Share
@Dendegrow
Follow
Week 2 of the flowering phase flew by 🌱💨. Unfortunately, I may have overdone it with potassium or kept the water level too high – the classic signs of clawing leaves were evident. Thankfully, they seem to be recovering now and are back under control 💪🍃. My IR night experiment is showing clear results 🌌: The plants exposed to infrared radiation at night stretched significantly more. This might be especially beneficial for this indica-dominant strain as it leads to better canopy distribution, improved airflow, and reduced risks of mold and disease. Plus, the light distribution is much more efficient now, which I’m excited to see pay off. On the downside, my Orange Sherbert turned hermaphroditic 😔. It’s hard to pinpoint the cause – overfertilization seems unlikely since I’m using only organic nutrients. I suspect it might be linked to an E-field experiment I’ve been running. To confirm this theory, I’ll conduct a new grow with a similar strain next year to see if the electric field negatively impacts cannabis development. Stay tuned for updates! Drop a like and follow along for more grow insights 🌿✨. See you next week! Woche 2 der Blütephase ist wie im Flug vergangen 🌱💨. Leider habe ich wohl etwas zu viel Kalium gegeben oder den Wasserstand zu hoch gehalten – die typischen Anzeichen von Adlerkrallen waren sichtbar. Zum Glück scheinen sich diese jetzt zurückzubilden und sind wieder unter Kontrolle 💪🍃. Mein IR-Nachtexperiment zeigt bereits deutliche Ergebnisse 🌌: Die Pflanzen, die nachts mit Infrarotstrahlung bestrahlt wurden, haben deutlich stärker gestretcht. Das ist besonders bei dieser indica-dominanten Sorte wahrscheinlich von Vorteil, da es zu einer besseren Verteilung des Blätterdachs führt. Dadurch verbessert sich die Luftzirkulation, das Risiko von Schimmel und Krankheiten wird minimiert, und die Lichtverteilung wird effizienter. Ich bin gespannt, wie sich das weiter auswirkt! Leider hat meine Orange Sherbert gezwittert 😔. Woran das genau liegt, kann ich schwer sagen. Eine Überdüngung halte ich für unwahrscheinlich, da ich nur biologischen Dünger verwendet habe. Ich vermute, dass mein E-Feld-Experiment eine Rolle spielt. Um das zu bestätigen, werde ich nächstes Jahr einen neuen Durchlauf mit einer ähnlichen Sorte machen und prüfen, ob das elektrische Feld tatsächlich eine ungünstige Rückentwicklung der Pflanze verursacht. Bleibt dran, lasst ein Like da und folgt mir für weitere Updates 🌿✨. Bis nächste Woche!
Likes
4
Share
@Ensign420
Follow
|»» LOG DISCLAIMER: Not intended as a grow guide. Grow log entries are usually posted 3 weeks later and are for my learning reference. ««| Introduction - Week 15 Summary - Ensign's log, stardate 17541.8, Wow what an epic grow week! First week within a 12/12 light cycle and lots of training got done! Ca-Caw! Heady OG is blowing up with tops and been tucking to spread the canopy out a bit in the front left quadrant. But also started to let the right side grow through the netting. As for TKO, been training growth upwards as she stretches through the scrog netting. Towards the end of the week, her top soil sensor started to cut out and had to swap it out with a new one. Both the Heady OG and TKO clones have been transplanted into solo cups, but Heady OG is clearly struggling. To prevent the potential loss of the genetics, decided to take two more Heady OG cuttings. Started my first batch of lactobacillus (LAB) serum and am waiting for the water to activate. Also been researching about tissue culture and think this can be the solution to preserving genetics when space is limited. Anyways, Onwards Ensign! [START OF WEEK 15] ========================================================== ---------- [ 4x4 MAIN TENT ] ---------- Heady OG BX1 #1 [Round4 ~Wk8] - WEEK 15 - Pre-Bloom [Stretch Wk1] TKO [Round2 ~Wk13] - WEEK 15 - Pre-Bloom [Stretch Wk1] ----------- [ 3x3 VEG TENT ] ------------ Garlic Budder OG#1 - WEEK 07 - Full Veg Garlic Budder OG#2 - WEEK 07 - Full Veg Gorilla Goat #1 - WEEK 07 - Full Veg Gorilla Goat #2 - WEEK 07 - Full Veg 07/28/25 → 08/03/25 This Week's Estimated Goals ---------------------------------------------------------------------------------------------- DLI: ~13 mol/m²/d PPFD: ~300 μmol/m²/s VPD: ~1.0 kPa This Week's Meter Readings & Averages ---------------------------------------------------------------------------------------------- Light On/Off: 19:00 - 07:00 | Wattage: ~326.5W [LV04] Distance From Canopy: ~31”, 27” DLI: ~15.60 mol/m²/d PPFD: ~361 μmol/m²/s VPD: ~0.71 kPa Soil %: [49.6, 36.1, 49.0, 47.1, 42.6, 43.0, 43.0, 44.6] ========================================================== Day 01 - Monday - 07/28/25 - Total Days: 106 ----------------------------------- Daily Averages ~[+01:00] - Temps: 83.6°F [28.7°C] - Humidity: 82.0% - VPD: 0.72 kPa - Soil %: [50, 36, 49, 47, 43, 43, 43, 45] ----------------------------------- - [+04:07]: Ca-Caw!! Let’s get this flower cycle started! --- Time to switch the clocks from 18/6 to 12/12 which will begin the stretch to flower! Let’s go! --- Within the AC Infinity App, --- For the Main Tent [4x4] controller, --- Changed the schedule from 'Vegetative [18/6]' to 'Flower [12/12]' --- Also made sure to sync the settings for each device. The current settings are: ------ GROW LIGHT (MARS HYDRO FC-6500): --------- The Mode is set to ‘ON MODE’ --------- The START/END times are set to 07:00PM/07:00AM --------- The SUNRISE/SUNSET Duration value is set to 20Min --------- The MAX value is set to 4 ------ EXHAUST FAN (AC INFINITY CLOUDLINE T6): --------- The Mode is set to ‘CONTINUOUS AUTO’ --------- The Temperature HIGH/LOW trigger’s value are set to 85°F/OFF --------- The Humidity HIGH/LOW trigger’s value are set to 87%/OFF --------- The MIN/MAX values are set to 1/8 --------- The Temperature Dynamic Transition buffer value is set to 2°F --------- The Humidity Dynamic Transition buffer value is set to 2% ------ HUMIDIFIER (AC INFINITY CLOUDFORGE T7): --------- The Mode is set to ‘CONTINUOUS TARGET’ --------- The VPD target value is set to 1.0kPa --------- The MIN/MAX values are set to 0/8 --------- The VPD Dynamic Transition buffer value is set to 0.2kPa ------ HEATER (AC INFINITY THERMOFORGE T3): --------- The Mode is set to ‘CONTINUOUS TARGET’ --------- The Temperature target value is set to 78°F --------- The MIN/MAX values are set to 0/8 --------- The Temperature Dynamic Transition buffer value is set to 2°F --- The only difference is the ON/OFF times for the grow light. Now lights will be on from 7pm to 7am (19:00 – 07:00). --- Everything else is identical to the previous veg schedule. --- Anyways, --- LET THE TWO-WEEK STRETCH TO FLOWER BEGIN!! - [+00:55]: Night check on the 4x4 tent. --- Ca-Caw! Looking great my ladies! --- Heady OG (BX1 #1) is continuing to blow up with more tops! The canopy is looking incredible! --- TKO is also looking great with tops everywhere! She has taken over this grow and hyped that - [+01:54]: Trained and tucked the top growth under the netting. --- Canopy is flat and even again. Great! --- Day one into the 12/12 flip and growth is looking great! - [+01:56]: Checked the Ecowitt soil moisture sensor data: ------------------ [ 4x4 MAIN TENT ] --------------- ------ 46% - [CH01 FT » G30 - Heady OG BX1 #1] ------ 36% - [CH02 FB » G30 - Heady OG BX1 #1] ------ 50% - [CH03 BT » G20 - TKO] ------ 47% - [CH04 BB » G20 - TKO] ------------------ [ 3x3 VEG TENT ] ---------------- ------ 40% - [CH05 BL » GR7 - Garlic Budder OG#1] ------ 41% - [CH06 BR » GR7 - Garlic Budder OG#2] ------ 40% - [CH07 FL » GR7 - Gorilla Goat #1] ------ 44% - [CH08 FR » GR7 - Gorilla Goat #2] --------- Veg: 38% - 45% | Flower: 45% - 55% --------- General: 30% [Dry] «| 45 - 60% [Moist] |» 70% [Wet] - [+01:59]: Checked the 3x3 veg tent. --- Mothers are all vegging along and the canopy is bushy and beautiful! --- Pots also look good too. No gnats! - [+02:01]: Checked on the propagation dome (in the 3x3), --- To refresh the air, lifted the top off for a bit. --- Clone growth looks great for the most part and getting curious on root growth. --- Heady OG looks green, but she has been very droopy the entire time. Not sure if this cutting will root, but there is no yellowing. May have messed up something in cloning. --- The TKO clone looks beautiful. incredible! --- Using a spray bottle, misted the top growth with RO water. - [+02:05]: Checked the humidifiers. --- Tanks are still full and no leaks found. --- Over the past week or so, been research about Lactobacillus and the organic benefits. Plan to give it a try and will start the process tomorrow. --- Shout out to Jeremy at BuildASoil for the YT videos and the Lacto recipe! --- LOYAL TO THE SOIL FOR LIFE! --- Anyways, Onwards Ensign! Day 02 - Tuesday - 07/29/25 - Total Days: 107 ----------------------------------- Daily Averages ~[+01:00] - Temps: 83.3°F [28.5°C] - Humidity: 80.4% - VPD: 0.78 kPa - Soil %: [50, 36, 49, 47, 43, 43, 43, 44] ----------------------------------- - [14:24]: Okay! Time to start some Lacto Serum! --- This lactobacillus serum is used to improve soil health and nutrient availability. This LAB serum can also be used to create fermented plant or fruit juices (FPJ/FFJ). --- Anyways, --- First need to make the rice wash solution! --- Filled a mini wide-mouth mason jar with 1 cup of White Rice. ------ Added 1 cup of RO Water --- Mixed the rice and water for a bit. --- Covered the jar with a paper towel and rubber-band. ------ [ ~10 MINUTES LATER ] - [14:38]: Great! --- Mixed the rice and water again before pouring a little over 1/4 cup into a mini wide-mouth mason jar. --- Covered the jar with a paper towel and rubber-band. --- The current room temps are around 80°F --- To start the microbial activation, going to let this rice water solution sit for a few days. - [14:45]: Smelled the solution through the paper towel. --- The solution smells like flour. Nothing foul. --- From what I understand the process is pretty simple: ------ Create the rice wash solution and let it sit for a few days to activate (white or brown rice). ------ Mix 1 part activated rice wash solution to 10 parts whole or raw milk. Then let it sit for a few more days for the lacto cultures to proliferate. ------ Once the milk separates into essentially curds and whey, strain out the curds and the extracted whey is the finished Lacto Serum. ------ This serum should remain shelf stable in the fridge for several months. ------ Alternatively, black strap unsulfured molasses can be added to the serum at 1 part molasses to 4 parts serum. This will make the product stable enough for non-refrigerated storage (lasts several months). ------ As for application, the serum can be used as a soil drench or foliar feed at 4mL (~1tsp) per gallon of water. --- Anyways, --- Will check on this in a day or so and am waiting until the solution turns from a flour odor to more of a sweet aroma. - [19:35]: Night check on the 4x4 tent. --- Ca-Caw!! Looking great my ladies! --- Both Heady OG and TKO are raging with more tops! -- [20:37]: Trained the top growth. --- Now starting to tuck mainly tucked Heady OG to spread growth out under the netting. --- Letting TKO stretch through the netting and only tucked the taller tops. Mainly trained the back area (won’t be able to train this once growth starts to ramp upwards) and made sure each square has at least one apical top. --- Also plucked and defoliated the Heady OG’s lower growth. Cleaned her legs and now she’s nice and smooth! --- Wow TKO’s main stalks are huge! Can really reach back area now so going to let her grow. - [20:47]: Checked the Ecowitt soil moisture sensor data: ------------------ [ 4x4 MAIN TENT ] --------------- ------ 45% - [CH01 FT » G30 - Heady OG BX1 #1] ------ 36% - [CH02 FB » G30 - Heady OG BX1 #1] ------ 45% - [CH03 BT » G20 - TKO] ------ 46% - [CH04 BB » G20 - TKO] ------------------ [ 3x3 VEG TENT ] ---------------- ------ 42% - [CH05 BL » GR7 - Garlic Budder OG#1] ------ 40% - [CH06 BR » GR7 - Garlic Budder OG#2] ------ 47% - [CH07 FL » GR7 - Gorilla Goat #1] ------ 41% - [CH08 FR » GR7 - Gorilla Goat #2] --------- Veg: 38% - 45% | Flower: 45% - 55% --------- General: 30% [Dry] «| 45 - 60% [Moist] |» 70% [Wet] - [21:34]: Checked the 3x3 veg tent. --- Ooo yea! All veg mama’s are thriving and bushy! --- Getting close to the grow light again so time for more training! - [21:53]: Super-cropped and trained the top growth. --- Pinched and bent the taller branches and lowered the canopy by 5-6 inches. - [21:58]: Checked on the propagation dome, --- To refresh the air, lifted the top off for a bit. --- Clones are growing along and hopefully rooting. --- Heady seems to be struggling, but she is still green. --- TKO is looking great and she is starting to get taller! --- Plan to check for roots in a couple days. --- Using a spray bottle, misted the top growth with RO water. - [23:07]: Time for a mini upgrade! Got a set of magnetic levels. --- Attached two levels to both the main tent and veg tent’s grow lights. --- Not really necessary, but the added levels will be useful during height adjustments. - [23:23]: Checked the humidifiers. --- Tanks are still full and no leaks found. Day 03 - Wednesday - 07/30/25 - Total Days: 108 ----------------------------------- Daily Averages ~[+01:00] - Temps: 83.6°F [28.7°C] - Humidity: 82.1% - VPD: 0.72 kPa - Soil %: [49, 36, 48, 46, 43, 43, 43, 44] ----------------------------------- - [23:36]: Night check on the 4x4 tent. --- Ca-Caw!! Looking beautiful my ladies! Wow! This is why we grow! --- Both Heady OG and TKO are looking healthy and tops are bursting through the netting! - [23:54]: Trained the top growth. --- Mainly tucked and continued to spread Heady OG out to fill in more squares in the front left quadrant. --- Did minimal training on TKO. Just letting her grow through the netting and wow growth is raging! --- Wow! The canopy is looking beautiful! - [23:59]: Checked the Ecowitt soil moisture sensor data: ------------------ [ 4x4 MAIN TENT ] --------------- ------ 55% - [CH01 FT » G30 - Heady OG BX1 #1] ------ 36% - [CH02 FB » G30 - Heady OG BX1 #1] ------ 49% - [CH03 BT » G20 - TKO] ------ 46% - [CH04 BB » G20 - TKO] ------------------ [ 3x3 VEG TENT ] ---------------- ------ 42% - [CH05 BL » GR7 - Garlic Budder OG#1] ------ 47% - [CH06 BR » GR7 - Garlic Budder OG#2] ------ 47% - [CH07 FL » GR7 - Gorilla Goat #1] ------ 40% - [CH08 FR » GR7 - Gorilla Goat #2] --------- Veg: 38% - 45% | Flower: 45% - 55% --------- General: 30% [Dry] «| 45 - 60% [Moist] |» 70% [Wet] - [+00:03]: Checked the 3x3 veg tent. --- Wow mother growth is raging again! --- Really wish I can flip these ladies to flower, but don’t have the space. --- Plan to start another round of mother cycling soon. Will probably super-crop tomorrow. - [+00:04]: Checked on the propagation dome (in the 3x3), --- To refresh the air, lifted the top off for a bit. --- Wow clones are growing! --- Heady OG is definitely going through some sort or rooting issue, but growth is still green. She is now starting to show signs of yellowing, so there may be roots, but not sure. --- On the flipside, TKO is crushing it! She looks healthy and perky! The yellowing of the lower growth along with the healthy and perky top growth means there’s successful rooting and the clone is translocating nutrients to produce root growth. I think. --- Using a spray bottle, misted the top growth with RO water. --- Oh! Also continuing to research tissue culture (TC) and have decided to give it a potential go. --- Shout out to Laur and ‘Plants In Jars!’ Her incredible YT videos have been a huge game changer and a highly recommend free resource for anyone trying to get into DIY tissue culture! --- Pretty much now I think tissue culture is the solution to my mother plant issue. --- From the little I understand, tissue culture is basically an advanced form of plant cloning and can be done quite safely at home. --- If done properly, plants suspended in tissue culture can be propagated and maintained indefinitely until needed. --- Each TC sample is basically a mini self-contained mother plant pod. --- Once needed, a TC sample can be brought back to a clone-like state for planting into solo cups. --- Aside from the technical process (which is going to be fun to learn), the largest challenge is maintaining a sterile environment during propagation. --- Anyways! - [+00:10]: Checked the humidifiers. --- Tanks are still full and no leaks found. Day 04 - Thursday - 07/31/25 - Total Days: 109 ----------------------------------- Daily Averages ~[+01:00] - Temps: 83.5°F [28.6°C] - Humidity: 81.2% - VPD: 0.75 kPa - Soil %: [49, 36, 49, 46, 43, 43, 43, 44] ----------------------------------- - [08:42]: Checked on the 3x3 veg tent. --- Both growth and pots are looking great! - [08:43]: Checked on the propagation dome, --- Clones both look bad and good. --- Concerned about Heady OG, but TKO has been healthy and perky the whole way. - [08:45]: Time to check for roots. --- Heady OG had one tiny root. Not ideal, but was actually surprised to find any root growth. Nice! --- Woah! Nice! TKO is bursting with roots! She’s definitely ready to be transplanted! --- Decided to plant both clones. Hoping that Heady OG will do better in the soil. --- Time to transplant the rooted cuttings! - [09:13]: Took 2 used solo cups (has bottom corners cut for drainage) and labeled each cup (Heady OG BX1, TKO). --- Partially filled each with some fresh (dry) BuildASoil 3.0 potting soil. --- Made sure that the soil was well packed. --- Inoculated each cup with Great White mycorrhizae along with a bit of Beauveria Bassiana. --- Misted the dry soil with a bit of RO water (~3 sprays each). ------ Sprinkled 1/64tsp of Beauveria Bassiana Plus ------ Sprinkled 1/16tsp of Great White - [09:26]: Time to plant! One clone at a time, --- Placed each clone into solo cups (also removed the clone tag). --- Made sure each solo cup had enough room for more soil. - [09:32]: Inoculated each Coco Coin with Great White mycorrhizae. ------ Sprinkled about an 1/16tsp of Great White onto each Coco Coin. --- Made sure to get the top and sides evenly. - [09:35]: Gently filled each solo cup with more soil. --- Completely covered the top of each Coco Coin and made sure to tuck the sides fairly snug with soil. --- Evened out the top soil. Each Coco Coin is about 1/4-1/2 inch below the top soil. - [09:44]: Added some BuildASoil Organic Straw Mulch to the top. --- Using the small straw bits at the bottom of the bag is great for solo cups. --- Time to water! - [09:51]: Filled a measuring cup with 2 cups of RO water. ------ Added 1/64tsp of Quillaja Saponaria Extract [60] ------ Added 1/16tsp of Horticultural Coconut ------ Added 1/16tsp of Horticultural Aloe ------ Added 1/8tsp of Mycrobe Complete --- Mixed and poured the solution straight into a spray bottle. - [09:54]: Took the dry soil weight of each pheno before watering, ------ Heady OG (BX1) weighed 261.4g ------ TKO weighed 240.9g --- Marked the starting weight on the back of each cup. --- While on a scale, --- Gently misted the straw mulch of each cup. --- Focused on the straw and sprayed as evenly as possible. --- Misted 5-10 sprays. Waited a few seconds, then misted again. --- Repeated this process until both cups weighed at least 300g --- There was no runoff. --- Oops! --- Had to slightly extend the day period (Lights usually turn off at 10:00). - [10:04]: Took the weight of both phenos after watering, ------ Heady OG (BX1) weighed 301.2g ------ TKO weighed 301.4g --- Marked the saturated wet weight on each cup. - [10:12]: Placed both cups into the propagation dome. --- Removed the side extensions along with the plug tray and have the cups resting in the main drip tray. --- Have the lid and lights suspended above the tray (~00 inches). --- Also increased the propagation dome’s bar lights. ------ Increased the intensity from 1 to 5 - [10:13]: Took general PPFD readings. ------ Clones were around 109 μmol/m²/s which gives a DLI of 7.06 mol/m²/d under an 18/6 light cycle. --- Turned the lights off and made sure that both were back to an 18/6 cycle (on from 16:00 to 10:00). --- Ca-Caw!! Done! --- Not worried about TKO, but getting concerned about Heady OG. Not sure if she is going to make it. - [14:23]: Checked on the Lacto Serum. --- The solution has been resting for 2 days. --- Smelled the rice wash solution through the paper towel. --- The odor has changed from the original flour odor but has not become sweet. However, the smell is getting there. I think. --- Will continue to check and still waiting until the solution changes into a sweet aroma. - [19:24]: Night check on the 4x4 tent. --- Ooo yea! Growth is looking beautiful and raging along! --- Both Heady OG and TKO are thriving with growth! The stretch is definitely ramping up! - [20:08]: Trained and tucked the top growth. --- Mainly focused on the Heady OG and spread her out a bit more evenly to fill in more squares. --- Wow TKO by far going to be the largest plant I’ve grown in a 4x4 tent. She’s extremely dense with healthy tops shooting up everywhere! --- Since I’m not tucking TKO anymore and she is getting taller, need to take readings and measurements. - [20:38]: Took the weekly general PPFD readings. ------ Heady OG (BX1 #1) was still around 361 μmol/m²/s which gives a DLI of 15.60 mol/m²/d under a 12/12 light cycle (at ~326.5W). ------ TKO was around 365 μmol/m²/s which gives a DLI of 15.77 mol/m²/d under a 12/12 light cycle. - [20:40]: Took the weekly height and light distance measurements. ------ Heady OG (BX1 #1) was still about 21.5" tall. ------ TKO was about 26" tall. ------ Heady OG (BX1 #1) was about 31" away from the grow light. ------ TKO was about 27" away from the grow light. --- Since Heady OG is clearly struggling to root, going to take a few more lower cuttings to make sure the genetics survives. - [20:52]: Filled a measuring cup with 1.5 cups of RO water. ------ Added 1/8tsp of Horticultural Aloe --- Mixed the solution and poured it straight into a solo cup. - [20:56]: Time to take the cuttings! --- Using a pair of trimmers (AC Infinity), --- Gently cut 2 small cuttings from Heady OG (BX1 #1). Took lower branches that did not reach the top canopy level. --- Trimmed and cleaned most of the nodes leaving the top node or two. --- Did not cut any leaf fingers. --- Made sure the tip of the stalk had a slanted cut (about 45-degree). - [21:02]: Placed both cuttings into the cup of aloe solution. --- Also made sure the cuttings were tagged. Not really necessary, but why not. - [21:05]: Placed the cup into the 3x3 veg tent. --- Have the cup resting in the propagation dome next to the planted clones. --- Going to let these cuttings soak for a day before refreshing with straight RO water. --- Let the two-day soak begin! - [21:06]: Checked the Ecowitt soil moisture sensor data: ------------------ [ 4x4 MAIN TENT ] --------------- ------ 47% - [CH01 FT » G30 - Heady OG BX1 #1] ------ 36% - [CH02 FB » G30 - Heady OG BX1 #1] ------ 50% - [CH03 BT » G20 - TKO] ------ 46% - [CH04 BB » G20 - TKO] ------------------ [ 3x3 VEG TENT ] ---------------- ------ 44% - [CH05 BL » GR7 - Garlic Budder OG#1] ------ 41% - [CH06 BR » GR7 - Garlic Budder OG#2] ------ 43% - [CH07 FL » GR7 - Gorilla Goat #1] ------ 46% - [CH08 FR » GR7 - Gorilla Goat #2] --------- Veg: 38% - 45% | Flower: 45% - 55% --------- General: 30% [Dry] «| 45 - 60% [Moist] |» 70% [Wet] - [21:08]: Checked the 3x3 veg tent. --- Looking great in the mother tent! --- Was planning on defoliating and taking new veg cuttings, but since Heady OG is struggling, going to wait a bit longer to start the mother cycling process. - [21:18]: Super-cropped and trained the top growth. --- Lowered the canopy a good 4-5inches. - [21:19]: Checked on the clones, --- Looking great! --- Heady is still struggling, but hoping she’ll perk up soon. --- TKO is looking perfect! She’s perky and I have no doubt that she’ll root just fine. --- More worried about Heady OG. - [22:08]: Checked the humidifiers. --- Tanks are still full and no leaks found. Day 05 - Friday - 08/01/25 - Total Days: 110 ----------------------------------- Daily Averages ~[+01:00] - Temps: 83.4°F [28.6°C] - Humidity: 83.0% - VPD: 0.68 kPa - Soil %: [51, 36, 49, 46, 42, 43, 43, 45] ----------------------------------- - [22:10]: Night check on the 4x4 tent. --- Ca-Caw! Let’s go ladies! Wow the garden is packed and looking incredible! --- Heady OG and TKO are looking perky and stretching through the netting with nodal growth everywhere! --- By far my healthiest grow cycle yet! - [22:21]: Did a bit of training. --- Slightly tucked and spread Heady OG a bit more to fill in the front left quadrant. --- Just going to let the rest grow! - [22:25]: Checked the Ecowitt soil moisture sensor data: ------------------ [ 4x4 MAIN TENT ] --------------- ------ 52% - [CH01 FT » G30 - Heady OG BX1 #1] ------ 36% - [CH02 FB » G30 - Heady OG BX1 #1] ------ 54% - [CH03 BT » G20 - TKO] ------ 46% - [CH04 BB » G20 - TKO] ------------------ [ 3x3 VEG TENT ] ---------------- ------ 44% - [CH05 BL » GR7 - Garlic Budder OG#1] ------ 41% - [CH06 BR » GR7 - Garlic Budder OG#2] ------ 46% - [CH07 FL » GR7 - Gorilla Goat #1] ------ 48% - [CH08 FR » GR7 - Gorilla Goat #2] --------- Veg: 38% - 45% | Flower: 45% - 55% --------- General: 30% [Dry] «| 45 - 60% [Moist] |» 70% [Wet] - [22:34]: Checked the 3x3 veg tent. --- Ooo yea! The veg garden is beautiful and wow growth is raging! --- Wow! The canopy is already stretching upwards and will probably need to train again tomorrow. --- Checked on the clones, --- Nice!! Growth is all around healthy and looking great! --- Heady OG looks less droopy. I think. --- TKO is looking perfectly healthy and already getting taller! Wow! --- Nice! Both Heady cuttings are looking healthy and not droopy. - [22:38]: Time to swap the aloe water out! --- Replaced the solo cup with a clean one filled with fresh RO water (1.5cups). --- Going to let this soak for another day before transplanting into Coco Coins for rooting. - [22:44]: Checked the humidifiers. --- Tanks are still full and no leaks found. Day 06 - Saturday - 08/02/25 - Total Days: 111 ----------------------------------- Daily Averages ~[+01:00] - Temps: 82.6°F [28.1°C] - Humidity: 83.2% - VPD: 0.66 kPa - Soil %: [50, 36, 50, 47, 42, 43, 43, 45] ----------------------------------- - [07:59]: Quick morning check on the propagation dome (in the 3x3 veg tent). --- Ooo yea! The clones and cuttings are looking healthy and green! --- Heady OG (BX1 #1) is droopy and seems to be recovering. I think? --- TKO is looking healthy and looking beautiful! --- Nice! Both Heady OG (BX1 #2 and #3) cuttings are looking good! These cuttings are quite a bit smaller than the last round, but they are healthy and green! - [20:06]: Night check on the 4x4 tent. --- Ca-Caw! Wow the canopy is thriving! --- Heady OG is looking healthy and perky! --- Wow! TKO is stacking up with nodal branching and crowning is everywhere with perky tops! - [20:13]: Did a bit of tucking on the front left quadrant. --- Could have trained Heady OG another week in veg before flipping to flower, but oh well. TKO needed to be flipped. - [20:32]: Checked the Ecowitt soil moisture sensor data: ------------------ [ 4x4 MAIN TENT ] --------------- ------ 45% - [CH01 FT » G30 - Heady OG BX1 #1] ------ 36% - [CH02 FB » G30 - Heady OG BX1 #1] ------ 66% - [CH03 BT » G20 - TKO] ------ 47% - [CH04 BB » G20 - TKO] ------------------ [ 3x3 VEG TENT ] ---------------- ------ 47% - [CH05 BL » GR7 - Garlic Budder OG#1] ------ 44% - [CH06 BR » GR7 - Garlic Budder OG#2] ------ 42% - [CH07 FL » GR7 - Gorilla Goat #1] ------ 43% - [CH08 FR » GR7 - Gorilla Goat #2] --------- Veg: 38% - 45% | Flower: 45% - 55% --------- General: 30% [Dry] «| 45 - 60% [Moist] |» 70% [Wet] --- Needed to swap out the batteries for TKO’s top soil sensor (CH03). --- Apparently there is a slight flaw with the programing on the WittFlows. Since the watering function is based on the channel and not the sensor, when TKO’s top sensor cuts out, the new CH03 (which is TKO’s bottom sensor) takes over. --- Anyways, - [20:38]: Checked the 3x3 veg tent. --- Veg garden is looking beautiful and wow top growth needs more training! - [20:53]: Super-cropped the top growth a bit. --- Lowered the canopy a few inches. --- Growth is getting out of control! Wow! Need to take cuttings soon to start the cycling process. --- Anyways! - [20:54]: Checked on the clones, --- Wow clone growth is looking very good! --- Heady OG seems to be recovering nicely in the soil and I’m getting more confident that she’s going to make it. Nice! --- TKO is looking great! She’s going to root and will be ready for transplant in a week or so. --- Both Heady OG cuttings are looking healthy and ready to be rooted! --- Time to plant the second round of Heady OG (BX1) cuttings! - [21:13]: Filled a measuring cup with 1.5 cups of RO water. ------ Added a pinch of Quillaja Saponaria Extract [60] ------ Added 1/64tsp of Horticultural Aloe ------ Added 1/32tsp of Mycrobe Complete --- Mixed the solution thoroughly. - [21:17]: Dropped 2 Coco Coins into the measuring cup. --- The coins immediately started to expand. ------ [ ~10 MINUTES LATER ] --- Took each fully saturated Coco Coin and temporarily placed them in half-cut solo cups. --- Using a squeeze bottle filled with Clonex, - [21:38]: Gently filled each pre-made hole with Clonex rooting gel. --- Time to plant the cuttings! - [21:43]: Using a pair of clean trimmers, made a final 45° cut. --- Also stripped and scrapped some of the stem’s outer membrane. --- To help with planting, gave each Coco Coin a squeeze to loosen the coco. --- Made sure to insert each stem straight and snug with the tip about a 1/4 inch from the bottom of the Coco Coin. --- Also secured the stem by pinching and pressing in the sides of the Coco Coin. --- After both cuttings were planted, --- Temporarily took the clones out of the propagation tray. Also placed the plug tray back in. - [21:53]: Placed both Coco Coins into the propagation dome’s tray. --- Since these cuttings are both identical cultivars, no need to really name. --- Added 1/2 cup of RO water to the bottom of the tray. --- Since I’m not using the dome lid (which is currently hanging above the tray), misted a couple of clear cups with RO water. - [21:55]: Covered both cuttings. --- Will need to mist the cups for the first few days in the tray. --- While rooting the cuttings, noticed that both clones (Heady OG BX1 and TKO) need to be watered already. --- Let’s go! - [22:02]: Took the initial starting weight range of both clones before watering, ------ Heady OG BX1 #1 » 261.4g → 301.2g ------ TKO » 240.9g → 301.4g --- General Solo Range: [Dry] «| [Initial Cup Weight] + ~55-100g |» [Wet] --- All phenos were last watered 2 days ago. --- Took the starting weight of both clones before watering, ------ Heady OG BX1 weighed 278.2g ------ TKO weighed 253.5g --- While on a scale, --- Gently misted the straw mulch of both cups with RO water. --- Focused on the straw and sprayed as evenly as possible. --- Misted 10-20 sprays. Waited a moment, then misted again. --- Repeated this process for both cups. --- There was no runoff. - [22:18]: Took the saturated weight of both clones after watering, ------ Heady OG BX1 weighed 278.2g ------ TKO weighed 253.5g --- Marked the final wet weight on the back of each cup. Also marked the watering date on the front. - [22:27]: Placed both phenos back into the tent. --- Done! Grow strong little ones! - [22:33]: Checked the humidifiers. --- Tanks are still full and no leaks found. Day 07 - Sunday - 08/03/25 - Total Days: 112 ----------------------------------- Daily Averages ~[+01:00] - Temps: 83.1°F [28.4°C] - Humidity: 83.0% - VPD: 0.68 kPa - Soil %: [48, 37, 49, 51, 42, 43, 43, 45] ----------------------------------- - [08:13]: Quickly checked on the propagation dome (in the 3x3 veg tent). --- Wow the clones are looking incredible! --- Heady OG is looking better and she’s still recovering. --- TKO is looking healthy and getting bigger. Nice! --- Both Heady OG cuttings are also looking healthy and look better than the first attempt (the recovering clone). --- Misted both cups with RO water. - [19:06]: Night check on the 4x4 tent. --- Ca-Caw!! Woah these ladies are definitely in full stretch! These girls are getting taller by the hour! Wow! --- Heady OG is looking beautiful and she is exploding with upwards growth! The middle of the canopy is basically at the same height as TKO. Incredible! --- Ooo yea! TKO is crushing it! Wow! She’s a good 7 inches above the scrog netting! --- The canopy is getting stacked with nodal growth! This garden is ramping up to be my best grow cycle yet! - [19:14]: Checked the Ecowitt soil moisture sensor data: ------------------ [ 4x4 MAIN TENT ] --------------- ------ 54% - [CH01 FT » G30 - Heady OG BX1 #1] ------ 37% - [CH02 FB » G30 - Heady OG BX1 #1] ------ 50% - [CH03 BT » G20 - TKO] ------ 41% - [CH04 BB » G20 - TKO] ------------------ [ 3x3 VEG TENT ] ---------------- ------ 41% - [CH05 BL » GR7 - Garlic Budder OG#1] ------ 47% - [CH06 BR » GR7 - Garlic Budder OG#2] ------ 47% - [CH07 FL » GR7 - Gorilla Goat #1] ------ 49% - [CH08 FR » GR7 - Gorilla Goat #2] --------- Veg: 38% - 45% | Flower: 45% - 55% --------- General: 30% [Dry] «| 45 - 60% [Moist] |» 70% [Wet] - [19:16]: Checked the 3x3 veg tent. --- Wow veg growth is raging with health and vigor! --- Mothers are looking beautiful and canopy is bushy! --- Nice! Clones and cuttings are looking healthy! --- Misted the cutting’s cups with RO water. - [19:46]: Back in the 4x4 main tent, --- Decided to tuck Heady OG a bit more and tried to spread the growth in the front left quadrant. --- Growth is going to be uneven but I think the left side will eventually even out. I think. - [19:54]: Quickly checked on the auto-watering system. --- System is still charged and no leaks or kinks found in the tubing. - [19:58]: Checked the humidifiers. --- Tanks are still full and no leaks found. --- Another week done and the garden is vibing and thriving! --- Next week will be the end of the stretch phase and as growth slows down, will hopefully see signs of budding. --- Ca-Caw! Stoked for this grow and can’t wait until these girls start to flower. - [+02:20]: TKO’s soil sensor cut out again.. --- Swapped out the unit with a new one and re-synced the channel to correct sensor ID. --- The old sensor got water damage. Going to try to dry it out, but really glad I have a couple spare units. --- Also glad that TKO seems to be taking the extra watering without any issue! May try to increase the soil moisture average next week for both pots. --- Anyways! Onwards Ensign! [END OF WEEK 15]
Likes
36
Share
@nonick123
Follow
Día 37 (08/07) Ajustes de LST en todas las plantas! 🚀 Día 38 (09/07) Ajustes de LST en todas las plantas. Las ramas inferiores están creciendo como un cohete! 🚀😍 Riego con 250 ml H2O pH 6,5 Día 39 (10/07) Las plantas se muestran sedientas! Creo que el cepellón está lleno de raíces y piden el trasplante! El crecimiento no se ha visto afectado de momento Riego con 500 ml H20 pH 6,5 Día 40 (11/07) Paso a regar con 500 ml / día, ya que hace mucho calor (30 ºC) y efectivamente las plantas ya han copado la maceta de raíces Las ramas de nodo inferior se han quedado enanas tras el entrenamiento, de modo que las elimino y aplico canela en polvo en los cortes Riego con 500 ml H20 pH 6,5 Día 41 (12/07) Riego con 500 ml H20 pH 6,5 Clones! Mi experimento vuelve a demostrar que NO necesitas complejos productos de clonación ni sistemas para obtener clones! Hace 15 días puse 2 clones con el tallo sumergido en miel durante 5 minutos en una maceta de 400 ml con PRO-MIX HP BACILLUS + MYCORRHIZAE He mantenido la humedad alta con una cúpula de humedad casera hecha con una botella de agua PET de 5 litros cortada por la mitad y pulverizando a diario. Han estado los 15 días en mi terraza con luz indirecta, y temperaturas que rondan los 30 - 32ºC durante las horas centrales del día Hoy los he trasplantado a una maceta de 1 litro porque ya habían formado raíces y empezaban a formar nuevas hojas! 🐥🐥🚀🐥🐥 Día 42 (13/07) Riego con 500 ml H20 pH 6,5 Día 43 (14/07) Trasplante a maceta definitiva de 21 litros de ROOTPLUS Pot de GSKOREA GLOBAL! Estas macetas son una maravilla! Proceso de trasplante: Se prepara con 17,85 Litros (85%) de sustrato PRO-MIX HP BACILLUS+MYCORRHIZAE + 1,05 Litros de Humus de Lombriz (5%) + 2,01 Litros de Insect Frass (10%) + 210 gramos de Earth Vibes Super Soil (10 g/L substrato) Se llena la maceta de sustrato con las manos (limpias) y rompiendo los trozos más gruesos, para que el sustrato esté aireado y esponjoso, sin presionar Se coloca una maceta vacía de 6,5L para que quede la forma perfecta de la maceta donde están actualmente Se espolvorea la parte proporcional de la probeta de microorganismos sobre el agujero de trasplante Se saca la planta de su maceta actual (bonitas raíces 😍) y se coloca en la maceta final Se riega muy lentamente hasta percolación profunda con H2O EC 0,5 pH 6,5 Una vez asentada, complemento con un riego de 500 ml con 25 ml/L de Humus de Lombriz Liquido Se coloca mulch (acolchado) de paja para evitar traspiración excesiva y cuidar a los microorganismos del suelo A ver como reacciona al trasplante! Aplicación foliar Kelp hidrolizado de Lurpe Solutions a 0.25 ml/l Realizo ajustes de LST aprovechando el trasplante a la nueva maceta. De momento tienen una canopia muy bien formada! 💦Nutrients by Lurpe Solutions - www.lurpenaturalsolutions.com 🌱Substrate PRO-MIX HP BACILLUS + MYCORRHIZAE - www.pthorticulture.com/en/products/pro-mix-hp-biostimulant-plus-mycorrhizae
Likes
3
Share
De belle couleur violette commence à arriver ! Ça va fair de belle Bud avec des reflets violets 👌🌱❤️ et l'odeur devient de plus en plus forte et appétissante 🤤 hâte de récolter😅
Likes
11
Share
Seedlings stretched a bit had to put them under the light early. Popped 2 seeds initially with 2 freebies I got, unfortunately the freebies didn't germinate in a week so I tossed them and popped two more Dolatos and all four germinated with 100% success rate. Kept them on a 20/4 schedule watering them only once and sprayed the top soil with a mister every now and again. 👍🏿
Likes
5
Share
Likes
14
Share
11/5 -- They now have 2 weeks of 12/12 under their belts and it's truly been a tale of 3 plants for the past week and a half. GZ2- This one has the opportunity to meet its full potential. It has stretched to give me this beautiful canopy and very few signs of over feed or stress in it. Hopefully she stays this way. Moby- look like it may have been developing some deficiencies. I fed it a few days ago and it seemed to respond well. Some leaves have gotten yellow but the plant is do thick and dense I'm not worried about a few falling off. All in all, it's been steady eddy for Moby Dick that I now believe is also a Barney's Farm Freebie(the seed is now listed where I buy mine from) I'm not going to change it but if you're keeping track, this is most likely a tent full of Barney's Farm. Gz1- and now the music gets a little more serious. I really started recognizing problems with her right at flip. She has lost a lot of fan leaves due to yellowing,, dark stems and I can tell her branching has suffered because of it. Growth at the bottom looks weak and even wrinkled in some spots. She has burn spots and signs of deficiency galore. But also VERY dark fan leaves. I've just come to the conclusion that flushing was probably my best move. She can still have a week of solid growing. If I can get it corrected now, this plant will still be respectable but the trend is disturbing and alarming to someone who knows how fast they can decline. So in conclusion, things are getting a little hairy. Flowering always brings on a new set of challenges and I'm still learning every single time. Wish me luck this week, I'll need it. 11/6 Updated pic on old friend banana daddy that they shared the veg tent with.
Likes
2
Share
I've not had to trim any fan leaves they have all died on their own and I have just picked them off with tweezers apologies for the video I don't know what happened but I add smoked a doobie before 😂😵‍💫
Likes
22
Share
Hello Diary. The third week of vegetation has passed and Fat Banana has entered the pre-flowering phase. The plant grew 41 cm in the first three weeks, which is one third less than its roommate Haze Berry. Fat Banana has developed dense branches with lots of leaves, now the leaves and branches are causing problems when watering. I continue to add BioBizz to each watering on a schedule for that week, and I also started adding CalMag preventively. Fat Banana has also become more thirsty, now watering is almost every two days when I prepare 6 liters of water with which I water all three plants evenly. All in all, everything is fine for now and I’m looking forward to the start of flowering. Let’s take a look at the review of the week. 09/10/2020 - Day 15. Watering. I added BioBizz as scheduled for the third week and added 1.5ml / lit CalMag preventively. p.H. I lowered the values ​​to 6.4 with Plagron’s Lemon Kick. The temperature of the water I water with is always around 18, 19 degrees. I also put in a Box and another fan. Temp / Humidity on the farm - 25.3 degrees and 48% humidity. 11/10/2020 - Day 17. Watering. This time I didn’t add BioBizz, but just put 1.5ml / lit CalMag and lowered the p.H. value at 6.4. Temp / Humidity on the farm - 25.3 degrees and 45% humidity. 13/10/2020 - Day 19. Watering. BioBizz for the third week and CalMag preventively. p.H was 6.3 Temp / Humidity on the farm - 25 degrees and 45% humidity. 15/10/2020 - Day 21. Photography, Watering and height measurement. After photographing for the end of the third week of vegetation, I measured the plants on the farm and after all watered with BioBizz and added CalMag preventively. p.H. I dropped to 6.4 Temp / Humidity on the farm - 25.2 degrees and 45% humidity. Fat Banana Auto - Day 21. - 41 cm This week I have finished the vegetation and am entering the flowering phase. For now, the plants look happy and pleased. Their conditions are pretty good and I will try to keep it that way. See you next week.
Likes
25
Share
@Dunk_Junk
Follow
It's her first week on 12/12. Changed to 6-12-36 powdered nutrients now.
Likes
13
Share
It went pretty good this week (*I'm sorry because of ly work I could not take pictures this week so you have 2 videos*). I will not cut anymore branches before turn into flowering next week, normally it will be a 20 week grow from seed to budd I hope great results with this Cheese from Greenhouse Seeds Company :)
Processing
Likes
22
Share
Hola amigos cultivadores. Buenos humos a todos 🌊🤙 Esta semana tuve algunas dificultades por negligencia mía. * Perdí aproximadamente 40 gramos contaminados por Botrytis. Llevaba una semana con humedad muy alta y no hice nada al respecto. Acá donde cultivo es muy húmedo y cálido y siempre la Botrytis ha sido mi enemiga. Sin embargo esta vez fue mi culpa, pues sabía de la alta humedad y no hice nada. Importante mencionar que la Big Kush por su tamaño de flor (enorme) es más propensa a tener problemas con excesos de humedad. Esta cepa hace flores gigantes. Ya está resuelto y se bajó de 80% a 65% en promedio. Aumenté ventilación, extracción y coloqué un deshunidificador. * Haciendo cuentas de los días transcurridos, estoy una semana por delante y por lo tanto creo que empecé tarde con el Pk1314. De hecho era notable que las flores estaban muy desarrolladas cuando lo empecé a aplicar. Aún así el Pk ha hecho lo suyo y las plantas han engordado, quizá no lo que esperaba. Algunas hojas con tonalidades amarillas, algunas propias del consumo de la planta y otras observándola día a día para detectar algún exceso. Las platas siguen consumiendo en promedio 2 litros de líquido al día, por lo que espero hacer un buen lavado de raíz en una semana aproximadamente. Buenos humos 🌊🤙
Likes
26
Share
Late to update this week. Was out of town and finally I found some time to update. I started giving them a healthy dose of KoolBloom to start finish this grow off. Temperature is getting higher and I wish I started these girls 2 weeks earlier, but hindsight is 420. I think these should be ready by week 9, so i’ll be looking at those trichomes at this stage of the grow. I like mine cloudy. What do you all prefer?
Likes
23
Share
@Spliffi
Follow
Germination 27 September 2023 Heya 🤙👍🤙🌱🌱🌱 In the heart of a humble garden, a miraculous journey is about to unfold. Beneath the soil's dark, nurturing embrace, a seed lies dormant, awaiting the precise moment to burst forth into life. It is a marvel of nature, a tiny capsule of potential, encoded with the blueprints of the plant it aspires to become. As the heavens open, raindrops penetrate the earth, quenching the thirst of the soil and signaling to the seed that its time has come. The seed absorbs this life-giving moisture, swelling as it takes in water. It's as if the seed is awakening from a long slumber, stretching its embryonic limbs for the very first time. Within this subterranean realm, the seed's outer coat softens, and a tiny rootlet begins to emerge. This is the radicle, the seed's first root, and it instinctively knows to journey downward, anchoring itself into the soil. It is the plant's lifeline, seeking out water and nutrients essential for growth. Simultaneously, a delicate shoot, known as the plumule, makes its way upwards, drawn by an invisible force towards the sky. It is a daring expedition, fraught with obstacles, as it navigates through the soil. Yet, guided by an innate sense of direction, it perseveres. Finally, breaking through the soil's surface, the shoot unfurls its first leaves, miniature versions of what they will one day become. These are the cotyledons, a pair of leaves that have been stored within the seed, packed with nutrients to sustain the young plant in its earliest days. As the sun's rays touch these fledgling leaves, photosynthesis begins. It's a momentous occasion, the plant's first breath, as it converts sunlight into energy. The seedling, still fragile yet full of promise, has successfully embarked on the first chapter of its life. From here, it will face countless challenges and opportunities, but for now, it stands as a testament to the remarkable resilience and complexity of nature. Thanks for reading🤙👍🤙🌱
Likes
129
Share
@DreamIT
Follow
🎲➕ VLC Critical Plus + by PEV Grow➕🎲 ➕20.6 Quiet week start, I dry the soil well and tomorrow I start with the fertilizer, yeah! ➕21.6 All great, you see the changes day after day, really interesting 😁👊🦄 ➕22.6 Everything is OK. Very fast, wide leaves for now, we are at the second node. a few days and mainlining begins 🤘 ➕23.6 all regular, super yeah ➕24.6 even today nothing in particular to say, I can't wait to be able to manipulate it 😁🦄 ➕25.6 It grows really well, very satisfied ➕26.6 All very well, tomorrow transfer next week or mid-week first cut, yeah! __________________________________________ ❓ Are you new to the world of cultivation and don't know where to safely buy your seeds? 😮On the Pevgrow site, you can find the best-feminized seeds indoors and outdoors. Achieved through totally natural stress methods and with guaranteed superior quality. ✅http://bit.ly/PevGrow ℹ️Check out the marijuana dictionary ✅http://bit.ly/CannabisDictionaryPEVGrow __________________________________________ 👀 Are you looking for a good lamp to start with? 👀 🌞Viparspectra has something more than the others, take a look at their site. ⏩ Use "GDVIP" for an extra discount or "ViparDreamIT" for an extra 5 %% discount 👀 Search for it on Amazon ✅Amazon US: https://amzn.to/30xSTVq ✅Amazon Canada: https://amzn.to/38udUVe ✅Viparspectra UE: bit.ly/ViparspectraUE 👀 Watch my ViparSpectra XS1000 unboxing on YouTube, leave a like and write to the channel 🦄 ✅http://bit.ly/UnboxingViparSpectraDreamIT ______________________________________________ 📷🥇 Follow the best photos on Instagram 🥇📷 https://www.instagram.com/dreamit420/ 🔻🔻Leave a comment with your opinion if you pass by here🔻🔻 🤟🦄💚 Thank you and enjoy the growth 💚🦄🤟
Likes
4
Share
Buenas farmers!!! Este cultivo e tenido mucho cuidado con la fase de crescimiento, para no tener los mismo problemas de altura, haciendo que empieze a florecer con un palmo de planta.
Likes
3
Share
Week 7 of Banna Purple Punch lost a few ladies a few days back! Bugs spider mites gnats I just do things on impulse rather than think bout what could be the outcome before pulling the trigger! I would like say chalk up the L! I need look at natural repellent or oils fuck lost Gorilla Zkittlez & 1 down Banana & battered Foster plus 7/8 months i should know better!