The Grow Awards 2026 🏆 


Likes
Comments
Share
@Smoking_Joe_Frazier
Follow
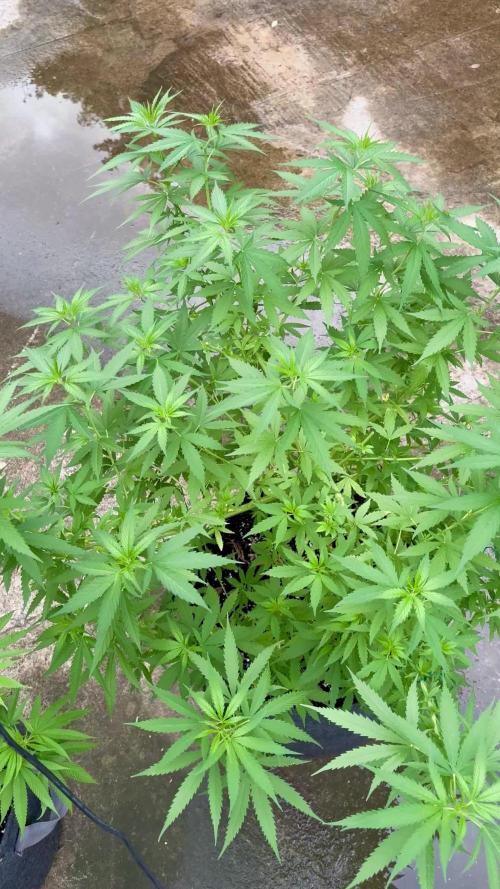
Week 3: Adapting and Thriving
Transplanting to Larger Pots
This week, I transplanted the plants into 11-liter fabric pots filled with Plagron coco coir mixed with perlite (70/30). The small pots were already root-bound. It's often said that a plant will stop growing when the taproot reaches the bottom of the pot. Personally, I think this is nonsense, but we'll see. This transplant provides them with more space for root development and better aeration, promoting healthier growth.
Growth Observations
The plants are showing significant growth, with vibrant green leaves and sturdy stems. The increased light exposure from the greenhouse setup is clearly benefiting them. Their resilience is impressive, and they appear to be adapting well to their environment.
Feeding and Watering
As the coco mix dries out, I am preparing for their next feeding. Following the Terra Aquatica Tripart feeding chart, I have increased the nutrient solution to an EC of 1.0 mS/cm. This should provide them with the necessary nutrients without the risk of nutrient burn, especially for autoflowering strains. I will not go higher than this concentration to ensure their safety.
Improved Weather Conditions
The weather has improved significantly, with very little rain and temperatures ranging between 19°C and 22°C for the next few days. This stable weather is ideal for the plants, providing them with consistent conditions to continue their healthy growth.
Daily Care Routine
My daily routine includes checking the plants in the morning and evening, adjusting the greenhouse openings as needed, and monitoring the moisture level of the coco mix. This consistent care helps me stay on top of any changes and address them promptly.
Looking Forward
As we progress into the third week, I am excited to see how the plants continue to develop in their new, larger pots with the adjusted nutrient levels. The combination of a controlled environment, balanced nutrition, and diligent care is setting a strong foundation for their growth.
Update on 11.06.2024
Today, I fed my plants for the second time this week. During this feeding, I adjusted the nutrient amount for the vegetative phase (2/3 of the recommended amount from Terra Aquatica):
CalMag: 2 ml/l (Starting EC before adding nutrients: 0.45 mS/cm)
Grow: 1.2 ml/l
Bloom: 0.8 ml/l
Micro: 0.4 ml/l
EC: 1,166 ms/cm (536 ppm PPM-500/TDM)
PH: 5,83
The plants were watered with approximately 20% drain.
Stay tuned for more updates as we continue this journey.


Likes
1
Share
@kauilmayel1996
Follow
Se ve bastante bien la planta
Creo que le esta gustando el lst...
Wow
En una semana creció muchísimo!!!
Estoy feliz pero al mismo tiempo no tengo ni una idea de que sigue...
Solo dejo a la planta crecer o sigo haciendo algunas podas...
Cuando y como???
😵💫😵💫😵💫
Tampoco sé si seguir amarrado es una opción....
O solo dejar que crezca y que ya comience la floración....
Aiuda


Likes
7
Share
@Organic473
Follow
As the rain continues this girl is showing her potential…I clipped a few clones from her this week…she is recovering successfully. She has about four more weeks in veg before I let her flower bin the start of 2026 Jah Guide.
Processing
Likes
Comments
Share


Likes
Comments
Share
@Sn3ak92
Follow
Dec 30: Beginning of the week
Soil PH: 7,5
Light intensity : 100w (about 33%)
The PH of my soil was too high @7,5 so my last waterings were at 6,2 to balance down.
Jan 2: Put a little molasses in watering for a little iron. could help le Kosher Kush plant...
Jan 4: mixed 1/4 cup powdered eggshells with 1/3 cup white vinegar and waited 10hr before mixing into water. Watered plants with that for calcium.
Jan 5: 1 tbsp Epsom salt (for mag) + 10ml voodoo juice in 1 gal


Likes
283
Share
@love_2_grow
Follow
D42 - Today is the first day in the sixth week of veg for #2 and the fifth for #1. It has been six days since the first topping for the first girl, so I went ahead and topped her for the second time. I kept a couple of clones from her this time since she is so vigorous.
I also had planned to do the third and final topping on the second girl but knew that I had to buy some more soil staples first. However, this morning a red warning showed up in my Corona warn app. It's the first warning I have ever gotten, but I'm triple vaccinated, of course, and I was wearing my N95 mask for this five-minute exposure, but I want to act responsibly and quarantine for a few days, just in case.
So I improvised with BBQ skewers and some electrical tape. The skewers won't hold that well, but the branches are still small, so it shouldn't be a problem until I can venture out again.
The cover crop was getting a bit unruly again, so I cut it back again.
Finally, I gave both girls around 1.2-liters of water @ pH 6.3 and added a couple of qtips with peppermint oil to deter pests.
D43 - I gave each girl about two liters of compost tea that I started brewing yesterday. A bit soon, possibly since I watered them only yesterday, but I needed to feed the girls in the other tent, so these girls got some as well.
D45 - Aaaaaaaaaarrrrrgggghhhh!
Thrips have found their way into the tent. Lately, I've noticed some discoloration on the older leaves but haven't thought much about it.
Today though, it was much more pronounced. I took out my loupe and microscope, and sure enough, I could see thrips larvae. Ugh.
I ordered some predatory mites immediately to help with the problem, but they won't get here until a few days, and I want to start fighting the infestation as soon as possible. So, I went out shopping and picked up some pure alcohol, chili flakes, and a spray bottle. After soaking the flakes for a couple of hours, I strained the mixture and prepared a 1:10 solution with distilled water in the spray bottle.
I removed all older leaves that were affected most and then sprayed all the remaining leaves, taking care to get them soaked on both sides.
This chili tincture is nasty stuff, though, and I was coughing like mad, and the snot was flowing like a spring-river. Next time I'll wear a mask!
I also sprayed the clones outside the tent and the Chocodope girl in my other tent, just in case. The Colorado Cookies girl is in flower, though, so I couldn't spray her. She has no sign of infestation, but I'll treat her as well with the mites when they get here.
D47 - I resprayed the girls yesterday with the chili tincture to ensure I got to all the little critters, and today, the predatory mites arrived. I hung one sachet on each plant, and I hope that's the end of the little buggers.
D48 - The end of another week of veg. The second girl thrives after her third topping, and I will do the third and final topping on the first girl in a couple of days. Once that is done, I can install the scrog net.
As for the thrips, I can still see larvae, but they are far and few in between. Hopefully, the predatory mites will soon make short work of them.
I haven't even flipped yet, but there are already flowers in the tent!!! Alfalfa flowers that is :D

Likes
4
Share
@Bir7822
Follow
7-10-2025 . je commence mon rincage aujourdhui,le 9-10-2025. je prévoit de coupe rla plante en pot le 18 octobre. je surveilles les trichomes avec le microscope. il ya eut de tres grosses rafales de vent dû à la tempête... des rafales de 70,80 kmh.. une petite branche a cassé sur celle en pot. j ai coupé cette branche et nettoyé les buds pour les faire sécher... l'autre plante en pleine terre, une gross ebranche à cassé, mais hereusement pas totalement cassée... la seve passe encore dedans. les feuilles et buds ont l'air bien. pas fané ni rien. donc le 18 octobre je serai à la 8 eme semaine de floraison pour celle en pot. celle en terre à 2 semaines de retard comparé à celle en pot... je sais que c'est pas top de filmer quand il fait noir, mais c'est + impressionnant. ;-)

Likes
6
Share
@LittleBigTrees
Follow
Just feeding and waiting for them to ripen up.
They have been very easy to grow despite being kept in small pots.
Likes
26
Share
@shwable
Follow
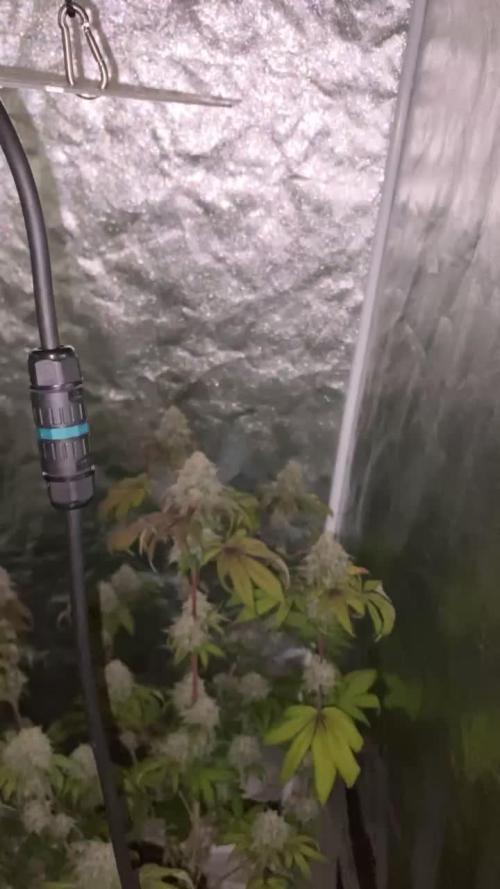
I made some mistakes but they continued to put on more frost
Did not realize that my timer for the light was not plugged in for 10 days so the ladies got 24h light a day for that period...
They already started to grow small leaves on the buds.. revegging but I corrected it on day 93 so it should be alright. Still a major fuck up.
Buds are already rock hard and smelling amazing, I just hope the light stress don't make em herm or produce seeds in the last weeks
Likes
28
Share
@carjos
Follow
I been away from grow diaries several weeks now, quick video for documentation, mute sound in video please, Andie Capp is looking so tired between 11am-1pm. As well am feeding as needed. 2-3 ounces 4-5 times a day for Yao, and 0.5 - 1 ounce 2-3 times a day for Andie.
Likes
8
Share
@ryanloftus222
Follow
Cc#1 wet = 14.62oz
Trimmed=1.92oz
Cc#2 wet =22.22oz
Cc#3 wet =26.39oz.
The last four crystal candies are getting an ice bath for 48 hrs then cut down to dry. I will re update my weeks when further weight is taken and I’ll re update the final product. She’s got lots of fruity notes with a little gas and earthy smell. First plant was cut down early and has cured for a week now and is more of an energetic high as flavors still continue to flourish as curing continues. Definitely a happy moment for me seeing as this is my first grow
Likes
11
Share
@GERGrowDesigns
Follow
Welcome to Flower week 9 of Sweet Seeds Mental Rainbow F1
I'm excited to share my grow journey with you from my
Sweet Seeds Project . It's going to be an incredible ride, full of learning, growing, and connecting with fellow growers from all around the world!
For this Project , I’ve chosen the Feminized Photo strain Mental Rainbow F1 :
Here’s what I’m working with:
• 🌱 Tent: 120x60x80
• 🧑🌾 Breeder Company: Sweet Seeds
• 💧 Humidity Range: 40
• ⏳ Flowering Time: 7-8weeks
• Strain Info: 22-30%THC
• 🌡️ Temperature: 26
• 🍵 Pot Size: 16
• Nutrient Brand: Narcos
• ⚡ Lights : 600W x 2
A huge thank you to Sweet Seeds for allowing me to try my Best with this amazing collection from Photo Strains they managed to Sponsore . Big thanks for supporting the grower community worldwide! Your genetics and passion speak for themselves!
I would truly appreciate every bit of feedback, help, questions, or discussions – and of course, your likes and interactions mean the world to me as I try to stand out in this exciting competition!
Let’s grow together – and don’t forget to stop by again to see the latest updates!
Happy growing!
Stay lifted and stay curious!
Likes
19
Share
@UKLEEDSGROWER
Follow
14 days in flower exactly and they are really filling in the space now, plenty of heads on each plant and the centre catchin up nicely.

Likes
37
Share
@NewbieLearner
Follow
This was a beautiful strain to grow. With her flowers getting big towards the end of harvest as well as the purple colours! I would definitely recommend that you try grow this strain. The buds are super dense and very well formed. An absolute treat to smoke and look at.


Likes
49
Share
@AsNoriu
Follow
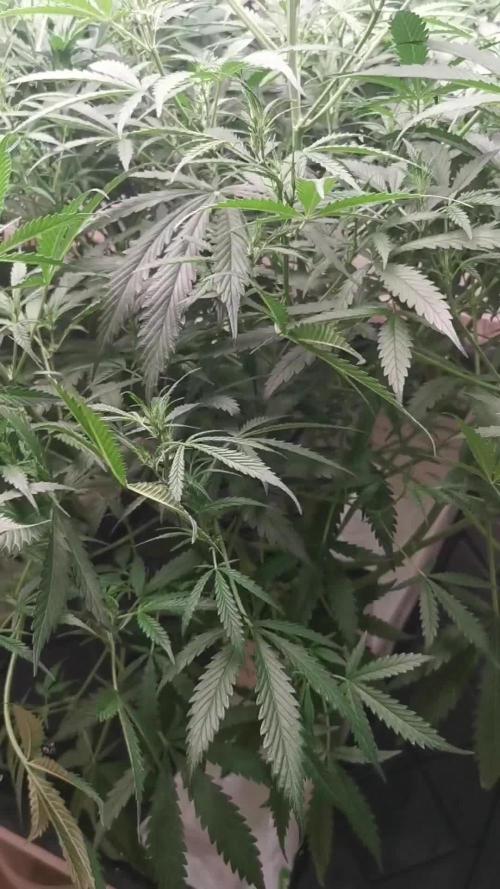
Day 78. Girls are missing food a lot, but i always love to underfeed them, taste ten times better at the end. My QB just burned Mag out of leaves, those branches exposed to most intense light - suffer most. But its not my first rodeo with them, so i am totally calm.
Funny, i got some Clover seeds pop out ... when i brought last predators, they were kept between seeds and now i have mini Nitrogen boost ;))) i know that its only couple plants in each pot, i know that soon i won't need N at all, but still funny aftermath.
Everything else on cruise control since my air system update i have to water every 30 l pot with 4-5 liters every two days, usually it was four ... They bulk up and looks like it will be high quality bud, let's see ... !
Happy Growing !
Likes
9
Share
@Rizik86
Follow
Day 22 - Plant is 6 inches tall. Tons of roots sticking down into the water. Checked PPM 215. PAR/PPFD ranges from 200 to 270 at the height of the plant.
Day 25 - Plant is 9 inches tall and 12 inches wide. Water dropped a lot. PPM was 100. Added 2 gallons of RO. Added 10 mL of CalMag. Added 10 mL of the 3 base nutes Micro Grow and Bloom. Added 5 mL of each of the additives. PPM was 515.
Day 26 - Plant is 11 inches tall. Fast growth! Short and bushy. Roots are thick as spaghetti noodles and formed a thick rootball. Nearly a dozen budsites. Stem is thicker then a pencil.
Day 27 - PPM is 415 in am. Afternoon PPM is 370. Plant is 12 inches tall. PAR/PPFD is 400 to 450 near the top of the plant. DLI is 27 based on 20 hours on and 4 hours off. Late night checked PPM 375. Added 10 mL of Micro Grow and Bloom nutes. PPM is 810.
Day 28 - PPM is 775. The plant is getting huge. The stock is about as thick as a Bic lighter. Plant is 13 inches tall.