
Likes
Comments
Share


@MrJac_GHZMono
Follow
6ta semana comenzó el 22/07/2019 esta vez hicimos poda de bajos por la humedad de la ciudad así puede circular mejor el aire y controlamos la presciencia de hongos, no lo queríamos hacer por miedo a la producción final pero las nenas reaccionaron muy bien y se noto en como comenzaron a engordar y a crecer sus flores, en realidad como que lo agradecieron, también esto ayudo a que le llegara mejor la luz a las ramas mas bajas.
Esta vez sumamos al riego los productos de floración de Top Crop en sus dosis bajas (Top Bloom, Top Candy) ya que algunas estaban presentando carencias de Fósforo y Potasio.

Likes
7
Share


@Cultivators_Dream
Follow
So far another one of Fastbuds finest growing perfect not having any problems or issues. Sorry haven't updated lately guys been super busy with work and hadn't got a chance but I'm back at it and will be so stay tuned. This girl I had to switch over to 12/12 (cause I'm growing her in a tent with photoperiods that needed to switch) gonna see how she does with the shorter days but so far she seems to be responding well to it(next run will be all autos with 20/4 so as to compare this strains performance with the different lighting schedules).


Likes
126
Share


@nonick123
Follow
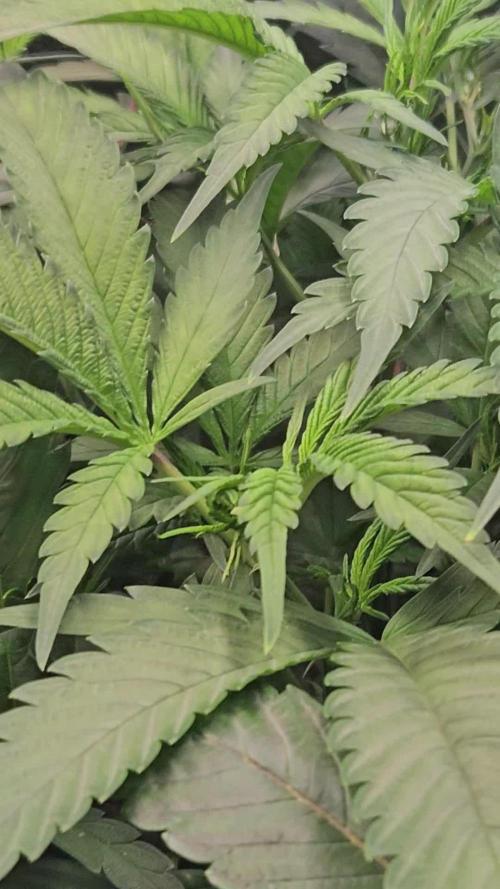
Día 27 (12/02) Sigo con los ajustes de LST, pero voy a empezar a dejar que la planta se empiece a estirar
Día 28 (13/02) Hago una ligera defoliación (2 hojas por planta) para mejorar la luz sobre las ramas laterales que están creciendo verticalmente
Día 30 (15/02). Riego 1 Litro H20 + Wholly Base 1,5 ml/l + Solid Green 1 ml/l + Rise Up 1,25 ml/l de Gen1:11
TDS 880 PPMs - pH 6,6 (ajuste con pH+ para subirlo desde 6,2 y buscar mejor biodisponibilidad del Calcio)
DÍA 32 (17/02) Ajustes de LST. La planta no para de crecer 😍
Mañana pasamos a 12/12 y que empiece el proceso de floración!
💦Nutrients by Gen1:11 - www.genoneeleven.com
🌱Substrate PRO-MIX HP BACILLUS + MYCORRHIZAE - www.pthorticulture.com/en/products/pro-mix-hp-biostimulant-plus-mycorrhizae
️Controlled by TrolMaster TCS-1 Tent-X System Main Controller - https://www.trolmaster.com/Products/Details/TCS-1
Likes
6
Share

@NoProbation4Weed
Follow
extreme growth under the Sanlight LED on 50%.
Plant looks more healthy than the weeks before.


Likes
6
Share

@PurpleBeen
Follow
Week 5 Flowering
Environment
Lighting 100% intensity when temperature remains below 28.5°C
Stable conditions maintained within optimal flowering andrange
Irrigation
Volume 4L per plant (flush)⚠️ adjusted due to slight nutrient burn standard range 2.5–3L per plant
Increased volume supports flushing strategy
Nutrition
Feed strength 1000 ppm reduced to 700 ppm
Water pH stabilized at 6.2
💜🍋? 980 ppm potential PK 52–34 boost under evaluation✅
💚🍬1000 ppm ⚠️ flush implemented
Plant Condition
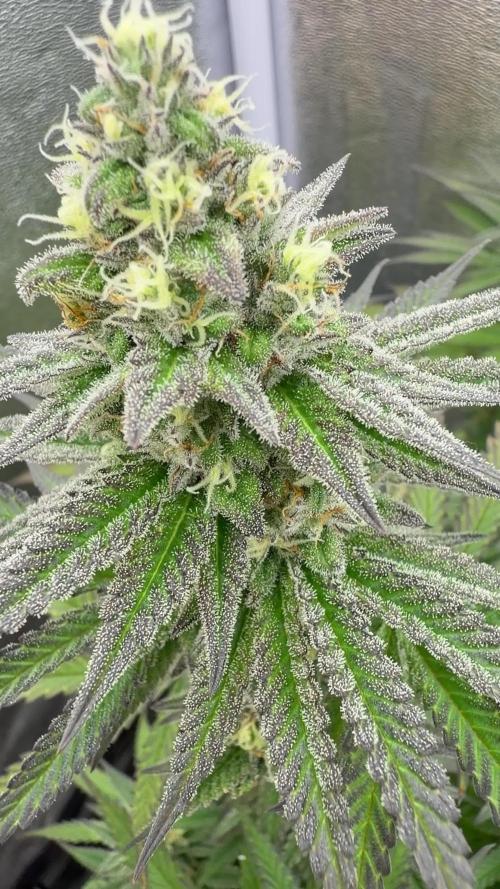
Buds is forming !!! Good smell and color, temp little hight 28,5 degrees during peak !
Slight nutrient burn observed and corrected
Rinsing phase is coming ≈ ? for the front plant : Critical Window and ≈ ? for the background plant : Amnesia Lemon
Phenotypes
Purple expression in background 💜🍋?A.Lemon
Camdy smell in foreground 💚🍬C.widow
Aroma
Terpenes lean toward a sweet, candy-like champagne profile — sugary, fizzy, and uplifting. The Amnesia expression brings a strong, distinctive layer with hints of lemony peanut butter, adding both richness and a subtle citrus sharpness.


Likes
14
Share


@LokalGrenz
Follow
Jan 13th ordered a Dehumidifier today should be here Monday need to get the humidity down for flower I can only get it down to 57% so Hopefully it will work
One of the amnesia haze plants have some type of deficiency not sure have brown spots on leaves
Got humidity some decent control but I’m sure amnesia haze 1 is dealing with PH issues the PH meter is cheap and I’m sure it’s been off a bit so I’m going to look for new one this week


Likes
59
Share


@Theia
Follow
Welcome to my attempt to grow a strawberry sorbet in 30g of Coco... The plan will be to veg her for 21 days once she's out and then straight into a 12/12.
No idea how this will go but it is all good fun.
The container is in fact a tea strainer with 20 micron mesh. I was hoping it will air prune and I will feed by dunning into a cup of feed so there will be no down pressure on the substrate.


Likes
26
Share


@Probation2Propagation
Follow
Pheno 1: strong natural tart cherries with a slight candy
Pheno 2: loud cherry candy
Pheno 3: cherry fun dip
Pheno 4: cherries mashed with earthiness
Pheno 5: the strongest cherry pheno I’ve ever smelt. Just loud cherries in your face.
I kept pheno 3 and 5. I pressed both into rosin and the terps were insane it smelt like I worked a double at the marischino cherry factory. The terps on 3 were cherries on the inhale with a candy fun dip exhale (absolutely up my alley). Pheno 5 was the most in your face cherry I’ve ever tasted. It was straight cherries throughout the inhale exhale with a slight tart/candy on the back end. I have found my cherry phenos for my future business. Thank you for riding this journey with me. Harvest results on my YouTube channel link in my bio!

Likes
5
Share


Likes
4
Share


@MoneyMorris
Follow
Looking like 3 more weeks until harvest. I’m going to start flushing in about 10-12 days

Likes
55
Share


@pifflestikkz
Follow
Day 113
23/08/24 Friday
Big feed today using de-chlorinated tap water pH 6 with Plagron products.
Day 115
25/08/24 Sunday
De-chlorinated tap water pH 6 today only.
Day 117
27/08/24 Tuesday
Feed again today using de-chlorinated tap water pH 6.
Day 119
29/08/24 Thursday
De-chlorinated tap water pH 6 only today.
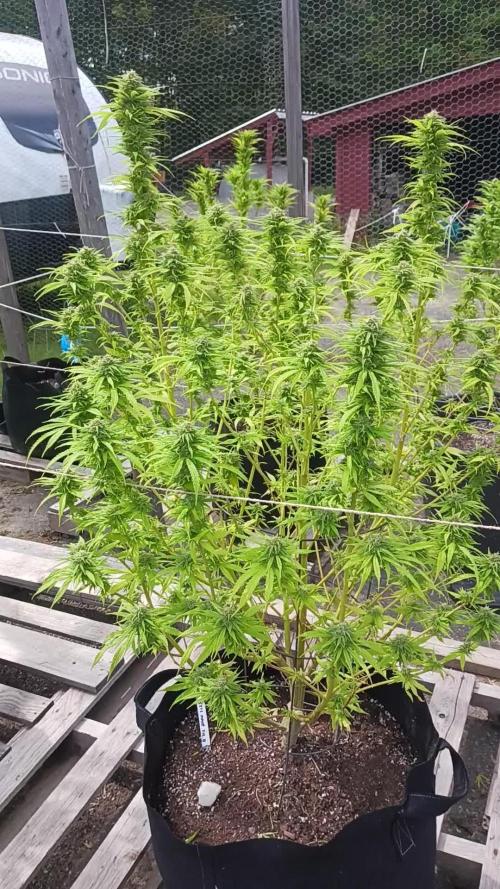
Picture and video update of her filling the Scrog, and now stacking 💪 🤤💚


Likes
5
Share


@Chubbs
Follow
Weekly update on these absolutely gorgeous girls. I was gone for the beginning of the week and came back today and I swear the flowers have doubled in size. They're smelling super strong and gassy. The flowers are dense as rocks so I hope with the summer heats they'll stay that way and not become airy. All in all Happy Growing.
Likes
17
Share

@masterofsmeagol
Follow
9/13 Took the last special Kush today. I had too. Those fucking locusts were eating more and more. At least the trichs looked good. The second plant is straight fire! They're ALL good. I'll have to do the review. Tenth planet is swelling up and trichs are getting cloudier. They are starting to eat the chem dog too but it needs to bulk up and the trichs aren't there yet. Mk ultra natural may be some of the best quality this year. I'm losing SOME to the locusts but it seems they avoid the frostier stuff. At least I'm hoping. This is a great plantvand despite the nugs being so tight and stuff it just needs more time and im going to give it to her. Pink kush is actually look9ng like it might finish. But the locusts have STRIPPED a lot of that. I'll keep an eye on them and keep this uuodated. I got a notification saying congratulations on a harvester diary. I know these outdoor seasons are long but what difference does it make? Hopefully I can still add week later.
9/14 Weather is good bit it's so dry that the locusts are deafening. Thrips are still around and there's not much I can do about it. Looking at the tenth planet I isolated I can see that locusts stripped the middle some and it was stunted from the thrips. The pink kush looks good but I'm losing g some to locusts. The 10th planet, Chem Dog #4 and the MK Ultra I left natural are bulking up and trichs are exploding! Since I safely have some quality cannabis I'm go8mg to let these ride. Unless I continue to lose substantial amounts. Then my hand may be forced. The pink kush is nowhere near ready though. The others would still be good taken now. Smell is strong and I've looked them all.
9/15 Rained last night. Plants were wet. I probably should've watered. Had to remove two branches due to mold. I also removed a couple small buds that had molded. These 40 degree nights don't do well with rain. I'm losing more and more cannabis daily from those locusts and from some mold that comes with the damage. I've never had a year like this. The sounds the make are deafening. And it's not just at night, or a specific part of the day. It's ALL. THE. TIME. I'm not growing again without floating row covers. I'll loon for some today bur that's like closing the barn door after the horses got out. Oh well. That big 10th planet is ready. I was just waiting for more amber bur I'm not taking a chance losing more branches. I'll think about it and I'll update what I decide to do. I might take that today. Chem dog had thr most damage but last I looked it wasn't where I needed it to be.
EDIT: DIDN'T TAKE ANYTHING. IVE GOT MY HANDS FULL TRIMMING AND DRYING ANYWAY. SURPRISINGLY THE TRICHS WERE ALL MILKY! THEY EVEN HAD SOME AMBER! CHEM DOG WENT CLEAR TO MILKY REAL FAST AND THE NATURAL MK ULTRA HAS BUDS THAT THE STIGMAS HAVECTOTALLY RETRACTED AND THE LOOK COMPLETELY DONE. AGAIN. TRICHS ARE ALL MILKY. IT THE BUDS ARE EXTREMELY DENSE AND I WORRY ABOUT ROT. BOTH THESE PLANTS COULD COME DOWN ANYTIME AND IM SURE ID BE HAPPY. I JUST HAVE A LOT RO DO AND THE WEAYHER LOOKS GREAT SO AS LONG AS THE LOCUSTS STAY AWAY THINGS WILL BE FINE. I ALSO watered everything a gallon. I may have been underwatering for fear of overwatering. Tomorrow's a new day. We'll see what it holds. 11% chance of rain. But after that it looks like it will be good.
9/16 Guess I didn't do a video. Went over this morning and then again around one. I brought my loupe and checked everything. Suprisingly some of the pink kush are MILKY already and legit hard as a marble. I won't get much from them but I bet it will be good. The tenth planet I probably should've taken. I was tired though and another day or so isn't going to hurt it. I took off a few of the fan leaves that were left but most have dropped already. The strain SAYS it takes longer but the loupe doesn't lie and the buds arent increasing in size anymore. The chem dog has caught up to it by now and the 10th planet WAS much further ahead. They both have been through the same stressors. This cold weather has sped shit up. I've got all MILKY with amber on thatl tenth planet and I don't want to keep losing more shit. The chemdog has swelled to almost the size of the 10th planet and are all MILKY as hell!. The mk ultra's stigmas have retracted on half the buds and are very dense. It has a few ENORMOUS calyxes on it. The only reason its still standing is that ive noticed A FEW clear tricombs and the plant is healthy. It can survive a little longer but its a September strain and we've had some cold weather already. Some have some stigmas still reaching upward (mostly on the cola) but other flowers have no visible stigma on the top. Theyve reached what looks like perfection and are all milky. That plant it frosty. It might be my best quality. Only time will tell. That plant doesn't have as much damage but I'd like to see a little more amber and see if the buds decide to connect. This strain is on time according to the breeder and ive just decided to oush it. I hope I dont regret I have a bud that rotted off a tenth planet branch so at least i can try it before i take it. Same with the chem dog but it's not dry yet. I'd would be good to try a tester bud before I made my decision on pulling the plant.
9/17 I did a video and took the tenth planet after finding a few buds that had molded and a small branch with mold on it. Should've followed my intuition and took it yesterday but I was sick. Still am. I found some mold on the chem dog and more stem mold. I also found some buds that had completely rotted and died. The plants have been through at least one frost. If I wasn't so tired and ill I would've taken the chem dog too. The buds were swelk8ng though and had caught the tenth planet that had stopped growing. I almost just cut it at the base and hung it upside down because I'm worried about the mold and whatever I'd eating it. It smells great, trichs areall MILKY with a little amber. I was just hoping for more size but it's been a strange year climate wise. I still have another 10th planet out but it has a few issues. The natural mk ultra will probably be the best quality out of the garden. It is rock hard and frosty as hell. I can still see some clear trichs or I would've snatched it. It LOOKS totally done. That's what's weird this year. Advanced trichs on small bud, trichs staying clear on big buds that appear finished. It has MILKY and amber so I coukd take it anytime but it looks healthy so I'll give it a little more time. The pink kush surprisingly has grown extremely trichome heavy rock hard buds. I'll get a harvest from them and it will probably be good quality bit it won't be much. I was able to sample the mk ultra and was extremely impressed. After I do the physical shit and take time for myself ill take pictures and put more up on the harvest reports. Hopfully the chem dog does ok tonight. I'm sure she'll be fine.


Likes
10
Share


@Colectivegrow
Follow
Empezamos (Día 8) nuestra segunda semana de vegetación de nuestras Sweet Seeds Tropicanna Poison XL.
Tienen 13 días de vida desde la germinación y se están regando con un pulverizador con agua de osmosis con CALMAG.
Las plantas están creciendo sanas y fuertes y están empezando a desarrollar sus primeras hojas de verdad. Estamos emocionados de ver cómo se desarrollan en las próximas semanas.
👽
