
Likes
Comments
Share


@DatGuyGrows
Follow
Soil level is a bit low after the transplant so getting ready to add some in. Took domes off and did first Nute feed on day 12. Using a FloraTrio mix with a touch of Cali-Magic and epsom salt

Likes
3
Share


@Cannabis_Sativa
Follow
In the mid flowering stage smells are amazing like citrus. The roots are full fill in soil, its hard rooted on the top on soil

Likes
15
Share


@GrowerFromHell
Follow
I think it's another good strain from the legendary Barney's Farm 😎


Likes
12
Share


@CheeRz
Follow
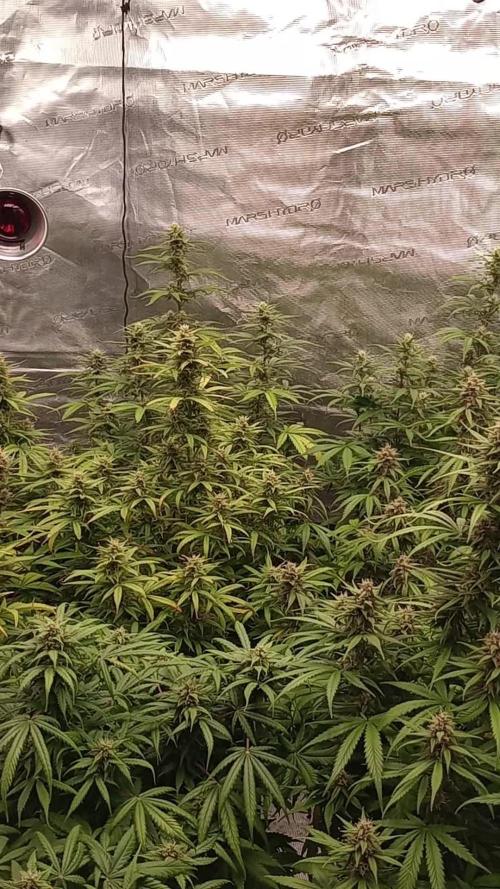
Flowering week 5 and we are approaching the finish line. Lady Runtz seems to be developing well, the leaves are still very nice and green. I am sure we will be ready in time for 05/31/25.


Likes
82
Share


@BigBadLion
Follow
Heeeey all!
Sorry for the extremely slow update! The past few weeks have been crazy for me! 😱
This week I made a lot of defoliation and decided to be somewhat greedy. I'll let the plants grow a bit more so they'll stretch well during flower! So while I defoliate I'll allow the plants to recover properly! 💪
Near the end of the week I also made another mistake with Roko (poor baby! 😭). I broke another of the stems (the one that divided the plant in two, right in the middle) and I feared the worst! But so far the plant kept growing without any problems.
I'm still thinking a name for my 4th baby, she has surprised me greatly and I didn't notice how many new branches had grown until I defoliated her and I'm sure she'll deliver some great buds! 😍
Anyway everyone, this is all for now.
Thanks for reading this journal and soon I'll update the next week! 😃


Likes
8
Share


@Black_Widow
Follow
Привет любители травки
Началась новая неделя
С утра я подгибал ветки на цветке и одна кола лопнула и переломилась и осталась висеть на четверти стебля
После перелома меня охватила паника и боль , но я вовремя зафиксировал стебель и наложил ей шину
Прошло пол дня и вроде все обошлось
Стебель у этой девочки жесткий , но хрупкий
с ней LST очень аккуратно надо проводить
А в целом мне нравится её генетика .
Day 40
Сегодня я поменял раствор на стадию цветения
будем дальше наблюдать как пойдут дела

Likes
25
Share


@The_Lonely_Farmer
Follow
Overall a great strain too grow as grows with ease and seemingly without issues even with minimal care.
With care she can produce hefty buds, as kept mine small my flowers reflect but still produced great smelling powerfully buds 🌱
Cycle finished in time essentially with ease and I'd be happy too recomend this strain from fastbuds.
I will update with more images and videos upon timing complete and give dry weight ect, these girls wont bring much but smell absolute treat.
Atm I have tried 1 small nug but still not ready not long untill can trim up, great oils and taste just need a little cure up once finished.
Tried uploading longer videos but again says error 👎 have now added few extra videos

Likes
12
Share

@DogDoctorOfficial
Follow
GMO Cookies — Week 11 (Flower)
“Served with Extra Curiosity”
This week wasn’t about doing more.
It was about seeing more.
And sometimes… that changes everything.
⸻
🔬 Photo Stacking — What it is & why now
This update goes deeper than usual.
We explored focus stacking (photo stacking) —
a technique where multiple images, each focused at a different depth, are merged into one ultra-detailed image.
* 20–25 frames → standard macro depth
* 80–100+ → high detail
* 200+ frames → extreme resolution, full structure visibility
Why now?
Because this is the phase where:
➡️ Structure is set
➡️ Growth slows down
➡️ Detail becomes everything
There’s less to do…
and more to observe, understand, and appreciate.
We’re no longer just growing.
We’re studying.
⸻
🌱 Quick Recap — How did we get here
12/12 from seed.
No traditional veg phase.
Plants shaped themselves under flowering conditions from day one.
What we see now is the result of:
* Early root establishment
* Stable environment
* Consistent feeding
* Minimal interference
No chasing. No forcing.
Just letting the plant express.
⸻
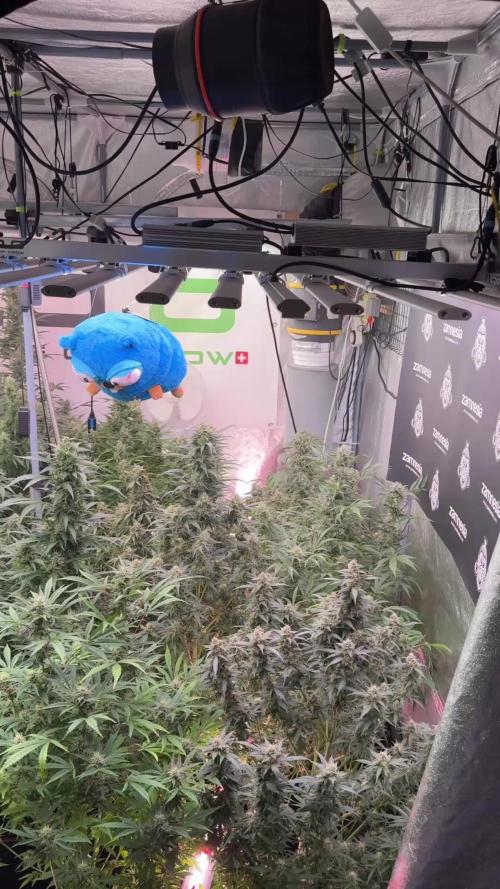
🌿 The Room — Stability over control
Conditions remain intentionally consistent:
* Temp: ~26°C day / 18°C night
* RH: ~60%
* pH: ~6.5
* EC: ~2.0
* CO₂: ~1000 ppm
Everything is guided by plant feedback (leaf EPD) —
not by rigid charts.
At this stage, stability matters more than perfection.
⸻
💧 Nutrition — Supporting, not pushing
Current feeding:
* Terra Bloom
* Pure Zym
* Sugar Royal
* Power Buds
* Green Sensation
* CalMag Pro
Balanced, consistent, predictable.
We’re not trying to “boost” anymore —
we’re maintaining the conditions for proper finishing.
⸻
❄️ Trichomes — The real story
This is where the stacking work pays off.
With the naked eye, we see frost.
With macro stacking, we see architecture.
* Trichome heads forming and swelling
* Density across sugar leaves and calyxes
* Early signs of maturity variation within the same bud
Not all trichomes develop at the same speed —
and now we can actually see that clearly.
This is where observation becomes knowledge.
⸻
🌸 Bud Development & Stacking
The plants are doing exactly what they should now:
* Vertical growth has stopped
* Bud stacking continues steadily
* Density increasing day by day
No explosive changes —
just refinement and consolidation.
This is the quiet phase…
but it’s one of the most important ones.
⸻
🎥 Studio Work & Branch Sacrifice
We took a branch to the studio for detailed work.
Was it a sacrifice?
Yes.
Was it worth it?
Absolutely.
That branch gave us:
* High-level macro insight
* Controlled lighting shots
* Focus-stacked visuals that reveal what’s usually hidden
Sometimes, giving a little… gives a lot back.
⸻
🧠 Why macro now?
Because this is the phase where:
➡️ Doing less = doing more
➡️ Interference can do more harm than good
➡️ Observation becomes the main tool
Macro photography allows us to:
* Study ripening progression
* Understand resin development
* Train the eye for future harvest timing
It’s not just content.
It’s education.
⸻
🔮 What to expect next week
* Continued trichome swelling
* Increased bud density
* More visible ripening signals (pistil changes, trichome shifts)
* Subtle but important daily progress
We’re entering the decision-making window soon.
⸻
⚠️ What NOT to expect
* No more vertical growth
* No drastic structural changes
* No need for heavy intervention
At this point, less input = better outcome.
⸻
🙏 Final Words
To everyone walking this journey with us:
* The OGs who’ve been here since day one
* The new eyes just discovering the process
* The skeptics — always part of the balance
* The silent supporters
* The platform hosting this space
* The sponsors and partners
* The genetics behind these expressions
And the plants themselves…
This week wasn’t about growing bigger.
It was about seeing deeper.
From grower to growers 🤝🌱
📡 DELETED @ 1K Please stay tuned.we never quit https://www.youtube.com/@TheDogDoctorOfficial NEW 🙏 Thank you for your patience and continued support.
FOR DISCOUNT CODES AND MORE JUST FOLLOW THE LINK https://website.beacons.ai/dogdoctorofficial
📲 Don’t forget to Subscribe and follow me on Instagram and YouTube @DogDoctorOfficial for exclusive content, real-time updates, and behind-the-scenes magic. We’ve got so much more coming, including transplanting and all the amazing techniques that go along with it. You won’t want to miss it.
GrowDiaries Journal: https://growdiaries.com/grower/dogdoctorofficial
Instagram: https://www.instagram.com/dogdoctorofficial/
YouTube: https://www.youtube.com/@dogdoctorofficial Deleted by Youtube - https://www.youtube.com/@TheDogDoctorOfficial NEW
Vimeo : https://vimeo.com/dogdoctorofficial Under construction stay tuned ⸻
Explore the Gear that Powers My Grow
If you’re curious about the tech I’m using, check out these links:
🔆 Lighting & Environmental Control
• Future of Grow — Advanced LED lighting technology
https://www.futureofgrow.com/
DISCOUNT CODE: DOG20
• Lumiflora — Under-canopy LED lighting
https://lumiflorade.com/
• TrollMaster — Environmental controllers and automation gear (past collaboration)
⸻
Genetics
• Zamnesia Seeds — Genetics used in this project
https://www.zamnesia.com/
⸻
🌱 Soil, Substrates, Boosters & Root Support
• Plagron — Substrates, bio mixes, and supportive products
https://plagron.com/en/
⸻
🎒 Storage, Curing & Preservation
• Grove Bags — Curing and storage solutions
https://grovebags.com/
⸻
📸 Photography Equipment & Tools
(Not sponsors, but part of my creative toolkit)
• Sony A6700
• Sony full-frame macro lens + few more
• Stacking photography workflow - learning
• iPhone (for behind-the-scenes shots)
We’ve got much more coming as we move through the grow cycles. Trust me, you won’t want to miss the next steps, let’s push the boundaries of indoor horticulture together!
As always, this is shared for educational purposes, aiming to spread understanding and appreciation for this plant. Let’s celebrate it responsibly and continue to learn and grow together.
With true love comes happiness. Always believe in yourself, and always do things expecting nothing and with an open heart. Be a giver, and the universe will give back in ways you could never imagine.
💚 Growers love to all 💚
📸 P.S. – The Eye Behind the Lens
All photos in this diary (for now — except for the ones showing the camera, which I took with an iPhone) are taken with a Sony A6700 paired with a Sony full-frame macro lens and a few more.
Photography is part of the story — it’s how we share the fine textures, the glow, and the quiet details that words can’t always capture.
I’ve also started experimenting with photo stacking — a technique where multiple images, each taken at a slightly different focus point, are layered together to create one perfectly sharp image from front to back.
It’s not digital enhancement or AI; it’s pure photography — a way to reveal the plant’s beauty in microscopic depth, from trichome to petal.
You’ll even see a few shots of "ghost me" capturing the shots — camera, lens, setup — because every grow deserves not just to be cultivated, but documented like art.
FOR DISCOUNT CODES AND MORE JUST FOLLOW THE LINK https://website.beacons.ai/dogdoctorofficial
NEW DISCORD - Official Server Invite Link : https://discord.gg/ksjAkA5T74
Likes
13
Share


@FlavoursUk
Follow
Day 44 - The smell is divine, and the buds are looking very pretty. Beautiful fade going on in the leaves, almost like a purple/red/black. Planning to tapper down the nutrients as we are coming closer to Harvest.
Crucial to keep the pH in range during flowering and being away a few days, I wasn't able to correct it until I was back. So they were drinking more water than uptaking nutrients.. leaving a high EC in the system. Corrected the issue by adding plain RO water, treated with cleanse, no nutrients.
They are now on track and could do with a last defoliation, but I've been holding it off. Will get around to it over the next few days.
The buds are sticky, smell great and rock hard. Dehumidifier was added to the tent to try lower the humidity to a better range.
Can't wait to see the end results and product. Another 2 weeks an I think we will be good.

Likes
12
Share


Likes
6
Share


@Ross4Twenty
Follow
Was showing signs of nutrient lockout so decided to start flushing process.. amazing smell but this will be the last ever diary of disco biscuits as she has outstayed her welcome.
Not as fat as I’d like her to be but still 2 weeks remaining before chop.


Likes
42
Share


@Jackweed77
Follow
18/05/21 giorno 57 tutto procede bene le ragazze sono delle vere bombe! Anche in questa ultima settimana stanno continuando a ingrassare e gettare fuori resina...l odore e molto intenso...per fortuna il filtro fa bene il suo lavoro...💚
21/05/21 giorno 60 messo nei serbatoi acqua a ph regolato inizia il lavaggio 💚🌻🌻🌻non vedo l'ora di raccogliere i frutti del mio lavoro...💨😋
24/05/21 raccolto!👍🌱💚🌻 messo il tutto a asciugare...attendiamo con ansia di provare il risultato....🥁


Likes
40
Share

@eldruida_lamota
Follow
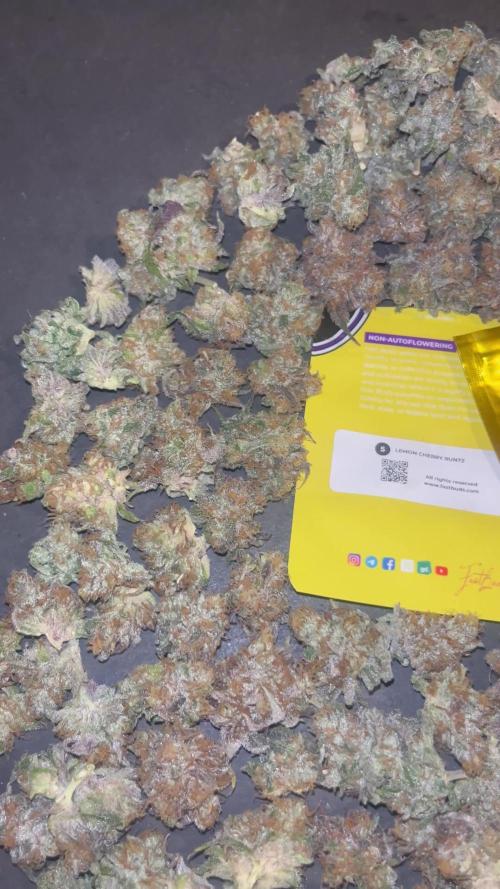
Venga familia que ya viene la cosecha de estas Lemon Cherry Runtz de Fastbuds, que ganas que tenia ya de darles machetazo.
Que locura de variedad , me encantó cultivarla , en este indoor no tuve plaga de nada así que todo fenómeno.
Las flores aparte de piedras, se ven resinosas.
a sido una genética con la que disfruté bastante, es fácil de cultivar y es resistente, 9/10 semanas de floración, la planta es bien olorosa, apesta bastante, los aromas son intensos y muy dulces.
Agrobeta:
https://www.agrobeta.com/agrobetatiendaonline/36-abonos-canamo
Mars hydro:
Code discount: Eldruida
https://www.mars-hydro.com/
Hasta aquí es todo , espero que lo disfrutéis, buenos humos 💨💨.
Likes
3
Share


@Mr_Freeze
Follow
(Back Left) Panama Red, (Back Right) Amnesia Lemon, (Front Left) Super Purple 2.0 Pheno #1, ( Front Right ) Super Purple 2.0 Pheno #2


Likes
21
Share


@Esmoki_La_Cabrona
Follow
September 2, Day 43. I removed the trellis because it was annoying and I realized the spaces were too large and that's why it felt clumsy... Kabob sticks are doing the trick so far.
As I was clipping some leaves to prepare for flowering, I noticed roots growing through the bottom of the pot. I hate transplanting plants so I sat the current pot in another pot that was filled 30% with additional coco coir that had been prebuffered with seedlings strength nutrients to avoid shock. I am confident the roots will continue their journey through the first pot and into the additional space below. Now to observe for a few days, aiming to switch to flowering next week.
I have removed at least 30 leaves throughout the last week and she is still looking so bushy and healthy... Thanks Recharge. I ordered Big Bud by Advanced Nutrients and I look forward to using it during flowering.
SUPER MEGA HAPPY UPDATE
Day 44, September 3. I clipped a branch and planted it in a prebuffered with seedling strength nutrients rockwool pellet... I baptized her Kaboom Baby.... And. She. Survived!!! Ahhhhh!!! So freaking happy! I am going to start a second grow under this diary called Kaboom Baby, La Reinita Africana.
Update, Day 46, September 5, 11am. Fed and watered with all nutrients except Recharge. Kaboom Mama is growing wild and free. I had so many training plans but I like her this way.
As always, thank you for stopping by. If you have any thoughts about this grow, please leave them below. Happy growing and massive yields to all 💯🙏💚

Likes
3
Share


@Wishar_Garden
Follow
Week 9 (26/07 - 01/08)
27/07
We can start seeing the flowers forming
Will maybe need to do some supercropping if she doesnt stop stretching