
Likes
Comments
Share


@HomeGrowHeaven
Follow
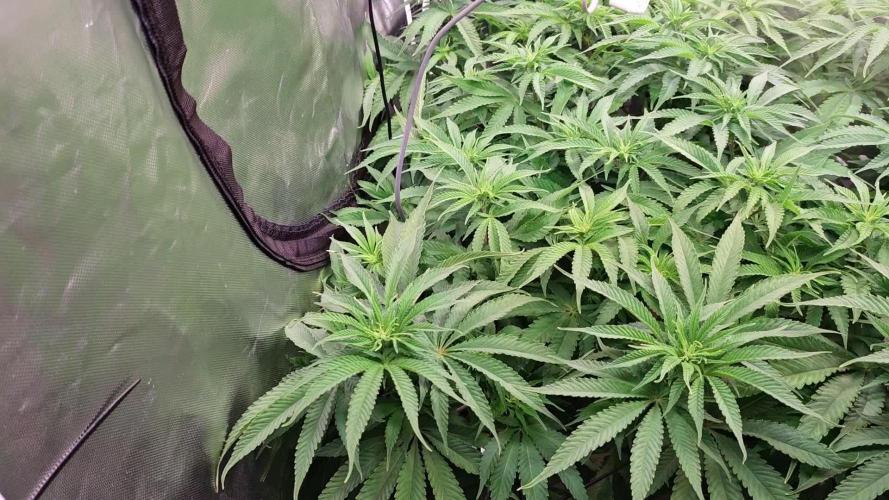
We chopped down the plants. Now they hang out to dry in the tent.
The Trichs looked very good. Some milky, some amber, hardly any clear. Just the way I want it. The popcorn buds were rather milky. So we have more of a couchlock effect on the head buds and the maximum THC on the popcorns. I'm really looking forward to the taste💚

Likes
61
Share


@Cariboo_OG
Follow
Grape Ape Cake !
Lineage;
Hotcakes
(Katsu Bubba Kush X Burnt Toast (from Raw Genetics)
X
Grape Ape
An Exciting New Collab from Katsu Bluebird !
Welcome back, & or Thanks for Joining me !
Week 15, & the End of 9 weeks of flowering (65 Days of 12/12)
Well Here we are, the last flower entry.. only one more entry the HARVEST of these Gorgeously Dank Flowers from Katsu.
We are Seven Days into the flush & thus far everyone is holding steady ! Only 3-7 more day's for the group ! As your can see plants One & Five are the quickest of the Pheno's, they received their last watering today & once they dry back 50% of todays water they'll be into 24-48 hours darkness before the chop.
As for Plants Two & Four are they Longest running of the Pheno's they will likely receive another watering, & run another 7 days.
Plant Three is the one i'm watching closest ! this plant is SHOWSTOPPING... Grape Candies Dipped in Gasoline floods the floor, the moment I open the tent.. This particular pheno may go 7 more days maybe not.. Its very close to the finish line either way... I'm Drooling.
The most exciting part about starting to pull plants is the ability for my to take some better isolated Bud Shot photo's ! :)I wish I had the funds to keep upgrading my photography gear but its an expensive hobby...maybe ONE DAY lol!💪
The Boys Club saw a little bit of action this week as well.. a long over due hand job for the jizz monster. I am very excited to cross this guy back with a cut of Pheno 3.. & maybe something else but I need to find it first.. any thoughts ? Grapes &...?
This process used to be SO damn time consuming.. until the Trim Bin..
The recommendation is to use 1/10 ratio of baking flower as a natural absorbent to keep the moisture away from your pollen.. as you can see I dumped a bunch out after the first photo lol
I cant wait to Share coming weeks as the Wonderful Harvest is almost here !
Thanks for Reading 🙌
If you have a question or a comment leave it down below otherwise,
I Hope You Check in Next Week,
Stay Safe out there & Happy Gardening
Cariboo

Likes
6
Share


@Art88
Follow
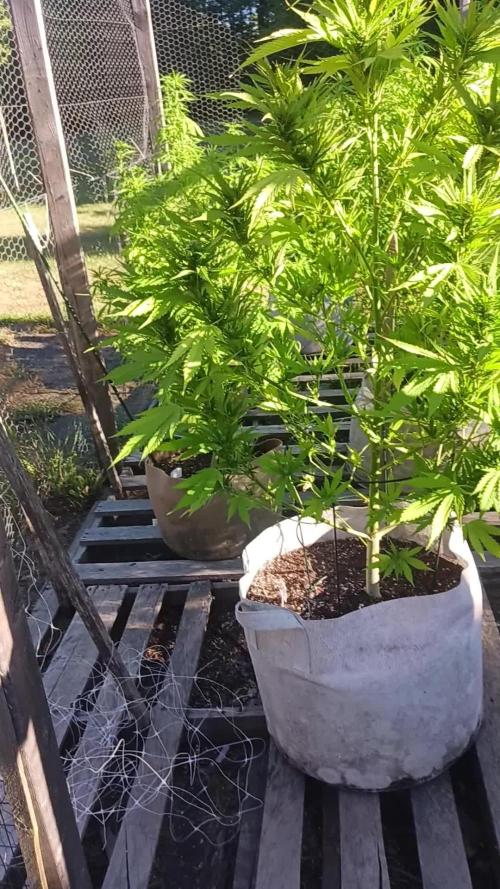
Cleaned the crown out and lifted the canopy gonna give them another week then flipping 🤙

Likes
23
Share


Likes
17
Share


@TheYorkshireFarmers
Follow
Week 4 Not Much Difference From Last Week A lot More Stickier and More Thc Showing On Both Plants

Likes
223
Share


@Tropicannibis_Todd
Follow
💩Holy Crap We Are Back At It And Loving It💩
Growmies we are at DAY 56 and she's just killing💀it👌
The Gorilla Punch Is Amazing 👏 But so is the OG
👉We are in full flowering mode for the👈 OG 👍 GP 👍 the AF was the hold out but shes finally went into flowering👈
So Shit , I gave them just a tad to much nutes at the start feeding 👈 But I have since fixed it
So I'm still doing some low stress training 🙃 and some defolation 😳
Lights being readjusted and chart updated .........👍rain water to be used entire growth👈
👉I used NutriNPK for nutrients for my grows and welcome anyone to give them a try .👈
👉 www.nutrinpk.com 👈
NutriNPK Cal MAG 14-0-14
NutriNPK Grow 28-14-14
NutriNPK Bloom 8-20-30
NutriNPK Bloom Booster 0-52-34
I GOT MULTIPLE DIARIES ON THE GO 😱 please check them out 😎
👉THANKS FOR TAKING THE TIME TO GO OVER MY DIARIES 👈


Likes
2
Share

@Gnrlymsntrp81
Follow
They are both growing nice and steady, so far no problems. The stretch ist moderate, but they are going to fill the netting fully by the end of this week.Allready smelling strong.

Likes
2
Share


@KeemBboomin
Follow
Once again these girls don’t really need much just watering when dry but other than that we are on cruise mode. I have been checking trichomes for about a week now and man is she almost there I should be giving them lights out with in another week or two can’t wait
Likes
18
Share


@BrownsBuds
Follow
Fed at start of this week with 2 litre each with bio blizz schedule.
Very clear signs of nitrogen deficiency in higher up leaves now, hopefully I am now feeding enough nutes.
trichomes still looking clear to me hopefully only another week or so until it’s ready to harvest.
Likes
13
Share


@Lfuego22
Follow
Today is just the harvest, wash and hang dry process. Still must dry and cure and won’t tastes for at least 30 more days. Sorry guys. Updates later
Likes
15
Share

@masterofsmeagol
Follow
8/10 Hurried morning. Today was water day and the hose fucked up. Dad got it working while I filled half the jugs needed with water and the requisite amount of plant doctor. I gave the preventative dose (which is 1/2 tsp per gallon but I upped it closer to 1 tsp per gallon) on the plants that have received the three full treatments, the 10th planet in the middle and the chemdog. The rest received their last full dose. I had watered the NATURAL mk ultra and other tenth planet yesterday so I'm waiting until tomorrow when the need water to give them their treatment. Other than the 10th planet I'm worried things are going pretty good. Tjat's probably tine too. I certainly wouldnt have even noticed it a few years ago. I only bought like half the amount of soil as last year and really tried keeping costs down. These aren't the biggest plants I've grown but I'm grateful for what I have. I'm working hard to get the most out of them I can. I'm planning to give it a few days and then feed later in the week.
EDIT: I THINK I got my grow question deleted. Finally. It's strange that I didn't get ONE outdoor growers response. Doesn't matter. I figured out the best course of action. I'm lucky. Or maybe I just work hard. I defoliate twice a day. I have some pruning to do on the interior of a COUPLE plants. I've cleaned them up pretty good this year. No signs of ANY wpm which is great but suprisinging considering the rh and the rolling fog most mornings.
8/11 I gave the tenth planet in the back and the mk ultra I didn't get yesterday. The mk ultra got the preventative dose (upped from 1/2tsp to 1tsp) and the 10th planet tge full dose. I'll have to check but I think this is the last cure dose for everyone. Found a pillar INSIDE a bud on the special kush that's far ahead. Then you can see on the video a HUGE cut worm or something on the branch I pull down. Luckily I saw it. Wasn't there when I got back but it took a few bites. Looked on the camera and saw a bird swoop in and grab him. Thank the lord! It's going to be 100° today and tomorrow with heat advisory in effect. I'm going to have to treat these plants for pests/pillars some how. I might just use BT and my super alkaline water. The septoria is under control and I'm just afraid spraying anything would make things worse. I'm certainly jot going to let them eat my early flowering plant. I can't apply ANYTHING in this heat. I'll research and maybe if it gets low enough tonight I might be able to do something. I'm going to go back over and check that plant going branch by branch. That one 10th planet tgat WAS the biggest plant is severely stunted amd has some "strange" looking leaves. I wasthinking about getting it off property or just chopping and burning but I figure it's been in there long enough that the others could be infected. I think it spreads through pests if that's the case then it might be better to get rid of it. I'm not sure what I'm going to do yet. I'm going to stop and try to get some mulch today.
EDIT: I found a place I can get a bale of straw and I think I'll use that to mulch. It's almost a 100°. After killing the pillar this morning and missing that cutworm I came back over to REALLY look at the special kush in later flower. I looked through every branch and every bud. I found four pillars on that plant. No REAL damage yet and extremely small. I had to pull buds apart to find them. It's like they were hiding from the heat. That was miserable hand picking them in 100° degree weather. Luckily the bird feeders are close but the bigger birds chase the smaller ones. The smaller birds have found a new food source and perch on my cage waiting. I'm leaning towards treating the flowering plant with BT-k. Seeing that tge citric acid WON'T kill fungus I'll just use OUR super alkaline water and hope for the best. Nothing will get treated during this weather.
8/12 IT reached 105° yesterday and I had a family medical emergency. Came over this morning to several plants drooped right over despite me checking MD day and them being fine. Phone dodnt charge so I couldn't get pictures. Watered everything but the ones that got it yesterday cause they looked good and still had weight. I had to leave before the ones that were down could pick back up. The kush plants seem to tolerate this heat much better. Beside the ones in the 10s tge others are taking this hear fine. I'll update when I get back.
EDIT: Went back over around 10. Another hot day. Suppised to be HOTTER than yesterday. I don't know how that's possible. both our thermometers went to 104 lately. Oh and I dont think that's beet curly top virus I think it's just great stress! I've grown this strain before and it's not the most resilient but it's other qualities make up for that. That's a loud off. I checked most buds on the plant in late flower and found a grass hopper IN the cola! No damage that I could see and I flicked him in the head which killed it. I came back to the chemdog that I didn't water drooping. I watered that and the 10th planet I didn't get this morning. The only one that hasn't got water today was the natural mk ultra and when I was there it was still heavy and looked really good so I left it. I'll have to come back around four and check things out. I'll be watering that tonight for sure. It will be hot tomorrow too then it will be better weather. I need to feed but I'm uncertain whether I should in this heat. All the kush strains I'm running are have Hindu kush as a parent and seem to be able to take the heat no problem. We don't get heat like this usually. It's different when it's 100° and 99% rh than dry heat.
Edit #2 WENT BACK OVER AROUND 3:30PM EXPECTING TO WATERING THE ONE PLANT I HADNT. THE MK ULTRA THAT I LEFT NATURAL. IT LOOKED GREAT WHEN I GOT THERE AND WAS STILL HEAVY. IT LOOKED BETTER THAN NORMAL. ONE SIDE HAD A FEW LEAVES THAT WERE STARTING TO DROOP BUT ITS RIGHT WHERE THE SUN IS HITTING IT ON TH BOTTOM. ITS JUST A LITTLE HEAT STRESS. THE 10TH PLANET ARE MORE PRONE TO HEAT STRESS. I NEED TO FEED. I DEFOLIATED QUITE A FEW LEAVES TODAY. IM RUNNING OUT OF LARGE FAN LEAVES ON MY PLANT IN MID FLOWER. EVERYTHING SEEMED TO START MAKING LITTLE ROCK HARD BUDS ALMOST OVERNIGHT AND THEY ARE STARTING TO SWELL. PLANTS NEED NITROGEN I THINK. I USED LESS SOIL AND WATERED MORE. I JUST DONT WANT TO FEED DURING THIS HOT WEATHER. TOMORROWS THE LAST OF THIS HEAT WAVE AND THEN ILL BE ABLE TO GIVE THE GIRLS A GOOD FEEDING. THE SILVER LINING TO THE PATHOGEN THING IS THAT IVE BEEN MUCH MORE COGNIZANT OF LEAFING THE PLANTS AND REMOVING DEAD AND DAMAGED LEAVES. I'VE DONE A MUCH BETTER JOB WITH THAT THIS YEAR. AFTER THE HOT SPELL ILL GET IN WITH SHEARS AND PRUNE OFF LARF. IVE GOT SOME BUT I HAVE MORE I NEED TO GET.
8/13 IT was supposed to be HOTTER yesterday than the day before bit it was the same 104°. Today is supposably the end of this ridiculous heatwave. I watered everything that needed it despite having watered deeply yesterday. I put 8 1/2 gallons into the garden where it needed it most. Chemdog and the big 10th planet I got yesterday. Soil is still wet and the bags are heavy. I can't believe how well these kush plants hold up to the heat. Hopefully better Temps tomorrow so I can feed. In other news I haven't been seeing septoria leaves. Less and less everytime I go over! Keeping my fingers 🤞.
8/14 Last of the hot days. Watered the chem dog and the big MK ULTRA. It's supposed to rain today. The rest of the plants are heavy amd doing good. I'll update when I can write more.
UPDATE: MY SPIDEY SENSE STARTED TINGLING AND I SAW THE TEMP WAS OVER 90° SO I WENT AND CHECKED THE GIRLS. THAT MONSTER 10TH PLANET WAS STARTING TO DROOP. THEY BOTH ARE A LITTLE HEAT STRESSED BUT WE ARE SUPPISED TO GET THUNDER STORMS AND MUCH MILDER WEATHER. I DID SOME SEFOLIATION AND PRUNING WHILE I WAD THERE. MY FEAR OF SEPTPRIA HAS LED TO ME BEINGVMUCH MORE DILIGENT IN PRUNING AND DEFOLIATION. I PLAN TO FEED TOMORROW AND DO SOME MORE PRUNING OF SMALL SHIT THAT WILL JUST GET EATEN OR INFECTED. PLANTS NEED TO BE FED. ILL NEED TO WATER TOMORROW IM SURE SO I ASSUME ILL BE FEEDING. I WANTED TO SPRAY BT TONIGHT BUT ITS TO HOT. I HOBESTLY BELIEVE THE BIRDS AND MY MANUAL INSPECTIONS HAVE BEEN DOING PRETTY GOOD. WISH I HAD A BLACK LIGHT FLASHLIGHT. THATS A GOOD IDEA! MAYBE I COULD EVEN GET ONE OF THOSE ONES THATCWORK ON FUNGUS AS WELL. I SAW A FEW LEAVES THAT LOOKED LIKE MITES HAD FED ON THEM. I FOUND ONE SO THERES GOT TO BE MORE. THE THING IS THOUGH....WHERE "I" GROW ITS REALLY HARD FOR A MITE INFESTATION TO TAKE HOLD. THE WINDS TO STRONG, THE TEMPS AND WEATHER TO UNPREDICTABLE AND THE FALL PREY TO NATURAL PREDATORS. AT LEAST THATS BEEN MY EXPERIENCE IN THE PAST. IM NOT SURE IF BT KILLS MITES. ILL CHECK. IF NOT ILL KEEP AN EYE OUT. HONESTLY, ITS OUTDOORS BUGS ARE GOING TO GET ON MY PLANTS. I DEAL WITH IT APPROPRIATELY. THIS WAS A SMALL BOTTOM BRANCH THAT GOT PRUNED ANYWAY. NOT A SPIDERMITE BUT STILL. FOUND A REAL SPIDER WHILE LOOKING FOR PILLERS AND HAD TO EVICT HIM. HIS WEBS LOOKED EGGECTOVE BUT I DONT WANT SPIDER WEBS ON MY PLANTS. HE/SHE DESCENDED VERY QUICKLY ON A WEB TRYING TO ESCAPE. NO DICE THOUGH. I APPRECIATE AND THANKED HIM FOR HIS HARD WORK HELPING KEEP MY PLANTS PEST FREE.
EDIT #2 I doubt many people read what I write but I've been rereading some of it and there are so many typos I appear dyslexic or to have a severe learning disability haha. Words are missing, letters are missing and sometimes sentences just don't make sense. Oh well. I'm not changing it. If you are able to decipher my notes congratulations!
8/15 We got NO rain despite other townsfolk near us having thunderstorms. Watered everything in the garden but the chem dog and 10th planet I watered yesterday. Everybody got a gallon but the big mk ultra got closer to 1.5. I fed them this morning with a quart. I could probably up the dose but this seems to work. I have some other defoliation to do. I see some small white specks. Mites. Just a few bottom leaves. I picked then off. I'll watch it and I'll be spraying SOMETHING soon. I was planning BT-k but if I have other pests I mat need to use something else probably Dr. Zymes. I'm more worried about pillars than a few bottom leaves that have a couple on them.
EDIT: WENT BACK OVER AT FIVE. EVERYTHING WAS LOOKING AWESOME DESPITE THE 82° TEMPS. OH AND NO MITES. ITS JUST ONE OF THE TENS ANYWAY BUT I FOUND A LEAF AND SCOPED IT. ILL DEAL WITH THEM. IVE HAD THEM BEFOŔE AND IT WADNT A PROBLEM. NOT SEEING ANY SEPTORIA. I HAVE TO GIVE IT PLANT DOCTOR FOR SAVING MY ASS. IM STILL GOING TO DO PREVENTATIVE TREATMENTS WEEKLY AS RECOMMENDED. PLANTS SEEM TO LOVE IT ANYWAY. I DONT KNOW IF ITS THE KOOL BLOOM BUT THE BUDS SEEMED TO BE SIGNIFICANTLY BIGGER SINCE EVEN THIS MORNING! ILL PROBABLY ORDER SOME LADY BUGS THIS YEAR. I DONT LIKE SPRAYING WHEN I DONT HAVE TO AND THE ONLY TIME I USED D.E. I ENDED UP WITH FUSARIUM THAT YEAR SO IM REALLY HESITANT ABOUT IT. WHILE I WAS THERE I HAND HUNTED PILLARS FOR QUITE A WHILE. I FOUND ONE. I FOUND DAMAGE ON A BRANCH BUT IT LOOKS LIKE SOMETHING ELSE (LIKELY A FINCH) GRABBED IT. THE BIRDS ARE ON MY SIDE BIG TIME THIS YEAR.


Likes
19
Share


@MiyaguiOkPolilla
Follow
Esta variedad me encanta, huelen genial y sus cogollos son super densos y llenos de resina siempre. Poca tolerancia a los excesos y es muy fácil de estresar. A pesar de todo sigue siendo una de mis variedades favoritas ya que su aroma old school con toques ácidos me fascina!. Actualizaré luego del secado y después notas de humo. Saludos!
Processing
Likes
94
Share


@Master_weeda
Follow
Good morning all
Day 63 and everything goes wonderfully I think for most that feels the end.
Some begin senescence including my gorilla glue from fastbuds and northen light auto from RQS
I start rinsing all of my 5 plants except the bubblegum which has not started to flower after 63 days
I specify that in terms of performance the blueberry auto of pev seeds and the most prolific it is beautiful. 😍
The gorilla glue from fast_buds is smaller but is not left behind because it is loaded with nitroglycerine 😋
We are no longer far from the harvest I am doing a final defolliation in order to let the light reach the lower heads
I think that within a week for some to two weeks for others they will all be harvested
What a pleasure for this run even if the weather is long approaching the harvest ... patience is the mother of all the virtues 😉
May the strength be with me 💪
And in french langage
Bonjour a tous
Jour 63 et tout ce passe à merveille je pense que pour la plupart cela sent la fin .
Certaines commencent la senescence notamment ma gorilla glue de chez fastbuds ainsi que la northen light auto de chez RQS
Je commence le rinçage de la totalité de mes 5 plants hormis la bubblegum qui n'a toujours pas commencée à fleurir après 63jours
Je précise que en terme de rendement la blueberry auto de pev seeds et la plus prolifique elle est magnifique. 😍
La gorilla glue de chez fast_buds est plus petite mais n'est pas en reste car chargée à la nitroglycérine 😋
Nous sommes plus très loin de la récolte j'effectue une dernière defolliation en vue de laisser la lumière atteindre les têtes du bas
Je pense que d'ici une semaine pour certaines à deux semaines pour d'autres elles seront toutes récoltées
Quel plaisir pour ce run même si le temps ce fais long à l'approche de la récolte... la patience est mère de toute les vertus 😉
Que la force soit avec moi 💪


Likes
22
Share


@Slobasian
Follow
You walk into the back yard and it’s a straight face punch of smells. Looking like some indoor rn moved all plants to safer place in case storm hits so now I atleast have a wind break


Likes
3
Share


@OldskoolHed
Follow
Overall a heavy yielded because of the density. Had a huge stretch and was super vigorous throughout all cycles of growth. Had no issues and got a nice dark fade at the end of flower. I will definitely be running this again.


Likes
25
Share


@Luna91
Follow
Hey!
My ladies are growing massive!! Tall and bushy! Eventually I had to change the height of the lights as I noticed some signs of hheet stress! After applying that big AC to the room, I could manage the heet but still the plants didn’t like it very much! So Im leave 1Veg/2Bloom lights on for 20h,but increase the lights for a few hours evry one a while to maximum.
I also did my last defoliation and made a video for you guys .
Best of luck!


Likes
37
Share

@masterofsmeagol
Follow
Week begins 8/12 LAST FEED 2 gallons 8/12 AFTER A RAINING NIGHT.
8/13 I've found what appears to be septoria on a couple plants. Looks like the weather will be OK tonight so I can apply organocide or something similar before dark. I've seen random pillar damage so this will be a two-for. I also should move the middle plant back and utilize my space more. Ph seems on point around 7.3. Higher in some places of the soil. I've noticed what looks like root issues on my blueberry. Winds were horrible yesterday and this plant doesnt hace a vertical trellis for support. Stem was pretty wobbly for a while but the plant seems to be growing fine. Either that or a jpn beetle munched the top of a bud. That's probably what happened. It was in the low 50's this morning. That's a 40 degree temperature swing in just a few days. This grow season has been the most challenging I've faced. Of course it had to happen when personal, family, and health concerns rear their head. Oh well. I can only do my best.
8/14 Went over at 5am to apply organocide to treat WPM or septoria as well as insecticide for pillars. I got there and one of my healthiest plants had been turning a little lime green now it was drooped over just like the larger GDP. This one is a 9lb kush though and they were doing good. Now it looks like it's dead over night. Maybe it's that liquid kool bloom. The soil seemed dry so I watered the plants. It MIGHT have picked ok a little. I'll have to check tonight. If not something is going on at night or in the rootzone and I really don't know what the fuck is going on. I will post updates and check later tonight. Damn. This has been a real challenging year.
8/15 That plant might be overwatered or not be draining correctly. At least I was able to get underneath it and the ground was dry. It was also hard packed dirt so elevating the bag may help. I'm going to wait a few days and see if things improve. This really sucks. I'm getting that defeated feeling. I need to get out of it though as I'm starting to see flower begin. The blueberry is probably the farthest along. I need to remember to take pictures of the newly developing flowers. Granted I've had numerous medical and other issues that have taken me off my game but losing two plants in one year is pretty shitty. I was able to fix things with COVID last year or the year before so I hope I can at least save this 9lb kush plant. If I lose this plant too it will be a substantial amount of cannabis lost. I need to rearrange my cage as well to make use of the extra space. Maybe I could've overwatered that plant that had been in the rain for a long time. I need to get my water routine down pat instead of doing the "lift the pot" method I have been doing. I went to several different commercial growers and got a bunch of crazy answers. Only time will tell. Last night I finished the organocide application on all the other plants except for the two babies and the drooped 9lb kush. Don't want to stress it further. I'll see how it goes.
8/16 Despite the soil drying out the newest disaster (my 9lb kush) is much worse with chlorosis killing leaves. Stalks and branches seem good. Soil smells musty and a little wetter than the rest. It was roofed to the ground slightly. NO water underneath. I stuck my hand in the bag from a bunch of angles. It's like the same thing that happened with the other one. I added to my surveillance. I also smell bleech and I hace an idea this might not be my doing at all. I can't be detailed but I'll find out one way or another. UPDATE. Went back over after the dentist and plants were dry as a fucking bone and droopy. I mixed up five gallons of phed water and watered everything. Even the 9lb kush that is pretty much dead. The soil was dry though. Everyone is saying overwater but I really doubt that. We had some massive rainstorms bur still. I need to review a game cam I have because unfortunately my cams went on the frits for a couple days (and the dogs went wild during that time around midnight) couple nights in a row. I fucking smell bleech. I'm a good dude and don't really have any enemies but we'll see what the game cam pulls up.
8/17 Of course we are getting a shit ton of rain. I watered yestetday because everything was dry as a bone
I watched yesterday as my blueberry was almost horizontal due to the wind. I added several supports to every branch and a few more up the main stalk. That may be what has been happening. The wind blowing so hard it separates the stalk from the roots. My problems started after I took my windbreaker tarp down. I put it back up for this storm. Or maybe it's just root rot. I dont fucking know. I cut all the dead stuff off the 9lb kush thats pretty mucb dead. Its holding on though. I probably shouldnt have watered that but it seemed bone dry. Maybe further down was wet. I dont know. Extra cams are up. I didn't smell that chemical bleachy smell today so it's probably in my head. I have better peace of mind with the night cams up though.and the dogs though. I've had a visitor this year but he left very quickly.
8/18 We got a shit ton of rain last night. No damage though. I spent what time I had in the garden working on the 9lb kush that looked like it was dieing. I'm not giving up on this one so easy. It seems to want to hold on. Despite the severely overwatered medium (due to this storm) I cam see new growth that looks healthy. The branches also seem stronger. I'm cautiously optimistic. The other one straight up died. So I might be able to salvage this. I'll go over later today and check on it. I debated putting it inside for the storm bur I figured I'd let the rain leech out anything in the medium in case it's locked out or something. At least I've got a couple real healthy ones this year. That NYCSA is amazing. That's a strain I'll probably grow again. Resilient as all all. Vigorous and doesn't seem impacted by things like WPM or other fungal ok infections or diseases like some other strains. I got a great recommendation from my buddy to use pots all the same size. It makes things easier watering. I just used what I had this year. I had bigger pots so I wanted to fill them. That tarp being up I think greatly helped with the wind. It's down now so things cam dry out. Still raining bit not yard and no wind. I think that may have played a large role in killing the 7ft GDP. Wind ripping the stalk away from the roots. Or it could've been a million other things. I'll never know. I do know that I have a better mindset, a great set of resources and I'm learning something new every year. If I can br8ng this plant back to life I'm going to be very proud of myself.....and her. Oh and I'm going to buy new tiger bloom. I'll start beasty bloom (hesitant as it has caused lockout in the past) as it goes better with my other nutes than the liquid kool bloom. Plus I started getting portables around tge time I used the liquid kool bloom. That being said, after two weeks I can see buds where there weren't before so I don't know. Next year I'm using seeds and I'm doing things different. I'm STRONGLY considering rapacaps idea about adding a removable roof for flower. The more I think about it tge better it sounds. That and putting wheels on pallets (buddy suggestion) and I could attach my supports directly to the pallet. I've got a lot of work to do that's for sure. Plants look healthy but I needvto him them again with organocide to fight any fungal stuff or pillars that might be hiding.

