


Likes
Comments
Share


@Earthsower
Follow
She’s doing fine just waiting for the peak of the plant to open before I pinch her she is still going steady. She has had her wilt and stands around 20cm

Likes
24
Share


@Basementganja
Follow
Harvested the Clones!
I'm stoked how #4 grew out, I think she's the winner!
With limited space in my grow, I'm only going to be able to bloom out the rest of the phenos clones to week 3-4.. The show must go on..
It's the price I must pay for using non-ideal cloning methods... Next round of phenohunting will have 100% cloning success, using my new aeroponics cloning machine.

Likes
422
Share


@Crashoverite
Follow
Hi everyone 😁
Welcome back in another week update!
Thank you all for this amazing support on this bananas journey💚💚💚
Uploading and updating each week content on daily bassis so please revisit this diary if week not over yet.
So far all going great. Girls looking very healthy and happy. Due to my short trip had to leave my 🍌💜👊 girls unsupervised for 3 days. Was stunned when opened my cabinet on the Dec 5th. Athena stretched like crazy. Good 3 inches. She better slow down as not much roof space left for her. May tie some taller branches to netting if necessary. Introducing blooming nutes for the first time this week on December 6th at smaller dosage and on the second watering as listed.
Week 8
Dec 4 - Dec 10
Dec 5
Leaves tucking
Dec 6
Heavier selective defoliation on both girls. Athena fully lolipopped and Xena at 75%. Watered with 8 ltr beetwen both with perfect runoofs PH 6.4. Girls were very thirsty 🤤
Dec 7-8
Just enjoying how my girls developing. Frost has landed and they are start showing colours. All is looking great.
Dec 9
Second watering for this week 7 ltr beetwen both. Runoffs PH 6.4
Even with so much difrence in size of my 🍌💜👊 girls it seems that they are drinking my juice almost equally.
Dec 10
Applied selective defoliation and tied 3 tallest branches of Athena to netting to avoid any potential burns on these beautiful baby colas.
It's the end of the week!
Thank you all again for such a great support, all the likes, dm's, comments and follows 💚💜💚💜
Stay tuned for coming week update 😁✌️💚


Likes
11
Share


@Chuckwaggon420
Follow
This is the last week. These girls getting chopped they are all sooo fat so dense sk heavy it's insane. Going to be a large harvest I bet! Has a way loud gas sweet smell and are just so sticky they almost stick to ur fingers!!!
These girls have been fading Out all nice on their own just let the soil do its thing. Will chop these girls and give them a quick trim all the big leafs and let it sit and hang for 14 days in the cold. Got around 15% amber so it's time woop woop.


Likes
23
Share


@Sators
Follow
🌱Day 64.💚
🌱Day 66.💚
🌱Day 68.💚
🌱Day 70. Hot reason why in UK most grow tent heat up, my grow tent temperature reach already 36 degrees. O lalaaa…I will get experience…😆💚

Likes
24
Share

@DE_BW
Follow
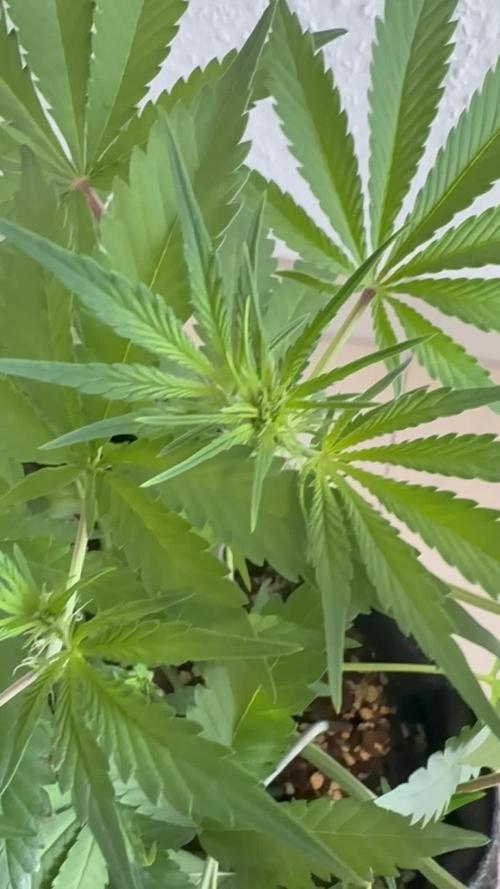
Week 5: Mendo Frost Auto is transitioning into early flower with visible pistils forming across the tops. LST is mostly finished now and the plant has developed a wide, open structure with multiple strong bud sites ready for the stretch phase.
Likes
49
Share


@masterofsmeagol
Follow
7/18 Plants are looking great. I was able to rearrange the plants so they have a little bit more space and so I can get around every plant. I have small random pest damage (i.e. I caught a four lined plant bug while hunting jpn beetles) but not enough h to warrant treatment. I will probably spray before flower. Sun's out amd plants were praying. I rotated a couple and it only took a few hours for them to "straighten out." I went to look again rhis morning and made the final determination to expand the cage. I'm looking for the 2x4's and the wire in the next couple days. The work that ive done now will but me sometime. I wonder how this rain impacted my soil.
7/19 Plants are looking fantastic. The stretch is starting. One purple punch looks like it's beginning to flower. I think I'm entering the transition period. Jpn beetle damage is evident but not significant. I defoliated a leaf with a a leafminwr or something in it. It's so much easier to get around the plants now. I'm seeing some chunks missing sporadically though. Went to the roses out back and found TONS of jpn beetleson top of each other reproducing. They destroyed that rose bush. I'm going to keep it as a trap plant. My dad's girlfriend wanted to spray it but that doesn't make sense as theflowers are all gone. Dad's grabbing the materials to extend the cage today I think. Right now I can get around every plant but the two big ones in the back. I just cant get to the backs of them and they are huge. Almost reaching the top of the cage. A 4'-6' extension will do wonders in flower. Can't wait.
UPDATE: Dad got the 2x4's and we assembled the extension and attached it. He's grabbing the wire as I type this. This worked out beautifully. I had no idea how big the blueberry cheese in the 50 gallon was! This extension (4ft i think) is PERFECT! Then I can get a little extra wire and pull it out if I wanted to. I think I have another 2x4 that I'm going to use in the middle. Lots of great pics and a video I'll upload tomorrow. Hot af today and humidity still super high. Even the commercial dudes was surprised I don't have wpm l and that judging by some of my plants structure that I may do better than I think. I certainly hope so. I WATERED 3 GALLONS OVER THE WHOLE GARDEN. The blueberry cheese in smart pots were drooping. They drink far more water than tje others. I would've given more but we are supposed to have thunderstorms. I left my back tarp off for the night. It will increase airflow and wind is down. I feel like this is going to be my year.
7/20 I updated and loaded everything on the app but notjing would save. Did it again in the website hopfully this saves
i didnt put it all up. Didn't water the plants today. Bags seemed okay weight wise. Good thing I did the extension yesterday because those three plants were drooping they were so thirsty. I focused most of the water yesterday on those plants that needed it. The others were somewhat dry but still had some weight. Like i said the blc drinks much more water than any of the other plants. I'm impressed with the growth I'm seeing. Especially since I have been being very stingy with the water and I've only fed like twice and that was just the kelp me/you and big bloom in negligible amounts. I'm watching for deficiencies. I'm just not seeing them. I'm picking up the wire and finishing the extension and then rearranging things. I'll update.
UPDATE: WATERED 4 GALLONS CONCENTRATING ON THE PLANTS THAT WERE DROOPING THE MOST. FINISHED ENCLOSURE AND INCREASED PLANT SPACE. TRELLIS WILL GO UP THIS WEEK. VIDEOS WILL BE UPLOADED TOMORROW.
7/21 I should've watered more volume last night. I noticed two plants that seemed much lighter than the rest. After some deliberation I gave them each a half gallon of water. One was the purple punch in the 10 that's huge amd the other was that huge blueberry cheese. I think I'm going to swap places with them, take out a pallet and get some other way to elevate that ONE plant and I'll have even more room. Then I'll add my supports. It's a dream working in there now. I noticed some small interior leaves being used up and dieing. I defoliated them but it was only a couple. I'll need to start nutes at some point. Doesn't need it yet though. I'm going to add some kelp me/you for the heat stress. I need to get the watering down better but it's more difficult when they each have different needs. I kinda have to read the plant. I'd rather be overwatered than underwatered. I tried to upload what I could but some won't.
UPDATE: I went over to clip off some fencing that was doubled up AND just to check on tge girls. Found two caterpillars (small but hairy so they were older not the inch worms and possibly what has been contributing to damage on those plants. Things are spread out so it will be harder for insects to move from plant to plant and I have better air flow. I worry that leaving my tarp off might lead to high winds and plants not able to take it buf I digress. I'll add supports later. Plants are huge and drinking far more water than I've been giving them. When I got there several were drooped right over and dry as a bone. The bags are essentially all roots now. I mixed up 8 gallons of water and split it between the plants. I gave less to the two Co trainer plants that weren't drooping and the 10 I watered yesterday that wasn't drooping but for the most part the ones that needed if got at least a gallon or more. The others a little under a gallon. It might rain A LITTLE tonight too. Oh, and since it's been so hot I added 1/2 tsp per gallon of kelp me kelp you to help the plants deal with heat stress. I also noticed that some of the very bottom interior leaves are being used up. I have a feeling ill need to switch to nutes pretty soon. Plus I need to suppirt those plants if I'm going to leave that tarp off and Gove them air. Took a video. But it won't upload here. I'll have to wait till tomm.
7/22 Didn't have much timevthis morning bit I dod a video. Boy those plants loved that water and that kelp. This morning everyone was standing straight up at attention. Supposed to get rain last night but didn't. Good thing I watered. I think I'm going to up the water next watering and then again to the 10% mark if necessary. Especially with the Blueberry cheeses. I'm noticing that a FEW INTERIOR leaves are showing nute deficiencies so I'm probably going to have to start feeding soon. I'll update later.
UPDATE: Went back over and cut off the extra wire. I'm going to need to water more volume. Specifically on two plants. The two huge blueberry cheese in 20 gallon smart bags dries out much faster than the rest. I'll have to out that on a different schedule or increase the amount given. Next watering will be 1.5 or 2 gallons a plant and it might be tomorrow from what I was seeing. It's super hot and with the added airflow the bags dry out faster. I also went through EACH plant looking for pests and defoliating old leaves that needed it. Plants are still nice and green but a VERY few older interior leaves are showing deficiencies. I know this is Normal especially since they are trying n g to transition to flower. I also saw pest damage on a couple plants. Four lined plant bug. I already found the one on the other plant and killed it but I'm considering doing a spray before flower. I'm thinking either captain Jack as a "catch all", BT which works great but mostly just on pillars or the organocide bee safe 3 in one pesticide. I also have pyrethium and other things. Thus far picking things off manually has been good enough. At the very least they will get an application of BT very soon.
7/23 Held off on watering this morning. Supposed to get thunder storms I DID split a gallon with two blueberry cheese that were the lightest in the 20 gallon smart pots. Thet drink way more. My water volume is going to need to increase. We haven't had nearly enough rain. I'm going to bump it up to 1.5 to 2 gallons each plant which will be 10% for the 20s and a little less for the others. I'm still seeing various pest damage. Nothing bad but I found another couples leaves that were chomped on by a four lined plant bug so I'm debating applying something tonight when I water. I'm also noticing old leaves being used up and some interior leaves showing slight deficiencies. It will be time to start nutes soon. I'll update as I go.
UPDATE: GOT THE FEELING I NEEDED TO CHECK THE PLANTS. SOMETHING DODNT LOOK RIGHT ON THE CAMS. WENT OVER AND EVERY PLANT BUT THE TWO I SPLIT A GALLON WITH AND THE PLANT IN THE 50 WERE DROOPED RIGHT OVER. LIFELESS. I SHOULD'VE WATERED THIS MORNING BUT I DIDNT HAVE TIME. I FIGURED THEY COULD WAIT UNTIL NIGHT. EACH PLANT GOT 1.5 GALLONS AT LEAST. I USED SIXTEEN OR SEVENTEEN GALLONS ON THE GARDEN. I GAVE EACH CONTAINER PLANT ONE GALLON AND GOT RUN OFF FROM BOTH. IM NOTICING SKIGHT FADING IN LEAVES BUT IM NOT INTRODUCING NUTES TO UNDERWATERED PLANTS. I THINK 10% IS GONNA BE TGE MAGIC NUMBER. 2 GALLONS EACH. EVEN THE 10 GALLON SMART POT. ALMLST AS BIG AS THE 30S BUT DRIES OUT QUICKER.
7/24 Plants looked fantastic this morning. Defoliated a few leaves that needed it. Showed my commercial buddy and he said things looked fantastic. Since the soils still holding nutes and I'm not seeing many deficiencies I may hold off on feeding. I'm starting early flower now. I will be using nutes soon. I think ive got the watering schedule pretty much down.


Likes
28
Share


@Professor_Chaos
Follow
Beginning of week..
Both have some gorgeous flowers.. Purples are already coming out on both. Both are flooding with complex aromas.. ETHOS Cookies is doing great.. Mandarin Cookies is gonna make it to harvest, I'm sure.. So excited!
Mid week..
I love how they both are giving off nice purples on the calyces already! Both smell so amazing! It makes me tear up with joy! Not sure when I should start flushing! ETHOS says that you count 9 weeks from flip to 12/12.. Not pistils forming.. Cuz you know, you need to factor in the transition time.. 1 - 2 weeks.. Sometimes 3! But I am super excited to harvest these lovely ladies!!!
Next day...
Ok.. So the runoff issue has gotten worse for the Mandarin Cookies.. Obviously, with all the def. you can see.. At least 3 that I can see right away.. Calcium.. Potassium.. Phosphorous.. Maybe even a slight Magnesium def. in there too.. Kinda hard to pinpoint when there is multiple showing, yet I am feeding PLENTY of all of them.. She should have no issues.. The runoff pH is now coming out at about 4.9 - 5.2, depending on a good or bad day, I guess.. I have just been puttinf it in at 6.3 every time.. Sometimes (alot now) I get a salt build-up between feedings.. I like to feed, water, feed, water.. Now I need to feed, water, water, feed, water, water... It's really bothering the shit outta me lol.. But the ETHOS Cookies is pretty close to peing on point.. Going in: 6.3 pH.. Runoff: 5.8 - 5.7.. Still in a decent range.. No signs of issues on any leaves.. They are both making some gorgeous nugs tho! Stackin calyces and trichomes lile crazy! And now they are really fattening up! I am so ready for this run to be over and let this medium dry out reeeeally good.. And take it out back Ol' Yeller style.. Yup.. That sounds like a plan.. I have PLENTY of NEW coco coir bricks and perlite that I have been hoarding.. Just like I do with my genetics 😄.. But I feel like you can never have enough.. And I plan on growing cannabis in coco coir till someone takes me out back Ol' Yeller style!
End of week..
They are both showing about 50% turned pistils.. The ETHOS Cookies is a little further along.. Not by much.. But the trichomes on the Mandarin Cookies seem a little further along.. Word.. They are both going to be epic smokes for sure! So I believe I will just give both of them small feedings just to get them through the week, then I should be good to start flushing.. On to the next week!...
Likes
15
Share


@NaturalMystic
Follow
Days. 99 F15 Lolipoping!
Days.102 F18 Bad news!. My medium raise to PH 7.0 but now no sign of any problem fast producing bud form. ☺️i will give her ph5.8-6.0 for next watering thank you all advice from my grow question. THANK YOU <3


Likes
24
Share


@AsNoriu
Follow
Day 0. Got few presents from Mars Hydro
New lights TS1000, was very happy, that she has dimmer and current price make her a good grab
New Mars tent, they a great and last few years easy, tested not once.
Great AMS strain, always wanted to grow few more Chocolope after my first diary here.
Day 1. Girls is out and looks happy ;)
Happy Growing !

Likes
3
Share


@Unculti_responsable
Follow
Día 1 de germinacion de la Jack orange de interior , humedecimos las servilletas con un agua en ph de 6,5 y la dejamos en la oscuridad con una húmedas de 24° , vamos a revisarla cada 2 días y volver a pulverizar si hace falta
Vamos q ver cuantos días tarda en salir

Likes
50
Share


@Pr3m_85
Follow
In hopping I don't make some bullshits...🤷🏼🤷🏼🤷🏼
Peace to all✌️✌️🏼✌️🏿✌️🏾✌️🏽✌️🏻

Likes
37
Share


@PapaNugs
Follow
A good first week from all the girls overall. They continue to develop as planned. They got watered with the spray bottle until Friday when they got a real watering.
This girl is doing well. Right on track for any plant.
Dimmed to 40%
Here are the lights details:
Medic Grow Mini Sun-2 150W LED
Model: MN150-022
Spectrum mode: V1
Efficacy: 2.8 umol/J
Saturday the seeds popped up and we are underway. Spraying the top of the soil with the water bottle to keep the topsoil moist.
Thanks for stopping by!
You can find the light on Grow Diaries:
https://growdiaries.com/grow-lights/medic-grow/mini-sun-2-150-watts
You can find the light on Medic Grow's website:
https://medicgrow.com/
Processing
Likes
2
Share


@BigGGrows
Follow
Well i figured i would try some different this week. I main lined her and topped her on day 9. Lets watch and see how she responds. I feel as though doing this early in veg will allow her more time to adjust before flower. Towards the end of the week 2, four days after the HST....we see 2 new main top braches coming in, as well as some action at the internodal cut point which is indicating a "Fimm" job rather my prior presumption of topping the plant. None the less i am excited to see her grow, and i intend on letting her grow naturally beyond this point....just to see the results.

Likes
16
Share


@Foggedaboudit
Follow
This is it for these Banana Punch from SeedsMafia! Thanks to the company for the freebies! Can’t wait to try!
Likes
10
Share

@SouthGermanGrowGirl
Follow
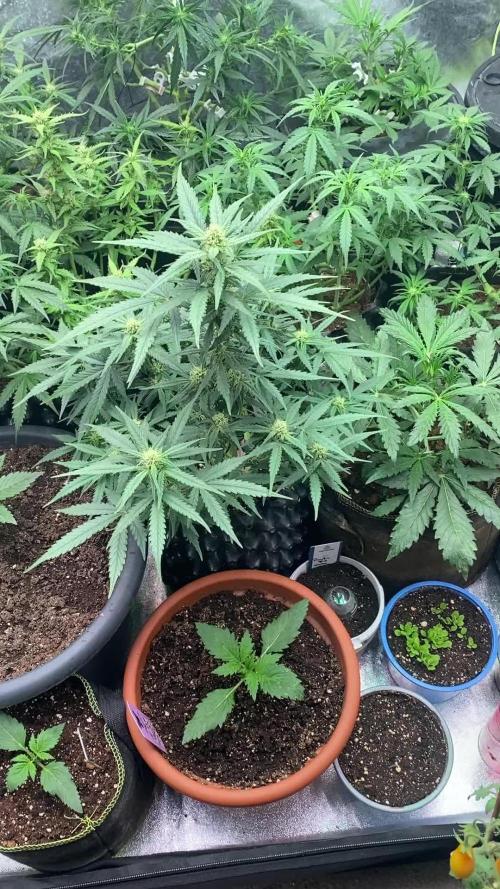
Yeah this Strain is amazing!
She just started to build Buds, and already started to be sticky asf too :-)
What i notice the last Days is...
When i give here today 2 L of Nutrients/Water, i have to give her tomorrow again because the Soil is dry...
So i think she want to be big?
Lets see lets see
Likes
Comments
Share

@Daw33d41
Follow
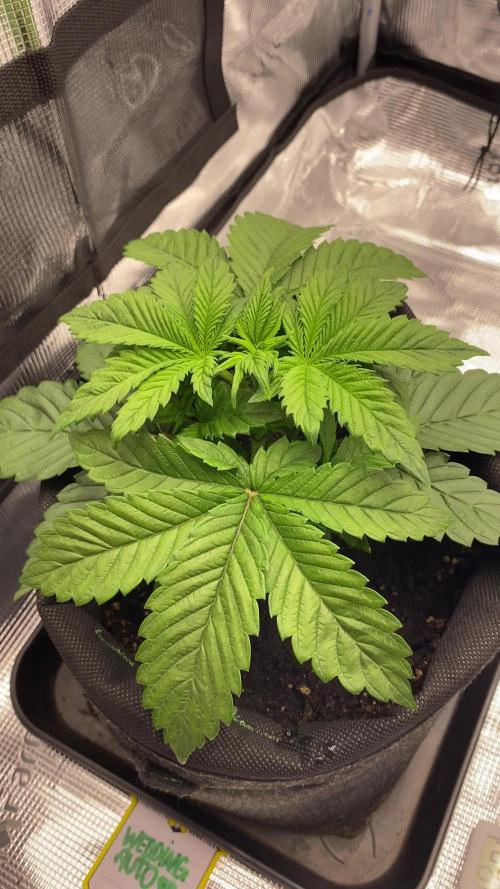
🇺🇸 Another week in, pests are completely gone and I tracked the source back to the Mega Worm, so everything is under control now. The plants have been getting only water from the start and still look healthy and beautiful, with nice color and steady growth. I’m trying LST on the Chemdoggin for the first time ever, and so far it’s looking promising. Btw. Upgrade to 90x90(:
🇨🇿 Máme tady další týden, škůdci jsou minulost a přišel jsem na to, že zdroj byl Mega Worm, takže rychlá akce a stan je zase čistý. Kytky jedou jen na vodě a i tak vypadají brutálně zdravě a krásně, silné stonky, sytě zelené listy. Chemdoggin začíná ukazovat pestíky. Zkouším na ni poprvé v životě LST a zatím to vypadá nadějně. Mimochodem upgrade na 90x90
