
Likes
Comments
Share


@gr3g4l
Follow
Con 79 dias lavado de raices a todas.
La aparición de botritis ha forzado el lavado a todas ellas para no arriesgarme más.
Dejo un histórico del tiempo que han sufrido las Auto desde el dia que pasaron a exterior. Un tiempo generalmente nublado y bastantes dias de lluvia.
Es lo que tiene el exterior, se depende muchísimo del tiempo y esta vez ha salido así. Otro año será diferente y saldrá mejor o peor.
De la jack tube que sacar parte del apical que se vió afectada por la botritis por lo que la altura seria áproximada.

Likes
9
Share


Likes
3
Share

@SpaceHaze123
Follow
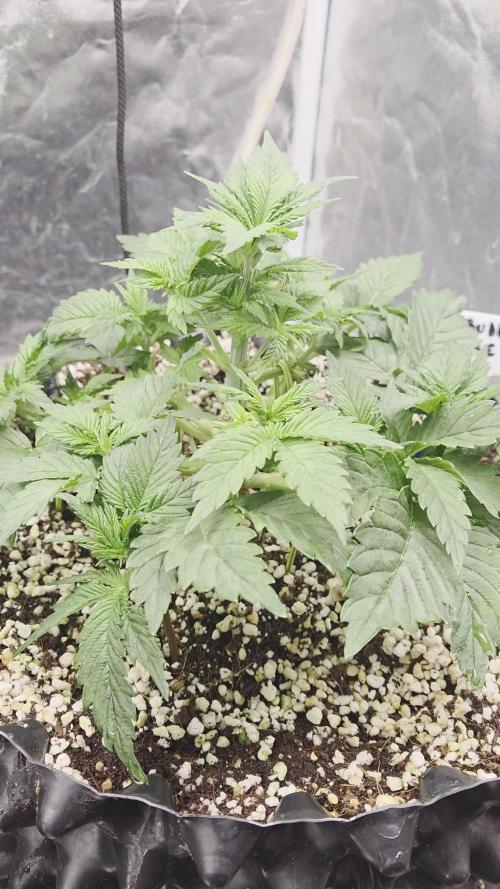
Snip snip, there goes half of the plant. I waited untill the plant was a little bit stronger to cut off the top and made sure to leave a little bit of the main stem sticking upward to try to prevent splitting the main stem because of the topping. Amped up the feeding a little to give her the strength to pull through. Now at 75% of recommended feeding 😶🌫️

Likes
5
Share

@FlowerForYou
Follow
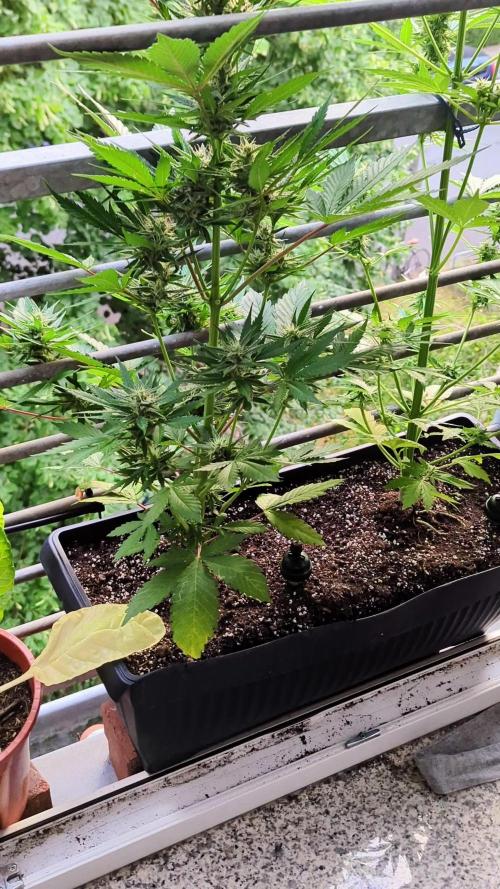
25/07/25: Another week in the books, and the ladies are progressing—slowly but surely. Bud development is moving along, though the cool and cloudy German "summer" isn't exactly speeding things up. Fingers crossed for a bit more sunshine in august to help ripen those buds and add some extra weight before harvest!🤞🏼☀️ Other than that, not much to report this week—no major changes or issues. Just letting nature do it's thing! 🌿

Likes
14
Share


@Kendoda
Follow
The Plants are vigorous and the growth is currently slow but steady.
I’ll up my light power and give them a good watering to hopefully push them on.


Likes
95
Share


@Roberts
Follow
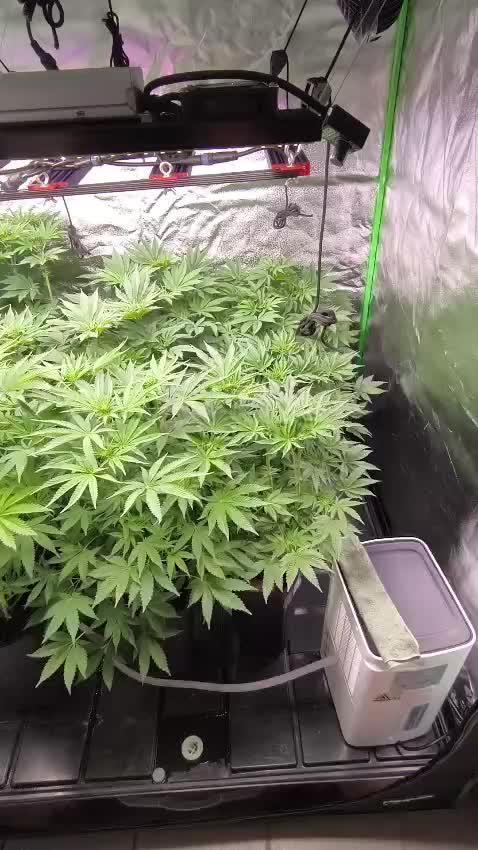
Northern lights has been doing great. She has started to show maturity signs in last few days. I did the video on it for the week. She was moved into the small Spider Farmer tent I have under the SE3000. I will veg her for about a week, and let her get use to any spectrum changes. I will likely flip her to flowering next update if she has little to no issues. I feed her about once a week. She get water almost daily as she has been drinking a lot. I still have not had run off during watering. I have fed super light as more of a supplement to the soil when I have given feed. On her next feed I will aim for run off. As I wish to test it for ph and the tds. I already know I have a little salt build up, but it has not become a major issue yet with light feeds. Everything is looking great and hopefully continues. Thank you Medic Grow, Spider Farmer, Pro-mix, and Divine Seeds. 🤜🏻🤛🏻🌱🌱🌱
Thank you grow diaries community for the 👇likes👇, follows, comments, and subscriptions on my YouTube channel👇.
❄️🌱🍻 Happy Growing 🌱🌱🌱
https://youtube.com/channel/UCAhN7yRzWLpcaRHhMIQ7X4g

Likes
34
Share


@Bruno_The_Stoner
Follow
Welcome to the next week of great adventure with young gorillas. The beginning of the week I started with a small flush with tap water at pH 6.3. I intend to change the 150W HPS lamp to brand new 250w plantstar this week. In next few days gonna use pk 13/14 One love for everyone 🌱🐒🌱🐒🌱🐒 P.S: mobile application is terrible, it is very difficult to update something, it always gets stuck during the upload of photo, no upload percentage. Already twice made me mess up the whole week
EDIT: Additional HPS mounted 250w plantastar. Unfortunately, after purchasing the wattmeter, I discovered that my LED consumes only 220w of guaranteed 350w. I'm thinking about giving it back for a guarantee. The current energy consumption of the entire project is 810w / h

Likes
3
Share


@Kinglui77
Follow
Because of the extrem Defolitation/Schwazzing, which was more or less necessary regarding Humidtiy levels of of over 95% around evening night and morning. Even though I also did it for trying out how the Plants react. They mainly stopped growing Bud for 3-4 Days and the leaves of the Bud Sides got a bit Bigger. Also I had problems with NutBurn and Heat Burn, Nutburn because of my not constantly watered Pots which, I guess, ended up beeing a really salty and nutrient soaked(from the soil) substrate because they are reused Filters for Water out of clay. As well in midday it gets really hot and we are more than 3500ft over the sea level.
And why I grow in Clay Filters ? Just to try, in my opinion already not recommendable even though it keeps the Soil a bit cooler..


Likes
52
Share


@DogDoctorOfficial
Follow
Another week has passed, and our beloved Cosmos F1 continues to amaze and astonish. It's as if the universe itself has bestowed upon her an extra dose of magic and wonder. I'm thrilled to share with you the latest chapter in our cosmic gardening adventure.
As I gaze upon our beloved Cosmos F1, I'm filled with awe at her transformation. She has truly become a sight to behold, adorned with an abundance of frosty trichomes that shimmer like stars in the night sky. Her fruits have also become denser, promising a bountiful harvest that we can almost taste. While we estimate there's still another week until harvest, we'll remain patient and let her guide us to the perfect moment.
In nurturing our cosmic beauty, I've continued to follow a simple yet effective regimen. I've provided her with pure water, ensuring she stays hydrated and refreshed. Additionally, I've incorporated Aptus Holland Enzym into her feeding routine, as I'm committed to preserving the vitality of the soil for future use. This approach not only benefits our current crop but also helps sustain the harmonious balance of life within our growing environment.
Let's take a moment to appreciate the significance of this soil preservation. By cultivating in a manner that allows us to reuse the soil, we contribute to the sustainable practices of our gardening community. It's a small but meaningful step towards reducing waste and honoring the interconnectedness of our natural world.
Last week, I mentioned my decision to defoliate our Cosmos F1. The room itself seemed to call for it, and our resilient plant welcomed the process with open arms, or rather, leaves. She embraced this adjustment with grace and resilience, showcasing her ability to adapt and thrive. I must say, defoliation has had a positive impact, allowing more light to penetrate her canopy and promoting healthy growth.
As I reflect upon this journey, I can't help but express my gratitude to @James and to Royal Queen Seeds for bringing Cosmos F1 into my life. She truly embodies the essence of an all-in-one package, captivating both my imagination and senses. The experience of growing my first CBD strain has been nothing short of extraordinary, and I eagerly anticipate the cosmic culmination of our efforts.
Together, we shall continue to revel in the wonders of the universe and allow its vastness to awaken our innate curiosity. Our Cosmos F1 is a testament to the marvels that can be achieved through patience, care, and a touch of cosmic inspiration.
May our cosmic garden thrive and inspire others to embark on their own celestial journeys. Until next time, keep dreaming big and let the cosmos guide your green thumbs!
As always thank you all for stopping by and for supporting me on this journey, i am super passion about growing and fell blessed to have you all with me on this new journey <3 <3 <3
Genetics - RQS COSMOS F1
Ligth - LUMATEK ZEUS 465 COMPACT PRO
Food - APTUS HOLLAND
All info and full product details can be find in can find @
https://www.royalqueenseeds.com
https://aptus-holland.com/
https://autopot.co.uk/
https://lumatek-lighting.com/
With true love comes happiness <3<3<3 Always believe in your self and always do things expecting nothing and with an open heart , be a giver and the universe will give back to you in ways you could not even imagine so <3<3<3
<3 <3 <3 Growers love to you all <3 <3 <3
Cosmos F1: The World's First F1 CBD Cannabis Variety
Cosmos F1 is the largest autoflowering cultivar in RQS catalogue of F1 hybrids. With her tall, typical Christmas tree structure and bright green foliage, Cosmos F1 is a testament to the beauty and vigour of Cannabis sativa. Plus, thanks to her pure genetics, which descend from Oregon CBD, she boasts the highest CBD concentration in our entire F1 seed selection.
Aromas, Flavors, and Effects of Cosmos F1: A Vibrant CBD Super Variety
True to the pure lineage from which she descends, Cosmos F1 boasts a delicious aroma that combines the freshness of crisp pine with the full-bodied, almost creamy aroma of modern Cookies varieties, and an unmistakable peppery bite. Thanks to her high concentration of CBD and low levels of THC, Cosmos F1 offers a balanced effect without intoxication. Cosmos F1’s terpene profile is dominated by myrcene, farnesene, limonene, pinene, and caryophyllene. Combined with high concentrations of CBD, Cosmos F1 produces a clear, meditative effect that relaxes the body while leaving the mind functioning and focused. Her effects help unite the mind and body, creating a state of cosmic order.
Likes
37
Share


@Aedaone
Follow
The temperatures, humidity, and watering volume(if measured) in grow conditions are all averaged for the week. The pH is soil pH. Any watering done by me is well water which is 7.6 pH and 50° F. Any listed nutrients are ml/gallon of soil.
Day 1 we had high temperatures of 88, clear skies, and lots of sunshine. I watered 2-2.5 gallons, from the water hose, per pot.
Day 2 we had a high temperature of 90 with lots of sunshine. I gave them 2.5 gallons of water per pot.
Day 3 we had lots of sunshine and a high temperature of 91°F. I watered twice today about 2 gallons from the water hose.
Day 4 we had a high today of 86° and mostly sunny skies. I watered about 2.5 gallons per pot today.
Day 5 we had mostly sunny skies with a high temperature of 88°F. I watered about 2.5 gallons from the water hose. I added 50ml of Ferrous Sulfate top dressed to each pot. I topped these pots of with soil that had premixed nutrients in it today. The mixture was roughly what I mixed in the original soil for week 1.
Day 6 we had a high temperature of 88°F with mostly sunny skies. I watered 2-2.5 gallons once today.
Day 7 we had high temperature of 89 with mostly sunny skies. I watered 2.5-3 gallons per pot.
This week was a success. These girls nearly doubled in height. The 41.75" of height is an average. The tallest was 44". I did the lst a little different. I'm leaving the two main branches going up. I'm hoping the lower branches catch up. We've got about 4 weeks of veg remaining before flower begins. I added a little iron to these and they seem happy with it. The soil I added was premixed with fertilizer so no feeding yet. These are really trying to get big.
Likes
25
Share

@Salokin
Follow
Week 8 Flower | GMO × Triangle Mints BX
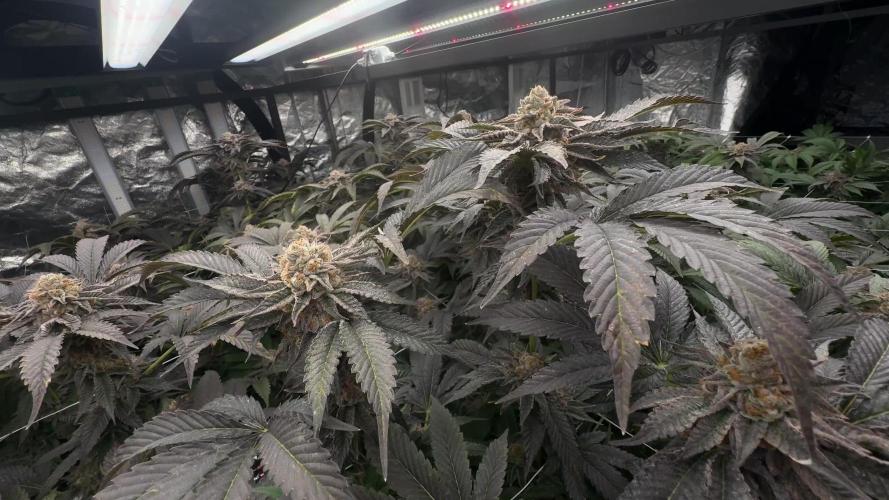
Week 15 overall, and we are in the final stretch. One week out from harvest and the room is telling that story loud and clear. The fade is deep and progressing perfectly — the plants are drawing down everything they have left, channelling it all into the buds in one last push. The purple expression that showed itself last week has deepened across multiple plants, the calyxes are swelling, and the trichome coverage is dense across every site from top to bottom.
Watering climbed again to 8L per plant per 24h — the root zone is pulling everything it can get in these final days. pH holding at 6.2, EC stepped further down to 1.2 mS/cm as the fade protocol does its work and the plant takes over. Height unchanged at 110cm, lamp still at 20cm — nothing moves from here. Humidity holding at 50%, day temp 25°C, nights 23°C.
Feed stack stripped back to the essentials for the final week: Athena Fade carrying the programme, Canna CalMag Agent 1.1 ml/l, Aptus Regulator 0.1 ml/l. Nothing else. Clean finish, no interference — let the plant do the rest.
The candy gas is relentless at this point. Harvest is next week. The GMO × Triangle Mints BX delivered exactly what was asked of it.
Next update Sunday. Stay tuned


Likes
17
Share


@Naujas
Follow
it's amazing, this growth looks much better than my first attempt, my decision was to put a smaller pot and change the light - the girl really liked it, FastBuds goriilla cookies with a small space manage perfectly:).


Likes
14
Share


@DaddyPrime
Follow
6/1 topped all of the mains(about 5 or 6). Shes so fucking bushy its crazy. Each main is branching out more and more at each node. Shes gonna be a huge bush by the end of summer. Also attempted to defoliate some of her more crowded areas
6/2 Shes looking super happy after a good feed yesterday. Responded super well to the topping on most of the mains. Slightly concerned its gonna make her even more thick and bushy
6/6 fed some recharge and slf100

Likes
17
Share


@CanabisLoverHobbyGrower
Follow
Just focusing on the zkittles now,.. she is focusing on fattening up, not gone any taller this week, I noticed a bit of yellowing around some edges of the leaves, I've added a bit of calmag to this week's feed, and last week I did a somewhat diluted version of biobizzes feed chart,.. any advice on how you guys think she's looking would be appreciated,.. roll on next week 👌 ** update ** 28th, I've started flushing now after abit of advice planning on a 2 week flush that takes her to 77 days which is what fast buds say on there site is top end for this zkittles auto,... ** update update ** after speaking with fastbuds they think there is 3-4 weeks left here so I've added bloom, topmax, heaven and acti Vera back to the feed 🤦♂️


Likes
5
Share


@Unnamed
Follow
Did not add any nutrients to the reservoir, only topped up the reservoir with water and adjusted PH/ORP, PH- adds P and ORP adjustment adds K.
Turned on the Mars Hydro VG80 mid week.
Stretch seemed to have slowed down.
Nothing else to report.
Values are average of the day.
DATE - °C - RH% (Tent Temp/RH)
20241111 23.1 61.5
20241112 22.6 60.9
20241113 22.7 62.6
20241114 24.0 64.3
20241115 23.5 61.6
20241116 23.4 61.3
20241117 22.9 63.7
DATE - PH
20241111 6.07
20241112 6.08
20241113 6.11
20241114 5.98
20241115 5.95
20241116 5.95
20241117 5.94
DATE - ORP (mV)
20241111 62
20241112 94
20241113 125
20241114 104
20241115 84
20241116 70
20241117 54
DATE - EC(us/cm)
20241111 2168
20241112 2167
20241113 2025
20241114 2051
20241115 1990
20241116 2020
20241117 2027
DATE - CF
20241111 21.68
20241112 21.67
20241113 20.25
20241114 20.51
20241115 19.90
20241116 20.20
20241117 20.27
DATE - °C (Reservoir)
20241111 21.7
20241112 21.9
20241113 21.7
20241114 22.3
20241115 22.0
20241116 22.0
20241117 21.5