
Likes
Comments
Share


@Mo_Powers
Follow
it actually behaved exactly as indicated by the breeder. a bit of a shame that it was so humid in germany and it got mouldy. but otherwise it was very resistant. a beautiful and easy to grow plant. a classic

Likes
2
Share

@Oldwied
Follow
Light Power: 60%
To slow down the faster growth compared to strawberry cola. I filmed it at the beginning of the week. Five days later, it was topped and repotted.
Every other day I sprayed and watered with fresh LAB. I store the LAB in the refrigerator for over a week and dilute it before use.
Thanks to budtrainers, your budcups work great.
Day 20
Photoshooting
Fimming
Day 22
Photoshooting
Topping
Day 25
Photoshooting
Transplantation


Likes
20
Share


@DeepRootsGrowTrees
Follow
KRITIC AUTO by KANNABIA
Week #5 Overall June 23rd-30th
Week #2 Flower
This week she's doing well no issues with her feeding she's a good looking plant. Stay Growing!!
Kannabia.com KRITIC AUTO

Likes
9
Share


@Unnamed
Follow
The ORP probe is not calibrated and values are to be taken with a grain of salt.
Values are average of the day.
DATE - °C - RH% (Tent Temp/RH)
20240905 24.3 70.9
20240906 24.7 65.5
20240907 23.9 69.5
20240908 23.2 62.9
20240909 22.4 62.3
20240910 22.5 61.4
20240911 23.0 55.4
DATE - PH
20240905 5.91
20240906 5.85
20240907 6.04
20240908 5.75
20240909 5.85
20240910 5.88
20240911 5.79
DATE - ORP (mV)
20240905 61
20240906 41
20240907 66
20240908 82
20240909 30
20240910 18
20240911 18
DATE - EC(us/cm)
20240905 2209
20240906 2260
20240907 2218
20240908 2297
20240909 2200
20240910 2165
20240911 2202
DATE - CF
20240905 22.09
20240906 22.60
20240907 22.17
20240908 22.97
20240909 22.00
20240910 21.65
20240911 22.02
DATE - °C (Reservoir)
20240905 21.5
20240906 22.0
20240907 21.7
20240908 21.7
20240909 20.6
20240910 20.4
20240911 20.6

Processing
Likes
127
Share


@DreamIT
Follow
🎃👹👽MONSTERCROPPING RED MANDARINE 👽👹🎃
____________________________________________________________________________________________
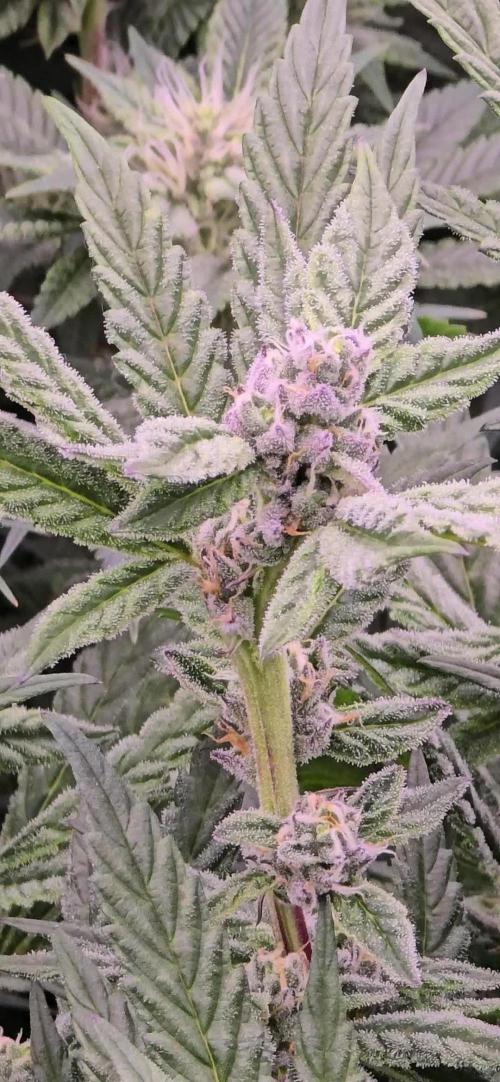
💀 12.2 everything is OK. tomorrow I try a new macro lens to photograph purple trichomes 😍
💀 13.2 ...
💀 14.2 Happy Valentine's Day
💀 15.2 ...
💀 16.2 Ready the carnival photos ... which is your favorite? 😁🦄
💀 17.2
💀 18.2 Red Mandarine bonsai shaped in the shape of a heart, with a ring in the center. Created to celebrate 3 years with my current partner, if you read, hello I love you <3
____________________________________________________________________________________________
📜👀 A look at the details of what I'm growing 👀📜
🍊💚 Red Mandarine F1 🍊💚 by 🌱🍭 Sweet Seeds 🍭🌱
📋 Details
⚧ Gender
▪️ Feminised
➰ Genes
▪️ 55% Indica / 45% Sativa
🎄 Genetics
▪️ Red Poison Auto (SWS39) хCalifornia Orange x Skunk hybrid)
🚜Harvest
▪️ 400 - 500 g / m²
🌷Flowering
▪️ 49 - 63 days
✨THC
▪️ 16%
✅CBD
▪️ 0,2%
🏡Room Type
▪️ Indoor
🌄Room Type
▪️ Outdoor
🕋Room Type
▪️ N/D
🎂Release Year
▪️ 2019
__________________________________________________________________________
👀📷🥇 Follow the best photos on Instagram 🥇📷👀
https://www.instagram.com/dreamit420/
🔻🔻🔻Leave a comment with your opinions if you pass by here🔻🔻🔻
🤟🤗💚Thanks and Enjoy growth 💚🤗🤟


Likes
51
Share


@Bubba_green
Follow
Going into flower tommorow 8 weeks to go 😁😁😁😁 just added a video in to

Processing
Likes
12
Share


@GrowGuy97
Follow
Day 35 - Ladies are way taller than I could have ever imagined & starting to get extremely dark pruple😍 make sure to check back for daily updates & happy growing friends✌️🏼🌱


Likes
13
Share


@Lickey
Follow
Going to end this romance. Too smelly and poor smoke reports. I still love her.
Made rosin and rso. In both cases she stays runny and sticky. Even in colder temps. Different strain for sure!

Likes
19
Share


@MadeInGermany
Follow
Flowering day 18
since time change
to 12 / 12 h
Garden of Green Cup
Hey guys :-)
The ladies have recovered well from the cold thanks to the heating mat and have developed beautifully 👍.
During the check today I saw that despite spraying neem oil 3 times, there are still a few trips :-( .
Now I've ordered nematodes again specifically against trips for leaf and substrate.
I will use that immediately 👍.
Watering was done twice this week, each time with 1.3 l (nutrients see table above)
Next week I will remove the lowermost shoots so that the energy goes into the upper buds.
Fresh osmosis water was mixed with tap water and put into the 100 liter tank so that the water can stand and I'll have enough next week :-)
Otherwise everything was cleaned.
Have fun and stay healthy 💚🙏🏻
👇🏼👇🏼👇🏼👇🏼👇🏼👇🏼👇🏼👇🏼👇🏼👇🏼👇🏼👇🏼
You can buy this Nutrients at :
https://greenbuzzliquids.com/en/shop/
With the discount code: Made_in_Germany you get a discount of 15% on all products from an order value of 100 euros.
👇🏼👇🏼👇🏼👇🏼👇🏼👇🏼👇🏼👇🏼👇🏼👇🏼👇🏼👇🏼
You can buy this strain at :
https://gardenofgreenseedbank.com/candyland/
Water 💧 💧💧
Osmosis water mixed with normal water (24 hours stale that the chlorine evaporates) to 0.2 EC. Add Cal / Mag to 0.4 Ec Ph with Organic Ph - to 5.8 - 6.5
MadeInGermany

Likes
7
Share


@NCgrower252
Follow
Grandaddy Purple- 31 inches tall
Colombian Gold- 35 inches tall
Alcapulco Gold- 28 inches tall

Likes
8
Share


@sellem
Follow
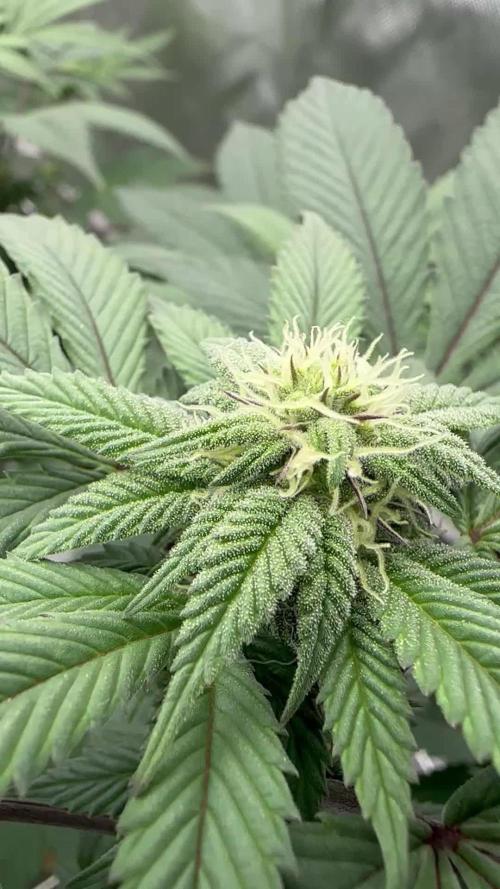
Welcome to week 9! Starting off with a nice photoshoot
Watered 3 plants on 08/04 with 1.5L 5.8 PH 1.7 EC. 2nd time for LCC "Cara" that she has to wait a day longer for watering. Oh well!
Watered LCC "Cara" on 09/04, 1.5L 5.7 PH 1.8 EC
No Watering on 10/04, but some nice colorful photos!
Watered all on 13/04, 1.5L, 5.7 PH , 1.7 EC.
Nutes all around the same, 5ml/L Plagron Terra Bloom and 1ml/L green sensation.
one BPP is showing awesome purpling, very deep and saturated, and one LCC really got that Fall color scheme going now. Very happy with how its going! Trichomes are still mostly clear/cloudy. Judging by my last batch of BPPs, i'd give them anywhere from between 1-3 weeks. dont know how ill manage harvest yet, either all at once, when some are more amber and some are still a tad early, or individually. I got finals coming up so probably depending on how i find the time for it.
Likes
12
Share


@UnicornSparklehorn
Follow
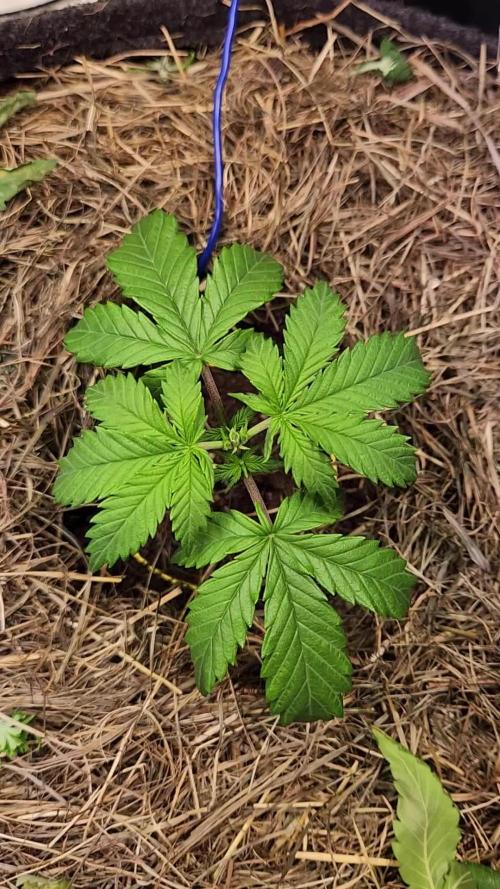
She's growing strong in her first week. I think she'll be ready for topping in her second week. I'm keeping the humidity high to compensate for the high temperature during this sensitive seedling phase. To give her the best start and prepare her for topping, I'm also balancing her water acidity to about 6.5.


Likes
14
Share

@DreamIT
Follow
Sponsored by:
🦎THE HIGH CHAMELEON🦎-💡VIPARSPECTRA💡-💐GREEN BUZZ LIQUIDS💐-🛠️WEDRYER🛠️
🏁 10/8 New sponsor at DreamIT. I am delighted to warmly welcome The High Chameleon to my journals and growboxes. The shipping was fast and the package was anonymous. Instead of the usual plastic to keep the seeds in place, I found a nice bag of chopped hemp, a smart and ecological choice. In addition, a very practical grass holder with attached grinder, really practical and comfortable. I will open a diary for each seed that I will try to grow with different types of training techniques, I will decide which ones along the way. let's begin !!
12/8 seems to be opening, I hope for the best
18/8 everything is going well
__________________________________________
Personal advertising (contains affiliate links)
__________________________________________
🦄 Check out The High Chamaleon website, their first selection criterion is the strong signature of terpenes by taking rare strains while being 100% organic and respecting nature. Safe anonymous shipping!
✅ https://bit.ly/TheHighChameleon
__________________________________________
Did you know that Green Buzz Liquids fertilizers are 100% vegan? A complete line of products ready to give the best to each of your plants! Visit the site and see my journals to see how they work 🦄
🤯 And with the code "dreamit" you will immediately receive a 15% discount on your purchases
✅https: //bit.ly/GreenBuzzLiquidsPro
__________________________________________
👀 Are you looking for a good lamp to start with? 👀
🌞Viparspectra has something more than the others, take a look at their site.
⏩ Use "GDVIP" for an extra discount or "DREAMIT3" for an extra 5 %% discount
👀 Search for it on Amazon
✅Amazon USA: https://amzn.to/30xSTVq
✅Amazon Canada: https://amzn.to/38udUVe
✅Viparspectra UE: bit.ly/ViparspectraUE
✅Viparspectra USA: bit.ly/ViparspectraUS
______________________________________________
🌈 Tired of blowing on your weed hoping it dries quickly? Check out the Wedryer website! You will find a well-made accessory that will help your weed dry in just 8-10 days without the annoying risk of finding mold or other annoyances! (no affiliate links)
✅https: //bit.ly/Wedryer_
______________________________________________
📷🥇Follow the best photos on Instagram 🥇📷
https://www.instagram.com/dreamit420/
Backup
https://www.instagram.com/dreamit4200/
🔻🔻Leave a comment with your opinion if you pass by here🔻🔻
🤟🦄💚 Thank you and good growth 💚🦄🤟


Likes
1
Share

@Mars8_8
Follow
Week 4:Got the new mammoth nova 720W light installed. Trying out the green spectrum. A few reviews said it has the ability to penetrate to the lower nodes because of the green. It’s definitely way hotter than my 300w Evo4 so having to adjust some things to manage heat. Outside temps 68-70 inside temps 75-77. I can get them down lower but have to open doors and keep fans at near max. Have it set at 8/10 at about 24 inches of height and so far adjusting well.
Plants are starting to frost over and smells are mixed. 1/4 has a very skunky pheno the rest are way more pleasant and fruity. Excited to see the colors start to bleed through as the leaves are already showing signs of purple.
