The Grow Awards 2026 🏆 


Processing
Likes
12
Share
@ELPIRATA
Follow
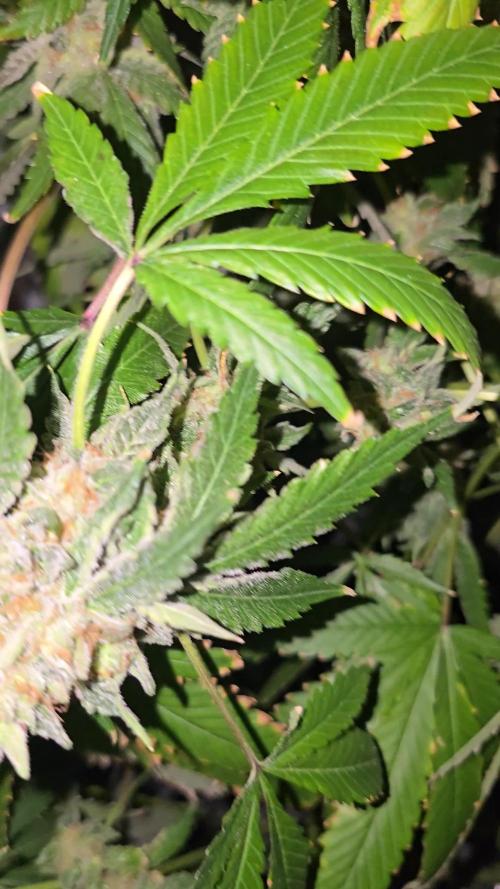
Asi van las cosas hasta el momento; Dia de actualizacion en la semana: 4/junio/20 (dia 29)
+Se agrega malla Scrog con 49 Espacios (Se podra completar?)
El día 04/06/2020 se han regado 3 plantas en macetas de 11 litros:
X2 Semillas Auto Lemon Kix= 1L [1mlKnactive+3ml/L ATAGrowth-C+3mL ATAFlower-C] PH 6.2 / EC= X Tº=23
X1 Semilla Auto Tutankhamon= 1L [1mlKnactive+3ml/L ATAGrowth-C+3mL ATAFlower-C] PH 6.2 / EC= X Tº=23
*El día de hoy se han regado 1 planta en macetas de 7 litros:
X1 Semillas Auto Lemon Kix#3 = 550 ml [1mlKnactive+3ml/L ATAGrowth-C+3mL ATAFlower-C] PH 6.2 / EC= X Tº=23
El día 08/06/2020 se han regado 3 plantas en macetas de 11 litros:
X2 Semillas Auto Lemon Kix= 1L [1,5mlKnactive+3ml/L ATAGrowth-C+3mL ATAFlower-C] PH 6.1 / EC= 1.17 Tº=23
X1 Semilla Auto Tutankhamon= 1L [1,5mlKnactive+3ml/L ATAGrowth-C+3mL ATAFlower-C] PH 6.2 / EC= 1.17 Tº=23
*El día de hoy se han regado 1 planta en macetas de 7 litros:
X1 Semillas Auto Lemon Kix#3 = 550 ml [1,5mlKnactive+3ml/L ATAGrowth-C+3mL ATAFlower-C] PH 6.2 / EC= 1.17 Tº=23


Likes
71
Share
@Mosquito_Haarlem
Follow
Week 12 is begonnen.
Ze heeft niet lang meer te gaan, dus vanaf vandaag 19 juli krijgt ze alleen nog maar Spa Reine mineraalwater. Dit om overtollige metalen en mineralen weg te spoelen wat de smaak ten goede komt. It contains no carbonation and has a very low amount of minerals.
Ze ziet er echt heerlijk uit, de toppen worden zwaar en ze begint steeds meer door te leunen naar één kant. Het past allemaal net aan in de tent.
Ik zal gedurende de week nog verse foto's updaten dus hou het in de gaten 🧐
Dag 21: ik heb de hoofdstam vastgebonden want ze leunt naar een kant omdat ze te zwaar wordt.
To be continued....

Likes
8
Share
@DWCpaqy
Follow
Week has been good. I'm not sure about the ppm and salt around roots, they are a little brown. Wounder if I should flush them and start again with nutrient?
And see some of the last picture, it's pretty thigth between the leaf and buds, should I but some of the leaf?
Ppm 1400-1600
Temp 22 to 31
Temp in water 20-26
Humidity 50-60%


Likes
16
Share
@DevilishCherryBlossoms
Follow
Water only from here
1L at a time
13/09
- Watered @ 10:43
- Health inspection
14/09
- Watered with 1l
- Added extra Fan
15/09
- No water needed today.
16/09
- Watered till run down for flush
17/09
- No water today damp
18/09
- flushed
19/09
- Flushed

Processing
Likes
7
Share
@thephalanx420
Follow
Welcome to my FastBuds GSC grow-off diary! I plan on growing 2 seeds from the same package - one using a 950ml Gatorade bottle dwc system, and the other sharing a 64L reservior DWC. I'll grow them both while trying to be as simiar in techique as i can, but i'm more interested in how the 950ml does, so might not be super picky about doing things exactly the same, heh.
I'm making this all up as I go!
Enjoy the ride!
Week 0
======
Day 0.1 - 2 seeds in water for 24hrs
Day 0.2- 2 Seeds in wet paper towel, in a plastic bag for 24-48hrs until taproot is out
Day 0.3 - 24hrs later - one seed has sprouted a tail
Day 0.4 - 2nd seed sprouted tail; put both seeds into rockwool
Day 0.5 - 1st seed sprouted from rockwool
Day 0.6 - 1st seed doing well, 2nd seed no change
Day 0.7 - Checked 2nd seed and hasn't budged, so it's a dud. Started a new seed (had 3 GSC, so all good!)
Day 0.8 - 1st seed into the 1L DWC bottle!
Day 0.10 - 3rd seed germinated - into rockwool to sprout.
DWC Prototype
-----------------
- 950ml Gatorade Bottle
- 2x small air stones
- 1/2" overflow tube where i want the water level to be
- Nutrient top-feed line
The reservoir below is 19L (~15L of solution) with a small 80gph water pump on lowest setting, which will be on a timer for 15 mins every 3 hours (at first - we'll see how that goes).
The water pumps nutrient solution up to the Gatorade bottle and the overflow goes back down into the reservoir.

Likes
3
Share
@Huckleberry39
Follow
This is my first Ganja farmer run and so far im loving it!! She is not as thick a big and full as I usually like them but she is definitely showing promise!!!

Likes
92
Share
@DogDoctorOfficial
Follow
Week 6 Flower Report: Maturation in Full Swing!
🌟 Welcome to the week where the magic of maturation takes center stage! 🌟
The garden has reached a pivotal moment as the trichomes are bursting with potential. Each one a glittering universe, they are the undeniable stars of this show, taking over every surface with their frosty brilliance. ✨ Watching them evolve is like witnessing art being created in real time – it’s a reminder of the beauty and patience this craft demands.
Trichomes: The Frosty Frontier
This week, the focus is all about those frosty beauties!
• Trichomes are the key indicators of ripeness and cannabinoid production. Watching their progression from clear to cloudy to amber provides the ultimate insight into maturity.
• Currently, we’re seeing a fantastic mix of cloudy trichomes with some clear still hanging around – a perfect sign that they’re gearing up for their final push.
• Fun fact: Trichomes serve as the plant’s natural defense mechanism, protecting it from UV rays and pests while being our treasure trove for cannabinoids and terpenes.
Spectrum Tuning: The Science of Light
Light plays a major role in shaping the maturation process, and this week, we’ve dialed in the spectrum for optimal results. Here’s the breakdown:
• Whites: Running at 77% to maintain robust overall growth and trichome density.
• Deep Reds, Far Reds, and UV: Maxed out at 100% to mimic the end-of-season spectrum, signaling the plants to finish strong.
• Deep Reds: Enhance photosynthesis efficiency through the Emerson effect.
• Far Reds: Promote stretch and flowering hormone production.
• UV: Stimulates trichome production for an extra boost of frost!
We’ve also added a timing twist:
• Reds & UV start 15 minutes before whites to simulate sunrise.
• Reds & UV finish 15 minutes after whites to mimic sunset, creating a more natural light transition.
These subtle timing tricks help reduce stress while optimizing light absorption, ensuring every photon counts! 🌞
Environmental Conditions: Precision is Key
Here are the dialed-in parameters for the week:
• Temps: 26.3°C
• RH: 70.1%
• CO2: 800 ppm
• VPD: 1.03 kPa
With these numbers, the ladies are thriving in their sweet spot, absorbing nutrients efficiently while maximizing trichome development.
Lighting Power:
• Lower layer at 800 PPFD and the upper layer shining bright at 1500 PPFD. The canopy coverage is perfect for even development throughout the garden.
Nutrition: Balanced and Boosted
We’ve stuck with the tried-and-true nutrient mix this week but with some strategic adjustments:
• Removed Breaking Powder to focus on trichome maturity.
• Introduced K-Boost at 0.5 ml/L, giving the plants the potassium edge they need to pack on weight and enhance terpene production.
• Feeding solution details:
• pH: 6.2
• TDS: 755 ppm
• Temp: 20.6°C
In the Autopots, the medium stays perfectly hydrated at 100% with:
• TDS: 580 ppm
• Temp: 22.2°C
Shoutouts and Gratitude
A huge shoutout to the amazing genetics and these incredible ladies, and a big thanks to Trol Master, Aptus Holland and Pro Mix for the stellar products that are elevating this grow to new heights! 🌱💪
To all growers out there, remember: Patience is the secret ingredient. Watch, learn, and trust the process – the results will always amaze you.
Here’s to another week of growth and gratitude. Onwards to Week 7 with hearts full of joy and gardens full of frost! 🌟💚
Growers Love,
Your Grateful Gardener
Discount Codes so you can save big on your next check out 💚💚💚
Kannabia - DOGDOCTOR 30% off
SeedsmanSeeds - DOGDOCTOR 10% off
CannaKan- DOGDOCTOR 15% off
terpyz.eu - DOCTOR 15% off
The Neutralizer - PORKIT5-DOG 15% off
Fast Buds - DOGDOCT 15% off
As always thank you all for stopping by, for the love and for it all , this journey of mine wold just not be the same without you guys, the love and support is very much appreciated and i fell honored and so joyful with you all in my life 🙏
With true love comes happiness 💚🙏 Always believe in your self and always do things expecting nothing and with an open heart , be a giver and the universe will give back to you in ways you could not even imagine so 💚
Friendly reminder all you see here is pure research and for educational purposes only
Growers Love to you all 💚💚💚


Likes
5
Share
@Mo_Powers
Follow
the weather is just wonderful at the moment. i'm happy to be growing it so early in the year. it's branching out like crazy and the first flower buds are already appearing. let's see how much higher it will go. once again, i'm totally convinced by the FAST BUDS genetics.
Likes
18
Share
@VI_Cannabis
Follow
July 5 - The girls are still doing awesome. temps are between 21-26. Humidity is 40-50. Still feeding every 24-36 hours with 3L per plant.
July 6 - They are doing good. Showing lots of flower sites now. Unfortunately I did not get any pictures today.
July 7 - Tons of progress since last week. I don't see any signs of any problems, and still no pests! The smell is getting A lot stronger as it starts to flower more
July 8 - Still doing there thing, no problems, temps and humidity is fine. Have been feeding every 24 hours now as they seem to be really thirsty
July 9 - Super happy with how they are doing. No issues yet. Smell is heavier, and tons of bud sites showing up. Only issue is they are growing pretty uneven.
July 10 - Time to get a even canopy! First time doing some HST. I also did some defoliation. One of the stems split open a bit but it seems to be doing just fine. I did he HST and defoliation in the morning, i then took pictures of 12 hours later and everything seems just fine!
July 11 - Everything seems to be a lot more even and the broken stem doesn't seem to affect the growth.
Likes
6
Share
@Sleestacker
Follow
Oh yeah fungus gnat infestation in my do si dos, spread to my early flowering jack herer’s and I panic chopped my 2 lime daiquiri’s probably 2 weeks early, fuck me!

Likes
1
Share
@renbuds
Follow
8/5-After letting the bottom branches grow for another 4 days they were showing plenty of amber and had firmed up enough to harvest. Did a rough trim and hung the branches in Cannatrol Cool Cure to dry.
8/11-Overall the buds were a lot smaller than previous Mephisto grows. I'm going to let them cure for 2-3 weeks and then do a real taste test.
Likes
Comments
Share
@MakFaso2022
Follow
Moby1: Seré breve realice LST y su forma de árbol en copa la verdad crece bastante en ramificación estoy pensando en dejar crecer un poco mas las puntas apicales y de ahí sacar los primeros esquejes de la Moby1.
Moby2: Sigue a su ritmo crecen sus ramas y su poda FIM continua su proceso me gustaría poder hacer otro trasplante en esta Moby2 quizás recicle un poco y no la pase a una maceta de muchos mas litros esto lo haría para controlar su crecimiento y usarla como madre de otra tanda e esquejes.
Processing
Likes
49
Share
@leafy
Follow
day 95 - start of week 14 : its getting a little cold in my grow room because of winter and i dont have much heat source in there . i hope it wont affect the flowers . im gonna defoliate one last time at the end of this week and then 2-3 more weeks of light then i harverst ,we'll see when we get there :)
-day 99 : i moved her into another room where is more warmth . she will be fine now . i just flushed her because someone suggested it that she might be locked . im waiting for the soil to dry now . im wondering how much longer does she have till harvest
Likes
109
Share
@MadeInGermany
Follow
Hi all 🤗
She continued to do very well this week 😍.
On June 28th she was placed in the flowering tent, where she now has a light duration of 12/12 h.
I am very curious to see how it develops in bloom, and what a smell will end up blowing through the tent 😍.
She still has enough nutrients left, so I will probably only give Green House Powder Feeding again in 2-3 weeks :-). I wish you all a lot of fun with the diary, stay healthy 🙏🏻 and let it grow 🌱🍀
You can buy this Strain @
https://greenhouseseeds.nl/
☝️🏼☝️🏼☝️🏼☝️🏼☝️🏼☝️🏼☝️🏼☝️🏼☝️🏼☝️🏼☝️🏼☝️🏼
Green House Seeds Company Cup 🏆
Type:
Wonder Pie
☝️🏼
Genetics:
Wedding Cake x OG Kush
👍😍
Vega lamp: 2 x Todogrow Led
Quantum Board 100 W
💡
Flower Lamp : 2 x Todogrow Led
Cxb 3590 COB 3500 K 205 W
💡💡☝️🏼
Earth: Canna Bio
☝️🏼
Fertilizer: Bio Grow Feeding ( GHSC ) , Enhancer ( GHSC ) , Bio Bloom ( GHSC)
☝️🏼🌱
Water: Osmosis water mixed with normal water (24 hours stale that the chlorine evaporates) to 0.2 EC. Add Cal / Mag to 0.4 Ec Ph with Organic Ph - to 6.0

Likes
55
Share
@Max1973
Follow
Day 44 - Put em in flower/bloom... 12/12... they are drinking alot.....
Day 47 - Decided to thin them out and defoliate ........ pics/vids....... (video are big files, need to pause, let em buffer)
Day 48 - Posted a pic, day after defoliation.
Day 50 - more pics, recovered from defoliation, and some pics of the beginnings of the flowering....... something interesting in the day 50 pics , is the color of the light spectrum...... it looks like a yellowy sunlight spectrum..... home made DIY LED..... 😎
Globe setup is working better,
10x click- 9w - 2700k - 8000 Lm
2x osram- 10.5w - 6400k - 2160 Lm
Lightpanel- 70w (600w) - 20x blue 6400k (2000Lm) - 38x red 2700k (4000 Lm)
Processing
Likes
8
Share
@Canadian_Bud
Follow
30-7
Well i'm a hoping she produces like her cousin did. I know Patience!!
It's been so humid in the house the dehumidifier has been producing constant RO water at 22PPM. So far no leaks in the new system🙏
This is an interesting CBD we will see if a new location in the room makes a difference this go around.😎

Likes
3
Share
@BLAZED
Follow
Week 4 (8-7 to 14-7)
8-7
Temps: 20.7 to 26.1 degrees
Humidity: 49% to 57%
9-7
Temps: 22.2 to 27.5 degrees
Humidity: 52% to 65%
10-7
Temps: 22.8 to 27.4 degrees
Humidity: 51% to 65%
11-7
Temps: 22.2 to 25.9 degrees
Humidity: 47% to 56%
12-7
Temps: 19.9 to 25.9 degrees
Humidity: 47% to 62%
Watering: Both 1000 ml.
13-7
Temps: 19.9 to 25.1 degrees
Humidity: 47% to 60%
14-7
Temps: 19.9 to 26.6 degrees
Humidity: 45% to 60%
Watering: Both 1000 ml.
Today i topped both plants!
Light set to 60% strength with a distance of 60 cm.
Likes
7
Share
@StickyFingah420
Follow
Semana de cosecha! Al fin el tan esperado momento momento se aproxima y no puede tener una mejor pinta! Realmente he quedado maravillado con la belleza de este fenotipo muy parecido al que promociona el banco en su portal, así que muy satisfecho por eso.
Solo esperar a que se seque bien el sustrato y estaremos cosechando estos bellos frutos 🤩😍