
Likes
Comments
Share


@Changman
Follow
17-07-2024
We have decided to flip them this week as certain light disruptions have caused complications and we are going to avoid anymore. Let's see how they react to the nutrients and go from there


Likes
148
Share


@love_2_grow
Follow
Boom! Touchdown! I let her dry for 13 days before the trim. The humidity in the grow tent was maybe a bit lower than what I usually prefer, but I wanted to be extra cautious against budrot in the other plant drying in the same tent.
It was a breeze to trim her and the final result was 84.4 grams of pure flower with no larf at all. In fact, I didn't even bother keeping the trim as there wasn't all that much of it.


Likes
12
Share


@ciansta
Follow
I’m going to leave the seedlings in the small brown pots until their 1st node and then I’ll transfer them into bigger plastic 3.5gal pots with 80/20 soil to perlite potting mix. One Dosidos is looking a bit behind and the one with the weird leaves ended up catching up to the Northern Lights, maybe even growing faster than it. All Dosidos’ ended up dying but one and I’m sure it’s on the way out. Northern Lights has had no issues and growing perfect.
Likes
Comments
Share


Likes
12
Share


@LSchnabel
Follow
A great run! Had a ton of fun filling this whole tent in with one plant! I think I way do this again with an overgrown mother.

Likes
2
Share

@For2itous
Follow
1 girl is definitely growing quicker so assume gonna be ~a week or so difference which is fine with me. The bigger plant is already rapidly budding and they're already a bit purple 💜 Happy holidays
Likes
2
Share


@Mytrichomedgarden
Follow
EL living soil en flora es increible regar con esa sidra viva cambio la forma de resinar de la planta y claramente revivio todo ! la Wifi cookie era macho y lo mate viene todo increible sin deficit de nada esoy muy contento todo organico sin nada d quimico el suelo y los tricomas tienen un olor muy dulce y hasta las hojas transpiran tricomas! MAMA!
Likes
55
Share


@w33dhawk
Follow
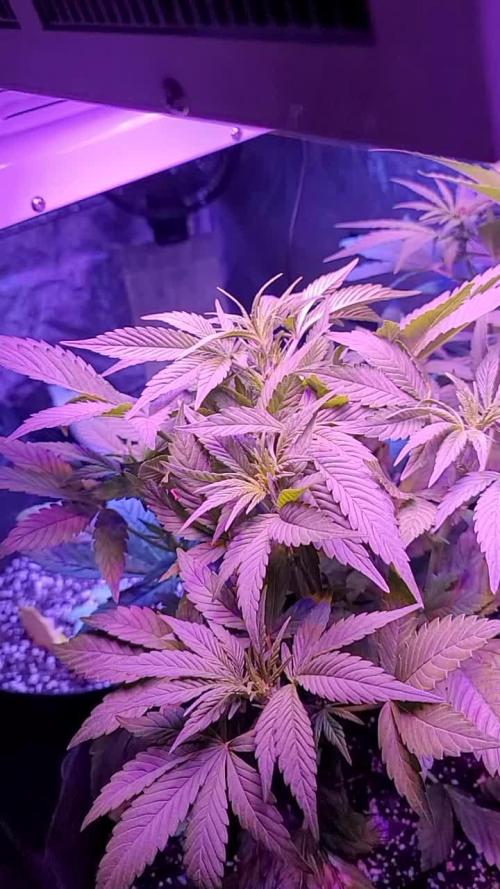
19.07.21 Anfang der 4 blüte Woche alles läuft soweit OK hab die Lampe heut wieder 3cm höher gehängt da einige Blatt spitzen anfangen zu verblassen denke mal das das Licht zu intensiv war, hoffe natürlich das ich die Ladys nicht über düngt habe. Hab auch die bloom dosis um 1ml/L herabgesetzt also jetzt nur noch 3ml/L anstatt maximaldosis 4ml/L. Blätter von den gegenüberliegenden buds fern halten war heut auch wieder angesagt und unterm netz halten sowieso......
20.04.21 wie gedacht hatte meine Pflanze Licht stress glaub ich zumindest die oberen Blätter sind heller geworden aber jetzt fängt sie auch noch an ihre Zähne am Rand der Blätter hoch zu Rollen glaube das ist überdüngung Hab es mal wieder übertrieben......
21.04.21 danke erstmal an alle die mir so schnell auf mein Hilfe gesuch geantwortet haben. Ich hab mir diesbezüglich meine Gedanken gemacht und mich entschlossen das ich den Dünger wieder runter schraube da ich ja auf gut abgestimmter Erde und nicht auf coco züchte sollte ich wohl eher weniger benutzen dessen bin ich mir jetzt bewusst geworden (hätte ich auch selbst drauf kommen können ich dussel). Die Lampe lasse ich jetzt auf 30cm Abstand da ich nicht das Gefühl habe das nach 2 Tagen 30cm das verblassen weiter fort schreitet (wird aber weiter beobachtet). Morgen ist giessen dran werde dann nur Wasser mit green sensation geben und beim nächsten giessen dann wieder mit minimal Düngung weiter machen um die Pflanzen nicht zu sehr zu stressen....
22.04.21 hab heute gegossen und auf dünger verzichtet soweit bis auf Green sensation 1ml/L und hab nochmal drüber nachgedacht wann das Problem mit den hoch rollenden Zähnen der Blätter anfing das war nach dem letzten giessen 2tage später nach dem ich wieder sugar royal gegeben hatte hätte den wohl lieber wieder weiter unten anordnen sollen von der menge her naja ich lerne dazu Fehler müssen sein sonnst hätte ich ja nix zum lernen is ja auch langweilig......
23.04.21 glaube die Ladys mästen sich jetzt da wo gestern noch minimale Lücken an den buds waren sind jetzt keine mehr das Wachstum is eingestellt seid 4 Tagen kam nix mehr an Höhe dazu. Ab jetzt kann sie Dann auch Figur an nehmen und ordentlich Gewicht zu legen hoffe es geht weiterhin so gut voran bis jetzt bin ich mega glücklich das es so gut klappt Ach ja und das Blätter runter schieben unters netz hab ich jetzt ein gestellt es wird einfach zu klebrig da zwischen den buds und ich will die trichom Köpfe nicht permanent berühren, nicht das ich noch irgendeine krankheit mit an schleppe oder andere Keime bzw. Beschädigungen anrichte an den Köpfen (ich desinfizieren meine Hände immer gründlich bevor ich an den Pflanzen hand anlege meistens doppelt und dreifach, hab aber trotzdem schiss man Weiss ja nie was so an Bakterien und keimen überlebt).....
24.04.21 hab heute nix ich wiederhole NIX gemacht an den Pflanzen war einfach zu faul war sogar zu faul zwischen durch mal zu schauen was die Temps und die Feuchtigkeit so machen deshalb kann ich heute nicht viel erzählen.......
25.04.21 diese woche lief auch wieder garnicht mal so schlecht ich bin echt erstaunt darüber das die Pflanzen so gut voran schreiten drückt mir die Daumen das das so bleibt.......

Likes
Comments
Share

@Nucleosynthesis
Follow
So of the two gelato mints one turned out to be hermit, and the mimosas only 2 made the final cut as one of them was vegging super slow and mutated, the mutant has been thrown in the mother tent to grow abit bigger cos I always like to flower out the mutants if i can.
So basically down to 1 x Gelato Mint and 2 x Mimosa all of them looking really nice too, full root production, decent side branching and a strong smell on all 3, the mimosas look on the stockier side and the gelato looks like it's gonna be quite leggy!
Looking forward to what these do, I'm half hoping the mimosa #1 is a keeper cos she smells unreal on the touch and has a lot of desirable traits so far.

Likes
11
Share


@LSnake
Follow
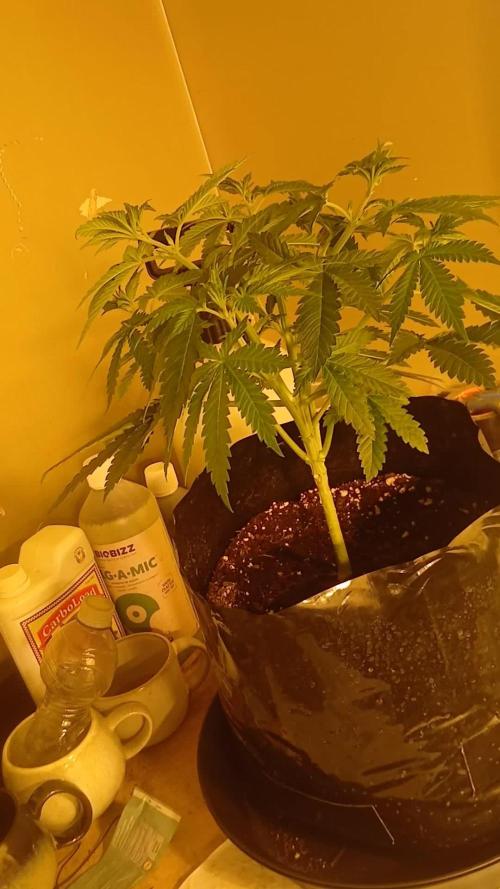
I am very satisfied with the germination that took place in a few days. 🌱💪
This week I will continue to keep an eye on the development of the plant to prevent it from stretching too much in the first weeks. 🔍
I use BioBizz Light soil which for the first few weeks manages to provide enough nutrients, so I will water with a little water every day, to keep the humidity a little higher, without running the risk of overwatering. 🌊❌
Likes
52
Share


@MeaCulpa
Follow
Half time in bloom.
I made a video with and one without flash. This is always a bit misleading.
I set Josefine a bit higher. I should have done this much earlier as she was already the smallest the whole time.
I defoliated a tiny bit. Should be.
A few leaves are turning yellow, but I think I watered a little too much, or gave too much fertilizer.
However, it doesn't look alarming to me at the moment. They'll catch themselves again.
Otherwise, I'm looking forward to the first week of April.
Likes
Comments
Share


@CentralCoastGenetic
Follow
Fast forward two weeks and they are showing ! Out of six plants only two wore males . Switch up to bloom nutrients let’s see how that goes 🤙🏽


Likes
7
Share


@Cannabis_Sativa
Follow
Late flowering smels is awesome like sweet and spiecy both on melane aroma tricome heads are coloured and ready to harvest

Likes
4
Share


@JeyGanesha
Follow
Anche queste albicocche crescono molto bene.....sempre complimenti a fast buds e a me🤣😂💪.sono robuste e anche lei con tanti punti dove fiorire....
Likes
5
Share


@GrowGuy97
Follow
Day 35 - This lady is growing very strong & already getting frosty! Is showing a few signs of deficiencies so I’ll be giving her a bit of nutrients to see if that help! Thanks for following & happy growing friends!✌️🏼🙏🏼🌱


