


Likes
Comments
Share


@CRiSPrGrow
Follow
These came down 11 weeks to the day from seed , this is them on their last day here. Wet weight is 😂 😂 😂 😂 😂 😂 was not expecting so much, it will last me HOURS ! these got wet trimmed now they're on the mat drying , the smell is typical american sweet candy ... was it fun? yes , yes it was fun ! what a plant this one is, my tallest one at 100cm, averaging 85cm , wet weight is.... gonna wait for dry weight, before i jinx it could be dense could be loose ! looks dense + not expecting to loose more than 50% it's all in the cure now ! 🚀

Likes
5
Share

@Budhunter
Follow
Week 11 Flw - Day 77 flw - Day 133 of cycle
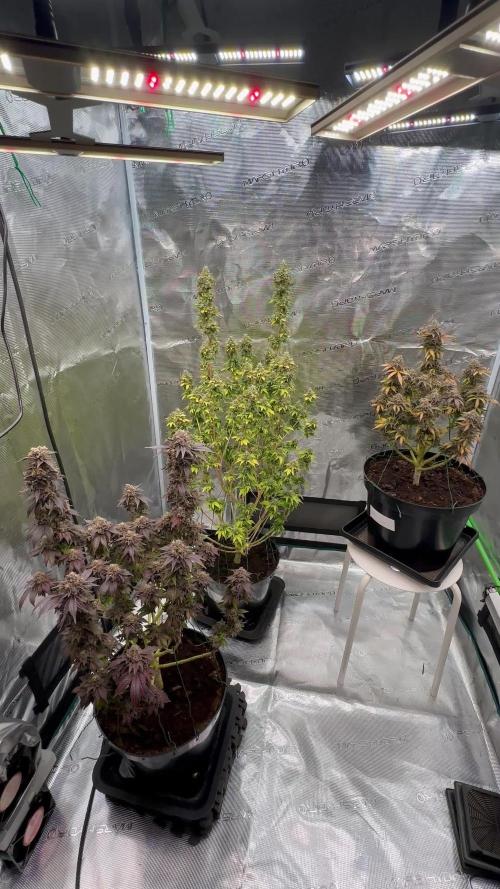
Black gum is fading color and turning yeallow and purple… beautiful looking plant.. the smell of it still kunk witj strawberry, similar with the first bud I cut off and smoked it.. the only downside is not gonna yield much(around 20-30g) .. bud at least is gonna be enjoyable weed
I am harvesting it in 5 days time from now just before my holidays so it will be drying when I am away.

Likes
Comments
Share


Likes
142
Share


@MadeInGermany
Follow
Hey everyone :-).
The last plants were also placed in the bloom chamber kammer.
Everyone has made great progress this week 🙏🏻.
There is not much to say about this week, I think videos and pictures say more like words 🙈😎.
I wish you all a good start into the week :-) Stay healthy and let it grow 🙏🏻👍


Likes
1
Share

@Eniiamrej_01
Follow
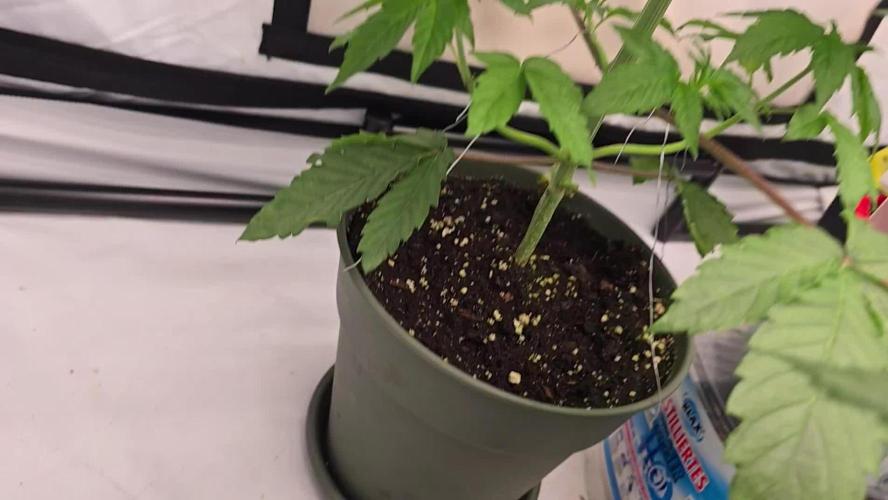
So nachdem die Plants in den neuen 7 Liter topf angekommen waren, wurden sie getoppt (diesmal relativ spät um die 120x120 zu füllen). Nun die triebe runtergebunden und wachsen gelassen.:)

Likes
6
Share


@Cultivandomedicinanatural
Follow
Esta es la última semana de crecimiento que le doy a las pequeñas, el último día antes de hacer el cambio de horas de luz le hago una pequeña poda de bajos ya que eso le dará más aire a la zona baja y más fuerza a la parte superior de nuestras plantas. En esta semana terminamos con una Ec de 1.6 y un ph de 5.8. Están creciendo muy rápido y con fuerza en los tallos.
Los tamaños de las pequeñas son: las red hot cookies 24 y 34 cm, las tropicanas 27 y 37 cm y la purple puch og 24 cm.
Likes
13
Share


@knicko
Follow
In Woche 4 der Blüte gebe ich den Ladys die zweite Ladung Greenhouse Feeding BioBloom je 2.5g/L vom Topf.
Dazu gebe ich per Gießwasser ab jetzt alle 2 Wochen 1g/L den BioEnhancer von Greenhouse Feeding und bei jedem Gießgang den Greenhouse Feeding Booster 0.2g/L.
Die Ladys wurden auch großzügig entlaubt. jetzt Konzentrieren sie sich auf die Produktion der Blüten.
Likes
1
Share


@Green_Peace
Follow
Fade coming in nicely after 7 days of flush, 1 more week and these girls will be for the chop. Just took more cuttings from the mother ready for the next grow. I love Shining Silver Haze! 😋

Processing
Likes
84
Share


@Silverback_Guerilla
Follow
SATURDAY:
Today I mixed up 5g of nutes for my bloomers and douched them. I'll let them dry completely for 2-3 days, then flush them a bit with a little boomerang and calmag.
I ordered a Gorilla lite-Line High CFM kit last week and received it today...fits my tent poles perfectly. This really works to keep the tent walls from collapsing in too far, and I was able to use one pole to rig a shelf to put the fan. That freed up a good bit more floor space.
Yesterday, I ordered a 4 x 4 Vivosun tent and inline fan, and a 1500w (5 x 300w COBs)..this tent will be for vegging autos to put
into the flowering tent as others are harvested, as well as a place to veg photos that I encounter before they are moved outdoors. I'll probably end up ordering another of the same lights, but for now I have a few supplemental lights I can use...blues and daylights.
I'll drop a few WW's or CC's as soon as that stuff arrives so they are big enough to occupy flowering tent space in a few weeks.
SUNDAY:
I spun everybody around and misted with spring water a couple times throughout the day and formulated my plan for ventilation of the new tent which should be here Tuesday. I plan to hook the exhaust from my 4' x 5' tent as fresh air intake in the top of my 4' x 4'.
By doing so, all that good CO2 that is exhausted from the flowering tent will rain down over the veg tent inhabitants before being exhausted from the bottom of the tent. I don't think heat will be a problem in the new tent with so much less light, so I'm optimistic that it will work just fine.
I may even route the exhausted veg tent air back into the bottom of the flower tent, giving the girls another shot at the CO2 enriched air....we'll see...
MONDAY:
Got the room ready for the new tent which will arrive tomorrow, misted, rearranged, and whispered sweet nothings to all the girls. Tried out my new macro lens...need practice..
TUESDAY:
Mixed up 7.5 gallons of nutes for the bloomers...ceased open sesame and began beastie bloomz.
Assembled my new 4' x 4' Vivosun tent and set up its ventilation and lights.
I implemented my idea of exhausting the semi-cool/CO2-rich air from my flowering tent into the top of the veg tent. Only needed 5' of flex duct, so it's got great airflow..no need for another intake fan...yay!
Tomorrow I'll get the 6" x 6" x 6" 'Y' duct and connect my 6" booster fan to it. The booster fan will still be sticking into the flower tent, drawing 70 degree a/c air into the tent via direct flex duct connection, but will now be mixed with the exhausted air from the veg tent. I'm probably gonna keep the ventilation in both tents running once I've got a fully closed-loop system. The only reason I was shutting down the ventilation was so that CO2 would build up for 4 hours, but even if it gets exhausted from the flower tent, whatever the veg tent inhabitants don't consume will find it's way back to the flower tent in under a minute...and so on, and so on..
I spent a while putting together a lighting schedule that will allow me to decrease temperatures while still keeping optimal color spectrums and maintaining good light intensity. Had to empty the tent so I could get to everything...what a pain!
---------------------------------------------------
FLOWERING TENT
Timer #1 --- exhaust, intake (digital timer)
on - 6:15am
off - 2:15am
Timer #2 -- primary blurple light (manual timer)
on - 6:30am
off - 10:30am
on - 11:30am
off - 3:30pm
on - 4:30pm
off - 6:00pm
on - 6:30pm
off - 8:30pm
on - 9:30pm
off - 2:00am
Timer #3 -- all 4 daylight cobs (manual timer + power strip)
on - 6:00am
off - 12:00pm
on - 12:30pm
off - 6:00pm
on - 6:30pm
off - 2:00am
Timer #4 -- all 4 overhead reds, sub-canopy tubes, side strip lights (manual timer + power strip)
on - 1:00am
off - 6:30am
on - 10:30am
off - 11:30am
on - 3:30pm
off - 4:30pm
on - 8:30pm
off - 9:30pm
Timer #5 -- all 4 miracle LED (flowering) in corners, corner, daylight supplemental
(manual timer + power strip)
on - 6:00am
off - 10:30am
on - 11:30am
off - 3:30pm
on - 4:30pm
off - 8:30pm
on - 9:30pm
off - 2:00am
----------------------------------------------
VEGETATIVE TENT
Timer #1 --- primary light and exhaust (manual timer + 3-way splitter)
on - 6:00am
off - 2:00am
Timer #2 --- blue supplementals (manual timer + power strip)
on - 2:00am
off - 6:00am
on - 10:00am
off - 2:00pm
on - 4:00pm
off - 8:00pm
Watching temps closely....
------------------------------------------
WEDNESDAY:
My new lighting schedule seems to be working..high was 87 today, and it dropped into the upper 70's last night...schweet!
I'm pretty confident that when I get my ducting in on Friday and have the closed-loop ventilation for the two tents completed, that it will drop the temp even further and I'll not be wasting so much precious CO2...and then I can ADD MORE LIGHTS and begin with renewed heat mitigation efforts!!! I'm really wanting to pump up the deep reds and maybe far reds during their 4-hour "nighttime" ...maybe more low-wattage sub-canopy tube lights, too.
I guess that the girls really loved the Beastie Bloomz...much fattening happening...
It was so nice being able to move Kushpialidocious into the new veg tent...more space, better canopy penetration.
THURSDAY:
Spun everybody around and misted with spring water..soil still moist.
Temps held pretty much...86-87 all day..i changed the overhead light timer a bit so it kicks on a half hour earlier and as a result temp climbed to 89-90 for about 15 minutes, but quickly dropped to 85 when the 4 COBs turned off... when the big blurple and 4 miracle leds in the corners ( + the extra 40w daylight supplemental in my darkest corner) turned off 15 minutes later, it quickly dropped to 79.....15 minutes later...74...15 minutes later...72!!!
"By Jove, I think he's got it!"
I might actually be able to harvest these fuckers with all terpenes intact.👍
On second thought.😎..I'm gonna dial back the reds a half hour again (and maybe the 4 COBs), because I'm going to try switching out the 40w Sansi bulb for my extra 100w Bridgelux/Epistar 3500k COB light. (MORE POWER!) I really don't think it gets very much, if any, hotter than the Sansi 40w. I'm really hoping to keep it below 90 at all times and as close to 70 as possible at night (red zone).. new temperature test will be tomorrow.
It will also be the first run with the closed-loop ventilation system in place...all ventilation will remain on at all times in both tents, and based on my rudimentary calculations, my 2 x 6" inline fans and the 6" duct booster can move enough air to circulate through both tents about 240 times per hour. I figured that like this:
The 3 fans move 1,010 cfm. The two grow spaces total 252 cu ft (4 x 5 and 4 x 4) There is just over 12 feet of ducting involved in the loop, which is about 6 additional cubic feet. Correct me if I'm wrong...I'm not an HVAC guy..
The A/C kicks on, on average, every 12 minutes, so there will be a regular supply of cool fresh air injected into the mix as well.
My hopes are high! (and so am I)
One other interesting thing is that the addition of the 4-5 gallons of frozen water in jugs makes the substrate temp stay in the lower 70's all day long..I'm hoping the roots at least get the signal that "Winter is coming."
FRIDAY:
Well, shit. My closed-loop ventilation system didn't work quite right...evidently, I should have studied up on calculus.
Rather than the negative pressure in both tents that I expected, both tents swole up like they were snakebit..(positive pressure?)..and temperatures in both tents started to rise...no pinche bueno.
I'm sure it's my math that's off..., for example, I didn't account for the fact that the flowering tent has a carbon filter which decreases the cfm's considerably, and the intermittent flow of central air is a variable that I am also uncertain how to factor.
So....I scrapped the idea until I can achieve truly equivalent intake and exhaust in both tents.
HOWEVER...I did discover a trick that I will dub a "heat siphon," which is a definite improvement, but only in the veg tent.
When I disconnected the flex duct from the 6" inline fan(exhaust) in the veg tent, I had intended to stub it off for now. I noticed that there was considerable "back-flow" caused by the duct booster intake fan in the flowering tent. So, the duct booster draws air from the a/c register, AND from duct which I've placed in the veg tent immediately above the light. I moved the 6" inline fan in the veg tent to to top of the tent and connected a 3' piece of duct to it that is also placed immediately above the one side of the light, so heat from the veg light is ejected into the room and partially drawn into the flower tent where it is mixed with cool a/c air, carbon scrubbed, and sent to the veg tent raining the unused CO2 down over them at about 85 degrees, which is considerably cooler than the normal tent temp.
It's still not perfect..
Because the flowering tent is absorbing some of the heat drawn of the veg tent light, I'm up 3-4 degrees on average in the flowering tent, which is not what I was hoping for at all...it's now hitting 92 degrees in the flowering tent at some points during the day, and hovering at 79-80 at night, so I'm gonna have to revise the lighting schedule again..

Likes
28
Share


@MrGrowthSpurt
Follow
This strain was easy to grow, she started flowering on the 5th week and reached maturity on the 13th week (8th week of flowering). I had 2 of these plants growing at the same time. White LSD#2 took on a reddish/burgundy tone which made it look completely different from#1 All in all it was really a easy grow.

Likes
25
Share


@pifflestikkz
Follow
Day 22
25/07/24 Thursday
Still no Feed/water since Tuesday.
Been a humid and overcast two days so not as much evaporation as normal.
All plants happy and healthy 💚
Video updates
Day 23
26/07/24 Friday
De-chlorinated watering pH 6 with 5ml calmag to 5L water.
Watered each with 250ml and had small run off.
I will continue to feed/water with small run offs to help prevent salt build ups.
Video update.
Day 26
29/07/24 Monday
Nice feed today, using de-chlorinated tap water pH 6.
They each had 300ml with small run off.
All looks incredibly happy and healthy!
The Auto Kabul that was mutated and twisted has pulled herself through and is just a bit shorter than the others.
Day 28
31/07/24 Wednesday
End of week😁
De-chlorinated water pH 6 today with Plagron pk13-14 5ml to 5L
Plagron power buds 5ml to 5L
Used 300ml of the 5L solution.
I will be using these on water days from now on as they are advised to be used every irrigation.
We'll see how they perform 💪💚


Likes
1
Share


@JBsTastyBudz
Follow
One is almost done... One is way taller than the other for some reason... Wonder if anyone had experienced that.... Like a Sativa dominant pheno and a indica dominant pheno... Pretty wicked man ☺️

Likes
9
Share


@Growbody
Follow
Ich grüße euch und heiße euch zu meinem Growbericht der Rainbow Sherbet Automatic von Zamnesia Seeds herzlich Willkommen.
Die URL zum Strain findet Ihr hier:
https://www.zamnesia.com/de/11230-zamnesia-seeds-rainbow-sherbet-automatic.html
Da sich bei meiner letzten Growrunde die 9 Liter doppelwandigen ROOTIES Stofftöpfe sehr gut bewährt haben, verwende ich diese auch für diesen Grow. Die Töpfe sind sehr leicht zu reinigen, Waschmaschine, Kurzprogramm ohne Waschmittel, schon sind sie wieder wie neu.
Ebenfalls beibehalten werden die Smart Start Plugs von Zamnesia. Der beigefügte Dünger ist trotz abgeklebter Verpackung feucht geworden. Zum befeuchten der Plugs habe ich stattdessen das Plagron Seedbooster Wasser verwendet.
Tag 80: Die Rainbow Sherbet Automatic von Zamnesia Seeds ist eine Schönheit. Die Buds sind schwer und müssen an den Hauptstamm gebunden werden. Die unteren Blätter und Zweige entfernt. Sie hat jetzt 4x Bioledex LED-Lampen.
Schön, dass du dich für meinen neuen Grow interessierst. Schau mal wieder rein ✋😎

Likes
7
Share


Likes
2
Share

@magicbudsgrow
Follow
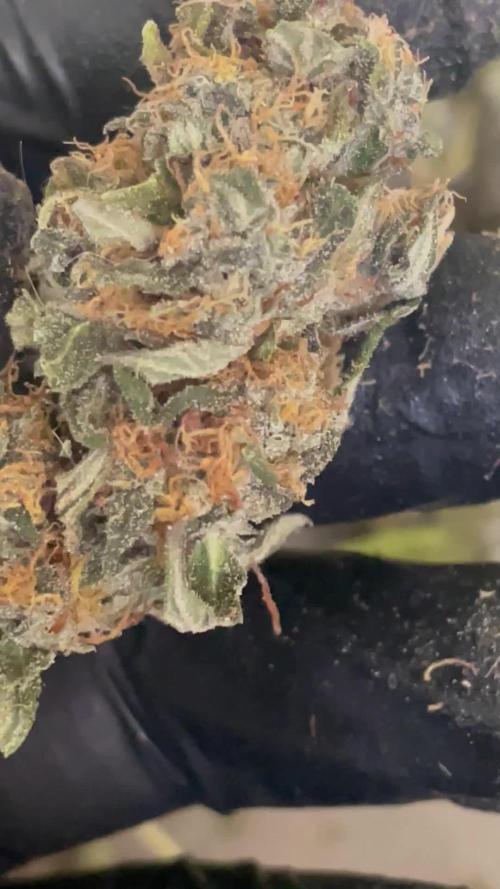
Muito cheirosa e grudenta! Deve ser uma genética excelente para extração com gelo.


Likes
8
Share


@Rinna
Follow
Overal I’m very happy. The weight’s looking insane. Obviously imma update you after drying and curing. Can’t say to much at this point, apart from the fact that everything is looking very nice!

Likes
70
Share

@squalino
Follow
🌿 Journal de Culture : Cherry Cola (Auto)
Date : 31/03/2026
Âge : 68 jours (Semaine 10)
Phase : Rinçage (Plante #1) / Maturation & Gonflement (Plante #2)
📊 Paramètres de mon espace
Température : 25°C (Jour) / 21°C (Nuit).
Humidité : 50%.
Éclairage : Pure LED 240W réglée à 100% d'intensité, maintenue à 70 cm de distance.
💧 Nutrition & Arrosage
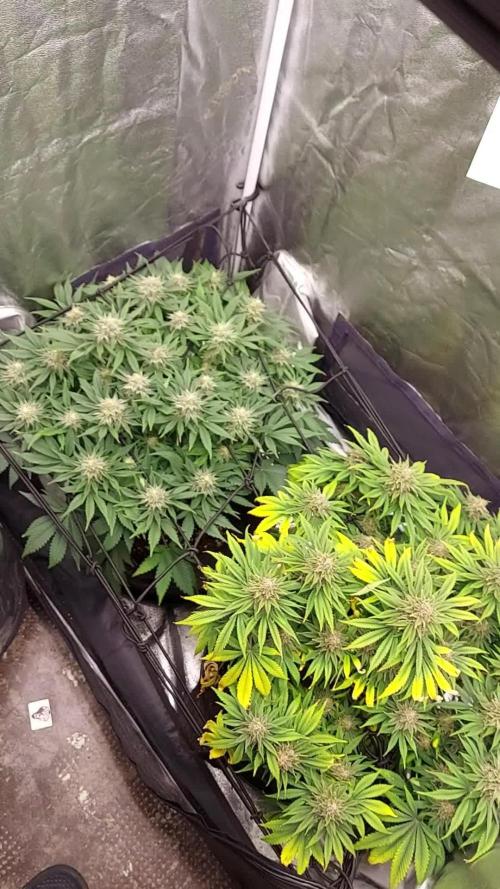
Plante #1 (42 cm) : Rien reçu. Son pot est encore humide et elle a officiellement commencé son rinçage à l'eau pure.
Plante #2 (34 cm) :
1 Litre d'eau avec 4 ml de PK 5-8 (BioTabs) PH 6,3.
Je continue de la pousser avec le PK pour qu'elle profite de son temps de floraison plus long et qu'elle gagne un maximum de volume.
📏 Suivi des Plantes & Travaux
Plante #1 (La Grande - 42 cm)
Observations :
La sénescence est bien marquée. Les feuilles jaunissent, ce qui confirme que le rinçage porte ses fruits : elle puise dans ses stocks.
Les Buds : Les pistils sont quasiment tous orangés. Même si les têtes me paraissent plus petites que d'habitude, elles sont d'une densité visuelle impressionnante et totalement recouvertes de givre. On mise tout sur la qualité et le poids à sec.
Plante #2 (La Petite - 34 cm)
Observations :
Elle a encore besoin de temps. Son feuillage est plus vert et elle continue de fabriquer de nouveaux calices. L'apport de PK aujourd'hui est stratégique pour l'aider à dépasser sa grande sœur en termes de volume de fleurs.
🔍 Mes observations
L'aspect général sous le filet de SCROG est magnifique. Le contraste entre le jaune de sénescence de la n°1 et le vert plus soutenu de la n°2 est typique d'une fin de cycle bien gérée. La production de résine est vraiment le point fort de cette session ; c'est ultra-collant et l'odeur de bonbon sucré est omniprésente quand j'ouvre la tente. La n°1 est dans sa dernière ligne droite, alors que la n°2 est en plein pic de gonflement.
Je remercie du fond du coeur tous ceux qui me suivent et me likes
( MUSIQUE DIAPOSITIVE FASTBUD )

Likes
26
Share

@pifflestikkz
Follow
Day 17
17/07/24 Wednesday
De-chlorinated tap water pH 6 with calmag 5ml -5L.
Very humid week, noticed a green turning colour on top of soils where the humidity has been far to high.
I have installed door netting and recently left open all day and night now so they can condition over night in colder temps.
All are doing well, one overdose slightly behind and looking ABIT swifted. But she'll come around 💪💚
Day 19
19/07/24 Friday
Lite Feed today, 250ml each pot small run off.
Seeing excellent start to these babies. Let's get it 👌💚
Day 21
21/07/24 Sunday
De-chlorinated tap water pH 6 with calmag 5ml to 5L.
Watering in 1L each day from now.
Updated video

Likes
23
Share


@Kynareth
Follow
I had a problem with the water pump connection and i think it hasn't watered in two or three days, so a marks appeared at some leaves (calmag deficency i guess). Now that the problem is solved it won't be worse. The flowering is really nice, its starting to appear the darker color at buds


