


Likes
Comments
Share


@Tetiana_Riz
Follow
Hello everyone. The last week before harvest. . first time i've had a girl like this grow up. It's interesting, quite strong and tasty.

Likes
152
Share


@EBxAH
Follow
Week 8 started today. Things are looking very good! Happy growing everyone ✌️🍀✌️
UPDATE: my new light JUST arrived!!! Man this thing is huge! It's a beautiful day to be alive, peace everyone
✌️🍀✌️
UPDATE: the new light is installed and looks beautiful! Definitely going to need sunglasses from here on out,lol.
✌️🍀✌️

Likes
15
Share


@No_Clout
Follow
Flowering is starting well, starting to see trichs so I’ve gave them their first feed with bloom nutes (C4) which is also 95% organic which is always a bonus imo and I’ve not grown anything using organic products so I’m anticipating to see the end results. Their all 3ft tall or just under which is abit taller than usual but overall we’re looking fine, did some minor defoliation and lollipoping on the bottoms 1/4 of all 3.

Likes
3
Share

@Nickeluring
Follow
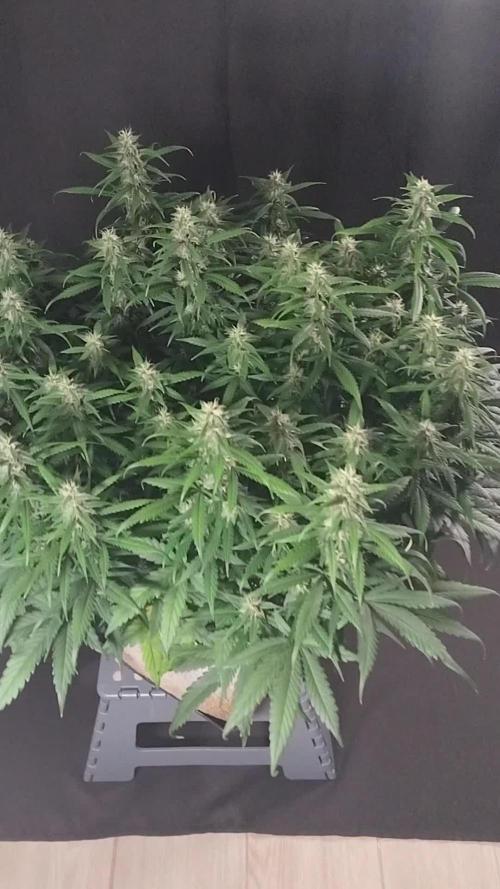
The plants look absolutely amazing at 8 weeks! Lemon Cherry Cookies has stunning looking flowers but needs minimum one more week. The others need a few more weeks. Guava and Apricot both are seriously fat. Apricot is super chunky.
Their heights:
Guava: 58 cm
LCC: 55 cm
Apricot: 47 cm

Likes
34
Share


@AbroCadabro
Follow
I just added weeks 5 and 6 into one week because I didn't really have time to post last week.
There seems to be a problem with my plants that I can't quite figure out. The only commonality that I changed with both plants since the last grow is the microbe Inoculant that I bought from NPK. The Black Afghan that I harvested back in November didn't have these microbes added to the soil and it grew into a monster. I am beginning to wonder if these microbes are stealing food from my plant. Even though these microbes are sold as "flowering" microbes. I'm beginning to think they are starving my plants.
Also, I am technically 7 weeks from the flip to 12/12. So I may just be at the end of the flower period for these plants. I checked the Tricomes and they are mostly cloudy with about 5-10% amber. Normally at this point I would be cutting out the nutrients and letting her consume her leaves. However, she has already started to so that and now I don't know what to do. I just don't know. So... lesson learned. Stick to the basic nutes and stop trying to make this job harder than it needs to be. KISS

Likes
13
Share

@MedicaL
Follow
Den 22..
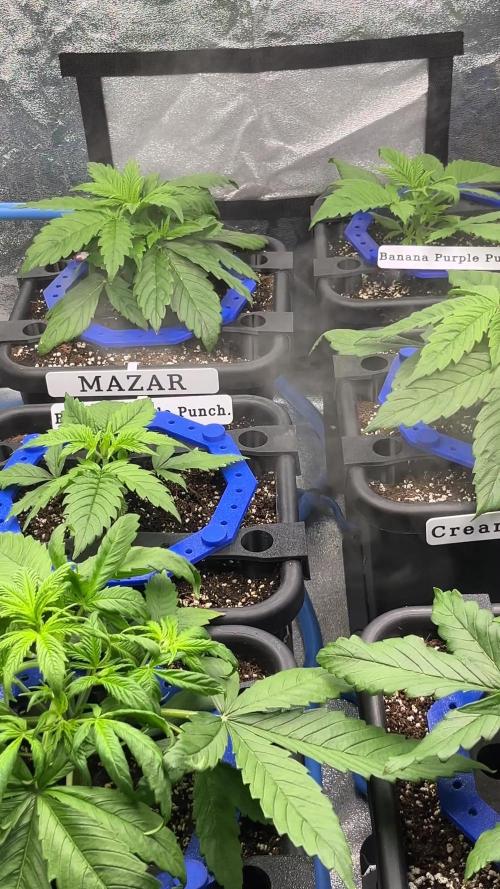
Zvýšil sem EC na 1,4. Mazar si trochu líznul, ale nic závažného,jen lehce chycené špičky. Ostatní to docela snáší dobře. Kořínky dorazily dolu, tak už si nasávají z nadrzě.Je to pohoda týden nezalévat 💪Zatím žádné pre-Flowers.
Ať to roste 🍀


Likes
7
Share


@stephandjo
Follow
Despite a broken stem at the start of growth and a lack of time to take care of it properly, this strain still showed its strength 👌
Pretty buds covered in resin, this strain is still on top of current genetics 👍

Likes
53
Share


@SativaSteve88
Follow
Smells getting stronger, flowers getting fatter, pistols starting to turn amber, we are getting closer to harvest, plants all nice and healthy the excitement grows the wait goes on but theyll soon be ready cant wait thery are looking really well, see you next week for the latest update ✌️👊
few of us closing in on harvest now with barneys new mimosa evo and cant wait to see the outcome, goodluck to all others with your harvest as well

Processing
Likes
73
Share


@Teamdirtbag2
Follow
I am Groot, I am Groot, I am Groot, I am Groot, I am Groot, I am Groot, I am Groot, I am Groot, I am Groot, I am Groot, I am Groot, I am Groot, I am Groot, I am Groot, I am Groot, I am Groot, I am Groot, I am Groot, I am Groot, I am Groot, I am Groot, I am Groot, I am Groot, I am Groot, I am Groot, I am Groot, I am Groot, I am Groot, I am Groot, I am Groot, I am Groot, I am Groot, I am Groot, I am Groot, I am Groot, I am Groot, I am Groot, I am Groot, I am Groot, I am Groot, I am Groot, I am Groot, I am Groot, I am Groot, I am Groot, I am Groot, I am Groot, I am Groot, I am Groot, I am Groot, I am Groot, I am Groot, I am Groot, I am Groot, I am Groot, I am Groot, I am Groot, I am Groot, I am Groot, I am Groot, I am Groot, I am Groot, I am Groot, I am Groot, I am Groot, I am Groot, I am Groot, I am Groot, I am Groot, I am Groot, I am Groot, I am Groot, I am Groot, I am Groot, I am Groot, I am Groot, I am Groot, I am Groot, I am Groot, I am Groot, I am Groot, I am Groot, I am Groot, I am Groot, I am Groot, I am Groot, I am Groot, I am Groot, I am Groot, I am Groot, I am Groot, I am Groot, I am Groot, I am Groot, I am Groot, I am Groot, I am Groot, I am Groot, I am Groot, I am Groot, I am Groot, I am Groot, I am Groot, I am Groot, I am Groot, I am Groot, I am Groot, I am Groot, I am Groot, I am Groot.
Who am I????


Likes
13
Share

@Trinidad
Follow
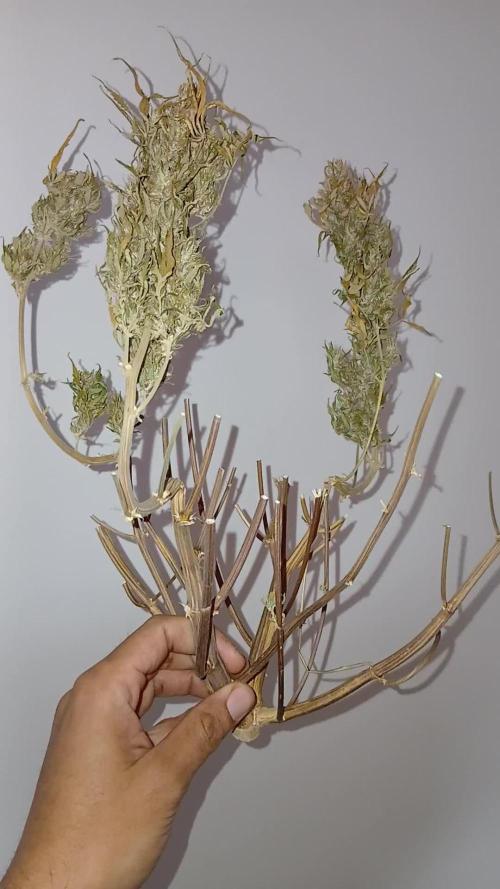
11 days of drying. I just trimmed her and put her in glass jars to cure. Trim was not to bad, got through her in about 1 hours, rough trim. I sampled this one alot while drying so her end weight is be more, maybe 5 grams. Her offical weigh was 61grams. The wet weight consist of entire plant. Branches and all which wa 465grams. From one of the videos you can see where 3 of her branches were broken because they were tied down. Self inflicted supercrop. A testament to how resilient these genetics are.
Likes
9
Share


@b_C6969
Follow
Day 74
Harvest time!
She didn't have the best start at life, lost a major limb/side stem early on (my fault, too aggressive with LST), and got a bit stunted from stress I think.
Flushed twice (once was to get her out of being stunted, it worked).
Probably could have left it another couple of days as some of the lower buds were still maturing, not many though, and i needed to get her out of there so I could turn the extractor fan down to bring the humidity up for the young plants. I'm really happy with the result, especially after the small disaster that was Zkittlez (which im pretty sure was actually CBD lemon as its not potent at all).
Not a big yield, would have been a lot bigger had she not lost a limb. I'm not too worried though, quality over quantity right? im pretty certain this is the best stuff i've grown so far, 5th times the charm huh? Trichomes are about 80-90% milky and 10-20% amber, first plant i've actually let get amber, so yeah, finally grew something right lol.
No nutes for about 2-3 weeks before chop, and yeah 2 flushes, so im hoping it'll have a nice taste.
Oh, and i didn't water for 3-5 days before harvest, which could explain why she's so light (not a lot of water weight), visually looks similar to the harvest, size-wise, yet a good 60grams lighter, will be interesting to see what the dry weight is. I'm gonna throw out a guess of 38gms.
Even though she has a great smell, its not very stinky while drying, nor was it in the tent. you have to touch the buds to get any scent, pretty handy tbh.
Currently drying in my wardrobe with a fan blowing underneath (not touching the buds) for airflow.
Happy!
EDIT: not the best trim job, im not very well at the moment so just wanted to get it done. plenty of trim that im going to use to make pain relief balms/lotions
Processing
Likes
21
Share


@LittleBigTrees
Follow
Plucked a few more leaves but other than that just feed them this week including bloom.
Also gave them some rice starch (from boiled rice water collection) on day 42 as a boost for the microbes 👍
Turned the IR off now and turned up to 34000lux
Likes
8
Share


@Canna055
Follow
Flower day 29
So 4 weeks done in flower the cherry Poppers are doing fantastic could lollipop them a bit more tbh but they’ve got yesterday the last topdess feeding till harvest just pure water
The HerzOG plants are 2 completly different phenos the one to the left seems to be more sativa dominant & the one to the Right more like a indica- hybrid
At least 5-6 weeks to go from now till harvest


Likes
Comments
Share


@GreeneScene
Follow
GIVE THIS GROW A THUMBS UP 👍
WEEK #2 DAY 9:
She was stunted day 6 & is recovering from that currently .
She is in a 5x5 with 3 autos between 35-42 days old .
The plan is to veg this single Cereal Milk out to fill this entire 5x5 once my Autos are harvested .
This is my first run with this cultivar & breeder however it was an easy choice considering I adore the taste , smell, & smoke of the strain!
Week 1 issues:
The tents VPD was out of whack . Due to the VPD being out of proportion slowed/stunted growth occurred equally across all 4 plants in the tent . Plants showed deficiencies of CalMag and interveinal yellowing , necrosis leaf spots , reddening leaf petioles & leaf stems slowly progressing in the worst affected plants to red leaf veins & lastly droplets of condensation on the leaves (plants were sweating)
Anyways after I fixed the VPD issues , I added a makeshift dome for humidity retention of the Cereal Milk & 3 days later which is today she has added 2 new nodes almost catching up to where she would be with normal healthy unstunted growth at day #9.
She was transplanted from her starter pot last night into a 2 gallon with plenty of dry amendments mixed in for a 6-8 week veg.
I’m debating on scrogging this plant or LST & Supercropping the SHIT out of this plant . I’ve never scrogged before and am not welcoming any new learning curves at the moment which is my main reason not to even though I think it may be the biggest help to filling this tent & “supporting” the enormous load of bud sites I am planning to grow .
I worry about to inconvenience of defoliating & training branches down without being able to get around the outside of my tent given its location in a corner .
If I had anticipated wanting to grow a single 2lb + plant when determining my grow location I would’ve placed it more ” openly “.
If I can think up a work around to canopy maintenance so that I can keep it clean & by the books I’ll quit complaining & try it .
Otherwise she’ll be LST’d & Supercropped OR topped and mainlined .
Day 14 END OF WEEK #2 I’ve added remote temperature & humidity monitoring/controller. Now I can monitor the dips & swings while making adjustments to better dial things in .
(Just trying it on for size here , for full disclosure I am not in love with it & if I can not modify what it is that is bothering my existence I WILL be returning this unit AND purchasing another brand with the capabilities I am looking for the connectivity for this specific unit I am trying was a BIG deciding factor for me but all in all is not enough to make me settle on this one if I can potentially have it all. . Odds are highly leaning towards returning this unit .)
Finally raised the pot to level with the older girls in flower currently . I was wrong when I reported in setup that she was “30 inches “ from the light . She in fact was 35 inches‼️away so I raised her to be 26 inches from the light by placing a 1 gallon bucket beneath her .
I WILL NOT LET THE MID-END OF FLOWER & DRYING to cause my run to get derailed
Likes
18
Share


@Hashy
Follow
Most of this week I was away so the tent was on autopilot.
When i got back i was pleased to see all 4 strains where still around the same on development. The Amnesia trance is the taller of the 2 AMS autos. She is starting to throw out some nice colours now. I'm fairly confident this one is going to hit my 13 weeks scheduled for it, so not long left.
Notes
Day 64 nothing away
Day 65 autofeed last weeks nutes
Day 66 Got back, everything's fine
Day 67 manually water
Day 68 light strength from 75% to 87%
PPFD was 579 Dli was 37.5 now its 634Ppfd 41.1Dli.
Day 69 autofeed this weeks nutes
Day 70 795Ppfd 51.3Dli
Back in a week
Take it easy.

Likes
58
Share


@AsNoriu
Follow
Day 8. From this attemt all 3 made it, but two plants look weakish, from other 2 only 1 seed is out. Not a fantastic start ;) maybe they will catch up later !
Installed tent, light dimmed to 30% of 240W, distance approx 40 cm.
Happy Growing !!!

Likes
5
Share


@Ieiogrow94
Follow
Eccoci di nuovo qui!!!
Super eccitato per questa nuova collab con Spliff Seed, che mi ha dato l’opportunità di testare questa nuova genetica e di condividere i progressi con tutti voi!!!
Come sempre partiamo nei bicchieri per poi travasare.. Questa volta verrà svolto tutto sotto la Lumatek Zeus 465 ProC, mi aspetto molto da questo ciclo!!
Pianta davvero incredibile, molto vigorosa e super resinosa..
Manca pochissimo e ci siamo, sono molto curioso del raccolto!!
Grazie a tutti per il supporto ❤️🍀🔥


Likes
43
Share


@Esoteric_growing
Follow
Seem to look a little over watered, probably should have let them root out the blocks a little more before transplant. Also humidity is on the low side but still growing at a fantastic rate.
The plant in the middle is getting removed, seems to be the runt of the litter no pun intended
Likes
38
Share


@Green_Mountains
Follow
Another good week. Watered them twice. I'm not planning on feeding them again. A little defoliation. I definitely think they are in the last 2 weeks before harvest.
Still seeing some nutrient burn developing on the leaves. I don't think I watered enough through the whole grow! I'd love to hear opinions on this!
Took some videos of the buds with an iPhone 12 at 6X magnification. Decent quality!
Otherwise, still looking to successfully harvest these plants! Thinking about the next grow. Probably going to be Auto Strawberry Cheesecake and Auto Anesthesia.
Peace!