The Grow Awards 2026 🏆 


Likes
Comments
Share
@Smoking_Joe_Frazier
Follow
Week 8: Flowering Stage
Rising Temperatures and Weather Challenges
The temperatures are expected to rise slightly this week, but intermittent thunderstorms and heavy rain are also forecasted. This unpredictable weather presents a challenge, but I remain hopeful for continued growth.
Snail Attack
I had been leaving the plants outside overnight, but during a late-night check, I found three giant slugs feasting on my Gorilla Cookies buds. These damn snails just won't give up. I'm seriously considering installing some kind of automatic deterrent system.
Feeding and Watering Consistency
The amount of water and nutrients remains unchanged. Each plant continues to receive 3 liters of nutrient solution in their 11-liter pots to prevent salt buildup and ensure optimal growth.
Growth Observations
Banana Purple Punch and Blue Dream: Both strains seem to have halted their vertical growth. They are now fully focused on bud development.
Tangie: This plant is still vigorously growing with new shoots appearing everywhere. Tangie seems perfect for low-stress training (LST) and could probably handle a well-timed topping without issues. I had to do some light defoliation to make sure everything receives enough light.
Gorilla Cookies: While it’s not growing as aggressively as before, it is concentrating on flowering. Despite this, it continues to gain some height.
Looking Ahead
As the flowering stage progresses, I'm eager to see how the plants adapt to the changing weather conditions and how they continue to develop. Despite the challenges, the plants are showing resilience, and the buds are looking promising.
Update 18.07: Pest Problems
Bad news, growmies. During my daily inspection today, I discovered some unwelcome pests. Some leaves on all the plants had white or silver dots, which I suspect are caused by thrips. The Banana Purple Punch plant was particularly affected, with numerous black dots on the top buds, likely aphids. I had to remove two small buds 😞.
To combat this, I brought all the plants inside for a thorough shower and removed any affected leaves. I then sprayed them with a light neem oil solution, taking care to avoid the buds to prevent affecting their taste. The Banana Purple Punch plant has been isolated to prevent further infestation.
I'm open to any advice or suggestions on how to handle this situation more effectively. What else do you think I should do?
Update 21.07
The heat has been intense lately, with temperatures soaring to around 31°C (88°F). Despite this, my garden is showing remarkable resilience. After battling thrips and aphids, my plants are bouncing back. The Tangie, Blue Dream, and Gorilla Cookies no longer display any signs of thrip damage on their leaves. It seems the light neem oil solution has done the trick.
However, my Banana Purple Punch remains a bit of a mystery. This strain appears particularly sensitive to nutrients, even though all my plants receive the same care and feeding. While the other plants look lush and vibrant, the Banana Purple Punch shows some troubling symptoms. Some leaves exhibit early signs of nitrogen toxicity, while others curl upwards with no apparent nutrient burn at the tips. Additionally, the large fan leaves are yellowing. Despite these issues, the buds are frosty and thriving.
I recently checked the trichomes and found that most are still clear, even on my Blue Dream, which already has a promising main bud. It's clear that patience will be rewarded with this beauty 😍

Likes
199
Share
@PEAKYPLANTERS
Follow
Hello everyone ,
Farmers friends
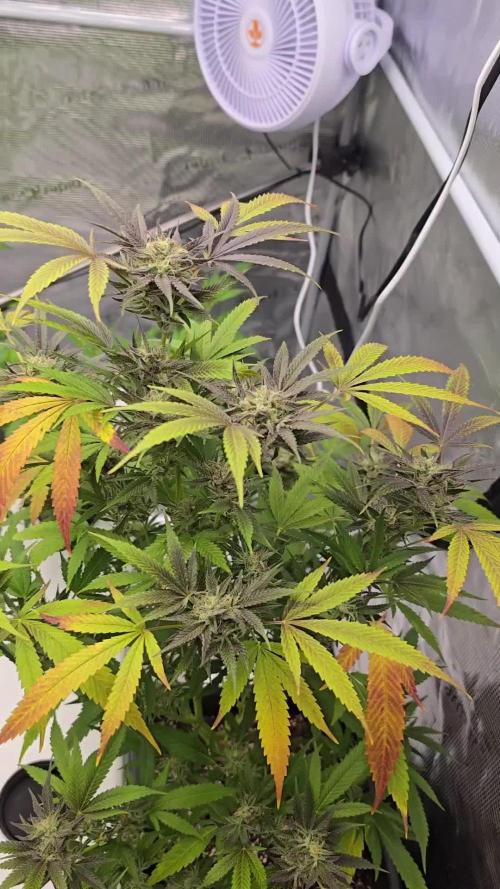
I had to bend my sweet little girl because she approached too much to light .... the result?
An explosion of ever seen colors !!!
This is my first red genetics and it's great to see these gems color himself

Likes
1
Share
@Whodeletti
Follow
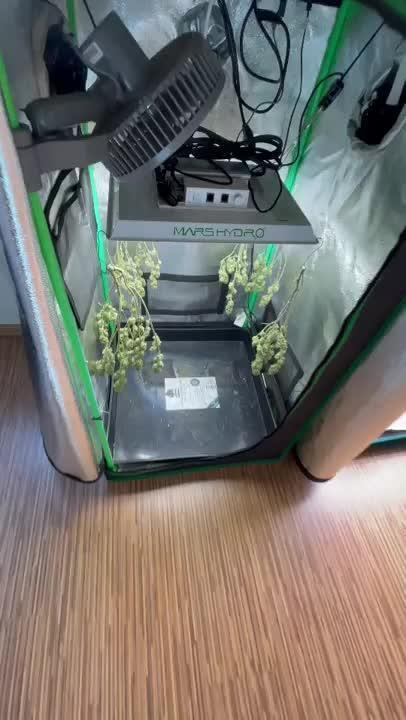
Ernte an Tag 66, weil genug Trichome Bernsteinfarben waren.
Nach 5 Tagen waren die Buds durchgetrocknet und kam in Terplockbags.
80,6 g Dryweight


Likes
39
Share
@Randyb4
Follow
This grow was stressful and very informative. I learned alot about what the plants want/need. Love having grow diaries to keep track of everything in such detail. I will definitely grow more Humboldt Apple Blossom in the future so I can see what the strain can really do.

Likes
31
Share
@Tweak
Follow
Got the screen on her late last week, now it’s a waiting game. She’s growing really fast for only being 5 weeks old. Let’s grow baby!

Likes
8
Share
@CRIPPYGROWS
Follow
I thought i was going too hard so I brought PPM down to 246 diluted with some rain water PH to 5.8. Leaves were coming out weird not sure if it was from the fimming i did or idk...But i did go ahead and topped her on all sites that i could top and gave her a haircut to expose those sites that were lacking exposure to light from the fan leaves blocking direct contact from the lights. Tied her down to maximize all angles of light exposure. She is pretty tough from all the shit i been putting her through to not fuck up this DWC

Likes
15
Share
@DeepRootsGrowTrees
Follow
AUTO MOON ROCK / DIVINE SEEDS
WEEK #11 OVERALL
WEEK #6 FLOWER
This week she started to stack buds are getting dense and covered in trichomes, she's smelling great!! Stay Growing!!
Thank you for stopping by and taking a look it's much appreciated!!
Thank you DIVINE SEEDS!!
AUTO MOON ROCK / DIVINE SEEDS


Likes
12
Share
@Gorrilla420
Follow
This was probably one of best looking plants I’ve done outdoor, grew really well in the new spot. Had a great main cola with many decent sized side branches. Didnt even do any training on this girl and produced plenty. Next year will do this again but peak summer and do some training on her.
What a great plant, especially in the uk weather she holded off nicely.
Big thanks to barneys farm for sending me these strains to try out.
That’s all, happy growing 🌱

Likes
21
Share
@Staffedition
Follow
Привет друзья. Моей растихе сегодня 88 дней.
Растение почти пришло в себя.
20.10 буду переводить на цвет.
Начал применять LST технику на 19 дне и продалжаю применять её через день, а 18 августа добавил ДЕФОЛИЗАЦИЮ
С 20.08 ДЕФОЛИЗАЦИЮ делаю каждые 3,4 дня
С 20.08 LST технику делаю каждые 4.6 дней
На сегодняшний день влажность 54%
5.09.2023 заметил высокий Ph 7.9
С 48 дня Ph не ниже 5.8
На сегодняшний день Ph 6.0
Начал кормить с 60 дня Canna Terra Vega
PPM 450
Всем мира и добра!
Не забудь поставить лайк❤️, если понравилась как прошла неделя
И читайте наш TELEGRAM: https://t.me/smail_seeds
#Smail_Seeds 😀


Likes
17
Share
@Changman
Follow
Got these beans from a festival and they are from 501 genetics based in Thailand (or malaysia i stand corrected apologies) and these are fire 🔥 hope and pray i got seeds so i can experience this journey once more. Fire 501 Genetics well done


Likes
21
Share
@Stash074
Follow
This week was good. Its been a week since I made the flip..the ladies are already starting their stretch. Pistils are showing up all over the ladies, which is a good sign of stable genetics being that I used feminized seeds. Right now I am giving them the transition stage feeding schedule. This will be my 1st time using bloom booster, I intend to start adding kool bloom to the feedings this week. Also I increased the intensity of the grow light to 100% Yesterday. I will keep yall updated in my next upload 😎🍃
Likes
22
Share
@MasterKush714
Follow
😎09/26/2023----____👹YOOOO WHATS UP GANG!!!! BIG THINGS POPPIN FOR WEEK 3 LFG👹!!!!!!!!!!!!!________________
_____________________________________________________________________------------------------------________________________________--------------------____________________________
SOOOO TINGS LOL GOING ON THIS WEEK, FIRST AND FOREMOST DOING STANDARD WATERING EVERY 2.5 DAYS, USING THE FOOP NUTES VEG1 AND VEG 2 WITH SWEETNER. SECONDLY, I HAD HER FIRST TOPPING DONE AS YOU CAN SEE IN PHOTOS, SHE IS RECOVERING PRETTY QUICKLY FROM THAT AS WELL. AND LAST BUT
DEFINETELY NOT LEAST, I HAVE UPGRADED SOME HARDWARE INSIDE THE GROW TENT, I HAVE STARTED USING THE MIGRO ARAY 2 +RED 120 W AND I MUST SAY THIS LIGHT
LOOKS LIKE SOMETHING OUT OF A SCIFI MOVIE SUPER SLEEK DESIGN, VERY VERY VERY WELL CONSTRUCTED LIGHT, THE WHOLE THING IS AMAZING TO BE HONEST AND I GOTTA SHOUT OUT TO SHANE TORPEY OWNER OF MIGRO, YOU KILLED IT MY GUY THIS SYSTEM IS A KNOCKOUT. WONDERFUL WORK SIR!!! THAT BEING SAID THANKS FOR STOPPING BY IF ANYONE WOULD LIKE TO COMMENT OR GIVE ANY ADVICE AS ALWAYS IM SUPER THANKFUL FOR THAT THANKS!!!!!!!!!!!!!!!! LETS FUGGIN GOOO!!!!!!!!!!!

Likes
26
Share
@Jsammy09
Follow
This was a pretty explosive week for growth! These girls really took off this week! I have been topping off the res with just plain RO water this week after the change and for this run I have kept the strength of the nutrients pretty low and have been hanging around 0.6 EC, I don't see much of a need to increase at all. I am going to continue to keep a lower EC and just watch the plants. I think last run I may have fed a little hot a time or two so gonna go low and slow this run and it has been working out so far. I will be putting my trellis net up either today or tomorrow because I think I am really going to need it this run. I noticed yesterday that it looks like these girls are showing signs of entering the flowering phase so I need to get set up and be prepared for the stretch! I'm getting a little nervous about the height of the plants as well because they are growing fairly tall pretty quick, but hopefully the net will help a bit. No issues to report really and they look healthy as can be! Thanks for stopping by and checking out my grow!
As always any tips, comments, recommendations are always valued and appreciated! Thanks everyone you guys rock!
Likes
51
Share
@MadeInGermany
Follow
Flowering day 37
since time change
to 12/12 h.
Hey guys :-)
The buds have developed incredibly nicely this week.
The smell is getting more and more extreme :-) .
The whole plant itself looks perfect 👍.
The growth has slowly stopped as the full energy goes into the production of the buds.
This week it was watered 3 times with 1.2 l each (nutrients see table above)
They were individually inspected and checked for their health.
Osmosis water for the coming week was refilled in a 100 l tank 👍.
Have fun reading the diary and stay healthy 💚🙏🏻
👇🏼👇🏼👇🏼👇🏼👇🏼👇🏼👇🏼👇🏼👇🏼👇🏼👇🏼👇🏼
You can buy this Nutrients at :
https://greenbuzzliquids.com/en/shop/
With the discount code: Made_in_Germany you get a discount of 15% on all products from an order value of 100 euros.
👇🏼👇🏼👇🏼👇🏼👇🏼👇🏼👇🏼👇🏼👇🏼👇🏼👇🏼👇🏼
You can buy this strain at :
Clearwater Seeds
Water 💧 💧💧
Osmosis water mixed with normal water (24 hours stale that the chlorine evaporates) to 0.2 EC. Add Cal / Mag to 0.4 Ec Ph with Organic Ph - to 5.8 - 6.5
MadeInGermany

Likes
99
Share


Likes
18
Share
@DevilsBud
Follow
Boom!!!!
New week and Damm there looking fire great smell coming from them all day long couple weeks to go 💪🏻