
Likes
Comments
Share


@Natrona
Follow
This week has been rainy so the outside girls only got watered and fed once. With all the rain we've had, all the girls grew a bit. I top dressed all girls with Bloomin Soil from Elm Dirt. Lemon Cake is now 48 inches and stacking nicely. Happy girl means happy mom.


Likes
15
Share


@Waveform
Follow
Day 60 and a new week, with lady #2 starting to show her age by getting some more yellowish fan leaves. Sugar leaves on both started to show a very lovely, deep violet color. By breeder information they should be ready in 60–63 days. I guess it will be a few more in my case.
Lady #1 is foxtailing a bit. Summer grow, definitely, and it was over 30 °C outside most of the daytimes, so I couldn’t avoid peak temperatures of more than 31 °C fully. Like every indoor grower – no restriction to this kind of plant only – I like to see self-grown green become big and bushy, but I guess with a 1,60 m tent it‘s better to stick with shorter specimen.
Even some fan leaves are getting into their autumn dress now, and wow, I like their style! Pistils are still white to more than 50%, so ne reason to check for harvest proximity or to feed them pure water only.
Day 62: With their cola foxtailing, tallest bud is now at 91 cm. Color is gaining saturation. A bit more intense leaf curl on very few of the uppermost leaves; nothing to worry about at this stage. Think I can do a microscope tour soon, even if I know it’s too early. ;)

Likes
6
Share


@Mr_nugs_lover_David
Follow
This lady has been Transplanted on day 39 since she was planted and she will be grown with the complete biotabs organic line, I have applied for this 50L pot: 25g of startrex for every 5L of soil so I've used 250g of startrex in total, then I've dropped a spoon of mycotrex in the planting hole and when I finished I finally added 5 slow release tabs for this 50L pot, and then I watered right after the transplant with 1g of bactrex per liter of water and 1ml/L of orgatrex, this is gonna be a fun season, stay tuned everybody!!


Likes
12
Share


@Purrple_Haze
Follow
Stretch Mystery & Waiting Game 🌱🕵️♂️
This week’s been all about patience and potential. We’re technically in Bloom Week 2, but our little mystery queen is still holding her cards close—no visible pistils yet, even though her structure and energy say she’s gearing up for something big. 🌿✨
That said, the stretch is definitely on. She’s reaching higher each day, and those side branches are starting to fan out beautifully. The symmetry is looking solid, and she seems right on track—even if she's taking her sweet time to show her true identity. 👀
Same feeding routine, steady rhythm:
🔸 BioBizz Grow, Bloom, TopMax + CalMag + Alg-a-Mic
🔸 Homemade compost tea, applied two days post-feed
🔸 Effective Microorganisms added 48h later
🔸 Silica spray every 3 days for added resilience
🔸 pH holding steady at 6.55, EC at a gentle 1400 µS/cm
She’s been soaking up plenty of sun and dancing in the breeze—no signs of pests or stress. Just one healthy, mystery-laced autoflower doing her thing at her own pace. 🌀
Let’s see what the next few days bring. Hopefully, we’ll spot some pistils soon—until then, I’m enjoying the ride. 🌸💫

Likes
5
Share


@CalGonJim
Follow
10/27 136AM Looking good, Amino spray is a success
10/28 122AM. Something something something DARK SIDE...... Ive smelled like things you people wouldn't believe .....cough....An attack shitter on fire on the shoulder of Orion.... all those smells will be lost....oh thank god I took a shower...wow... Cousin Eddie as Roy Batty.
10/28 122PM What a night, a mystery raccoon!!!!. Water about 2 L 3ml each AN Bloom, 1ml Big Bud, .5ml Purpinator.
10/28 1054PM RACCOON CAME BACK....NOW I HAVE TO TAKE CARE OF HIM.
10/29 223AM Plants are great, getting more runoff so I will get the color fade, no runoff no color fade, good to know.
10/29 237PM AFTERNOON... I think Glutathione suppresses color!!!! The OPPOSITE OF WHAT IM TRYING TO DO...BUT...It makes STRIPED DARK OPAL BASIL...MY EXPERIMENT WITH RETARDING AND EXPRESSING COLORING USING DIFFERENT METHODS WORKS TO CREATE STRIPES AND PATTERNS NATURALLY, PLAID PURPLE BASIL MAN....PRETTY COOL!!!! 🎨.
10/30 506am noforsantatu.......YOU SOMMON ME.....HO HO HO....the Nosforatu voice) Im Thinking of a Christmas version of Nosfuratu.
10/30 810AM WAKE ME UP BEFORE YOU COCO, DONT SOMETHING SOMETHING SOLO........HAHAAHA!1 NOW YOU HAVE THAT SHIT SONG IN YOUR HEAD TOO!!! I AM THE MASTER OF EVIL!!!!
10/30 824AM GOT THE COCO OUT, PERLITE GETTING READY ...BUT FIRST I WANT TO MAKE PEANUTBUTTER COOKIES, IT ONLY TAKES 2 CUPS OF FLOWER, NOT THAT HARD TO MAKE, DOING THAT BEFORE THE DIRT WORK, NOT PUTTING IT OFF AT ALL.....
10/30 1247PM Afternoon. cookies are awesome extra butter and crisco ..... Plants are great. AMINO TREATMENTS ON COOKIE APPLE ARE AN OBVIOUS AND GREAT SUCCESS!!!!!!!🚨. THE CA AT THE BACK OF THE TENT HAS 100 PERCENT MORE RESIN PRODUCTION COMPARED TO THE OTHER. THE HEAVIER THE AMINO TREATMENT THE HEAVIER THE RESIN, ASTOUNDING!!!!
11/1 241AM.....ALMOST FRANK SINATRA TIME...... I GUESS THIS IS NOW A CHRISTMAS GROW.
11/1 520am. TASTY TERPS 1ml in 2L for light supplemental watering. EC 500. HALLOWEEN IS DEAD TO ME NOW, ITS ALL CHRISTMAS COOKIES AND BAKED GOODS UNTIL I DIE!!!
11/2 4AM RACCOON SIGHTING!!!😻.


Processing
Likes
2
Share


@tapciganin
Follow
So this is the week I found out all about PPFD, PAR and LUX, basically all the basic info one needs to understand how lighting works. So I brought down the 300W LED I have down to 18cm from the plants since that's the spot where I get 1000 PPFD. Since I don't have a quantum meter to measure this directly, I instead measured the LUX output of the LED light with a free app on my phone and then converted the LUX to PPFD using an online converter.
Also bought real nutes, more specifically the GHE Flora Duo 500ml tri-pack. As a result I also switched up the feeding schedule, so now I'm feeding them every three days, and doing water only every three feeds. A bit late in the process, but hey, first grow! 😅
Finally, the first amber thricomes are showing, yay! 😍

Likes
6
Share


@mikheil007
Follow
In my opinion it's last week for Girl Scout Cookies Auto and for Power Plant Auto tilll harvest, how do you think?? Vanilla Latte Auto is on it's 3rd week of flowering period and is very strong and beautifull plant


Processing
Likes
15
Share


@HisHope
Follow
9/14 Week 9 and they are doing fine
Little vid Hero Left rear Bea rt rear
They are almost identical now Bea a bit larger
Nuets not changing for now
9/16
Doing well but some white tips are saying we gotta reduce the salts so will be dropping CT nuets 10% and upping PK to 2.5
Extra space is really doing them well
Defoliation again tonight the war on stemmed leaves has begun
9/17
Held a meeting of the minds and decided the best course of action is to flip the light schedule so I can feed them more appropriately, twice a day.
Leaving nuets as they are as this will drop pot EC. Setting the alarm for the AM before lights out at 7:30 and changing the sched to 6AM-6PM summer is done no need for current schedule. Lights be out from 7:30AM to 6AM long I know but should not bother them.
Made a bouquet of all the sucker branches, seems to be a lot on FF11
9/19
Lights on girls feed buds look fine
Video enjoy

Likes
14
Share


@Downunder90
Follow
## Week 5 Update: Transplant Success and Flowering Prep 🌿💚
### 🌱 Growth and Flowering Prep! 🌱
This week marked a major milestone as the Greenhouse Super Lemon Haze, Humboldt Seed Bubba Kush, and Blueberry Muffin were successfully transplanted into 7-liter pots. The plants are adapting well and showing vigorous growth.
---
### 🚀 Transplanting Success 🚀
**Greenhouse Super Lemon Haze 🌞**
- Thriving after the transplant, with rapid Sativa growth.
- High light intensity is crucial as it prepares for flowering.
**Humboldt Seed Bubba Kush 🌿**
- Compact and sturdy, ideal for limited space.
- Adapting smoothly with no signs of transplant shock.
**Blueberry Muffin 🥞**
- Benefiting greatly from the extra space, with early signs of flowering.
- Vibrant growth and increased resin production.
---
### 🌼 Preparing for Flowering 🌼
With the transplant done, the focus shifts to flowering. The light cycle will be gradually adjusted to 12 hours to initiate bloom. Nutrients will be tweaked to support bud development, and a final round of LST and defoliation will ensure even growth.
---
### Looking Ahead
The plants are ready for a productive flowering phase. Stay tuned for more updates as the buds begin to develop! Happy growing! 🌿💚


Likes
33
Share


@Ksouth1
Follow
Last week went well once the distance was changed for the light and I added another mL per gallon of cal-mag and she is getting color back to some of the damaged leaves. I think she is back on the right track. She has needed more cal-mag than anything I have grown. Can't wait to try it out when finished. The smell is unreal. Reminds me of a super sour smelling candy like sour patch kids. She is stacking up bud nicely so far. Just smooth sailing for the next few weeks I expect. Until next time happy growing to everyone!

Likes
13
Share


@Mackinnon
Follow
UPDATE :
Very aggressive defoliation was needed,
(Week 4 day 27 ) room is only 3x5and was very full
My goal is having a grow that is easy to maintain with Nice big passages
UPDATE:
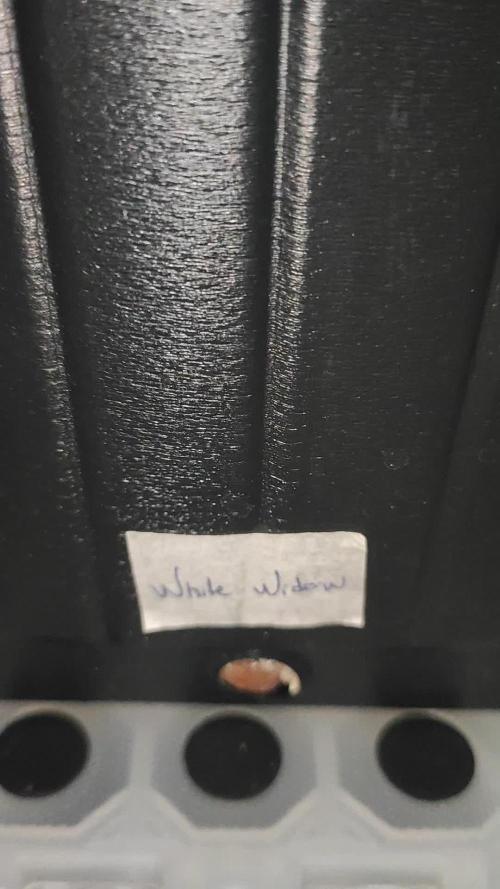
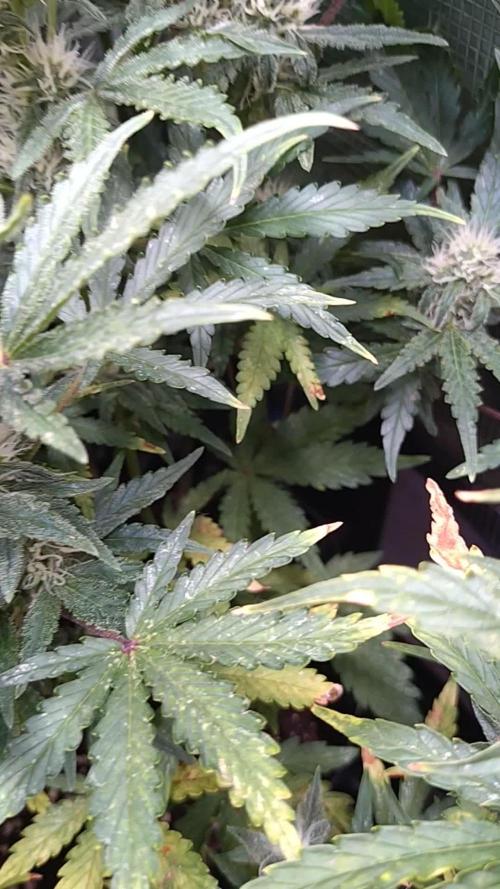
They are showing no damage from the defoliation. The Canopy is growing back quite fast , alot easier to deal with but next grow probably only go with 4 plants , 2 white widows , 2 blueberrys. I haven’t decided lst or top , SUGGESTIONS????
Update:
Day 34 -removed aprox 30 sun leafs


Likes
16
Share


@MadeInGermany
Follow
Info:
Unfortunately, I had to find out that my account is used for fake pages in social media.
I am only active here on growdiaries.
I am not on facebook instagram twitter etc All accounts except this one are fake.
Flowering day 4
since time change
to 12/12 h.
Hey everyone ☺️.
4 days ago she was placed in the flowering tent.
Thanks to the training it has become very bushy :-).
1 g Enhancer Pro l cocos was added.
As always, a cuttings were cut before moving 👍.
Otherwise everything was cleaned and checked.
Have fun and stay healthy 🙏🏻
You can buy this Strain at
https://www.barneysfarm.com/blue-cheese-34
Type:
Blue Cheese
☝️🏼
Genetics:
Blueberry
X
Original Cheese
👍
Vega lamp:
2 x Todogrow Led
Quantum Board 100 W
💡
Bloom Lamp :
2 x Todogrow Led
Cxb 3590 COB 3500 K 205W
💡💡☝️🏼
Soil :
Canna Coco
☝️🏼
Fertilizer:
Green House Powder Feeding
☝️🏼🌱
Water:
Osmosis water mixed with normal water (24 hours stale that the chlorine evaporates) to 0.2 EC. Add Cal / Mag to 0.4 Ec Ph with Organic Ph - to 5.5 - 5.8

Likes
5
Share


@Ieiogrow94
Follow
Eccoci qui...
Tutto va per il meglio, questa settimana non ho applicato stress alla piccola, ma ho guardato l'evoluzione che ha avuto dando i nutrienti.
Ora ha un odore davvero intenso ed uno strato di resina pauroso, vediamo come si riprende dalla defogliazione che ho fatto settimana scorsa.
Si sta sviluppando un bel colore viola che si riflette sulle cime come si vede dal video, OTTIMO!!!
Seguiranno aggiornamenti, grazie a tutti per il supporto🔥🌲❤️

Likes
41
Share


@MR_PUUF_K93
Follow
Las Banana Cream 🍌 estan enormes!!
Los puntitos que empezaron a salir en una de ellas me han dicho que puede ser carencia de calcio.
Las Runtz que salieron después tuve que germinar dos por fallo de las semillas esta muy bien creciendo poco a poco y la que es de su día avanzando y comiendo 😎🤟🏼
Las ZKITLLEZ mutantes que salieron con un cotiledón han aguantado bien y estáN como nunca! La que salio con dos cotiledones SUPER ANCHA!! ME ENCANTA💪🏼🌴😎
ESTA SEMANA YA LAS CAMBIARÉ A 12/12 🌸🌸🌸

