The Grow Awards 2026 🏆 


Likes
Comments
Share
@renbuds
Follow
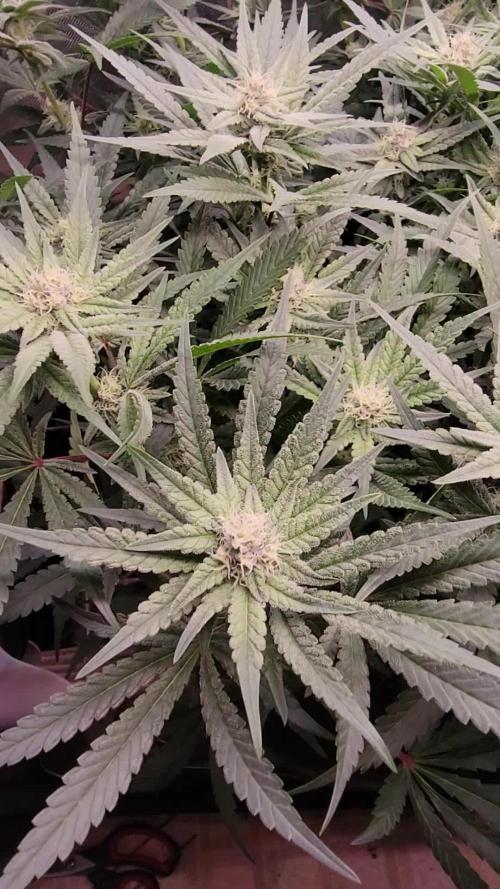
8/5-After letting the bottom branches grow for another 4 days they were showing plenty of amber and had firmed up enough to harvest. Did a rough trim and hung the branches in Cannatrol Cool Cure to dry.
8/11-Overall the buds were a lot smaller than previous Mephisto grows. I'm going to let them cure for 2-3 weeks and then do a real taste test.


Likes
4
Share
@Dameon0803
Follow
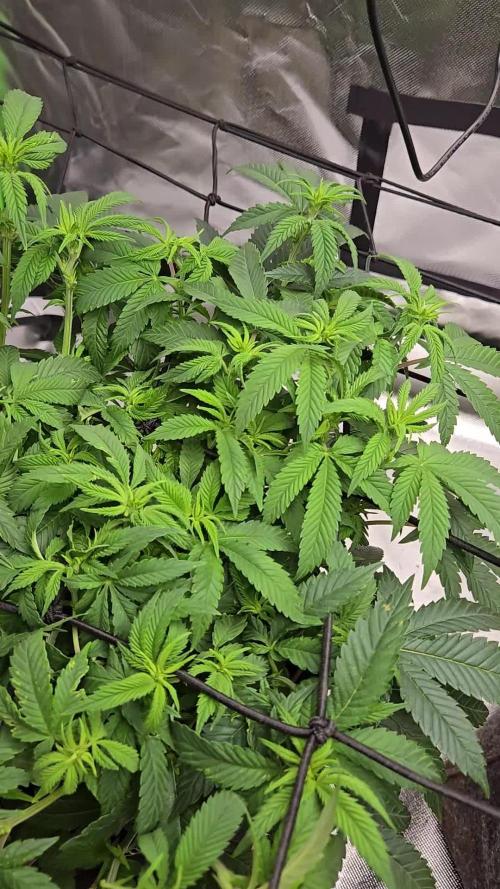
Another easy week. Bud and trichome production seem to be on point. This plant is truly maxed. She is 18 inches with about 12 inches being above the scrog screen. She stretched a little more than expected. She was supercropped in several location and didn't skip a beat. Obviously, the angle of my camera doesn't give the whole picture. But now there's some buds that can be watched in development. I'm fighting night time humidity. My little Vivosun dehumidifier can't keep up. Likely a future upgrade as I'm sure I'll struggle to get to 50% with lights on next week. Temps when my light off could ideally be lower as well. Not enough that I see the need to invest into anything like an A/C. Loving to see the little bits of purple start to come out. I'm sure lower night temps would amplify that. I did a final top dress of Build-A-Flower, an 1/8 cup of Craft Blend, and a topping of Kashi followed by a half gallon watering with the listed nutrients once at the beginning of the week.


Likes
60
Share
@I_and_I
Follow
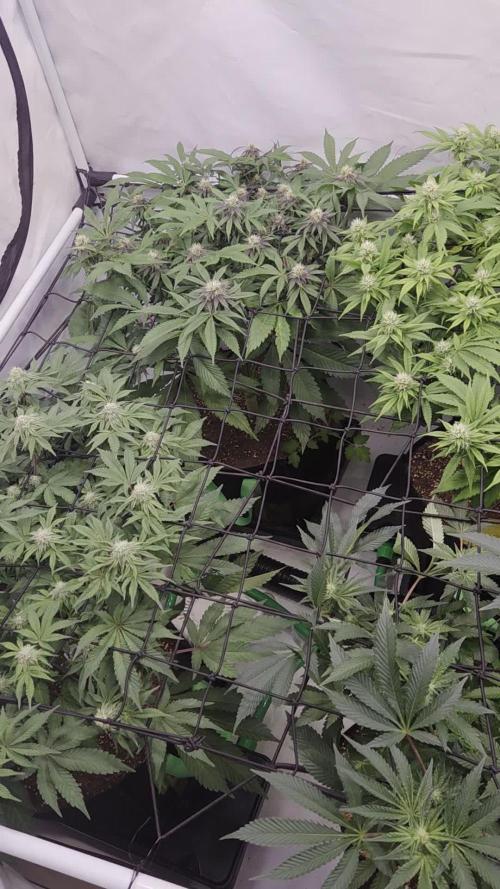
Start of week 6 flower, banners going strong, massive sativa pheno is starting to fatten up, still a long way to go with it
Smaller more indica bushy pheno you can see will be finished sooner, she's starting to glisten from the trichomes forming
Hadn't really got a proper whiff of the banner smell till now, damn it smells superb
😎💪
Likes
121
Share
@ctm_dzagi
Follow
After reducing the intensity of the light, I still do not observe the effect of stretching, The applied techniques justify themselves, paired coke after training is developed almost identically
I decided that in order to realize my plan as much as possible
It is worth staying at eight calls coming from the width of the light, in this scheme the landing site is not the most successful
realized it was time to adjust the landing site
Just dug a hole in the left side of the pot reaching the second bottom,
then he pushed the entire coconut array along with the flour to the left,
and poured the previously dug coconut into the hole formed on the right

Processing
Likes
24
Share
@ElChicoDelaWeed
Follow
14 días desde EASY START.(4 semillas,1 venía solo la cáscara de un lado)
Maceta RQS 10L.
-EASY BOST ORGANIC NUTRITION.(preparación del suelo con 50g en 10 litros de sustrato con perlita)
-EASY COMBO BOOSTER PACK.
-En la 2ª semana riego las 4 plantas con agua mezclada con la pastilla EASY GROW BOOSTER (la dividí en 4 trozos para la semana 2,3,4 y 5 diluyendo en 1L. de agua la mezcla).
-Las 3 que están en vaso de plástico para la próxima semana le voy añadir al vaso uno granos del EASY BOOST ORGANIC que no le mezclé cuando las planté).
👌


Likes
53
Share
@guerilla
Follow
Start of 6th week and very close to chop!
Reduced ppm..
VERY fast flowering!

Likes
13
Share
@MrGrowDiarie
Follow
Day 77
The canopy has really filled in nicely - the plant looks healthy, bushy, and well-trained. The SCROG net is doing its job perfectly, keeping the tops even and encouraging strong horizontal growth. Leaves are a deep, healthy green with no visible nutrient burn or deficiency. Growth appears balanced and vigorous.
Likes
2
Share
@Kitties_and_Colas
Follow
She hermied on us so this may be the last time we plant an unknown seed indoors, this set us back about 3 weeks. ..we plan on putting all of this plant towards edibles ..This wasn't a total waste imo..we learned a valuable lesson on taking unnecessary risks :)
Likes
15
Share
@Dunk_Junk
Follow
Day 63 - Flowers just starting. They're looking nice. Through the week I've chopped quite a few leaves off her to allow light penetration.

Likes
3
Share
@Northern_Ent
Follow
June 14: going good but weather is cool and rainy. Layed a loose Scrog net to keep the fan leaves from shading the growth tips.
June 15: weekly foliar spray of Extreme Blend this morning. Looking good with one week to go to the solstice. Big veg growth coming over the next couple weeks with the extended sunlight hours.
June 18: rain day.
June 20: happy summer solstice. Tropicana Cookies was started a bit late but she’s doing fine. With the long sunlight hours at this time of year she’ll now head into the rapid vegetative growth phase that is so much fun. Expect over an inch per day soon as long as the weather stays warm enough. High of only 16 C tomorrow is a bit cool.
Likes
25
Share
@Merrymoosefamilyfarms
Follow
Hey hey my fellow growers, I hope everyone had an excellent week! It is great to be back here at the beginning of week six, let’s get into it!
Last week I had misspoke- I said I was going to train 5 of the 6 plants I have going from fastbuds, this was false…. What I meant is all 6…
Yes at the time I had only INTENDED on messing with 5 but the last one, the way it was structured with the self top, it was practically BEGGING me to get in there and play with it- and I ask you this- who would I be to deny that little strawberry pie the simple pleasure of a little training? So train I did…
Nothing crazy, but actually for all six plants (despite my best efforts, best being debatable) to not go overboard- I have been going in a doing a little bit of training and taking a leaf off here and there if it’s blocking any potential bud sites. I am trying to be really careful and not do too much at once and upset any of them- but at the same time, after stunting them a bit with the taproot incident (which I will keep referring to until I learn from that mistake) I want to do what I can to maximize yield after tripping up a bit in the beginning.
We will see how it goes, but for now, everything seems to be doing well and responding well to the bit of training I have been doing.
Right now I am seeing a range of sizes among the bunch- the forbidden runtz are both shorter and squatier coming in at about 5.5 inches in height each and I notice everything is spaced a bit tighter on these so I have had some difficulty spreading them out but not to any problematic extent, just in comparison with the rest-
Next we have the strawberry pie- the smaller one coming in at 5.5inches, is the one that I was speaking about that had topped itself. It seems to be doing well and handling the training just fine. However the other one, that one is much bigger and is about 8.5 inches tall. It wasn’t until I busted out the ruler that I saw that this was the second biggest plant of the fast buds.
That leaves the largest which of course was the gorilla cookies! The smaller of the two is coming in at 8 inches and the larger one coming in at 9.5! They are both tied down and doing great, showing growth each day after being trained and having select leaves removed.
We are getting closer and closer to flower I hope to have a bit more time with them but that is totally in their hands, so we will see what happens- the game plan now for me at this point is to keep doing what I’ve been doing- trying to balance on a delicate line.
As far as other news…
I am doing dishes the other day- I have my phone propped up with YouTube on and dude grows playing (my preferred way to do dishes) I hear the dude mention a giveaway they are doing that I had submitted an entry for recently so my ears had perked up…👀 I saw they had the contest page pulled up and on display and I thought to myself, wouldn’t it be cool if I got to see my picture right now, sure enough- I hear them start talking about my pictures! I in no way won (at this point, my fingers are crossed though haha) and I realize that this is debatably anticlimactic however, I listen to these guys everyday at work so I was stoked! I still am!
There are lots of good giveaways going on right now, all the amazing contests going on on this site, Instagram wherever! You have to be in it to win it folks and often it doesn’t take much to enter- I wish you all luck if you participate in any holiday contests and I hope you all have a fantastic holiday week and I will catch you all here at the same time in the same place hopefully with some new goodies and we can continue this fastbuds journey! Growers love and happy holidays everybody!!!
💚🤙🌱
Likes
1
Share
@FeebleSnane
Follow
Today is day 91 since the plants sprouted, and day 56 of the 12/12 light schedule.
We're on the home stretch. Both plants #1 and #3 look good in all aspects, and are reaching the end of their lives. The hairs are mostly brown now, with most of the white pistils still on the newest growth on the buds. The trichomes are darkening nicely. I'll be stopping nutrients and switching to a flushing solution to clean out the salts that have built up in the soil. Hopefully I can cut the plants down in a week.
I decided to give up on plant #4 in the other tent. The buds were clearly affected by the pollination, since I noticed them stop growing weeks ago, but the pistils turned very early. It's annoying to lose 2 of the 4 plants I grew to bullshit, but it's par for the course at this point.


Likes
9
Share
@masterofsmeagol
Follow
6/22 Some pictures didn't upload but that's probably a good thing. As long as the video went up its good. I need to take less pictures. I'm glad I watered the plants in the back with a premixed gallon last night as we didnt get nearly the rain I thought we would. It's small showers throughout the day. The plants are getting enormous. A couple have revegged. Mostly the 10th planet. The others aren't anywhere near as impacted. Boy are some of these stalks thick. I chose to keep a couple plants that could be grown naturally without topping or fimming. I like to see the structure of the tree bit with humidity like this 98%rh it's easy to get botrytis. That's why it's good sometimes to have multiple bid sites so your proverbial eggs aren't all in one basket. But you do end up with a massive cola. I think that mk ultra with the big fan leavescis just going to be one giant bud. That's what it's looking like. Oh and today is the summer solstice. Longest day of the year.


Likes
17
Share
@EXZELENS
Follow
Bud wet weight : 168,1g of trimmed medium to big sized buds
25,4g of tiny tiny buds/larfs = 193.5 grams of trimmed wet buds.
Details on genetics and smoke report above.
This, as my first grow, is way more than I ever expected it to be. I haven´t had that much fun and enthusiasm in a very very long time.
I can´t even explain the feeling it is to harvest your own cannabis, but I know most of you know what I´m talking about haha.
It was really nice to practice LST, even tho it was SO HARD, ´cause I didn´t had barely any space to work since I used a hard pot and did not fill nearly half the size of it and the walls of the pot were really high. It was even difficult to water without dropping water on the lower buds.
I haven´t learnt much about defoliation tho, I feel I need to study a little more about the phases you should or should not do it.
Also, I discovered thrips are a pain in the ass. I had 2 tough weeks dealing with thrips, but in the end it was alright.
I don´t have any humidity control device, which I intend to buy for the next grows.
Growdiaries was really helpful for me, it kept me motivated everyday (not that I wouldn´t have had it anyways), the Grow Questions are REALLY useful and all the community is awesome. Thanks to all people that helped me here on GD during this first grow!
To conclude it: I am really happy and satisfied with how the grow turned out. They look incredible, it almost feels like I can´t believe it still.
Peace.
UPDATES:
07/10 : The buds are now dry and already in curing jars, one of them with a Boveda 58% humidity pack.
The total grams of the dry buds are: 41.4g (medium to big sized buds)
4.1g (tiny buds) = 45.5 grams!
I´m really happy with the results, I thought it would be around 30g so yeah, that´s a really good surprise!
In 2 weeks I´ll be back to update the smoke report.
Thanks so much for reading! Peace.
09/10 : I managed to fit everything in the same container with some space between them, so now every bud is with the Boveda pack.
14/10: It´s been a week and the smell improved, it still smells a little like hay/plant ( even tho it´s not too dry neither too wet ).
21/10: Now it´s been two weeks and even tho the smell isn´t anymore hay, it´s a lot herbal. I really think the aroma can get better, but the taste is already good enough for me. The smoke report has been done and in case I have something to add, I´ll report here.
Thank you so much for reading! Peace.


Likes
9
Share
@GOSHIN_GROWS
Follow
Started using chelated micronutrients, calcium sulfate, and Drip Hydros Base B to push the plants even harder.
Everything mixed together nicely with no nutes crashing out.

Likes
41
Share
@PigBearMan
Follow
High,
I'm flushing since FD49.
Looks good so far, will be a nice har-fest... I guess it'll be around 600-650g dry buds. 👌
Next Moby clones are allready on their way... 😉
21% THCV is way better than 30% Gorilla's advertising. I smoked some a few days ago...what an overhyped strain that GG is...lol. 😆
Edit: Let's see if Dinafem can change my point of view when it comes to the Gorilla genetic. 😉
Stay green.👽
