
Likes
Comments
Share


@Arkain_Jenetics
Follow
Everything is going good. Some are showing some sort of deficiency . Lowered lights a little bit. Going to start watering every other day. One of the critical thunder autos is like 8 inches tall lol definitely breeding her.


Likes
58
Share


@AsNoriu
Follow
Day 8. From this attemt all 3 made it, but two plants look weakish, from other 2 only 1 seed is out. Not a fantastic start ;) maybe they will catch up later !
Installed tent, light dimmed to 30% of 240W, distance approx 40 cm.
Happy Growing !!!

Likes
8
Share

@All_our_small_plants
Follow
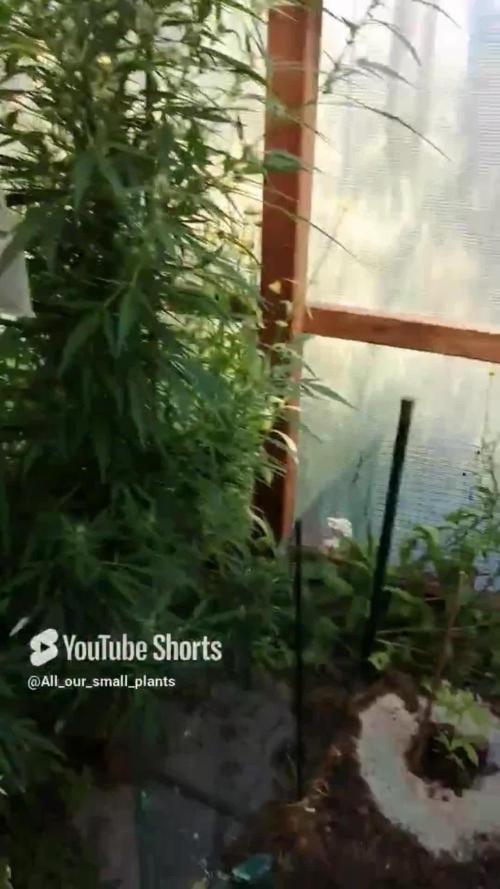
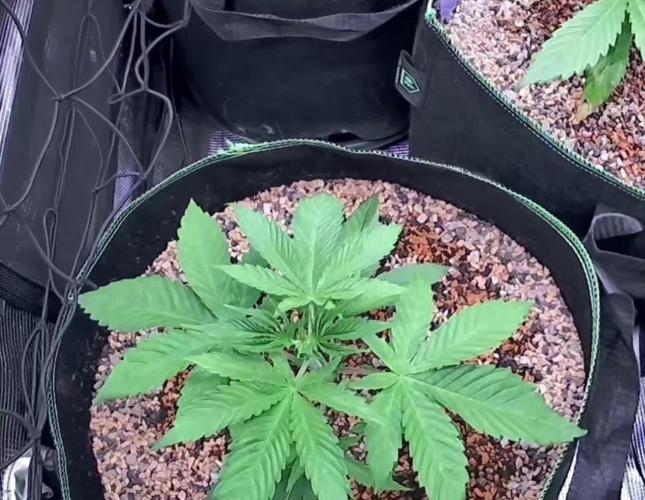
Bewässerung: 500 ml jeden 3 Tag in der Fünften Woche
pH-Wert: 5,8
EC-Wert: 0,4 mS/cm
Temperatur: 30ºC
Luftfeuchtigkeit: 50%
Schädlingsbekämpfung: im Moment haben wir keine Anzeichen von befall wir haben nur mal zur Prävention etwas Sand gegen die Schnecken um die Pflanze gemacht, dies verhindert das diese sich nähern.
PPFD: Direktes Sonnenlicht
DLI: Direktes Sonnenlicht
Besonderheiten: Sind in kleinen Töpfe gepflanzt und werden diese Woche in den Boden gesetzt.
-Tag 29 Heute wurden Beide in den Boden Gesetzt und wurde mit Sand umrandet. Das dient dazu das sich keine Schnecken nähern, zusätzlich haben wir sie mit einem kleinen Zaun umrandet damit sie unser Tiger nicht gleich entlaubt 🙀 sehen beide soweit gesund aus.
-Tag 31 beide haben die Verpflanzung in die Erde überlebt 😍
Likes
17
Share


@Naujas
Follow
She is much prettier than she was a week ago :) I remembered that I have my first grow light, which is more compact and it will give me more space, so I changed my light, now the girl's side branches get light too:) I add a lot of video memes, because I really want to win Iphone16 pro ;) and those who don't take risks don't drink champagne:) good luck to everyone.

Likes
3
Share


@Chuckwaggon420
Follow
This week has been awesome with these ladies! Have moved them to the flowering tent and letting them get acclimated in here. Will prolly do 1 more week then switch to flower for this tent! Have got all 6 ladies all stacked in here all tight together. They are already demanding alot of water so I can see how a drip system might be nice but idk if would work for coco
Still doing same 5.6- 5.7 ph declorinated water with a heavy feed. Still doing some training as these girls grow so have more tops as they streach. I maintain about a 60%RH for this room for now and give them ladies about 1400ml every 2 or 3 days.
Will do a pre-flower check again in the next couple days should be showing havnt looked much! Fingers crossed!!
Much

Likes
7
Share

@BlossomB
Follow
The Perfect Student & My First Topping
🌿Unstoppable Perfection🌿
Die Tropical Chimera ist seit Tag 1 mein absoluter Musterschüler. Sie ist das Paradebeispiel für eine wunderschöne, perfekt symmetrische und kerngesunde Pflanze. Ganz ehrlich: Wenn ich es nicht besser wüsste, würde ich glatt behaupten, sie ist eine Kunstpflanze – so makellos steht sie da. Sie wächst, und wächst, und wächst... einfach unzerstörbar!
🌿A Heartbreaking Milestone: First Topping🌿
Diesen Samstag war es so weit. Da sie meine erste photoperiodische Pflanze ist, hatte ich durch sie auch mein „erstes Mal“ beim Toppen. Ich muss gestehen: Es fiel mir wahnsinnig schwer, mein Baby zu „köpfen“ . Ich trauere dem entfernten Kopf immer noch ein bisschen nach...
🌿
Aber die Chimera? Die ist aus Stahl! Während ich noch trauere, zeigt sie absolut null Anzeichen von Stress. Sie hat sich keine Sekunde hängen gelassen, keine schlaffen Blätter, nichts. Sie ignoriert den Eingriff einfach und wächst munter weiter, als wäre nichts passiert. Wahnsinnige Vitalität!
🌿Pure Vitality – No Additives🌿
Auch hier bleibe ich meiner Linie treu: Kein Dünger, absolut nichts. Sie ist so gesund, vital und tiefgrün, dass sie offensichtlich alles hat, was sie braucht. Am liebsten würde ich sie einfach ewig weiterwachsen lassen und unendlich viele Klone von dieser perfekten Genetik ziehen.
Likes
11
Share


@Sejnik
Follow
Holky vypadají naprosto úžasně. Nemají žádné nedostatky a už jsou trochu cítit. Mám z nich velikou radost ale ještě si na ně musím 2 měsíce počkat.
Tento týden jsem do svých děvčat zainvestoval trochu peněz. Pořídil jsem jim 2 dodatečná světla 2x42w a výkonný odvlhčovač vzduchu. Sbohem vysoká vlhkosti. Sbohem plísně. Mám velikou radost že vlhkost konečně klesla, protože jsem měl opravdu velké obavy z plísně.
Bohužel mě to stálo jednu rostlinu a tou byla Haze Berry 1. Byla to ale nevyhnutelná oběť, kterou jsem musel podstoupit, jinak by se mi odvlhčovač nevešel do stanu. Nebyla jiná možnost.
Zalévám jednou pouze s RQS tabletami easy bloom booster (jedna tableta na 8 litrů) EC 0.7-1.
Podruhé RQS tablety easy bloom booster (jedna tableta na 8 litrů) + hnojiva od Biobizz EC 1,4-1,6.
Zalévám každou z rostlin tak, aby měla dostatečný odtok vody ze spodku květináče.
Likes
18
Share


@Dunk_Junk
Follow
She's doing her thing this week.
Watching pistils and trichomes.
I want plenty of amber trichomes before harvesting her.

Likes
2
Share

@Maggie_de_Block
Follow
Looking good, not really a lot to add. Keeping the feeding regular, temps are doing okay. She’s looking great buds are really starting to show and trichome production is picking up. Realised humidity was set to 60% last week so she’s had 10 days on 50% now and I think it’s helping produce trichomes as well. Imma keep removing big fan leaves but other than that letting her do her thing
Thanks for having a look x
Update few days later:
Just defoliated a bunch, should’ve actually done this about a week sooner but was too hesitant because I did a big defoliation before flipping. She’s looking much better now though and a lot more bud sites are getting direct light(first 3 photos/video)
Processing
Likes
8
Share


@Munchiesfrommars
Follow
This one was super big and made me super happy.
Green crack probably is one of the best strains from classic old school
Perfect morning strain
Brilliant vibes and emotions all the time
Best antistress
Likes
16
Share


@GODSGIFT_2005_JM
Follow
🍼Greenhouse Feeding BioGrow & Bio Enhancer
⛺️MARSHYDRO
The ⛺️ has a small door 🚪 on the sides which is useful for mid section groom room work. 🤩
☀️ MARSHYDRO FC 3000 LED 300W
☀️Also special thanks to VIPERSPECTRA P2000 (200W) & XS2000(240w) LED growlights
🌱 DUTCH HEADSHOP SEEDS:
www.dutch-headshop.eu
www.dutch-headshop.nl
ONE STOP SHOP
. 100% germination success on first try! with HUGE seed selection!
. Very friendly customer service
. Best bio-seed packaging
. Sells other products @ best prices:
. Nutrients
. Vaporizers
. Smoking accessories (grinders, cones)
. CBD Tinctures
. Resin Extracts
. Boveda humidity packs
. Ziplock bags
. Other health supplements such as:
. Lion’s Mane Organic Capsules
. Hemp Seed coffee

Likes
60
Share


@m0use
Follow
The time has come! Flowering has been initiated and is off to a good start,
The Photoperiod is now running at 11/13 on/off and the intensity of the light has been bumped up to 60% giving me a DLI of aorund 37.5 at 30" hang height in my 2x4.
As the plants where topped a bunch I have found in previous grows the stretch will not be as crazy as if I left them on their own, however the increased pot size may negate that effect, only time will tell :D I also gave them a 2nd watering as the last one was leaving the pots a bit to light. This could be their new normal 1gal one week, 2 gal the next separated by a few days.
They have all been amended with a 50/50 mix of grow and bloom from Gaia, Also added in some extra Insect Frass, Yeast and Bokashi grains, mixed this all with worm castings and compost for the top dress. added the compost after mixing it into the top layer so it gives it a bit of a blanket. made a little video of it and me watering the plants on a speed run. One thing I need to find is a sprayer head that has a 70-90 degree bend on it. I'm tired of watering from overhead as my wand is straight and does not have a bend. Its made of hard plastic and was thinking I would toss the tip in the oven to soften it up and place a coat hanger though it, then bend it ever so slightly and wait for it to cool, can snip off the wire and pull it out once its all done and have a bent tip. or I can get a 2nd wand attachment for it. Just been so busy have not had time to search for it,
the peppers are doing much better as well, after the defoliation from last week they where getting a bit more light but that is all gone now, the plants have taken it back. and they are in shade, the plants seem to like it more. only the one strain likes the intense light of the led's, Fatalii peppers, It might be the hottest ones I'm growing if the goronong don't measure up. The JigSaw peppers are also starting to show some of their variegation in the leaves that make them pretty to grow now they are in the shade more. and its bound to be better then pure purple leaves from the LED"s Butterwort is eating all the gnats as well. so no problem there. Will apply the nematodes later next week to kill em off in the medium. Don't want them getting trapped in the flowers. stupid little fuckers.
I left out some of the extras in the water this week as it was its first topdressing, didn't want to stress it out to much, I will be topdressing every week and diving the total ammount of amendments in 4 parts. vs one big feeding at beginning of the month like its been suggested on the label, I find this helps avoid the N burn I normally see and gives them a bit better of a breakdown for flowering period. It worked really well with my G13 Labs Blue Cindy grow so I am repeating the process and will likely make this my new standard. I will also be adding in some Mg into every other water till stretch is done same with a very light feeding of molasses, I know it has been negative in past grows but going to try it out again with much smaller amounts. 1tea/pot, the extra sugars should work wonders on the Bokashi added into the soil and allow it to thrive.
Plants are starting to get more of a funk to them as well, So i feel that's what was happening with the gifted plant to my parents smelling up the place, it was just entering flowering as it was not in a tent n the lighting must have been to low. And the little cuttings I did last week are fine, no roots but will soon have a bunch of little clones to go. Just in time for spring.
I think that's it.
Big shoutout to Medic Grow for sponsoring the lighting in my tent, They have provided me with 2x Mini Sun 2's in the 240w configuration, They use the v1 growing spectrum that is a all purpose seed to harvest spectrum so their is no hassle of switching it mid grow. If you interested in learning more about Medic Grow products please visit the web link below.
https://medicgrow.com/
https://growdiaries.com/grower/MedicGrowLED


Likes
26
Share


@Rock_n_Roll_Randy
Follow
DID SOME MAJOR DEFOLIATION SO THE LIGHT CAN PENETRATE THE BOTTOM BRANCHES. ITS REALLY STARTING TO SHOW WITH HOW MUCH BRANCHES HAVE SHOT OUT.
FINALLY STARTING THE PHOTOPERIODS AND I HOPE MY TIMING IS GOOD FOR CHOPPING THE AUTOFLOWERS..........SEEDS PUT INTO THE SOIL ON JUNE 22ND.
RUNNING OUT OF ROOM IN THE 8X8 TENT SO I PUT ALL THE PHOTOPERIODS IN THE 5X5 WITH A TSW2000. SOME FAN LEAVES ARE BIGGER THAN MY HAND NOW.
SORRY TO EVERYONE WHO TRIES TALKING TO ME....I STILL CANT TALK TO ANYONE BECAUSE I TRIED CHANGING MY EMAIL ON HERE AND IT MESSED EVERYTHING UP. I CANT LIKE ANYTHING OR COMMENT ON ANYTHING. THE WORST IS I CANT JOIN CONTESTS
STRIVE NUTRIENTS IS THE BEST IVE EVER USED. A MUST TRY AND I BUY IT MYSELF. GOT A SAMPLE LAST YEAR AND ITS SO GOOD I BOUGHT MORE. ITS A 2 PART POWDER NUTRIENT THAT DISSOLVES IN MINUTES AND YOU MIX THE SAME STRENGTH OF THE 2 PART NUTRIENTS FROM WEEK 2 UNTIL THEY ARE FINISHED (BESIDES THE FLUSH), NO MORE BULLSHIT OF SWITCHING TO BLOOM FERTILIZER. THATS MY FAVORITE THING BESIDES THE RESULTS.
CHECK EM OUT AND BELIEVE EVERYTHING YOU READ BECAUSE ITS NO BULLSHIT, AWESOME FRIENDLY AND HONEST PEOPLE
Likes
34
Share


@Gorrilla420
Follow
Another week gone for this plant and she’s took really well to the training implemented last week. Knuckled both of the main branches last week and kept the biggest branch tied down ans as you can see she’s shooting up from doing so. Should get few more tops now and bush out. She’s come on lovely these past few weeks after mowing munched on by slugs and I personally didn’t think would recover from it but I was so wrong! Ones she gets strong again from the knuckling I will tie all heads down to get more light into the middle. Next time down will give her some bio grow but this week shes had plenty of rain. Been ate a little by slugs so put some copper tape around stem to help keep them off.
That’s all this week happy growing 🌱
Likes
6
Share

@Rko41
Follow
Cut début de moisissure mais elle etait prête et quelle odeur de dingue presser de faire le smoketest


Likes
11
Share


@GorillaZativus
Follow
👑Actualización Jardin 30-33 días . 6 macetas de 18 , 4 genéticas .
⌛️Videos , en este orden :
Primer Video
🎥 🎥🎥🎥🌬️🌬️
🌱Slurricane x Tropicanna Cookies F2
@crisol_seeds
🌱Og Strawberry Starkiller x Tropicanna Punch F3
@secretfile.cl
🌱Gorilla Glue 4 @bsfseeds @bsfseeds.usa
Segundo Video
🎥 🎥🎥🎥🌬️🌬️
🌱 Gorilla Glue 4 @bsfseeds @bsfseeds.usa
🌱 Skywalker Haze @dutchpassion.official
🌱 Skywalker Haze @dutchpassion.official
📸
Fotos :
📸Todas
📸Gorilla Glue 4
📸 Og Strawberry Starkiller x Tropicanna Punch F3
📸 Slurricane x Tropicanna Cookies F2
🌱Hoy foleo a sustrato : King Crab 👑
0,5 ml en 1 litro .
Ec : 0,5
Ph: 6,2
🌱metimos más amarres al y full lst ,
y podas .
🌱 @baconlinecl @bac_online_nl
Likes
1
Share


@Joint_Ventures
Follow
12 on 12 off light schedule from seed to harvest. Accidental of course. Currently Week 6 flower. All 12 plants under 2 TSW-2000 300W Mars Hydro lamps.


Likes
5
Share


@VividLeaf
Follow
Flush week!!! I also pre-harvested one branch to see the difference in taste (flush vs no flush) and also the difference feel (body/mind high).
Super sticky stuff! And soooo smelly! Citrus fruit with spice

Likes
8
Share


@Leafy420
Follow
Day 14
After a week from the bottom feed
The pots feels light again
My finger was dry
So i think its time for they first halve dose feed
23c, Ppm 700, ph 6,25
Gave each a dose of 100ml water
Day 16
Last night I saw roots so today I transplanted
Wich didn't really went as plant because something (Hopefully only soil) dropped right before I placed "Jane" into her new home :(
Besides that it went okay
Gave them a good dose of water
Now wait till it dries and then they get their first full feed dose
Day 20
This night they got they first full feed
500ml each
4ml grow A&B
4ml b52, bud candy and voodoo
With a low ph to bring down the ph in soil
Wich is a lil high I qeuss
22,7c 1000ppm 5,8 ph
Day 21
Today we did some LST
Now they lay, next up is sit and then we roll
So far they are cooperating
Day 22
All are now bend and secured and doing well :D
Day 23
Soil was dry gave them some calmag 1ml/l each 700ml 6.10ph
Likes
2
Share

@CheeRz
Follow
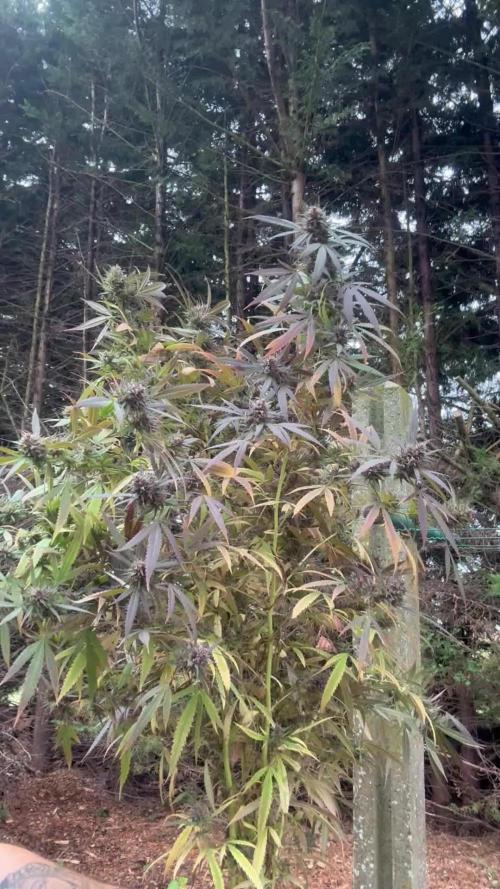
The outdoor season almost is over, and Moon Rocks have also been harvested. She was the smallest of the three GAC plants. The buds are relatively round and firm, and they have beautiful purple leaves. The buds smell woody with sweet undertones. She was also super easy to grow! Big thanks to Divine Seeds.
