
Likes
Comments
Share


@GermanGrow182
Follow
Die feminisierten stehen kurz vor Beginn der Blüte und wachsen immer langsamer in die breite.
Critical Auto ist fast fertig. Noch ein paar Tage (gutes Wetter ist angesagt) und dann wird auch sie geerntet. Creamatic ist geerntet und trocken mit 23g besser im ertrag als erwartet. Es läuft gut 👍
Bis nächste Woche ✌️

Likes
12
Share
@LennyBriscoe
Follow
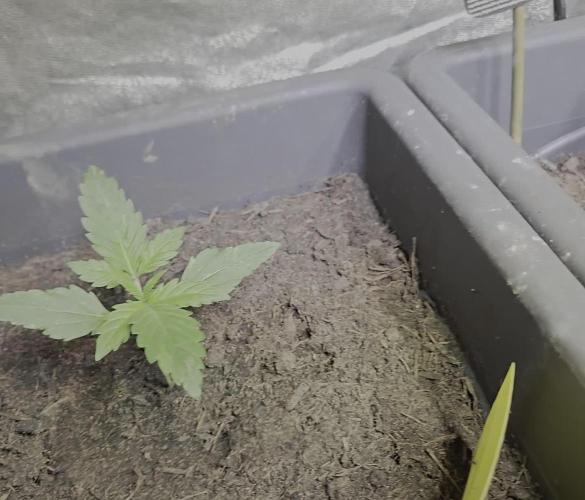
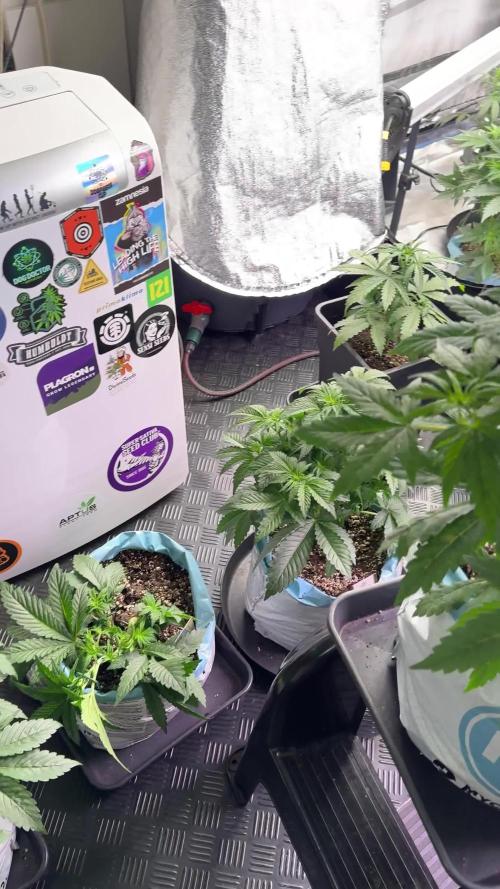
Nachdem ich zwei Verluste verkraften musste, hab ich mich dafür entschieden 2x "Dark Devil Auto" von Sweet Seeds und 1x "Lemon Cherry Gelato Auto" von Zamnesia nachzuschieben, die sich alle drei mittlerweile als Keimlinge im finalen Topf wiederfinden.
Eine "Dark Devil" hat es nicht geschafft, aber dafür geht's dem anderen Keimling umso besser.
Bis zum Ende der Woche zeigen sich die unterschiedlichen Genetiken der Strains deutlich .. Am weitesten ausgebildet hat sich .. Überraschung: "Titan F1 Auto" ... 😎 ...


Likes
8
Share

@GREENPHOENIX6262
Follow
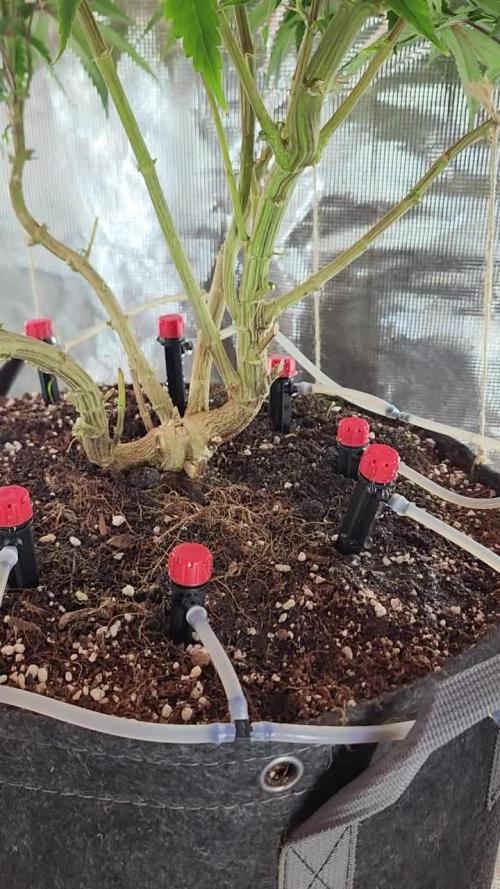
02/23 (M) (Pre-Flower) flipped mother into flower last week - flushed with clean water for 2 days then began giving flower nutes in small doses for now - still feeding off the drip lines seems to be working as planned. Feeds will become more often (once/twice a day - 1 min feeds.
02/23 (C) - 7 of the 15 clones have rooted successfully with thick multi strands in each clone - Green color starting to come back as well - Have begun applying nute feeds to help recovery - Will give the other 8 sometime to begin rooting but if nothing happens in the next week then I will keep the 7 rooting now and cull the other 8.

Likes
11
Share

@DogDoctorOfficial
Follow
🌱 White Widow – Week 3 | Structure, Strength & Setup
Genetics: White Widow (Zamnesia Seeds)
Light Schedule: 11/13 (Flower From Seed)
Stage: Week 3 – Preflower (no signs yet)
Structure: Compact, Healthy | Heading into 4th Node
Feeding: Aptus Full Recipe
Lighting: ThinkGrow Model One Bars + Future of Grow Black Series 600W
Control: Full TrolMaster Ecosystem
⸻
Three Weeks In – Compact & Confident
Here we are, Week 3, and White Widow is showing us her best early form. She’s:
• Tight in internodal spacing
• Vibrant in color and leaf health
• Low & strong, with no stretching yet
• Just pushing into her fourth node and still no signs of flowering, exactly what we’d hope in this phase, given our light cycle
She’s not rushing—she’s setting her foundation.
In an 11/13 light cycle, some might expect earlier preflower signs, but not all strains respond immediately. And honestly? I’m loving this slower, more intentional rhythm. She’s taking her time, and that usually means she’ll stack smart, not wild.
⸻
💧 Feeding Routine – Gentle, Consistent Support
Even though she’s rooted in a rich super soil blend, we’re continuing to assist her via the feed water with a light, targeted Aptus mix:
Current Feed Recipe:
• Aptus Regulator – 0.15 ml/L
• CalMag Boost – 0.25 ml/L
• All-in-One Liquid – 1 ml/L
• Start Booster – 0.25 ml/L
This isn’t about force-feeding, this is about helping the soil activate and harmonize, giving her what she needs before she starts asking for more. The mix keeps her cell structure strong, supports microbial life, and encourages consistent early root development.
She’s loving it and it shows.
⸻
💡 The Environment – Light & Movement
This week, she’s been bouncing between two active grow zones, as we continue to refine the entire setup. It’s all managed within the TrolMaster ecosystem, offering precision control over both lighting and environment.
She’s currently rotating between:
• ThinkGrow Model One Bars – soft, powerful full-spectrum LED bars with excellent canopy penetration
• Future of Grow Black Series 600W – full spectrum, deep reds for flowering intensity
Both are synced and monitored through TrolMaster, giving us:
• Consistent PPFD targets (250–400 µmol/m²/s for now)
• Environmental tracking for temp, RH, and VPD
• Freedom to adapt space as needed while the grow evolves
🎛️ Why this setup?
Because we’re still dialing in the room and flexibility is everything. She’s adjusting beautifully to these shifts, showing no signs of stress. A real soldier.
⸻
👀 What to Expect / What Not to Expect
Expect:
• More node development, maintaining compact shape
• Flower pre-signs within the next 7–10 days
• Slow, deliberate shift toward stretch (if she chooses to stretch at all)
• Stronger feeding signals as roots fully colonize the pot
Not to Expect (just yet):
• Pistils or heavy flower behavior
• Wild vertical growth
• Deficiency signs (thanks to our balance and microbial boost)
She’s exactly where she needs to be.
⸻
🤝 Gratitude & Shoutouts
Huge thanks to the partners helping this journey become a reality:
🌱 Zamnesia Seeds – for delivering timeless classics like White Widow and keeping the legacy alive
🔧 Aptus Holland – for the precision nutrients that support both living soil and direct feeding
💡 ThinkGrow – for elegant, pro-level light bar systems that keep our canopy even and calm
🚀 Future of Grow – for the Black Series 600W, bringing serious intensity and bloom readiness
🧠 TrolMaster – for letting us control every detail, from light to leaf, with precision and peace of mind
⸻
💚 Final Thoughts – Week 3
This White Widow is more than just a plant, she’s a rebirth after a rough start, a solo performance, and now she’s writing her own pace into this grow.
No rush.
No shortcuts.
Just care, balance, and a slow, steady climb toward bloom.
We’re watching closely, learning daily, and adjusting with love. Thank you for walking this path with us. More to come soon 🌿
#WhiteWidow #ZamnesiaSeeds #Week3Update #ThinkGrow #FutureOfGrow #TrolMasterControlled #AptusPowered #GrowDiaries #11_13FromSeed #FlowerFromSeed #LEDGrow #CannabisCommunity #GrowYourOwn
📲 Don’t forget to Subscribe and follow me on Instagram and YouTube @DogDoctorOfficial for exclusive content, real-time updates, and behind-the-scenes magic. We’ve got so much more coming, including transplanting and all the amazing techniques that go along with it. You won’t want to miss it.
• GrowDiaries Journal: https://growdiaries.com/grower/dogdoctorofficial
• Instagram: https://www.instagram.com/dogdoctorofficial/
• YouTube: https://www.youtube.com/@dogdoctorofficial
⸻
Explore the Gear that Powers My Grow
If you’re curious about the tech I’m using, check out these links:
• Genetics, gear, nutrients, and more – Zamnesia: https://www.zamnesia.com/
• Environmental control & automation – TrolMaster: https://www.trolmaster.eu/
• Advanced LED lighting – Future of Grow: https://www.futureofgrow.com/
• Root and growth nutrition – Aptus Holland: https://aptus-holland.com/
• Nutrient systems & boosters – Plagron: https://plagron.com/en/
• Soil & substrate excellence – PRO-MIX BX: https://www.pthorticulture.com/en-us/products/pro-mix-bx-mycorrhizae
• Curing and storage – Grove Bags: https://grovebags.com/
⸻
We’ve got much more coming as we move through the grow cycles. Trust me, you won’t want to miss the next steps, let’s push the boundaries of indoor horticulture together!
As always, this is shared for educational purposes, aiming to spread understanding and appreciation for this plant. Let’s celebrate it responsibly and continue to learn and grow together.
With true love comes happiness. Always believe in yourself, and always do things expecting nothing and with an open heart. Be a giver, and the universe will give back in ways you could never imagine.
💚 Growers love to all 💚


Likes
13
Share


@Ghosttown
Follow
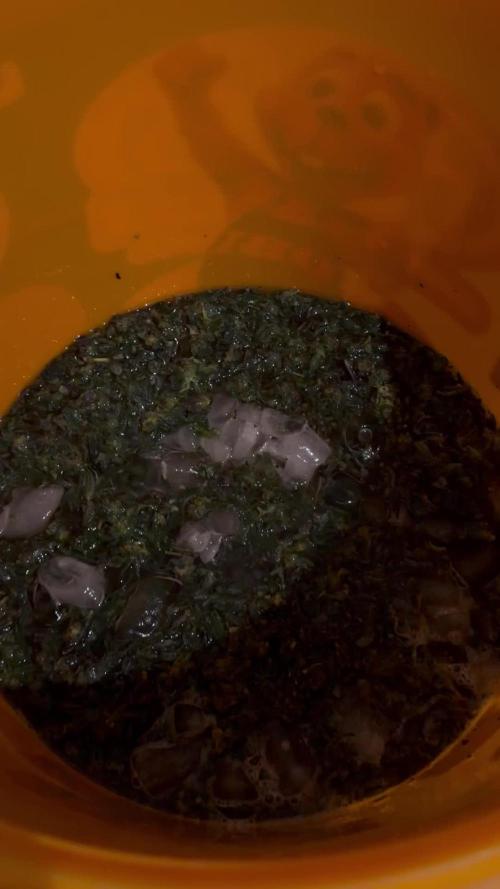
After 48 hrs darkness I've finally trimmed buds to prep for hanging.
Plant 1 .82kg wet weight
Plant 2 .88kg wet weight
Plant 3 .77kg wet weight
Total wet weight incl stems 2.47kg or 2470g
Equate to 5.438 lbs wet weight.
I can't wait to see dry weight. I'll be happy with half loss in water.
Likes
29
Share


@Fullmeltalchemist
Follow
D58/F8 - 11.14 - Showing her sex and stretching still <3 Recovered very well from defoliation
D62/F12 - 11.18 - <3

Likes
8
Share


@R1pp3r
Follow
Una rama quebró por mucha tensión pero se recuperará.
Se regó de forma foliar con jabón potasico y tierra de diatomeas para reforzar la planta contra plagas y hongos

Likes
61
Share


@Captensmokey
Follow
We are working hard again on a good harvest.The bad rainy days are coming. Now we are going to try even harder and a lot is being asked of the plants. The cellmax has had a major influence on the plants. They shoot up. I do use some extra boost pk 13 14 From bio nova. Just to provide them with poshpor and potassium. They also quickly get Molasses

Likes
32
Share


@Arcadium
Follow
Uneventful week, hot, dry, defoliating a little inside, drip every 3 days, still doing foliar spray for pests. Flower sites are slowly developing, really just beginning. Should easily be finished be end of Sept.

Likes
2
Share

@DogDoctorOfficial
Follow
🌱 Skywalker OG — Week 5 From Seed (12/12 Run)
Hello everyone, welcome to another update, and a big thank you to everyone following along, newcomers, longtime readers, sponsors, platform, and of course the breeders and creators behind these genetics. It truly means a lot to share this journey together.
For those just joining: this is a 12/12 from seed run, approached gently and observationally. No rush, no aggression, just letting the plants express themselves while we listen closely.
⸻
🌡️ Environment & Room Conditions
• Temperature: 21°C
• Relative Humidity: ~58%
• Outside conditions: 4–5°C with 90–98% RH
Given what’s happening outside, I’m actually very happy with how stable the room is staying. The plants seem to agree, posture, color, and overall vigor are excellent.
• CO₂: ~666 ppm
For now, this is perfectly fine. No need to push or supplement — steady and natural.
⸻
💡 Lighting Strategy (Top + Under Canopy)
At the start of the week:
• Only top lights are running
• Power: 100%
• PPFD: ~700–850 (depending on plant size)
As the plants stretch and rise above the under-canopy fixtures, we’re now introducing under-canopy lighting:
• Lumiflora under-canopy lights
• Starting at 30% power
This is very intentional.
The goal isn’t to blast the plants, but to teach them that light and photons will be arriving from more than one direction. We want a gentle adaptation — letting the plant reorganize how it uses light rather than forcing it.
Power will be increased later, but right now it’s all about adjustment, not intensity.
⸻
🌿 Training Approach (or lack of it)
Because this is a 12/12 from seed run, we are being extremely conservative.
• No topping
• No hard training
• No defoliation
The only work being done:
• Leaf tucking
• Gentle leaf bending
And the response has been incredible. These girls are reacting with:
• Tight internodes
• Bushy structure
• Calm, confident growth
Sometimes, truly, less touch = better performance.
⸻
🌱 The Triple-Branching Lady (Main Focus of the Week)
This week’s highlight is one very special plant showing clear triple branching.
At each node, instead of the usual two shoots, she’s producing three distinct branches, stacking from the bottom all the way up. The structure almost looks like she’s tucking herself naturally, creating a dense but elegant framework.
This is not something we forced. It’s purely genetic expression meeting the right conditions.
She looks happy. She looks calm. And she looks like she’s planning something special.
We’ll be doing a dedicated report on her by the end of the week, because this kind of morphology deserves proper documentation.
⸻
💧 Watering & Nutrition Strategy
Water Source
We’re using a mix of:
• Rainwater
• Dehumidifier-collected water
This water is extremely soft, so this week we introduced something new:
➕ CalMag Pro
Not because the plants were asking — but thinking ahead.
Before adding nutrition, we want a proper mineral foundation. This helps stabilize uptake and prevents issues before they even show up.
Aside from that:
• No changes to the main recipe
• Everything remains steady and predictable
⸻
Two Systems, One Tent (Why Autopots + Hand Watering)
We currently have two feeding approaches in the same tent:
🔹 Autopots (6 plants)
• Mineral-only feeding
• EC: 2.29
• pH: 6.0
Organics and autopots generally don’t play well together. Organics are alive, they change over time, they ferment, pH drifts, and control becomes very difficult when solution sits for long periods.
It’s not just about smell — it’s about stability.
🔹 Hand-Watered Plants (including the Skywalker OGs)
• EC: 1.43
• pH: 5.9
With organics, hand watering gives:
• Better control
• Individual feeding per plant
• The ability to respond to how each plant drinks and eats
And honestly? I love this approach. Each plant gets treated as an individual, not a number.
⸻
🌿 Overall Plant Health
• Deep, lush green
• Strong structure
• Bushy growth everywhere
• No signs of stress
This run honestly feels too good to be true sometimes — but it’s real, and it’s exciting.
⸻
🔍 Growth Stage & What to Expect Next
Even though this is Week 5 from seed, the plants are still finishing what I’d call their last week of veg.
By the end of this week, we’re starting to see:
• Clear pre-flower signs
• Early transition into flowering behavior
This is a very important phase. The plant is deciding how it wants to flower — structure, spacing, and energy distribution are all being set right now.
What to expect next week:
• More visible pre-flower development
• Stretch continuation
• Increased response to under-canopy lighting
What not to expect:
• Heavy defoliation
• Aggressive intervention
• Rushed decisions
We’ll continue to observe gently and respond calmly.
⸻
🙏 Final Thanks
Thank you again to:
• Everyone following along
• The OGs and the newcomers
• The sponsors and the platform
• And especially the genetics that make moments like this possible
This is a joy to document, and an honor to share.
More soon, especially on that triple-branching beauty 🌱
As always, feel free to share thoughts, observations, or just enjoy the ride with us.
👽 New team member
Meet Mr. Baggy
Our new fluffy alien/beaver/whatever-he-is friend, won through a Grow Diaries contest.
Expect to see him around — he’s officially part of the grow now.
Week 5 Veg/pre-flower | 8×8 Tent | Master Conditions
🌍 External Environment (Context) • Outside temperature: ~5 °C
• Outside RH: 92–96% (very high humidity)
• Strong seasonal pressure influencing internal stability
⸻
🌡️ Internal Tent Conditions
• Tent temperature: ~21.8 °C
(noted drop due to cold external temps)
• Tent RH: ~58%
→ Very good considering outside conditions
⸻
💨 Airflow & Circulation
• Primary airflow: Bottom → top → wall return
• Pattern: Full-room vortex circulation
• Additional fans: Central airflow to break blind spots and mix layers
• Goal: No stagnant pockets, uniform VPD across canopy
⸻
💧 Water Source & Rationale
• Water: Dehumidifier water + rainwater
• Base EC: force
• Systems designed to support plant intelligence, not override it
FOR DISCOUNT CODES AND MORE JUST FOLLOW THE LINK https://website.beacons.ai/dogdoctorofficial
📲 Don’t forget to Subscribe and follow me on Instagram and YouTube @DogDoctorOfficial for exclusive content, real-time updates, and behind-the-scenes magic. We’ve got so much more coming, including transplanting and all the amazing techniques that go along with it. You won’t want to miss it.GrowDiaries Journal: https://growdiaries.com/grower/dogdoctorofficial
Instagram: https://www.instagram.com/dogdoctorofficial/
YouTube: https://www.youtube.com/@dogdoctorofficial
⸻
Explore the Gear that Powers My Grow
If you’re curious about the tech I’m using, check out these links:
🔆 Lighting & Environmental Control
• Future of Grow — Advanced LED lighting technology
https://www.futureofgrow.com/
DISCOUNT CODE: DOG20
• Lumiflora — Under-canopy LED lighting
https://lumiflorade.com/
• TrollMaster — Environmental controllers and automation gear (past collaboration)
⸻
Genetics
• Zamnesia Seeds — Genetics used in this project
https://www.zamnesia.com/
⸻
🌱 Soil, Substrates, Boosters & Root Support
• Plagron — Substrates, bio mixes, and supportive products
https://plagron.com/en/
⸻
🎒 Storage, Curing & Preservation
• Grove Bags — Curing and storage solutions
https://grovebags.com/
⸻
📸 Photography Equipment & Tools
(Not sponsors, but part of my creative toolkit)
• Sony A6700
• Sony full-frame macro lens + few more
• Stacking photography workflow - learning
• iPhone (for behind-the-scenes shots)
We’ve got much more coming as we move through the grow cycles. Trust me, you won’t want to miss the next steps, let’s push the boundaries of indoor horticulture together!
As always, this is shared for educational purposes, aiming to spread understanding and appreciation for this plant. Let’s celebrate it responsibly and continue to learn and grow together.
With true love comes happiness. Always believe in yourself, and always do things expecting nothing and with an open heart. Be a giver, and the universe will give back in ways you could never imagine.
💚 Growers love to all 💚
📸 P.S. – The Eye Behind the Lens
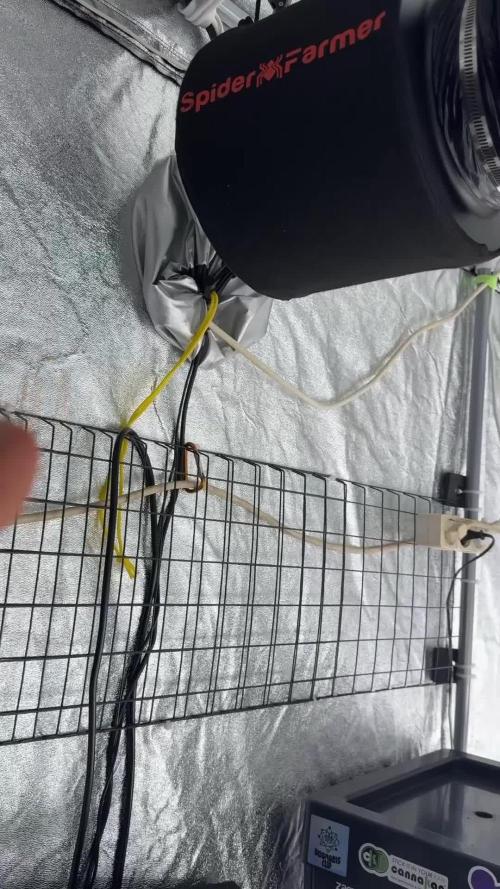
All photos in this diary (for now — except for the ones showing the camera, which I took with an iPhone) are taken with a Sony A6700 paired with a Sony full-frame macro lens and a few more.
Photography is part of the story — it’s how we share the fine textures, the glow, and the quiet details that words can’t always capture.
I’ve also started experimenting with photo stacking — a technique where multiple images, each taken at a slightly different focus point, are layered together to create one perfectly sharp image from front to back.
It’s not digital enhancement or AI; it’s pure photography — a way to reveal the plant’s beauty in microscopic depth, from trichome to petal.
You’ll even see a few shots of "ghost me" capturing the shots — camera, lens, setup — because every grow deserves not just to be cultivated, but documented like art.
FOR DISCOUNT CODES AND MORE JUST FOLLOW THE LINK https://website.beacons.ai/dogdoctorofficial
NEW DISCORD - Official Server Invite Link : https://discord.gg/ksjAkA5T74
Likes
4
Share


@GeminiCQC
Follow
Can't wait for each of them to finish out. Giving them hopefully their full amount of water, less with the auto as it was stunted by the 12/12.

Likes
6
Share


@valiotoro
Follow
Hello everyone 😎
Week 5 of flower for the Dutchie🧡
Time to flush⚓️
Mac#1 Very nice smell of citrus & cookies 🍪🍋
SFV top buds ready✂️super dense,smell citrus & earthy🤤
Glueberry one more week for the top buds✂️

Likes
16
Share


@3lementa1
Follow
I saw some white dots and I was worried there was some kind of infestation. The grow area wasn't really isolated from the rest of the house so I think it was just dirt but I wanted to be safe so I sprayed then with insecticidal soap and rinsed them off in the tub.

Likes
10
Share


@DangerMouse
Follow
Even though I made some big (rookie) mistakes, she's really forgiving and with the right care I'm sure she can grow out to be a proper monster. No bugs, mold, mildew or anything that was a reason for panic. I started flushing too soon and completely stopped her growth, a wise lesson. Because she was harvested a little too soon there is more of a head high instead of a body stone and depending on my mood I like it that way. She's supposed to be a heavy hitter but because of the early harvest she's a good companion during the day and will actually allow you to have a normal, fun conversation.
So in conclusion, i'm pretty happy with 127 grams of harvest for a first proper grow using a self made 200W LED growlight and DWC setup. More plants will be grown, thats for sure.
Thanks for reading and feel free to leave a comment!
Happy growing,
Danger.M

Likes
7
Share

@The710Garden
Follow
Good yield,good terpprofil on Both phenos Crazy trichome Productions!
I will Look what she will she will do it i dial her in in a next run,theres so much potential in this genetic!

Likes
25
Share


@Creme_De_La_Creme
Follow
Hey Guys, so we got through Week 1 !
Everything looks good for me...
Forgot to take more pics of the baby this week, will make up for it on Week 2.
i feed the baby foliar spray and normal feed with the light soluction about 500ml every 2 days or so.
EC 0.8 | PH 5.8
HPS Light at 60%
I think i got it right, let me know if you guys see anything wrong.
Likes
3
Share

@GoodTimesOrganics
Follow
Welcome Back!💚
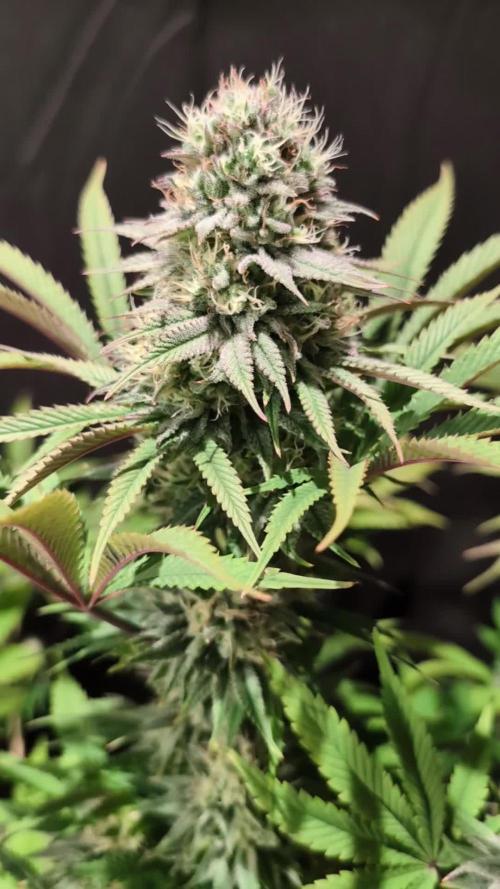
Die sechste Blütewoche ist vorbei und die Blütenentwicklung kommt langsam an ihren Höhepunkt.
Es zeichnet sich eine schöne, Dichte Blütenstruktur ab, mit immer weiter ansteigendem Trichom Anteil.
Das Aroma nimmt ständig zu und es sind fruchtige und süßliche Aromen wahrnehmbar, allerdings kommt jetzt noch ein tiefer dumpfer Geruch dazu.
Da es aktuell vie Regnet, sind die Werte auch etwas anders. Die Luftfeuchtigkeit ist wieder höher und die Temperatur ging auch etwas rauf.
———————
🌞 Temp: 23°C
🌚 Temp: 20 °C
💨 RH: 58%
VPD: 0,86kPa
😎PPFD: 830 mqm
———————
Stay Tuned! 💚

Likes
12
Share


@CanadianFillmore
Follow
Week 5 begins for LSD and Green Crack! The LSD ladies had the most yellowing over the last week, yet they have the most frost on the buds. The Green Crack ladies had a little bit of yellowing and has bigger buds, but no frost at this time. They all seem very happy in their new 4x8 home.
Thanks for stopping by growfessors, tune in next week for another episode of growfessor theatre. 👽🌳💚
Likes
20
Share


@Bread_n_Buds
Follow
Our Gush Mintz Automatic from Zamnesia has given us great satisfaction, I can tell you that another great one will come, but this one treated with LST is a fantastic plant.
** We remind all users that we grow two plants per strain, one worked with specific techniques and the other left to grow freely and beautifully or worked with uncut techniques to preserve speed.
Description // This plant was worked with a recovery LST in the sense that I had just broken a small branch of the mainfold I had recently created and instead of uprooting I started with a fairly aggressive LST. In this way the plant was started to restart and went up with folds, folds and bends helping me with soft laces and our metal arches that if you want to use them it is better to get the palastified ones to damage the stems as little as possible.
Trichomes and maturation // We did a thorough microscopic analysis 10x (and 10x x 1.6) and noticed a good percentage of milky/lumpy trichomes; The percentage of amber trichomes was also excellent and still a bit transparent, but that's fine for us as we're not crazy about THC oxidation and hyper indica effects around here.
Fertilizers and soil // We used the Plagron organic fertilizer range, all the recommended additives and Pro Mix soil, both unfertilized and organic. Calculate the dosage according to your needs on the website
------ https://plagron.com/
The nutrients are available in convenient packs on the Zamnesia website
--------- https://www.zamnesia.io/en/11457-plagron-easy-pack-natural.html
Try this strain, it is one of the best in recent years, with a very high THC level ---- https://www.zamnesia.io/en/11234-zamnesia-gush-mintz-automatic-semi.html
Zamnesia Brief Description // Gush Mintz Auto is a relaxing hybrid strain derived from the original Gush Mintz and a high-performance ruderalis specimen. This cross has produced a plant with 70% indica and 30% sativa genetics. Her parents have given her some interesting characteristics, including mint and candy aromas and a high THC content of 20%. Smoking these buds provides creative vibes, a feeling of euphoria and a pleasant high that lasts from head to toe. In addition to its enticing flavors and powerful effects, Gush Mintz Auto produces large yields of compact buds in just 9-10 weeks from germination.
Gush Mintz Auto is extremely easy to grow, with plants reaching an average height of 70cm indoors and 120cm outdoors, making her ideal for discreet grows or limited space, both indoors and outdoors. This strain is suitable for LST (Low Stress Training) and performs best when grown in the ScrOG technique (a technique that optimizes light exposure to maximize yields).
Intense aromas and deeply relaxing effects
As Gush Mintz Auto grows, her aroma intensifies, releasing sweet and minty notes. This refreshing flavor profile is perfect for smoking, offering an inviting combination of minty freshness and sweetness. The effects are deeply relaxing, enveloping the body in a pleasant sensation of well-being without being overly sedative. Gush Mintz Auto is perfect for those seeking creative inspiration, making writing, painting or music sessions smoother and more inspiring.
The whole world of growing and much more is at Zamnesia, just visit the website to find "the best that nature has to offer" in various shapes and colours.
-- // www.zamnesia.com


