
Likes
Comments
Share


@MT_Farmer
Follow
This week i defoliated a bit, as i wanted to have more light reach lower parts of the plant to increase bud sights and increase air flow through out the plants. Also I put in the net again in a nother attempt to even out the cannopy which didn't really work

Likes
25
Share


@ILoVeThiSpLaNt
Follow
Giorno 56
La Grape Rolex v2 va bhe l'avevo già fatta ed è uno spettacolo come odore e consistenza dei fiori.
La Jack 47 Xl #2 mi ricorda una Sweet Cheese e insieme al formaggio puzza di pompelmo (?!? 😀)
Le Crystal Candy XL sono le mi preferite come altezza e struttura.
A settimana prossima per altre fotografie 🖐️

Likes
2
Share


@Earthsower
Follow
At the end of week 11 the blue dream has done extremely well. She is fully recovered with pale lateral branches and the leaves are soft smooth with 7 fingers with no burnt tips. Her canopy is complete and her stem is stalk like. She has been defoliated the substrate has been loosened and sgrown 5cm this week standing at 73cm tall The blue dream is ready for bloom with no special attention required.

Likes
6
Share


@Sensiseeker
Follow
Grape God is almost done I could chop not but I am going to push it another 7-10 days.
My haze beast will have a few weeks still.
I started 2 other plants in Autopots for my first run with them. I m running a Roc Bud ICC tester and a Berserker MOG x Grape Pez
Likes
31
Share


@The_Bearded_Grower
Follow
welcome to 📅Day 29 transition has started 4/12/2021. as she moves into transition she is looking and growing very well but she does have some rusting and I'm not sure why I just hope it does not get to bad. Other then that she is very strong and healthy.
I have turned the Mars hydro TS 1000 up to 68% putting out around 32,000 LUX💡 so far I'm very happy with this light
that's it for todays update so happy growing and as always keep your stick on the ice 🏒
update 📅4/14/2021 she is looking good and I'm starting some lolly popping. the canopy looks very even and that's what I like to see I'm going to up the water in the res as they are drinking lots now💧
update 📅Day 33 transition 4/16/2021 ok all lollipping is done and so is defoliation not all that's left is to make sure the tops all stay at the same height and I have increased the amount of water to 5 gal from 2.5 gal💦. I am thinking about a new air pump the has 4 outlets instead of 2 so I can also put air stones in the res at the base of the auto pots as the nute water just sits there for the most part and just films over and I don't like that.
Likes
44
Share

@ILoVeThiSpLaNt
Follow
Giorno 70
Tutte le piante sono state raccolte e tra un mese aggiornerò il diario con le foto delle cime essicate.
Sono molto contento perché certi odori mi hanno colpito e non vedo l'ora di sentirli in fumata.
Grazie a chi ha commentato e ha lasciato un like. Un altro giro è appena iniziato. Ci vediamo di là 💪🖐️❤️


Likes
2
Share


@Ibgrowing
Follow
First week of flowering!
I chose to also do some lst on this lady, a bit of a different approach. She survived a couple of very warm days(32°C). The lower leaves started to die off so I used some more nutes.
Watered with 2l(nutes), 1,5l(no nutes) and 2l(nutes).
She is starting to smell a bit also, looking forward to seeing the buds!


Likes
35
Share


@MadeInGermany
Follow
Hey everyone ☺️.
After 60 hours, the lady's case was already open :-).
Today the seed was placed in soil :-).
I only use the soil for cultivation because I have it left and it has to go slowly :-).
When repotting, it comes in Canna Coco 👍.
I watered the soil with some Canna Rizotonic before the seeds got 1 cm under the soil :-).
After that, the pot was placed under a hood in which I sprayed clay every day so that the humidity is between 80-90%.
I do this for the first few days until the head looks out of the earth.
From this point on, I open the hood at the upper opening bit by bit every few days so that you can slowly get used to 65% humidity before the hood comes down.
It is also only poured when the roots are right, until then the earth is sprayed. Which training I will use I will decide spontaneously when the time comes :-).
Until then, I wish you all a lot of fun with the update. Let it grow and stay healthy 🙏🏻🍀
You can buy this Strain at :
https://www.zamnesia.com/de/3271-zamnesia-seeds-blue-dream-feminisiert.html
Type:
Blue Dream
☝️🏼
Genetics:
Blueberry x Haze
20% Indica / 80% Sativa
👍
Vega lamp:
2 x Todogrow Led
Quantum Board 100 W
💡
Bloom Lamp :
2 x Todogrow Led
Cxb 3590 COB 3500 K 205W
💡💡☝️🏼
Soil :
Canna Coco Professional +
☝️🏼
Fertilizer:
Green House Powder Feeding
☝️🏼🌱
Water:
Osmosis water mixed with normal water (24 hours stale that the chlorine evaporates) to 0.2 EC. Add Cal / Mag to 0.4 Ec Ph with Organic Ph - to 5.5 - 5.8 .
Likes
10
Share


@Eldorado_ed
Follow
Think I will maybe go back 2 autos after this not liking these tbh maybe because am impatient as f**k and things are a lot different lol, never know might turn out better in the end 🤞🏻Let’s see what the next week brings ✌️🏻

Likes
100
Share

@MadeInGermany
Follow
Hi people :-)
This week the Victory Kush F1 (Phenotype 1-3) and the Zkittlez (Phenotype 1) were harvested.
The Orange Sherbert (Phenotype 1-2) and the Zkittlez (Phenotype 2) were flushed.
The rest fertilized as usual.
Next week it continues :-)
I wish you all a nice and healthy weekend.


Likes
9
Share


@Serhiosaez
Follow
Día tan esperado de esta cosecha de crítical mas con cogollos muy duros y muy apretado y compactos y grandes con un aroma muy fuerte con un olor a diesel


Processing
Likes
Comments
Share


@MG2009
Follow
06/01/2020
Time to make the seeds!
First my Cookie Cake F1 plant is a 7 star cookies male
(Top dawg seeds) X a female Captains cake clone
(Captains connection) and will be growing TLO Style.
7 Stars Cookies Strain | Marijuana Strain Reviews
50% Sativa /50% Indica
THC: 22% - 27%
7 Stars Cookies is an evenly balanced hybrid strain (50% indica/50% sativa) created through a potent cross of the classic F1 Durban X Girl Scout Cookies strains. This potent bud is infamous among cannabis users for its super high potency and long lasting effects that are perfect for any hybrid lover. The 7 Stars Cookies high starts with a rush of cerebral effects that rush though your mind, lifting your spirits and leaving you blissfully happy and unfocused. As your mind flies higher and higher, your body will begin to slip away into a state of deep relaxation that leaves you totally stoned and out of it. A sharp pang of hunger comes next, leaving you with a ravenous case of the munchies as your mind slips in and out of calming sedation. Thanks to these effects and its super high 22-28% THC level, 7 Star Cookies is often chosen to treat those suffering from conditions such as chronic pain, insomnia, stress, depression, and migraines or headaches. This bud has a sweet citrusy flavor with hints of spicy earthy grape upon exhale. The aroma follows the same profile although with a light pungency to it. 7 Star Cookies buds have fluffy dense popcorn-shaped olive green nugs with bright orange hairs and golden crystal trichomes.
Captain's Cake Marijuana Strain Information
About Captain's Cake
Hailing from the beautiful land of Maine, Captain’s Cake is brought to us by The Captain’s Connection. This indica-dominant strain boasts two pretty incredible parents, Girl Scout Cookies and White Fire Alien OG, making her a bud that offers great effects for both recreational and medical patients. While Captain’s Cake typically acts as a true hybrid, user sensitivity may dictate that your experience comes with the roll of the dice.
A fairly potent strain in her own right, Captain’s Cake averages around 21% THC. Rumor has it that CBD levels can vary dramatically, with some reports showing a range between 1% and 15%. While that data remains to be confirmed, you can instead relish in beautiful buds that are bright green, featuring orange pistils and lovely amber trichomes. Oddly enough, flavors and scents do vary a bit with this strain, and you’ll notice it smells much worse than it tastes. A sour and earthy fragrance that includes lemon, nuts, and berries will hit you right away while your mouth enjoys a nutty vanilla cookie experience that’s slightly citrus-like.
Captain’s Cake is awesome for those times when you need a boost of energy to get through a particularly trying task. Whether you’re experiencing the three o’clock workday slump or you simply have to clean the house before it gets any worse, this strain is here to help. Users note a euphoric boost that helps you to focus on your tasks while having a huge smile on your face, but keep in mind that this joyful experience can only last so long. Soon the munchies will hit, and after you’ve had your fill of snacks, you’ll be ready to settle in during a sedating comedown.
Even if Captain’s Cake doesn’t have an astounding amount of CBD, medical patients still note that she’s a strain that is practically magical. Users find that mental woes are easily dissolved after taking a few hits, making stress and depression a thing of the past. Bodily aches and pains are also treated with a slight feeling of physical sedation, and those who struggle with their appetite will likely turn to this bud time and time again.
This plant is an ideal choice for new and experienced growers, and the ability to cultivate inside or out makes her pretty versatile. Said to be a quick flowering strain, you’ll be gifted with a nicely sized yield after 8 to 9 weeks. Plants tend to grow fairly large, so make sure you have enough space dedicated to your crop before you begin.
Depending on how you handle marijuana, Captain’s Cake may knock you out for an amazing nap or in some cases may fire you up with tons of energy. Others will experience a nice set of hybrid effects, so it’s best to know yourself before lighting this one up.
Red Sky is
Description
The (paternal P1) father is the legendary Cherry Hemmingway male. A hybrid of a landrace Bhutan, and Rez Dog’s Firecracker (Williams Wonder x NYC Diesel).
The female KOS’s own Skyanchor (Bogglegum x PSI) a cross using a prime selected male of BOG’s Bogglegum. A bad ass old-school hybrid made using a Northern Lights #5 (real deal) crossed to a Bubblegum (real deal). The female used to make the Skyanchor was my clone only PSI (Purple Salem Indica) that I was given by my good friend Keith, in Salem, OR, USA. Some kind of crazy old Purple Kush variant; potency is not only severe with this baby, but supernaturally intense.
The Cherry Hemmy is well known by me to relate large yields and incredible vigor along with increased resin production, and also usually relates cream soda, vanilla, or cherry-ish terpenes, making exotic and addictive combinations when used as part of any hybrid. So, the Red Sky yields well—very well.
Some truly legendary strains involved in this Small Batch Seed run.
Great genetics equals great end results.
I put video of Red Sky #3's brothers #2, and #4.
Likes
16
Share


@Mrg7667
Follow
Just about up to normal feeding, some leaves are starting to get green back some not so much!
tricombs are start to turn milky in allot of the chocolate marhsmellow and actually a couple of the DD i might me able to harvest both at the same time
Smell is absolutely insane i can smell it around the corner from my apartment 😅

Likes
33
Share


@zera1337
Follow
Week 4:
I somehow managed to overwater 2 of my cuties. Having a humidifier + the fan not being properly positionend kinda lead to this. However, they are now looking stronger again and back on track.

Likes
15
Share


@BushDoctor740
Follow
Day 21 and the girls are really starting to take off.I did some LST on 3 of the 5 so far and will get the other 2 bent over in the next few days.
Day 27 I watered with recharge tea and tied down some branches to get some more light into the center of the plants.I have increased the light intensity to 50 percent and slightly lowered the humidity this week.
Likes
56
Share


@Cannabeast40
Follow
Let´s get this going asap 😎
See you again very soon 😍
____________________________________________________
If you want to see more macro and micro photos, don’t forget to visit my Instagram page 🙂🙏🏻
https://instagram.com/cannabeast40?igshid=YTQwZjQ0NmI0OA%3D%3D&utm_source=qr
Likes
42
Share

@RockoCalenberg
Follow
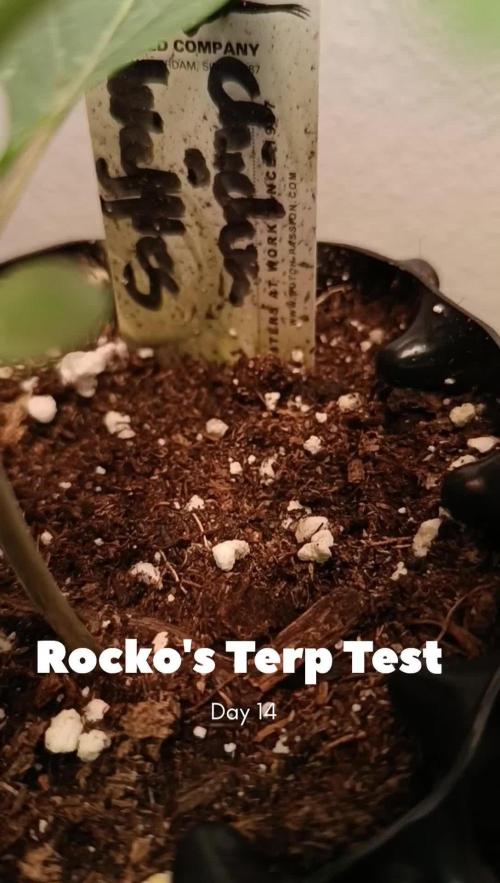
🌱 Tag 14
Die ersten zwei Wochen sind durch und die Pflanzen stehen richtig sauber da.
Kompakter Wuchs, gesundes Grün und insgesamt ein sehr stabiler Start.
🌿 Pflanzenstatus
Alle drei entwickeln sich gleichmäßig und ohne Auffälligkeiten:
👉 kein Stretch
👉 keine Deformationen
👉 einfach stabile Genetik am Arbeiten
Fruit Bomb Punch
Am vitalsten und wachstumsfreudigsten.
Strawberry AK
Etwas ruhiger, aber konstant und gesund.
Chicken & Waffles
Auffällig durch die schmaleren Blätter, sonst ebenfalls stabil.
? Umtopfen & Substrat
Aktuell stehen sie noch in 1L Air-Pots.
👉 Jetzt geht’s in die 19L Stofftöpfe
Das Ganze in einen Mix aus frischer und wiederverwendeter Erde, aufgepeppt mit:
Wurmhumus
Traubentrester
Schalenmehl
Dolomitkalk
weiteren organischen Amendments
👉 lebendig, aber bewusst moderat gehalten
🌱 Düngung
Fruit Bomb Punch → 2 Guerilla-Tabs
Strawberry AK & Chicken & Waffles → je 1 Guerilla-Tab
💧 Gießen
👉 bisher nur Wasser
👉 Pflanzen stehen stabil
✌️ Fazit
Sehr sauberer Start:
👉 gesund
👉 stabil
👉 bereit für den nächsten Schritt
Der Terp-Test läuft… am Ende entscheidet das Glas. 🍯🔥
Grow on 🌱💚
🌱 Day 14
The first two weeks are done and the plants are looking really solid.
Compact growth, healthy color, and overall a very stable start.
🌿 Plant Status
All three are developing evenly without any issues:
👉 no stretching
👉 no deformities
👉 just stable genetics doing their thing
Fruit Bomb Punch
The most vigorous and fastest-growing so far.
Strawberry AK
A bit more reserved, but steady and healthy.
Chicken & Waffles
Stands out with its narrower leaves, otherwise just as stable.
? Transplant & Substrate
They’re currently still in 1L air-pots.
👉 Next step: moving into 19L fabric pots
Filled with a mix of fresh and recycled soil, enriched with:
worm castings
grape marc
shell meal
dolomite lime
other organic amendments
👉 living soil, but kept balanced and not overloaded
🌱 Nutrients
Fruit Bomb Punch → 2 Guerilla Tabs
Strawberry AK & Chicken & Waffles → 1 Guerilla Tab each
💧 Watering
👉 water only so far
👉 plants are stable and happy
✌️ Conclusion
A very clean and promising start:
👉 healthy
👉 stable
👉 ready for the next step
The terp test is on… in the end, the jar decides. 🍯🔥
Grow on 🌱💚


Likes
26
Share


@Earthy_Greens
Follow
🌱✨ Here’s the wrap-up for Week 9 of the growing season! 🎉🍀🌿 Our girls have officially taken their final shape 💎✂️ and are all set to begin the exciting flowering stage 🌸🔥.
They’re looking amazing 🌟 and thriving just as planned 💚📈. With every stem and leaf perfectly positioned 🌿🔄, we’re gearing up for a breathtaking bloom 🌸✨.
Stay tuned, friends—there’s so much more to come, and we can’t wait to share the exciting updates with you! 🚀👀📔 The best is yet to bloom! 🌞👊💚✨
Likes
39
Share


@AestheticGenetics
Follow
4/1/25
Welcome to another week and Thank you to @Zamnesia and @Plagron for the genetics and the chance to participate in the contest.
These are beautifully tall plants. I have had to spray with lost coast plant therapy and some Safer brand insecticidal soap because of creepy crawlies such as mites of some sort.
4/7/25 i shoved everysingle plant into my main tent. it has a humidifier and controls and all the goodies. the plants that have been struggling were in a separate tent without a humidifier or even an exhaust fan. and i think that may have had something to do with the issues. im really hoping that it isnt something that can spread to other plants because ive shoved 5 - 5 gallon pots in 2.7x2.7 grow tent. but hoping the environment is more friendly for them during the last half of
The pistils have changed colors because of the spray but everything else is looking nicely.
Super tall and super thin leaved plants but the buds are very tight and i imagine will be fairly dense.
some of the plants have decent cola stacking of maybe 6+ nodes
Today i top dress with 3tsp of Bloom, 1Tsp of Microbe Charge and 1Tsp of Bloom Booster.
4/6/25
R3 is producing some giant buds. The lower buds are twice as big as some of runtz plants. They all smell super fruity