The Grow Awards 2026 🏆 


Likes
4
Share
@Forrbiddenterpz
Follow
Seeds started to pop about 4-5 days after germination I got 100% germ on this run


Likes
Comments
Share
@FrenchMister
Follow
Starting to Low Stress Training and super cropping some secondaries

Likes
6
Share
@momsbasement_exotics
Follow
little bit of nute burn but im still happy with how they look going to begin flushing them soon with just water and a little calmag every other water.

Likes
Comments
Share
@Alejangrow
Follow
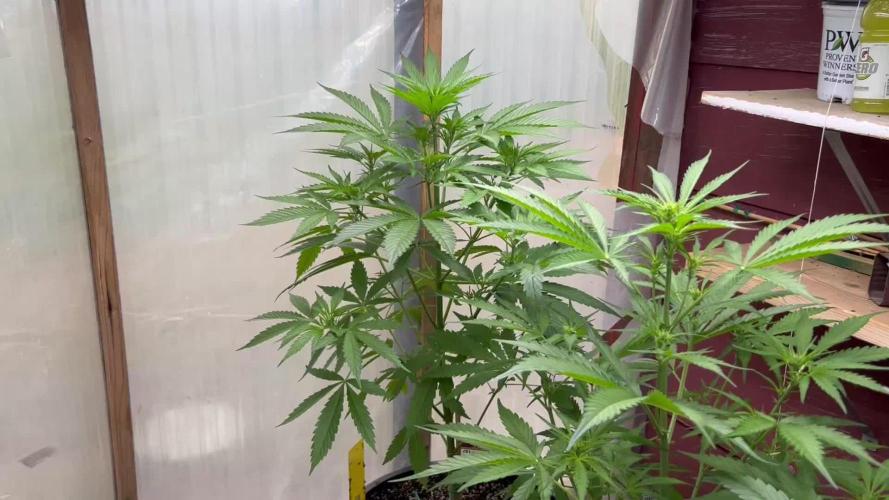
Shes reached 4 feet tall this week😎🌿
Did some defoliating to unblock some of the bud sights.🌺
She took well too last weeks flush & is back on the recommended regimen. 💉
Cant wait to see how these 2 turn out.
This is supposed to be a 7 week flower strain but probably gonna let go for 8 weeks flower.🤷♂️🏽

Likes
4
Share
@ProtoxGenetix
Follow
Week 6 I dont put the nutrients ml beacause my feeding its the same ml on the athena chart blended line with Fade.


Likes
15
Share
@Viccrazyweed
Follow
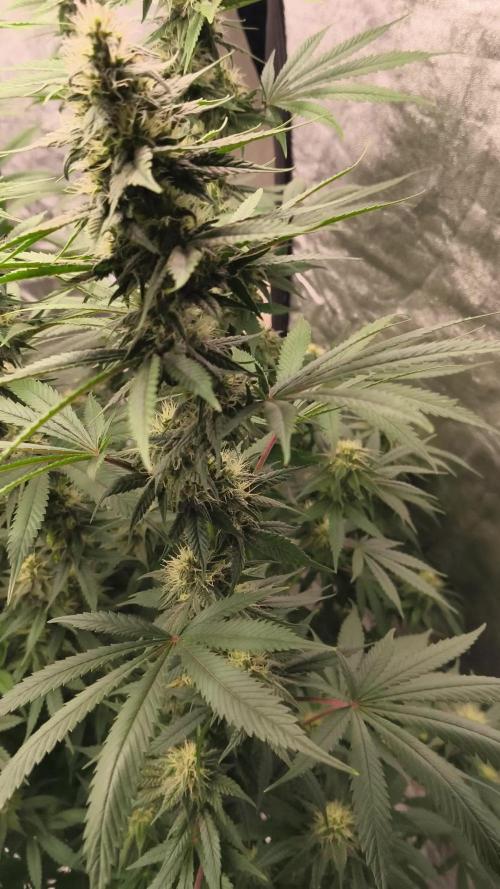
They are blooming!! Nice white hairs are showing off the centre and they have start creating a “budd”, I don’t really know since im a newbie but the leave colours are perfect, no excess or anything else shown since im watering with the correct PH
Both are truly beautiful, i think next time i will choose a single plant and treat it the beat i can, exposing her to anything i just learned here
I thought aswell that i could afford some “top candy” or “top bloom” but I don’t really know if it will improve a lot or if its worth the money
Better air flow during days due to new big fan working
Likes
3
Share
@Whosaysgirlscantgrow
Follow
Last week or so on this one. She’s got one last feed and then we will be heading to flush in the next 3 or 4 days. Aiming for the chop in 7 days ish. She smells like a sweet shop, starting to change to purple in places! I can’t wait!
Still using Monkey Nutes

Likes
19
Share
@CannabisAprendiz
Follow
Bueno , este es el segundo cultivo que realizó del la cepa "Waka" , el anterior lo tengo igualmente documentado en otro diario .
en esta ocasión cultivamos los clones que habíamos recolectado del cultivo pasado , guardando los fenotipos que nos gustaron más y los clones restantes los pasamos a floración que fueron los que se le hizo seguimiento en este diario.
El crecimiento fue bastante explosivo y reaccionaron muy bien a cada trasplante realizado .
pude observar que los clones de cada fenotipo seleccionado se desarrolló con mucha similitud al de sus madres .
El olor en vegetación es bastante discreto y en floración se pone un más intenso
El desarrollo en floración fue explosivo generando bastante resina y se vieron muy hambientras .
Al fumar se puede sentir un rico toque cítrico en las N° 4 se siente un fuerte sabor a limón en algunas flores mucho mas marcado que en otras,
N° 3 y 13 un agradable toque a naranjas muy rico de sentir en el paladar , La N° 8 con pizcas dulces bastante interesantes.
El humo al fumar es muy suave lo que permite sentir mejor el sabor de cada fenotipo.-
saludos y buenos humos😉
Al momento de cosechar se cortaron los clone y se dejo secando en oscuridad a temperatura ambiente por cerca de 16 días posterior a eso se pasó a curar en frascos

Likes
8
Share
@Johnny_0G
Follow
I flipped the girls over to flower last Wednesday and gave them a good defoliation and trained a few more of the branches. My last autoflower carmalicious is closing in on the finish and she's getting frosty and by far the most dense buds I've felt so far. I'm using 2tbl of 444 and 2 tbl of 284 with a tbl of basalt with my water as feed. I'll feed them everytime once we start to have fuzz balls but I think I'll be feeding every other time for right now.


Likes
10
Share
@Pechu420
Follow
Very beautiful plant with a delicious aroma. Thick, heavy buds and flowers, branches tied because of the weight. I had a small accident when removing the other plant from the grow, and 3 branches of the highcloud broke because of the weight, but it is resistant and I tied them as you can see in the photo, and the branches recovered, without any major problems. Good genetics, fast and strong.


Likes
10
Share
@sanibelisl
Follow
Can’t find anything negative to report. Summer camp is going well. All girls are in stretch and looking like they’re going to be basketball players. All are on course to be tall for auto’s. The shortest is now the tallest, the Harvey Wallbanger is at 30 inches, the next is the 91 Grapes at 28 inches
and bringing up the rear is the Vanilla Fizz at 26 inches tall. The weather has been a little hotter and drier past few days so the girls will either get a drink tomorrow or the next day.
*** update August 2 Day 44
Girls are about half way through summer camp and have been in stretch for the last week. Big changes have happened with the Harvey W. Now five inches taller than the 91 Grapes and the Vanilla Fizz still being the shortest at 28 inches tall. All three girls have entered flower so additional stretch should be minimal (we will see). Lights have the option of adding different spectrums for specific effects, so added some blue to see if it doesn’t slow down the stretch (I think it will). Should help tighten up the nodes as well. Watered them once on Thursday morning with plain water ph of 6.0. Debating whether or not to top dress with bloom nutrients this next time or wait until stretch has stopped.


Processing
Likes
18
Share
@Lady_NugWitch
Follow
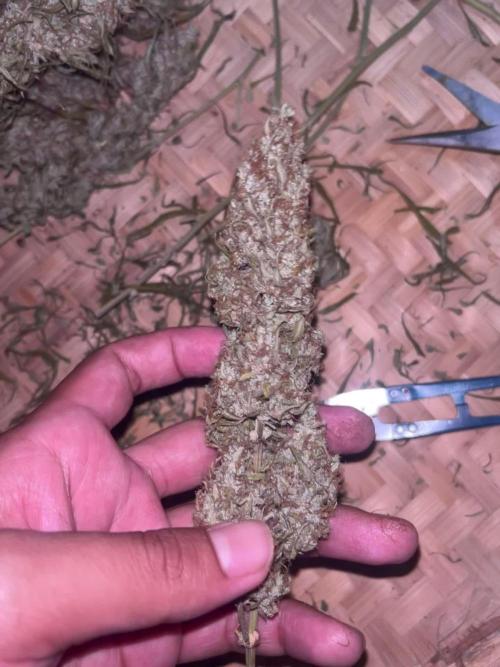
Gonna harvest one of the devils.. she is amazing looking... I love the fade on her and now she's in the dark.
2nd one is still stacking and looking FAT all over..gonna wait on her another week maybe.
The smell, OUTTA THIS WORLD!!!
Likes
16
Share
@osmrducks
Follow
Day 64: Started flushing the girls today. Got All milky and starting to go amber.
Day 65: Still flushing. The girls smell amazing. I have one in the bunch that is SUPER airy and I am just not sure what is going on with her. It's the girl that I accidently broke off the main cola a while back. Not sure if that has anything to do with it or not.
Day 66: No new updates. Cut one of the colas off for a taste test and trial run on drying as this is my first go. Figure if I can dry this super dense beauty with no issue, I will be able to dry the rest. Have it hung up in the spare bathroom. Stays roughly 71° in our house and I'd say roughly 40%ish humidity.
Day 67: Girls are smelling really nice! I keep looking at trich's and looks like no change. They are all cloudy and only a few amber from what I see. Still new to it so no tellin!
Day 68: No updates.
Day 69: Girls still looking good. My bud is still drying and looking super hideous. I feel it is drying slow enough but sure doesn't look or feel dense as it did when cut. Will know in several days to come when fully dry.
Day 70: Girls smell dank and look the same! No new updates at this time.

Likes
4
Share
@Growyourownathome2x2
Follow
Day 47 12/12 3 plants in 2x2 no more nutes will be fed from now just ph balanced water for the next 2 to 3 weeks until harvest, looking forward to trying this stuff smells so good and looking very frosty with nice colours starting to show I’m dropping my night temps down to 15 degrees Celsius to hopefully bring out some more nice colour, can anyone guess the final weight 🍁
Likes
44
Share
@Roberts
Follow
Bubba Kush Mintz is growing good. She is getting her first lst, defoliation, and root pruning today. Everything is looking really good. Nothing else to report at the moment. Thank you Spider Farmer, Aeque Genetics, and Athena. 🤜🏻🤛🏻🌱🌱🌱
Thank you grow diaries community for the 👇likes👇, follows, comments, and subscriptions on my YouTube channel👇. ❄️🌱🍻
Happy Growing 🌱🌱🌱
https://youtube.com/channel/UCAhN7yRzWLpcaRHhMIQ7X4g