


Likes
Comments
Share


@Grower_Of_Persia
Follow
my dry and cure style is this:
4 days of hanging upside down to get water activity lower to around 0.6 in 50% humidity and 26 C temp (i know its a little high but we are in a hot summer right now and i cant get it lower even with air conditioner) and then after 4 days of drying i remove leaves and stalks, trim buds and move them to jar for the rest of their life :D . and in the first 4 days of curing i open the jar door and let hem get some fresh air in the jar for about 5 minutes and close the jar door again, after 4 days of curing like that buds are smokable but they will get better as they getting cured about 1 month.
buds are one of the hardest as fucking rocks type of buds! very dense , compact , sticky , smelly , amazing at every aspect
growing stage was 60 days and flowering stage was 70 days total (harvested tops at day 63th)
the total weight of dry buds was : top buds 174 G + lower buds 55 G = 229 G
my overview of strain with details:
the seeds:
unfortunately i only got 1 seed cracked out of 5 so i will not know how much this genetic can get different but at least i got the chance to grow once of this wonderful strain
the plant :
in every stage you can ensure that you are dealing with a high level plant ,
she will get big so you have to control her height LST and SCROG highly recommended , will grow very well with tick stalks and big fan leaves , has good resistance for stress and will respond very well to stress trainings , she really has gorilla power in herself ,
fresh buds on plant :
buds are very compact and dense even from start , fresh blossoms smells like pineapple and mango , 2 different shades of sweet smells like you hold 2 junks of pineapple and mango in your hand and you smell them together, she is a trichome and resin factory , very very sticky , very oily , strong smell
dried buds:
very compact and dense , hard as rocks , has dark colors with purple hues inside it , it smells sweet
smoke :
very smooth and sweet like lollipop , pineapple , mango like , after 2 minutes it'll kick in and you'll get higher and higher with every breath , has a strange and especial high mind high mostly

Likes
6
Share


@Cannabis_ConnectionUK
Follow
Week 3
Big Leaf strip and lollipop
Few more stakes added
Lights 100%

Likes
25
Share


@OZDAOgrow
Follow
So,
I ran out of Bloom from Athena 🤦🏻♂️, it's a pity I didn't throw out those two jerk bushes earlier, so it would have been enough fertilizer until the end of the cycle.
I had to switch to Grow 😂 It has 2% nitrogen, I hope it won't affect the bushes too much.
Soon I'll cut one, the oldest one, I'll do a little rinsing and put it under the knife. I think the others need a couple more weeks to stand.
Likes
22
Share


@Grassland
Follow
Nice progress this past week as well. Should be ready in specified time 63 ish days. Some leaves are showing there age and possibly that the lights were to close.
Dropped Root 66 and Diamond nectar thinking I am at least half way threw mid bloom. TDS = 750 , total wattage =277, 24 hr lights on.


Likes
1
Share

@sunshinegroww
Follow
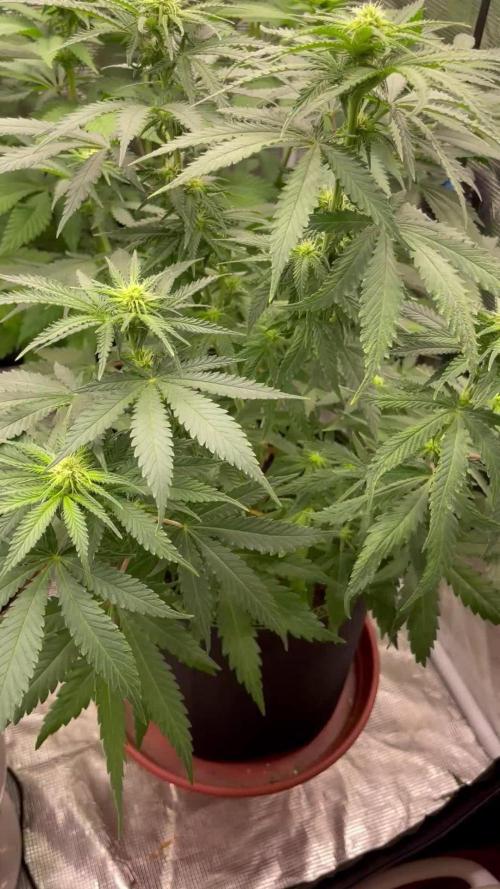
Hello week 3 some defoliation as needed to increase airflow she looks happy as lari very happy indeed not a lot say lets goooooooo


Likes
12
Share


@Archieballs
Follow
She’s looking good. She’s taken well to LST She should be a 9-10 week plant so I think I will feed her once more.


Likes
19
Share


@willertex
Follow
📅 D79 - 18/01
📜 Made the flush and then feed her again. Waiting signs of ripen to start the final flush
✍️ 1 EC
♒ 7 pH
🌊 10 L
📏 50 cm
📅 D82 - 21/01
📜 Final flush started
✍️ 0,2 EC
♒ 6 pH
🌊 10 L
📏 50 cm

Likes
14
Share


@karchutos
Follow
Buenas a todos! La planta es una bestia! crece muy rápida y con mucha fuerza, estoy muy sorprendido. Gran genética y buen feno, un lujo...

Likes
13
Share


@gr3g4l
Follow
Aunque dejaron de crecer a lo bestia como lo hicieron en preflora, 25-30 primeros dias a 12/12h. han seguido creciendo hasta ahora y esta semana me tocó volver a calzarlas todas para que estubieran a una misma altura.
Esta semana viene bién cargadita de nutrientes con tres riegos , dos o tres dias entre uno y otro, según veo o creo que lo necesitan.
Seguiré regando mitad mitad, agua de grifo / destilada . El primer riego de la semana 3 ml/L de top Candy y un pelin de ácido cítrico para bajar el PH. EC 1,03 , PH 7,00
El segundo riego con Bud y Bloom, 1,5ml/L y 3ml/L respectivamente más ácido cítrico para bajar PH. EC 1,30, PH 6,9
El tercero con Delta9 y callMag. 4ml/L. y 0,5ml/L respectivamente más ácido cítrico para baja PH.
última poda de hojas abanico, 2 o 4 de cada y poda de yemas para que no compitan con los apicales que reciben luz. También me tocó fijar mejor los troncos con alhambre de jardineria para que estos no se doblen por el peso y pierdan por aquí algo de energia.
No tengo claro si fuí capaz de disminuir el exceso de nutrientes por lo que durante toda esta semana y hasta final de flforación se mantiene una EC baja. mezclando mitad agua del grifo mitad destilada y así consigo mantener esa EC .
El haber regado en crecimiento y principio de flora con un agua tan dura y alcalina hizo que las plantas muestren el aspecto que muestran

Likes
15
Share


@DRO420
Follow
Just repotted these clones ... They have amazing roots... Looking very healthy

Likes
33
Share


@Chris_Calyx
Follow
So this was quite the productive week..!
They grew enough after the topping for em to bend over. First step to ScrOG has been done and I'm quite happy with the results 💚
Next step is the screen of course!
Then let them full it and switch em
Just a reminder.. I'm growin 4 plants in a 120*120 so a little patience would be required if you, like myself, would like to fill that space up ❤️💛💚
One day I'll fill it with just one plant 😆😆

Likes
8
Share

@HashishOculus
Follow
Week 8 Flower (Day 85-91 | Flower Day 50-56)
Day 85 - Feb 19 (Flower Day 50)
00:10 pre top-off: pH 5.95 / EC 1.674
Post top-off: pH 5.88 / EC 1.658
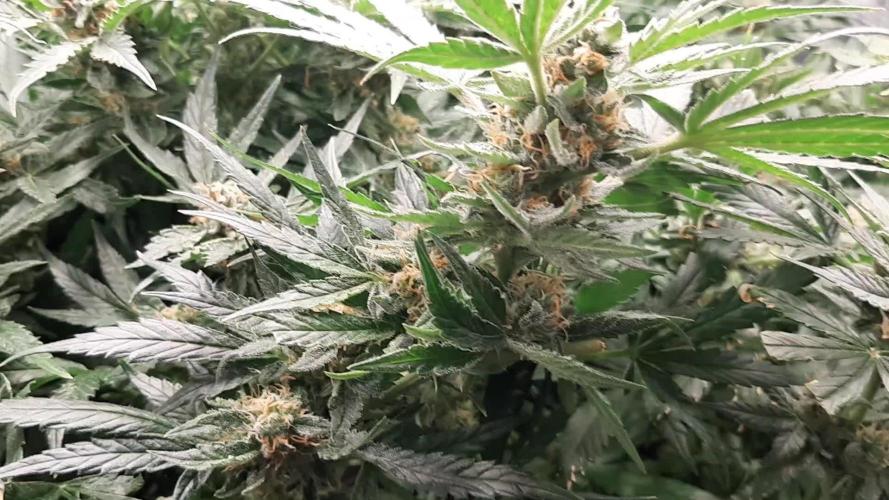
Noticed again that the real bulking seems to be happening under the very top tips. Pistils lower down are still white. This matters more than the “top of the tops” look.
Day 86 - Feb 20 (Flower Day 51)
00:10 pre top-off: pH 5.92 / EC 1.804
15 min post top-off: pH 5.95 / EC 1.720
EC had crept up. Top-off brought it back down. Plant posture looks good (praying, not tacoing). Still feels like she’s in “steady stacking” mode.
Day 87 - Feb 21 (Flower Day 52)
Reservoir change at 01:00
New res: pH 5.78 / EC 1.752
Fed ½ dose of what Advanced Nutrients recommended. Reset felt worth it because I couldn’t find any res changes after Feb 6 in my notes, and I didn’t want to gamble this late in flower.
Day 88 - Feb 22 (Flower Day 53)
00:10 pre top-off: pH 6.0 / EC 1.780
~1 L consumed
Post top-off: pH 6.0 / EC 1.894 (first reading likely off - meter acting a bit wonky again)
PPFD noted around 790. Also: smell is getting more funky (in the good way). And importantly: she’s not “scarred” anymore - almost all previously damaged leaves have been trimmed away by now.
Day 89 - Feb 23 (Flower Day 54)
00:10 pre top-off: pH 5.0 / EC 1.852
15 min post top-off: pH 5.58 / EC 1.724
pH came in low and got corrected with the top-off. Plant looks fine. No sign of new damage spreading. The trend stays: tops look “older,” but the mid/lower stacking is active.
Day 90 - Feb 24 (Flower Day 55)
00:10 pre top-off: pH 5.56 / EC 1.874
~1 L consumed
15 min post top-off: pH 5.67 / EC 1.724
Leaves praying. No taco. Everything feels stable and predictable right now - exactly what I want after the January chaos.
Day 91 - Feb 25 (Flower Day 56)
00:10 pre top-off: pH 5.73 / EC 1.872
15 min post top-off: pH 5.80 / EC 1.786
Still holding that same EC band after top-offs. Some tip burn / slight leaf edge crisping visible on a few leaves, but nothing that’s escalating fast. Focus remains on bulking and resin rather than chasing white pistils on the very top tips.
Thricomes look mostly clear with a few cloudy and no amber.
Week 8 Notes / Takeaways
Res change happened Feb 21 @ 01:00 (pH 5.78 / EC 1.752, ½ AN dose).
EC after top-offs mostly sits ~1.7-1.8, which is consistent given ~800 EC tap water baseline.
Smell turning stronger + funkier in a good way.
Canopy damage from the old incident is largely a non-factor now - most of those leaves are gone.
The “action” is in the mid/lower stacking and healthy sugar leaf resin production.
I'm hoping for another 3 weeks of flower before harvest.




Likes
41
Share


@Organic_G
Follow
Hab es etwas zu gut gemeint mit dem flüssig Dünger, dachte es wäre ein Kalium Mangel, es war aber eine leichte Verbrennung und dann habe ich die Babys noch mehr verbrannt 😂 egal passiert man lernt und es wird besser 😎
Ansonsten sind die Pflanzen an Tag 28 der Blüte und am Beginn der 5. Blütewoche.
Parameter sind soweit stabil,
28 Grad Tages Temp
60-62% RH
VPD 1.5 -1.7
Ich denke das ein weiteres Düngen nicht mehr notwendig sein wird.
Topdressing wurde ebenfalls nachgelegt.
Ich denke das Sie ziemlich fortgeschritten für gerade mal 4 Wochen Blüte sind 😍
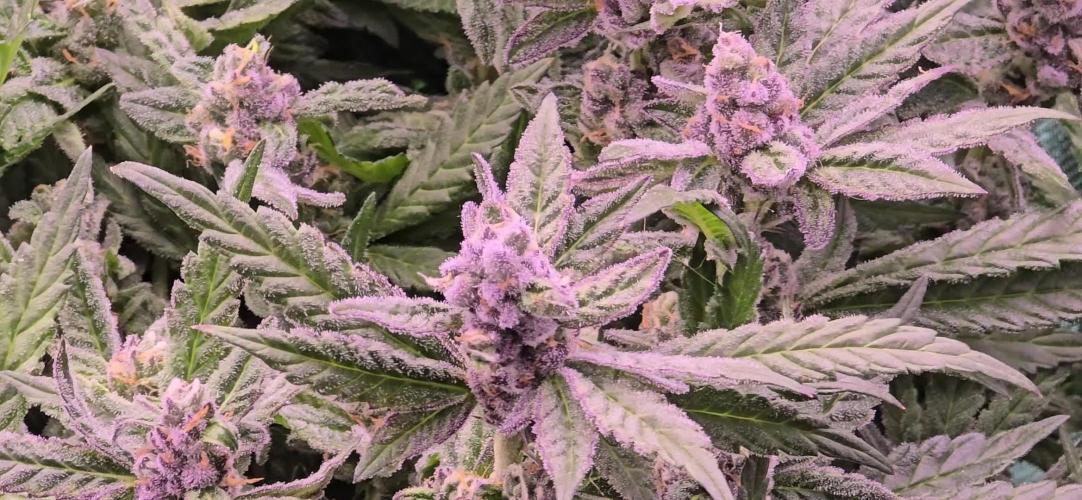
Budds sind gut fest, alle sehr Trichomenreich selbst die Fächerblätter tragen außergewöhnlich große Mengen an Harz…
Weiß nicht ob es die Generiken sind oder die UVB Lampe ihre Arbeit macht.
Diese ist 5 h täglich an ggf wird die Dauer nochmal erhöht, es macht den Pflanzen auf jedenfall nichts aus… (310 nm Peak aber auch 285 nm dabei )
Geruch ist Fruchtig Sweet Tropisch, hoffe noch auf einen weiteren Komplexen Aufbau des Terpenenprofils und auf deutlichen Nachschub in den unteren Ebenen…


Likes
24
Share


@BearBuds
Follow
This grow is going to be really interesting. I have never grown sativa dominant hybrids before because I was always scared I would not have enough room. However, last season I had a really good run growing VERY short plants (see Mighty Minis) and it got me thinking, why not. So here we are; I'm growing 1 Blue Dream and 1 MelonSicle this round. Both are Sativa hybrids so I am hoping the stretch will not be too intense; no more than 2.5 original height before flowering. The blue dream I bought with the previous rounds of clones I got because I have herd that if trained well, this plant can PRODUCE. The plan is to continuously top, and train until the MelonSicle has caught up and is ready for flower. I will have the room to flower about 2 months from now so this Blue Dream is going to be a 2/2 table top by the time I am ready. Very excited about this one, also a little nervous.


Processing
Likes
4
Share

