
Likes
Comments
Share


@BleedingGums
Follow
Hello everybody!🙏🏿🌸
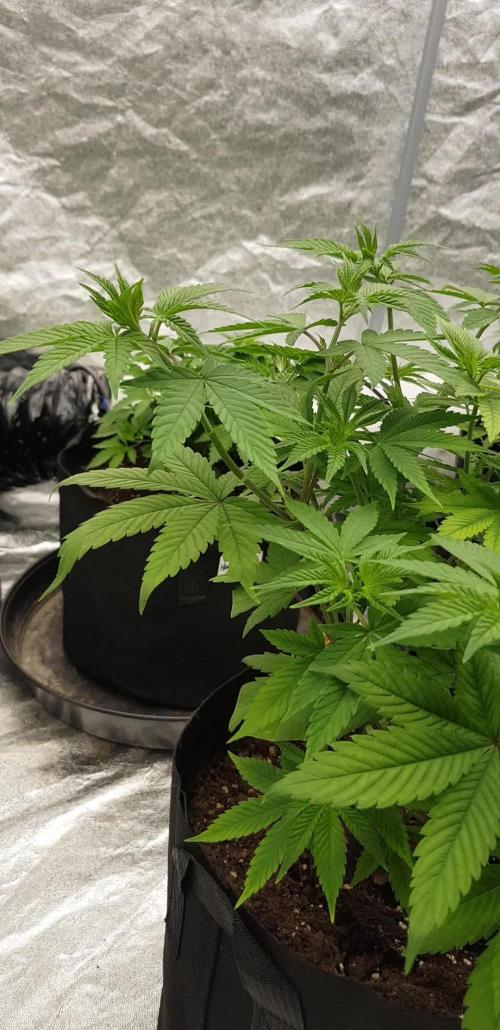
the girls recovered well after the topping , with no grow stops and feeling pretty good! ( 2 of them even got 4 new main stems )
Looking forward for the first trimming and flower phase.
Moisture is pretty high, I noticed water forming under some pressed leaves.
-They getting 1,25,l 2x per week
- The roots start to grow out at the bottom of the pot
Fan running on full power and they hearing classic music most of the time
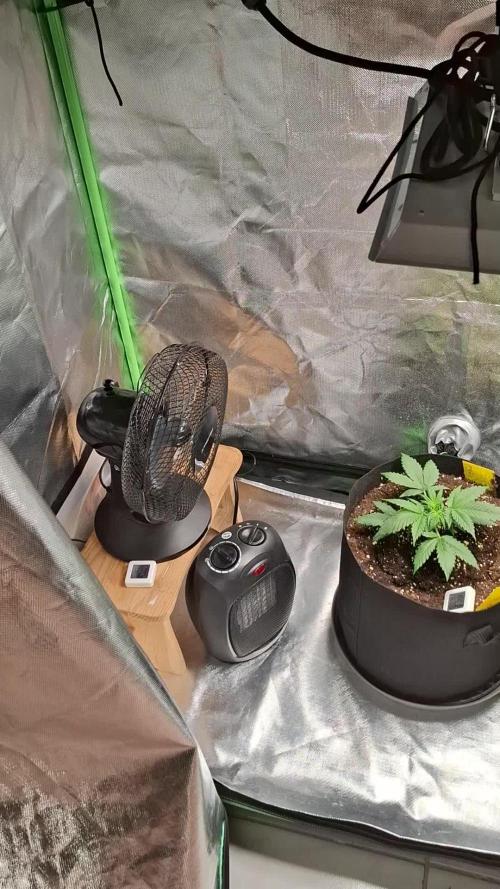
Day 20
-each Lady got 1,25l
- pulled the baby leaves at the bottom
-replaced them in the tent
- placed van on a higher point
" Cant wait for start of next week and flower phase🌸🙏🏿"
Day 21
- noticed water on the side of the tent
- leaves got greener after watering
- some leaves got little burns on the edges so i adjusted the light

Likes
8
Share


@Kayotic
Follow
*Day 30
*Keep accidentally snapping branches off while tying down
*Watering a half gallon every other day

Likes
21
Share


@Hydronaut
Follow
A step back recently:
Started a final flush (2 days in), and decided to start feeding her again - thanks to some great GD input!
250 ppm at re-start and will work my way to 500ppm? She's still rockin' along - like nothing happened.
She topped out at 350 ppm without tanking PH, so she is stable here.
PH is now swinging down fairly quickly last 12 hours. Drained off 1/3 of reservoir and get reservoir down to 250PPM.
5 days later, major PH swings down again. Mixed another fresh reservoir. I am using Zero Water 5 gallon system, and just realized the PPM coming out was 100, and PH at 3! If I am at 100 today, that means these filters have been shot for a while, maybe since start of my PH issue. There is also interesting information about when zero water filters reach their expectancy. They put out fishy smell and otherwise. I will be watching my filters more often and taking more notes since this ZeroWater 5 gal system is really the way to go if you are only growing a plant or two. Filters are a bit spendy but when you take time, gas, convenience etc. its a no brainer (if the water coming out is zero:) - I get about 15 gallons per filter (175ppm from tap).
Day 70. It’s been about a day since new res change. Steady Eddie at 250 ppm and 6.2. I’ll let her drink the bucket down a good ways if things remain stable with a drift down. I doubt it though, 5 gallon is fine for 12” autos but at 2’ she really needed 8 gal. Time to up the R&D on the cabinet! Also checked Zero Water again and filter is now putting out 200ppm of 3.0 water. New filters installed!
Hope she finishes soon, the top of her canopy slowly getting cooked over the last 10 days. 8" of light distance is too little. PPFD 2000+ at the top, but leaf temps are in the upper 70's. Gotta hit a decent DLI on these lower buds - without nuking the top nugs, right?!
As the week concludes, she’s in a fresh bath, at 250ppm @ 6.0 and running stable again. New water filters installed so zero water variable removed. Last serving of half+ teaspoon of GH dry KB ripening, and will reduce ppm by 25/day until I reach 10-15%. 1-2 day flush, if at all.

Likes
4
Share

@GERGrowDesigns
Follow
Welcome to Veg Week 5 of Sweet Seeds Sweet Mandarine Skittlez F1
I'm excited to share my grow journey with you from my
Sweet Seeds Project . It's going to be an incredible ride, full of learning, growing, and connecting with fellow growers from all around the world!
For this Project , I’ve chosen the Feminized Photo strain Sweet Mandarine Skittlez F1 :
Here’s what I’m working with:
• 🌱 Tent: 120x60x80
• 🧑🌾 Breeder Company: Sweet Seeds
• 💧 Humidity Range: 60
• ⏳ Flowering Time: 7weeks
• Strain Info: 19-24%THC
• 🌡️ Temperature: 26
• 🍵 Pot Size: 0.5l
• Nutrient Brand: Narcos
• ⚡ Lights : 600W x 2
A huge thank you to Sweet Seeds for allowing me to try my Best with this amazing collection from Photo Strains they managed to Sponsore . Big thanks for supporting the grower community worldwide! Your genetics and passion speak for themselves!
I would truly appreciate every bit of feedback, help, questions, or discussions – and of course, your likes and interactions mean the world to me as I try to stand out in this exciting competition!
Let’s grow together – and don’t forget to stop by again to see the latest updates!
Happy growing!
Stay lifted and stay curious!
Peace & Buds!


Likes
2
Share


@autofloweronly
Follow
Jelly cak3 I can’t wait. She smells dank and look great. I can’t wait. Jelly cak3 smells more like fruity cak3. I smell grape I smell berries I smell cherries I can’t wait jelly cak3
Likes
13
Share


@Pennuts
Follow
The drying process lasted 14 days and I'm in the 2nd week of curing, I've already tried some buds and neither the smell nor the taste are great, the taste and smell of both phenotypes is lemon.

Likes
6
Share


@GrapevineGrower2
Follow
Another straightforward week in the grow room. All three Phenos continue to look fine with good leaf color. I've been working on this super soil recipe for three grows now. I learn a little more with each attempt and come to find this particular blend in larger 7 gallon grow bags IMHO is passing the eye test. All three are in stretch, so I'll continue to keep an eye out over the next 2-3 weeks. In the 3x3, I have manage height. No additional feedings just watered ph'd between 5.8 and 6.2. I do water at top as well as bottom (wicking). These girls are already beginning to exhibit a loud smell. Just bought a new carbon filter, which I will swap out today. This closes out the week. Thanks for stopping by.
Likes
16
Share


@DrAnandamida
Follow
La floración sigue su curso esta semana y nos va regalando colorido y aroma para nuestros sentidos. Aunque me he encontrado un pequeño contratiempo, algunas hojitas están siendo mordisqueadas por pequeñas orugas. Si bien es cierto que sólo he encontrado algunos ejemplares en su hermana de cultivo S.A.D. CBD, sí que se pueden apreciar hojas mordisqueadas en estas dos cepas Red Pure Auto y su compañera OG Kush - Dianfem... 😒 Los pistilos van inundando toda la planta y siguen aumentando su tamaño. Las flores continúan oscureciendo, las hojas y sus tallos ya muestran un claro color rojizo/púrpura. 🌿 El tallo tiene un tamaño y consistencia considerable, lo que le está permitiendo resistir algunas rachas de viento sin excesivo problemas y sin necesidad de soportes o guías (por el momento). Se perciben bastante mejor los aromas de las floración. En cuanto a las altura, una mide 40cm y la otra 48cm. Seguimos aumentamos la cantidad de agua, progresivamente, según van pidiendo/necesitando las plantas.
Sigo intentando no utilizar ningún tipo de "ayuda extra", salvo la tierra enriquecida de BioBizz All-Mix donde están plantadas. Seguimos con el agua mineral, luz solar, mucha paciencia y mucho amor!🤞😍 Aunque para controlar la aparición de pequeñas orugas he añadido: 20g de tierra de diatomea (Diatical de TRABE), directamente sobre el sustrato (1-2 veces/mes y se puede aplicar en cualquier momento del cultivo). 50ml de Super Kukulus (fitofortificante ecológico)/1 litro de agua para riego foliar, tanto en el anverso como en el reverso de las hojas (2-3 veces/sem y se puede aplicar en cualquier momento del cultivo has 2 días antes de la cosecha). Además, añadiré unas pequeñas tiras (Yellow Sticky Traps) para mayor tranquilidad, veremos los resultados en las próximas semanas! 💪😅


Likes
8
Share


@DWCpaqy
Follow
Are just in day 5 and two of them seems to enjoy.
Ph 5.8
Ppm 720
Ec 1340
****
First time growing, and first time with dwc. I chose to build my own dwc tank!
First week was alright, I think I put the seed to early in coco coir and then into leca in dwc tank.
Tap water is around 200 ppm and 7.6ph, I boil the water because of kalk.
First 2-3 days I was starting with 7.2 - 6.6 ph and 520 - 640 ppm
D. 4-5
640-790 ppm 5.8-.5.6 adding more terra Aquatica
D. 5-7
790-980 ppm 5.6-6.2 ph 23c tent 19c w.

Likes
9
Share


@Budhunter
Follow
Stardawg is beatiful.. I’ve grown it in the past and the plant was way smaller.. I think it will be the most yielding plant of this run and looks like may be the best taste too..
I finally managed to move however humidity is pretty high in my new place.. I am trying to put it down, hopefully it will work..
Likes
6
Share

@Chef_LA
Follow
Die Pflanzen sehen zwar gesund aus aber sie haben fast kein Wachstum 🤔. Ich weiß wirklich nicht was da schief läuft. Habe schon mit der Lichtstärke experimentiert aber weder etwas mehr noch etwas weniger brachte eine Veränderung.
Für Anregungen oder Tipps bin ich offen und würde mich freuen von euch zu lesen.
Am Gießen, Dünger oder der Temperatur kann es nicht liegen. Hatte schon öfter Automatics mit dem Setup.
Likes
12
Share


@russrahl
Follow
Looking good so far, got a little bit of light burn at beginning of week but not to bad. Plants are really starting to shoot up now that the roots have hit the water. Topped all 4 at beginning of week 3 for LST prep. AC unit in tent is keeping it around 21 Celsius and water is keeping between 18-20 Celsius naturally so far. When the lights go up from 600w to 1000w though my tent will hit 25+ Celsius so I am currently testing a new water cooled thermoelectric peltier reservoir water cooler I built and I will be installing soon. So far testing it I can bring a 5gal bucket of water from 25 Celsius to 10 Celsius in about 6 hrs. So we will see what it can do with about 20gal of water in my set up once my lights get turned up. I will be posting pics/video once I get it all figured out. So far it’s way cheaper then a commercial water chiller and seems to work good.

Processing
Likes
22
Share


@EelGrows
Follow
Week 9:
Day 57-60: So... I'm in love with these White Cracks! #1's Main cola coupled with that PHAT ass double bud has got my wouth watering! I was worried it would be a bit too early on day 73 for #2 and #3 but they seem to be catching up qickly and are really only a few days behind #1. I can throw everything at #2 in terms of nutes and she just eats it up, what a surprise pheno after the VERY bushy and compact structure of her first 3.5 weeks. Buds are very dense on all 3 plants and SUPER frosty! They enjoy an upped dose of Calmg on day 60!
Day 61-63: They are starting to show their fall colors ever so slightly, and the temperatures are going to be 2C cooler from here on out, so hoping for a little extra color 😉 Gave em all a nice final feed of bloom nutes on Day 63. #1 has about 85-95% white pistils and #2 and #3 have about 45-55% orange pistils. #1 is about 70% milky with a 5% amber and #2 and #3 are about 50-60% milky and a few amber here and there. Looking forward to these last 10 day! will be giving them PH'd water with regulator until harvest in 10 days. I only have time on Day 73-74 to harvest which I don't mind. I'm hoping this will create a varience in the type of effect every plant has to offer!
Oh and these White Crack overpower the 4AM in terms of smell by quite a large amount. I can't smell the 4AM in the tent with these 😂
EDIT: Oh and just wanted to say thank you for all the help you all have given me so far! Oh and shout out to FastBuds, which sent me a message last week saying they were interested in me growing their genetics! They're sending me some free seeds for my next grow! How awesome is that!

Likes
3
Share


Muy buena cepa, potente, productora y fácil de cultivar. El efecto fue exactamente lo que buscaba; intenté curar la yerba lo mejor que pude para poder preservar los terpenos y así disfrutar aún más. Cepa recomendada😄

Likes
2
Share

@CheeRz
Follow
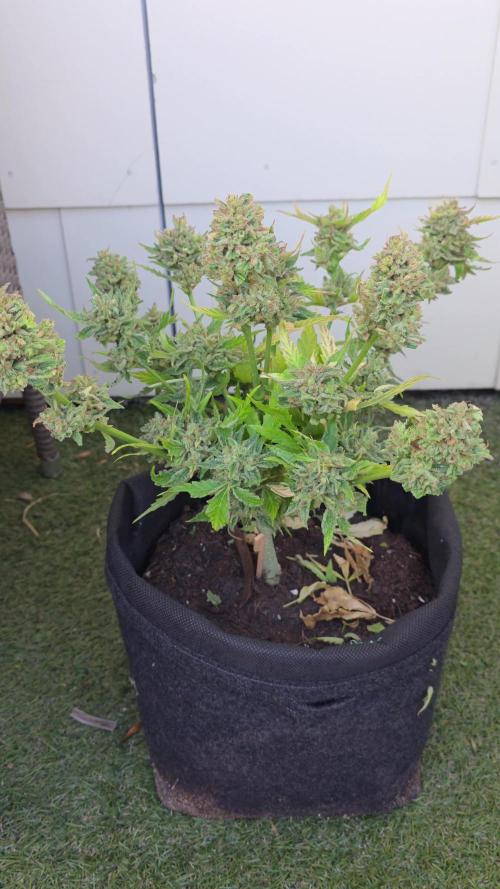
The outdoor season almost is over, and Moon Rocks have also been harvested. She was the smallest of the three GAC plants. The buds are relatively round and firm, and they have beautiful purple leaves. The buds smell woody with sweet undertones. She was also super easy to grow! Big thanks to Divine Seeds.

Likes
5
Share


@Mr_nugs_lover_David
Follow
She's looking extremely healthy and strong and still working on that shape. Let's see what happen! 💚❤️💛


