The Grow Awards 2026 🏆 


Likes
39
Share
@Ezzjaybruh
Follow
Burnt tips a bit this week but going well
Stretched like a mofo this week. Temps are getting crazy and humidity was bad enough I invested in a new dehumidifier..
I got trigger happy after seeing the excellent growth and structure of this plant last grow that I chose it as my main strain this grow - growing 4 in DWC .. but I’m not in love with the effects of it at this point so that sucks but nbd.. it’s still a decent smoke

Likes
84
Share
@bioaccessory
Follow
Не прошло и 8 недель, как растишка наконец зацвела🌿, при этом резко прибавила в росте. Снизил дозу базовых удобрений до половины таблицы, и всё вроде пришло в норму. Кстати, общение с супортом AN оставило неоднозначное впечатление, мне даже показалось что у них на вопросы отвечает бот😃
Уже вижу, что досвет нужно было чуть выше закрепить, но мне пока лень лезть в эти джунгли, может быть позже отрегулирую правильную высоту, уже когда полностью прекратится рост растишки.
В остальном всё хорошо, жду появление одуванов. Только вперед и только вверх! 👆
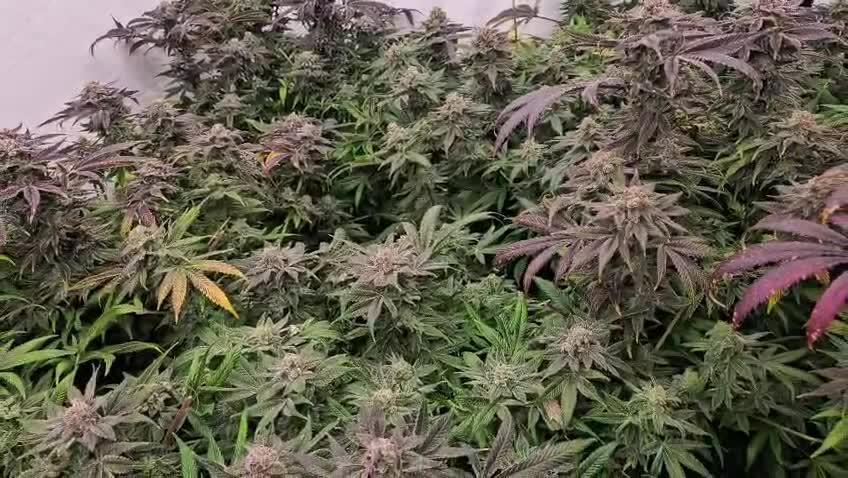
upd 02.11 Представляю соседок: в левом дальнем углу тёзка LSD от MasterSeeds, ей я на раннем этапе делал FIM-подрезку, которую она толком не заметила, уже 90см и сильно прёт дальше, видимо придется ломать макушку. В левом ближнем углу Super Skunk от Seedstockers, в начале пути сильно тормозила, сейчас вроде нагнала остальных.
👉планирую добавить еще один досвет😎 - диоды deep red специально для цветения, на отдельной планке, оставайтесь на связи👈
Спасибо, что заглянули, и будьте здоровы! 🙏
Продолжение следует ...😶

Likes
Comments
Share


Likes
40
Share
@valiotoro
Follow
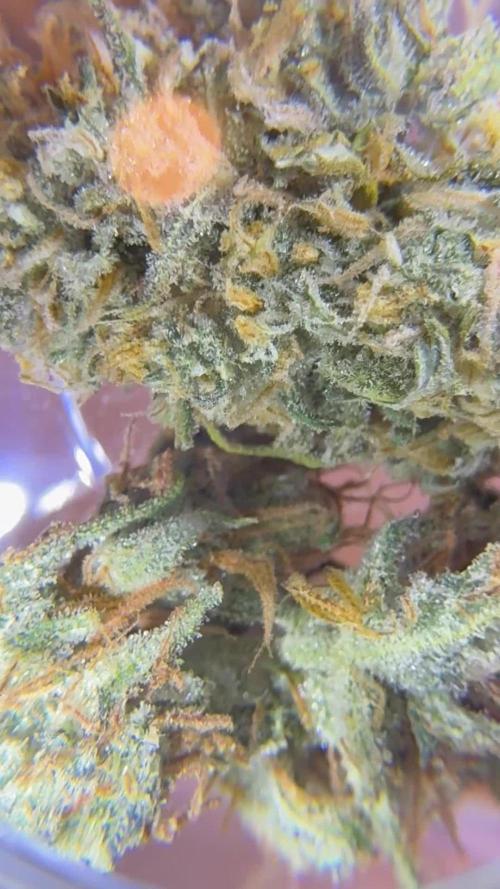
easy trim✂️
The buds are Absolutely perfect,exactly what i was looking for🤩
Green pheno : cookie,diesel & gelato🍪⛽️🍦
Purple pheno : flower,sweet & honey🌸🍯
After 7 days on the dry rack she was ready for the jar to start the curing process.😋


Likes
3
Share
@Joaka
Follow
no se si sera normal pero se siente poco olor aun, esperemos que con el tiempo incremente su olorsh

Likes
22
Share
@GermGrowFox
Follow
Ein weiterer grow geht zu Ende und ich bin sehr zufrieden :) Updates gibt es sobald es trocken ist und fermentiert werden kann.

Likes
28
Share
@Hawkbo
Follow
Everything is movin along some will be coming down this week a few need a little longer. I'll get some pics up a little later today
I have to retak these pics tmm they got deleted
Retook the pics on friday so they are a couple days late but wasnt much different than 2 days before
Likes
14
Share
@ClydeGrows
Follow
No training yet whatsoever, and probably will not based on how she's growing- very vertically, no wayward side branches or stems. This is my preference for this plant as it has considerably less root growth space and I have no experience with micro grows!
Have watered with pH between 6-7 (7, 6, 6.5 usually- allowing a range over the week). Watered with molasses and epsom one water, then plain, then a light feed with Cronk bloom nutrients (an auto-specific nutrient blend) when it started preflower.
The plant beside it in the tent is exactly the same cultivar (Seedsman Critical +2.0), which was growing identically until about 1.5 weeks ago, when the difference in their environments became clear. Obviously the Monster is less monstrous :P
Thanks for looking and happy growing everyone!

Likes
9
Share
@WolverineGreens
Follow
Finally got everything together and started flower. Got my fingers crossed for my 1st organic run amd 1st run replacing the 1000 watt mh with 2 315 watt cmh.
Forgot to keep a mother of the cotton candy kush so everything in this run will b retired after its done. Except for the thin mint gsc of course.
11/27- only thing left is to finish adjusting the trellis and bring reservoir tote back in to set the irrigation system back up (debating if i will).


Likes
77
Share
@Silky_smooth
Follow
I have forced flower a few days ago so not to overbush her when she stretches in this period in going to stick her down in this first week of flower to keep her lower to the soil and opening her up it also hardens out the branches to support the buds better
Day 33 pinned her down just 2 nodes further down the line so the stay horizontal
Likes
61
Share
@Grey_Wolf
Follow
Sensi Seeds Jack Herer 6th week of veg completed 14th Jan 2020
Welcome back , Now even tho this girl isn't really all that impressive size wise , she is very very pretty with those Indica leaves and lush green colour.
You can see where I topped her awhile back has now developed into two gorgeous Tops. I gave her a feed of some of the Dr Greenthumbs High tea i brewed up and she
lapped it up as it contains everything your Soil needs to remain super healthy. That is all for this week I shall be back again next time same Bat channel 😄

Likes
4
Share
@SkullRipper
Follow
Day 54 of week 8 flowering
This week I have continued to flush and I am a bit surprised that the plants are still not showing their amber warning light!
This means I started to flush to early as I was expecting the clones to be harvested around now, This info will really help me planning the next crop of clones.
I also defoliated the canopy to allow for the smaller buds to ripen.
Happy growing,
Skully.
Likes
39
Share
@DogDoctorOfficial
Follow
over all i am super happy with her, she perform like a champion and looks like she will deliver like one also, lets see whats on the scale wen al dry and ready to smoke .
As always thank you all that joint myself and i on these journey , you guys are great and thank you GD for providing us with a platform that works amazing . BIG SHOUT OUT to you all <3 <3 <3


Likes
2
Share
@Gardens_of_Of
Follow
She seems to be overfed, showing yellowing here and there. Also other has some leaves have brown spots. I might have messed up the Ph because I did not adjust the Ph of nutrients mix. I assumed it was ph corrected. Now, I am adjusting the Ph and reducing feeding. Let’s hope that she recovers next week.

Likes
8
Share
@ElGrowLab
Follow
They’re getting a bit thicker. Some Leafes are burned maybe to much fertilizer. Next pouring only water and top-Max. Getting closer to the end

Likes
14
Share
@Nookandplant42o
Follow
Water rainwater + epsom salt and diluted nutrients with more total water of 180 ppm ph 6.2 temperature of the 20 ° solution, gradually using more water due to the 10% runoff temperature, slightly relieving the roots without much removal, sprayed with water without ppm complement due to perspiration and water loss when it's hot, more soil around the stem "I made some abrasions around the stem that is now covered with soil in order to create more quick roots, added more mycorrhizae around to heal and root and stretch with mycorrhizae. Always covered with coconut fiber so it doesn't dry quickly without absorbing enough, I really need one more exhaust fan to pull in fresh cold / fresh air from the outside in, and limit one little use of fans since air conditioning is not part of my plans at the moment.


Likes
27
Share
@WestOzzie
Follow
Starting to see flowers now,did some pruning,took off big fan leaves and some other little ones to get more light in,has been 2 days rain
https://youtu.be/3oju_Zeh7_E
Likes
32
Share
@Doubleb84
Follow
She started flowering this week yay! Slowly upping the nutrients, have read so much about giving half strength of Fox Farms so I don’t want to over do it.
Have a few leaves that have a few spots of discoloration, and I noticed the stems turning a bit purple but overall still really
healthy!
Overall going well! Going to keep upping the nutrients.
