




Likes
38
Share


@Silverback_Guerilla
Follow
8/31:
I fed today..8 gallons split between the 15 plants. Now that the 3 autos are out of the closet, they've all got a little more elbow room.
9/1:
Lotsa frost and aromas now..
9/4:
Fed today, rotated edge plants, plucked off some yellow and dead leaves, and sniffed them up really well..😋
I started germinating the next batch of beans today, so these bitches need to get busy...
9/6:
One of the FFT4's is starting to ripen up and show some senescence, and one of them is showing some potassium deficiency...
I'm switching over to Cha Ching and will be reducing the dosage of ONE at the next feed.
I lowered the lights to be at about 12" on the taller ones and 14" on the shorter ones shooting for maximum PAR for a few days...they'll either blow up really big or burn up really bad 😬

Likes
4
Share

@JeyGanesha
Follow
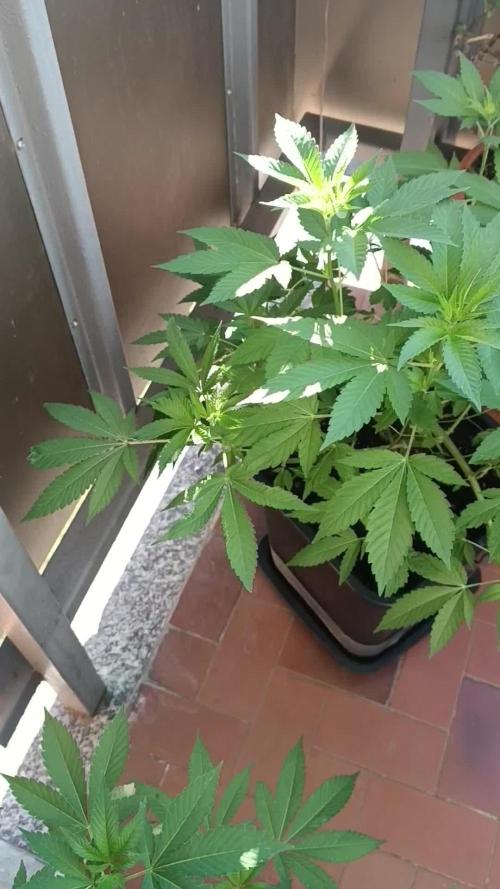
Ieri 24/7/2025 ho messo fuori in giardino del mio brother questa matanuska....qui dovrebbe esplodere 😂😉👍💪.spero che in questi 2 mesi di fioritura ci siano belle giornate di sole da dare alla pianta tutto il fullpower che ha bisogno,💪🙏
Likes
19
Share


@ScrogFreak
Follow
We had a couple unseasonably warm days this week, our wood furnace was going when the temps went up. The tent hit 27.5 degrees one day?, which resulted in the heat damage to the leaves. The leaves are also starting to die back faster. I have a feeling they may determine my harvest day instead of my trichomes. Still only some amber, maybe 5-10%, the rest are cloudy with very, very few clear

Likes
2
Share


@CanarianGrow92
Follow
The last week for this fatty girls 😁 soon its harvest date, nice strain to grow, really easy, typical old school vigorous and stable! Nice kush smell, since the end of last week we only gave water

Likes
7
Share

@ThatsmyGrow
Follow
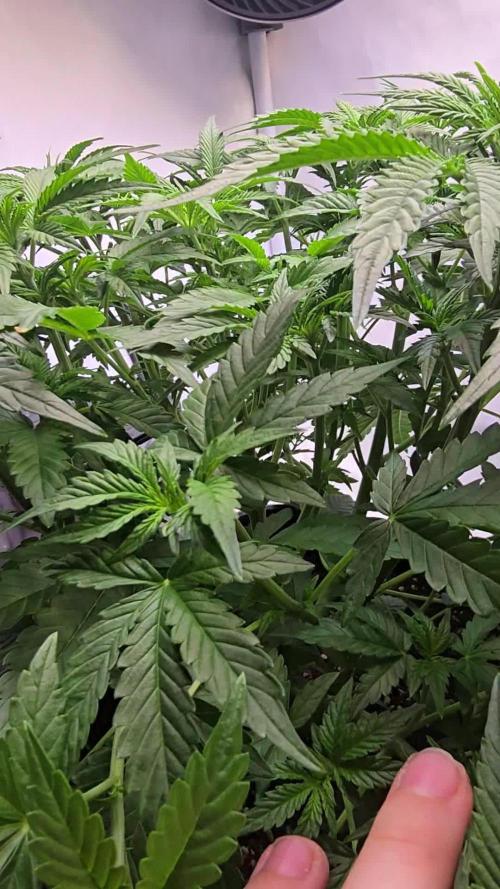
She is getting soo wide, like i topped her and use lst, but nope.
Its the nature grow of the super lemon haze, i love it.
We will see how big she is getting.


Likes
9
Share


@Headies
Follow
So this week after I gave it under nutrients I apparently gave it too much nitrogen while having a potassium deficiency. Shiney dark leaves, So i fixed that, but some didn't bounce back, and I tried nitrogen. I think they are doing pretty good considering everything I've put them through SO FAR. lol. Nutrients are NPK Raw's total lineup, follow their instructions at first, Fastbuds adjustments as of this week.

Likes
29
Share


@gottagrowsometime
Follow
Welcome to my Tiny/Rare Pot Diary for seedsman contest.
Wk 3. Days 15-21. Plant has picked up this week. Leaving behind her issues from the 2nd week. (Which I now know where caused by the extreme high PH bioenhancer adds to the soil. On normally terms it would be fine. But, as I used a light mix soil.) I found out again the hard way coming into the later stage of this week. More PH issues showing up on the healthy growth. (And it came 2 days after adding the bioenhancer, all I need to do, is treat it as if it was coco and PH the bioenhancer to bring it back down to 5.8 ish.. just until the soil has had time to change itself and have better nutrient uptake. (So anyone using bioenhancer with biobizz light mix soil, pH it as it says to do as if you were using coco)
Other than coming back into PH issues. The plant is doing fine. Locked out of certain things like calmag at this stage. I should of mixed some all mix with it, and I doubt I'd be having any issues at all. But, growth has been good this week. Hopefully this will be the last of my mistakes brought out onto this poor girl. Nodes are growing, and taking a nice shape. For been in a .75ml plastic bottle, I just have to keep her environment, (substrate) in desired levels.
The Bioenhancer is meant to give a PH of 9ish with water. But, shouldn't affect any soil but says with coco, you need to PH..It's just I used light mix, and that's more coco than soil, and takes time to be treated. All my other plants took these feeds just fine, as the soil was mixed with all mix soil + light mix.
The injection of my AIrPump seems to be going well. But, hard to tell, what kinda impact its having.
Thanks for viewing this week. Be sure to drop a like or comment so I can visit your diaries. Either way, thanks for dropping by.
Stay safe my friends.

Likes
42
Share


@Only4passion
Follow
First feeding of week 3 juste before taking pictures!!
😁🍀✌️
Day 17 one of the gorilla melon looking not really happy after feeding!! She was doing great I don’t really know yet if it’s a deficiency or over feeding but I’ keep an eye on it 💚✌️
Day 18 I accidentally dropped a full bottle of water on my gorilla melon, which split in two at the base and break the pot😭she wasn’t able to stand alone so I hold her luck she continue to grow 🍀💚✌️
Likes
14
Share


@LokalGrenz
Follow
Got a dehumidifier it’s reading different from what mine controller 69 is saying but I have it set at 40% it’s the lowest so it’s going pull humidity regardless right now it’s about 53% which is okay would like it to get down to the 40’s I also changed the light schedule today to 20/4 the humidity raises at in my tent when lights are out so I figured change it to 20/4 instead of the 18/6 I’ve been running so if humidity does go over it won’t be for as long as before hopefully this works just trying to avoid any mold situation
So far the Amneisa Haze 2 is at stretching she’s going be big I can but the haze 2 is done seems to just be flowering the sour diesel is looking good as well so far I’m happy with its looking like left town for two days and the auto watering pots worked!


Likes
5
Share

@HoneyBlunt42
Follow
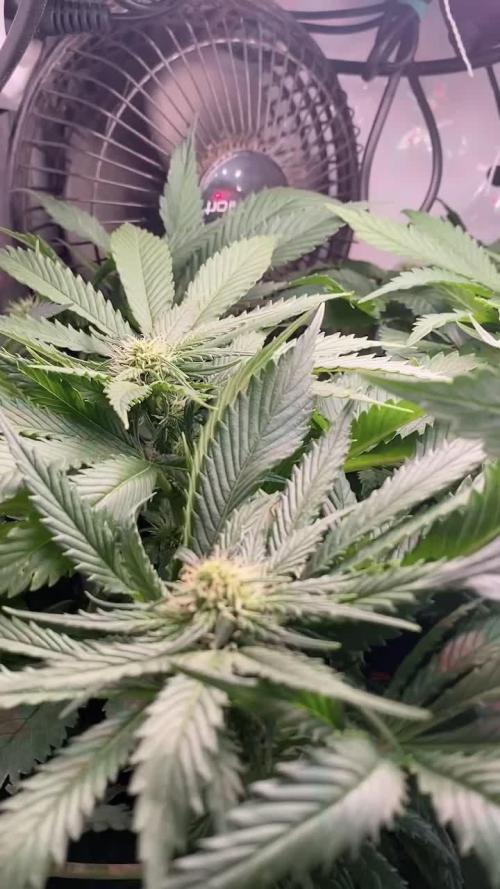
At the end of week 10, both plants look great. Hydro IZI has stopped growing vertically and is flowering. The inner shoots were turning pale, so I added another 40W of light—an identical LED fixture.
The plant in coco was moved to a 7L pot. Yesterday, I added PowderFeeding BioBloom; it needs to be reapplied during the 3rd or 5th week, depending on the strain. Today, I prepared 15L of water (pH 5) and mixed in 15g of BioEnhancer (humic acids and seaweed extract).
I’ll be using this solution for watering over the next 24 hours. I completely changed the nutrient solution in the Hydro IZI’s DWC bucket—this is only the second full change of the entire cycle. By this morning, the pH had dropped to 5.2.
After the change, I added the full Hesi lineup according to the schedule for the fifth week of flowering and adjusted the pH back to 6.3—the optimal level for the flowering stage. The DWC plant is currently twice the size of the other; it’s only limited by the grow box itself, and it has very dense branching.
The coco plant received less light and was only moved to the 7L pot with flowering nutrients yesterday, but I think it will catch up to the first one by harvest time.

Likes
2
Share

@deseed_uy
Follow
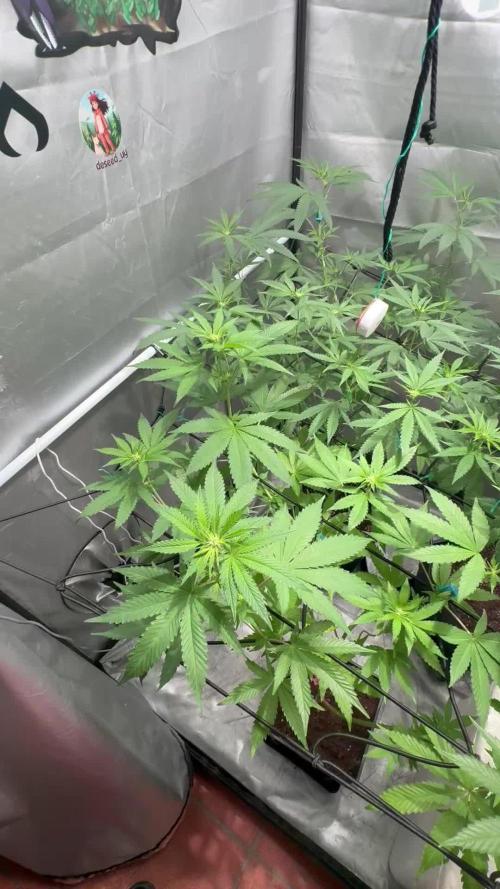
Puse los ultimos clip lst para nivelar las ramas mas altas del medio y ahora si a esperar unos dias para hacer las podas bajas

Processing
Likes
29
Share


@RushGreen
Follow
Sayer le grand jour et arriver, nous passons enfin en floraison.
Changement photo-période : 19/10
(Croissance J37) (Pré-Floraison J0)
On va laisser faire la nature, le stretch va bien renforcer nos petite et espérons pour cette première récolte une réussite absolue à la hauteur de nos attentes.
Arrosage 1L : 19/10
Pulvérisations
(Vita Race + Sugar Crystal) : 19/10

Likes
11
Share


@Ecogeek
Follow
Lost of changes these last few weeks in addition to changing the light position and duration I back off the feeding and giving both jst purified water. Did a flush today since their looking close to home plate. Had to do a heavy defoliation with some of the leaves on both plants. It looked like some mold developed but after cleaning the tent and letting the girls get bone dry to avoid it’s return everything is a go! It’s been a exciting and knowledgeable grow

Likes
4
Share


@The_Projexx
Follow
Welcome to week 4! The plants are really growing along now so we will be looking to transplant as soon as possible into their final homes ( 5 gallon ) I will be topping the plants this week to get some of that branching going and we will be looking to start the flowering process sooner then later. Im aiming for 2 weeks more of veg then flower time if things are in order.
Huge shout out to @MarsHydroLED for allowing me to grow with their kick ass equipment!
Huge huge shout out goes to all my followers and to the people who stop into the diary alike you guys are kick ass keep on keeping on!
-The Projexx
Day#22 Pictures N/A Things are starting to grow along nicely , aiming to transplant in a few days!
Day#23 Pictures N/A Transplanted plants into their 5 gallon homes except for 2 went into 7s and 2 stayed in their same buckets. Watered 1/2L each at 550PPM
Day#24 Plants are digging their new homes , we took some video action. Its getting hard to fit all the plants in 1 frame haha.
Day#25 Pictures N/A Plants are just growing along , going to top in the near future.
Day#26 Watered ladies 1L each from the bottom at 550PPM. Going to be bottom feeding from here to see if it makes a difference.
Day#27 Topped the plants let the branching begin!
Day#28 Ladies look unhappy but thats them adjusting for their new nodes!
Recap: Things are pushing strong this week we topped the plants and they are growing like nothings happened. I dont know that Im a fan of bottom feeding the plants but well see how things develop in the near future, I may have to practice the technique until im comfy with it as I would normally top feed.
Likes
518
Share


@yan402
Follow
🌸🍏✨🍭🌸🍏✨🍭🌸🍏✨🍭🌸
Hi and welcome to another Kannabia grow!
This time I’m running their Apple Fritter (feminized photoperiod). She’s going to veg under 24hr light and be manifolded.
Still cleaning the rest of my Candy Cream GF (11.04.25) — going to sow the seed tomorrow (12.04.25)
*been lazy, sowed on 14.04.25
🌸🍏✨🍭🌸🍏✨🍭🌸🍏✨🍭🌸
---
💭❗💭❗💭❗💭❗💭❗💭❗💭
❗Events & thoughts worth noting❗
💭❗💭❗💭❗💭❗💭❗💭❗💭
12.04.25 (GW1) – Cleaning + flushing the old coco coir. Might need to add another brick. *No new brick needed ✅
This is how I recycle my coco coir — fast, cheap, no BS.
🌿 Harvest plant
✂️ Chop roots small — they stay in for structure (organic perlite)
💦 Hot water rinse — remove salts & dust
🍶 Pre-soak with light feed:
Micro 10ml
Bloom 0ml
GreenBuzz 10ml
Cal-Mag 60ml
FFJ/FPJ 10ml (new disgusting batch)
pH down (citric acid)
♻️ Media stays — Roots stay — Back in service.
14.04.25 (GW1) – Planted seed in final pot ✅
16.04.25 (GW1) – Did last tent clean up + setup ✅📸
17.04.25 (GW1) – Seed germinated 🎉📸 — roughly 48hrs in final pot. Solid start👌♥️
23.04.25 (VW1) – Minimal burnt tips 📸 — not progressing, not a concern.
26.04.25 (VW1) – Started using the new batch of FPJ/FFJ
https://growdiaries.com/diaries/266849-grow-journal-by-yan402
30.04.25 (VW2) – Increased TriPartMicro & GreenBuzzBloom 10ml → 15ml
03.05.25 (VW2) – Increased TriPartMicro again 15ml → 20ml, topped the plant, and added final layer of clay pebbles around the base, trimmed side branches and did LST in preparation for "manifold" 📸
08.05.25 VW3 finished manifold📸
13.05.25 VW4 Increased TriPartMicro to 30ml and GreenBuzzBloom to 20ml.
15.05.25 VW4 Done defoliation and LST 📸
18-19.05.25 VW5 pruned all the shoots bellow my "mains" and did a full defoliation📸
24.05.25 VW6 increased GreenBuzzBloom to 30ml
04.06.25 VW7 did a cleanup📸
11.06.25 VW8 increase TriPartMicro to 40ml
17.06.25 (VW9) – Final structure pass 💈🌿
Did a clean perimeter prune + removed weak shoots. Ended up with 12 tops, was aiming for less, but she made the call
Didn’t fight it, just shaped it the best I could
Airflow’s good, structure’s stable
🛑 No more cuts until post-stretch
Pics coming shortly 😘
Flip coming soon — we’ll see how she handles it.
20.06.25 VW9 Switched lighting to 12 hours, may the stretch begin 🤞
22.06.25 VW10 Did a good LST session,made some pics, and came to some conclusions and a small change of plans:
Originally planned for 8 mains — long, spaced colas and maybe a couple stronger “titans” if she wanted to go that way.
But she’s showing me something else, and I’m not here to fight her — just guide her.
Now after stretch, I’m keeping side shoots only if they: Fill real canopy gaps
Don’t crowd neighboring tops (minimum 15cm spacing)
Aren’t growing into walls or toward the next plant
Anything too close, too low, or heading into shade gets removed. No point forcing it.
Looks like I’ll finish with 14–16 solid tops, depending on how she settles.
I’m just trying to give each one enough light and space to stack properly.
No overcrowding, no larf — just letting her do her thing with a bit of structure.
Increased Tri Part Micro to 50ml as well.
28.06.25 VW11 one week since I flipped to 12/12 and she is stretching nicely, a bit shy in showing pistils compared to the Fantasy Feast regulars I have in the same tent.
29.06.25 VW11 increased GreenBuzzBloom 30→ 60ml
06.07.25 FW1 TriPart Micro: 50→ 30ml
TriPart Bloom: 0 → 20ml
Home-made FFJ/FPJ (Watermelon + Pumpkin): 10 → 30ml
12.07.25 FW1 GreenBuzzBloom 60 →40ml, TriPart Bloom: 20 → 60ml, fpj 30→60ml
19.07.25 FW3 Got some bleached tops, been out and about at job interviews and didn't notice a last minute stretch spurt 😭, should recover fine though plenty of time left 😁
22.07.25 FW3 TriPartMicro 30→20ml , TriPartBloom 60→80ml , GreenBuzzBloom 40→50ml
24.07.25 FW3 Cal-Mag 60→40ml
26.07.25 got thrips but handled them with extra airflow and defoliation.
29.07.25 FW4 GreenBuzzBloom 50→20ml, Home-made FFJ/FPJ (new batch) 60→120ml
31.07.25 FW4 Home-made FFJ/FPJ (new batch) 120→200ml
🌱💦🌱💦🌱💦🌱💦🌱💦🌱
🌿 Day to day tasks & actions 🌿
🌱💦🌱💦🌱💦🌱💦🌱💦🌱
02.08.25 FW4 – Fed 5l of #1 → 2l runoff
03.08.25 FW5 – Fed 5l of #1 → 2l runoff
04.08.25 FW5 – Fed 5l of #1 → 2l runoff
05.08.25 FW5 – Fed 5l of #1 → 2l runoff
06.08.25 FW5 – Fed 5l of #1 → 2l runoff
07.08.25 FW5 – Fed 5l of #1 → 2l runoff
08.08.25 FW5 – Fed 5l of #1 at 75%→ 2l runoff
09.08.25 FW5 – Fed 5l of #1 at 50%→ 2l runoff
(*RUNOFF reused for tomato plants)
🍶💧🍶💧🍶💧🍶💧🍶
💧 Nutrients in 30L #1
🍶💧🍶💧🍶💧🍶💧🍶
💧 TriPart Micro:
10 → 15 → 20 → 30 → 40 → 50 → 30 → 20ml
= 0.67ml/L
🍶 TriPart Grow:
0ml
= 0.00ml/L
💧 TriPart Bloom:
0 → 20 → 60 → 80ml
= 2.67ml/L
🍶 GreenBuzz Bloom:
10 → 15 → 20 → 30 → 60 → 40 → 50 → 20ml
= 0.67ml/L
💧 Cal-Mag:
60 → 40ml
= 1.33ml/L
🍶 Home-made FFJ/FPJ (new batch):
10 → 30 → 60 → 120 → 200ml
= 6.67ml/L
💧 pH Down:
Citric acid (BuxXtrade) — adjust to ~pH 6.0
📦 TOTAL:
360ml per 30L
🔬 12.00ml/L
🍶💧🍶💧🍶💧🍶💧🍶
⚙️✂️⚙️✂️⚙️✂️⚙️✂️⚙️
✂️ Tools & equipment ✂️
⚙️✂️⚙️✂️⚙️✂️⚙️✂️⚙️
✂️ 2× MarsHydro SP3000
⚙️ MarsHydro 150mm ACF Ventilator
✂️ Trotec dehumidifier (big unit)
⚙️ Mini no-name dehumidifier
✂️ Kebab skewers (LST – stainless)
⚙️ Wire + roast skewers (LST assist)
✂️ Scissors (HST)
⚙️ Vacuum (for spills & cleanup)
✂️⚙️✂️⚙️✂️⚙️⚙️✂️⚙️✂️⚙️✂️⚙️
---
🍏🍪🌬️🍬🍏🍪🌬️🍬🍏🍪🌬️🍬
Apple Fritter (Kannabia Seeds)
🍏🍪🌬️🍬🍏🍪🌬️🍬🍏🍪🌬️🍬
Species: 50% Indica / 50% Sativa
Genetics: Sour Apple × Animal Cookies
THC: Up to 25%
Effect: Euphoric, relaxing, creative
Flavor: Sweet, fruity, pastry notes
Flowering: 56–63 days
Resistance: High
Indoor yield: 450–500g/m²
Outdoor yield: 600g/plant
Structure: Strong, bushy, dense buds





Likes
17
Share


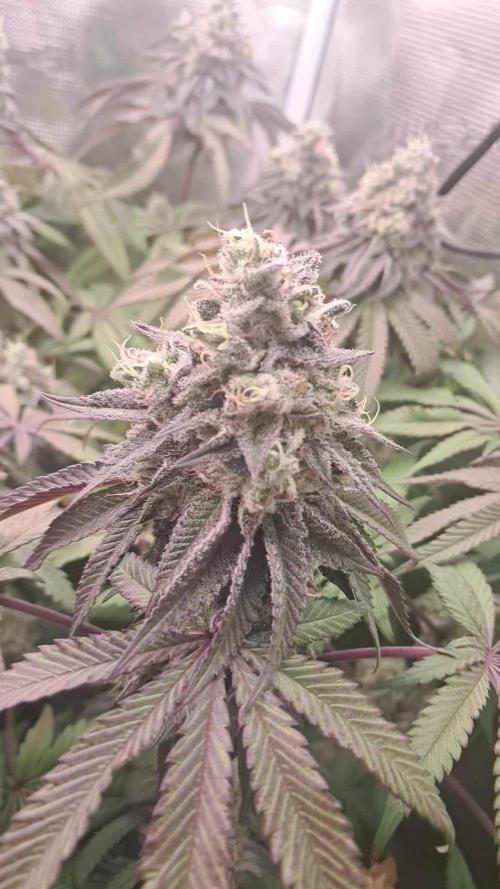
@JonnyKush
Follow
day 73 I was not ready for all this! 🤣🤣 they literally exploded and I started seeing purple on these buds I had to tie them up so the weight of the flowers didn't break the branches. compared to El Patron that I also have in my tent, Purple is much fatter and shorter. they have a very sweet scent and I can't wait to taste it, but alas I will go there a little longer. I have to say that 6 photoperiods are too many for my 1m x 1m x 2m tent. in addition to this I have noticed that they are very hungry. like me and give me some advice. thanks for stopping by, have a nice day and happy cultivation 💜🌳💜🌳💜🌳💜🌳

