
Likes
Comments
Share


@Shizzlemanizzle
Follow
Been away couple of days
Day 74
Came back and the lady’s exploded. Dropped down the nutrients since day 60 and started flushing on day 68. I’m waiting for the plants to get brown trichomes. But all in all I’m happy if I don’t fuck it up somehow
Day 77
Flushed yesterday the last time. Ppm was 400. Will chop them on day 84, if nothing special happens this is the last Post until before chopping them.
THANK YOU ALL FOR YOUR TIPpS AND YOUR OPINION YOU GUYS ARE GREAT!!!! Happy Growing to everyone !

Likes
2
Share


@karate
Follow
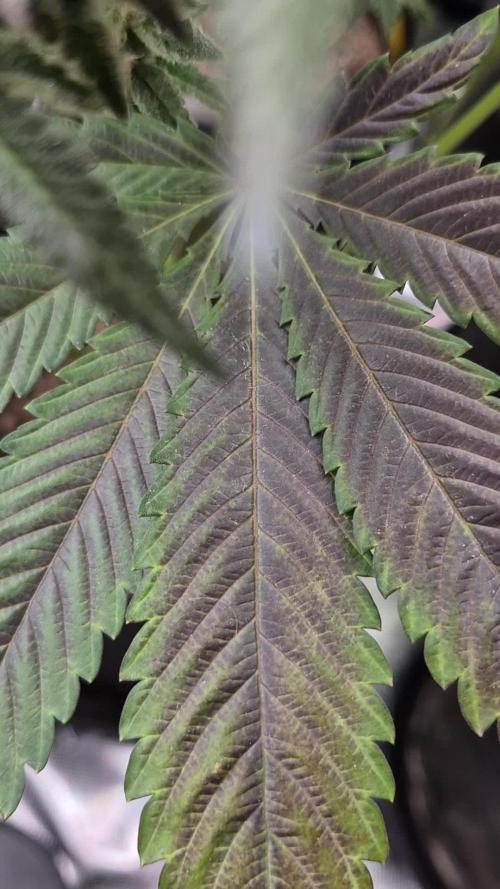
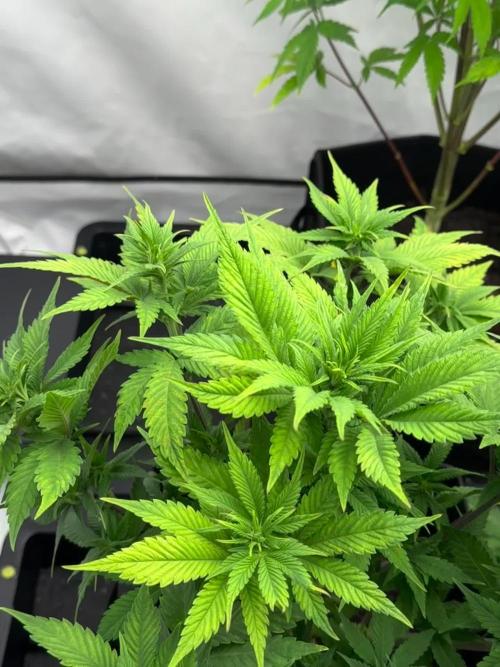
Some yellow leaf tips on the younger ones, maybe nute burn? Will stop feeding for this week and see how they change.

Likes
4
Share


@MasterKush714
Follow
06/10/2024 Roots roots Rootz!!!!
Had to take out a few that weren't moving along!!!
06/14/2024
They going in lfg!!!!

Likes
2
Share


@RyanGrows
Follow
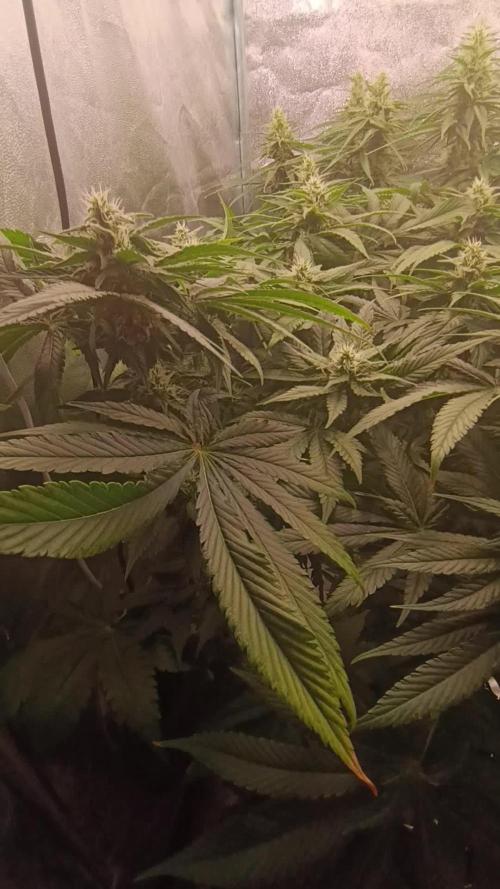
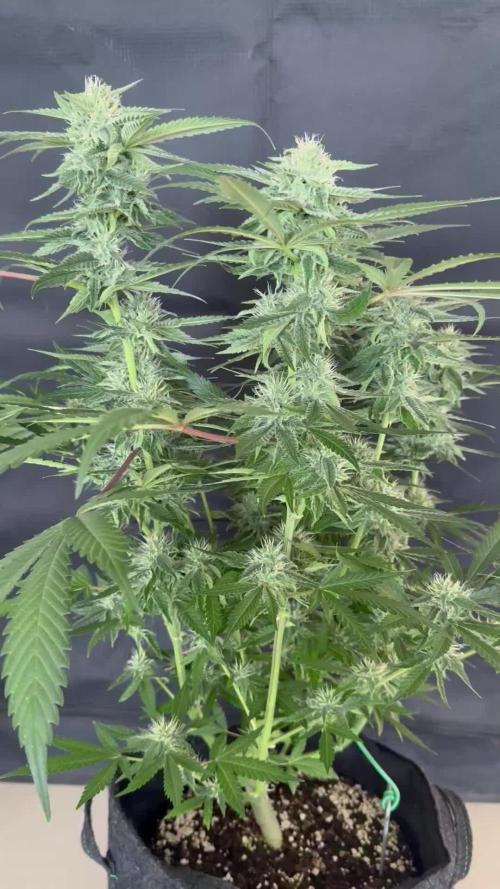
The plants are on autopilot and beginning to stack buds and put on trichomes.
I raised the lights because there was slight light bleaching on the tops of a few colas.
The left pheno is going to take longer to flower i can tell. The right pheno is finishing quicker and has much smaller yet frostier nugs.

Likes
25
Share

@GeezandDraht
Follow
Week 7 🌸
This week went by rather unproblematicly
The Buds are developing, no more Nanas and the smells are getting stronger. Some of the plants will need support for their Buds sooner rather then later, therefore we will be getting Bamboo-Sticks by next week.
On Day 43 we defoliated one last time to ensure better light penetration for the lower buds and better airflow for these last weeks of flower.
On Day 45 we fed the ladies with again 75% of the week 7 dosage. PH to 6.0, EC: 1.69mS.
Drain: pH 6.3, EC: 3.6mS (7% run-off)
Day 49: Pink Milk and Fx3 seem to be ahead of the Limonario and will propably come down first. Though they still show new growth and have some time left. The trichomes haven't turned amber, yet. Limonario still has lots of white hair and new growth developing.
Terp-Talk 😍:
Pink Milk: creamy, gassy, berries💜
Fx3: sweet strawberry, a little creamy❤️
Limonario: lime, mint, lemon balm, fresh, loud💚

Likes
6
Share

@Lombardy11
Follow
Zdar Bando .
Začínám 6 týden a holky nabírají hezký na objemu.
Hnojím podle deníku 2ml/l od všeho a myslím si že už je to na hraně.
Všechny dostávají stejně 3l akorát jedné se něco nezdá.
Možná už je na ní moc hnojiva.
O proti těm dvoum je pozadu a má menší paličky, při další zálivce změřím ec a uvidím, jestli bude velký rozdíl tak uberu něco na 1ml/l.
Už se těším na výsledek 😁.
Tak další hlášení za týden .

Likes
17
Share


@Genji87
Follow
Like u see I did some lst topping fimming etc in week 6, I do this a lot… changing my vent system to a black hole creator with a gas controller. Chills


Likes
11
Share

@GERGrowDesigns
Follow
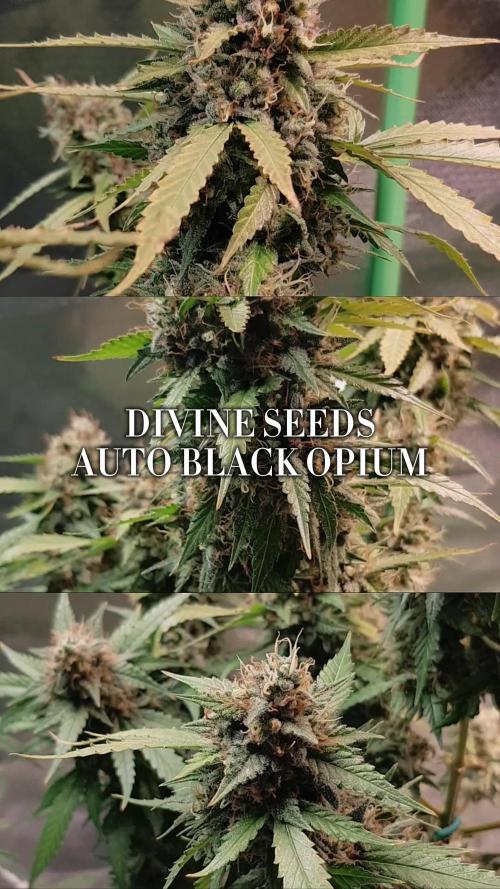
Welcome to Flower Week 8-9 of Divine Seeds Auto Black Op1um
I'm excited to share my grow journey with you all as part of the Divine Seeds Autoflowering Competition 2025. It's going to be an incredible ride, full of learning, growing, and connecting with fellow growers from all around the world!
For this competition, I’ve chosen the Feminized Automatic strain: Auto Black Op1um
Here’s what I’m working with:
• 🌱 Tent: 120x60x80
• 🧑🌾 Breeder Company: Divine Seeds
• 💧 Humidity Range: 50
• ⏳ Flowering Time: 8W-10W
• Strain Info: 25%THC
• 🌡️ Temperature: 26
• 🍵 Pot Size: 0.5l
• Nutrient Brand: Narcos
• ⚡ Lights : 200W x 2
A huge thank you to Divine Seeds for allowing me to be a part of this amazing competition and Sponsoring the Strains. Big thanks for supporting the grower community worldwide! Your genetics and passion speak for themselves!
I would truly appreciate every bit of feedback, help, questions, or discussions – and of course, your likes and interactions mean the world to me as I try to stand out in this exciting competition!
Let’s grow together – and don’t forget to stop by again to see the latest updates!
Happy growing!
Stay lifted and stay curious!
Peace & Buds!


Likes
24
Share


@MrPott
Follow
This is the final week of nutes for the ladies! Time to flush her for the coming week. Also read that Purple Punch needs cold temps at night to turn color. Since I can't do that where I live, an alternative is to flush her with ice water. Giving that a try and will keep you guys updated.


Processing
Likes
15
Share


@Andres
Follow
she grows strong and healthy. their daylight hours are not always right. that is why I think flowering was lengthened. I have to take her out of her tent outdoors because it is difficult for me to enter and take good photos..

Likes
11
Share


@Hempshire_Empire
Follow
Shes doing super well and seems to only want water. 4 weeks left on this girl.

Likes
13
Share


@Rob691
Follow
D-70 : Chaco Haze. They just look amazing, even 1/4 is very small (about 40cm). At this stage she should be 60 or 70 cm high... Anyway, the flowers are doing great. I really hope the will continue to grow. I dream of a grow room full of flowers between 1 and 1.4 m high ! Still 8-9 weeks to go, so they have time :)
Likes
16
Share


@HegauHillsFarmers_M11
Follow
Die Pflanze wurde Mitte letzter Woche an Tag 66 geerntet. Getrocknet wurden die Blüten 6 Tage lang bei einer Luftfeuchtigkeit von 53% bevor sie nun ins Glas kommen.
Getrimmt wurde die Pflanze trocken.

Likes
Comments
Share

@ibbzy
Follow
Tent has been heavily neglected....will pick up routine this week. Just been a busy week and hopefully settling in the next coming weeks.
Top dressed with 2-8-4 and worm castings
Have to up nutrients and sort out these deficiency's or PH you inbalance is what I think the culprit is
Likes
5
Share


@GrowFunMD
Follow
What a world of difference a week can make when growing auto-flowers. I did a lot of maintenance on these girls the last couple of days. See pics and videos. Two of the plants have stretched out nicely. The other three are falling behind, but looking very nice. There is a strong citrus smell happening right now. Smells like I have a tent full of fresh lemons. Started using Big Bud and Bud Candy this past week. Tent 2as getting quite crowded, so I also moved the water reservoir on the outside of the tent. It was very hard to cut a lot of those beautiful buds off the plants, but I think it will pay off. I also got the new Vivosun Grow Cams, so far I like them, but I do have some feed back.


Likes
14
Share


@DOOBS_N_BREWS
Follow
10/21(day 43)
-Its the start of week 7 and all is good. Im happy with the progress these plants have made even with my newbie error last week. Im going to start the week off with a small water of pH balanced water.
10/22(day 44)
-Watered all pants with rhizotonic and pH'd water. Also misted the rhizotonic from under the fan leaves.
10/23(day 45)
-HULK A is really exploding in growth right now. PH seems to handle LST well.
-HULK B is flowering faster but the growth is slow and its falling behind HULK C height wise .
-HULK D is evening out which is cool to see
10/24(day 46)
-Added another 200W . daisy chained them together.
10/25(day 47)
-I think the plants have already responded well to the new light.
-HULK A/C are now larger than HULK B my healthiest seedling. All plants have recovered from my mistake in week 5 but B is a little stubborn.
10/27(day 49)
-Eniding the week nicely with leaves looking healthy and plants overall health looking great. Real happy with the new light.

Likes
29
Share

@DE_BW
Follow
Mendo Frost is stacking beautifully and continues to impress with her structure. The buds are developing nicely across all branches, while the trichome production is ramping up fast, giving the entire plant a heavy frosted look already. Pistils are still mostly white, suggesting there’s plenty of time left for swelling and maturation. Overall, she’s looking very healthy and seems set up for a strong finish.
Processing
Likes
23
Share


@Joni2017
Follow
Day 80, this week the buds are already taking density 👏🏻👏🏻😋 she continues the very healthy flowering 🙌 size 82 cm👏🏻👏🏻 temperature 24º C ☀️, humidity 60% 💧 watering 750 ml alternating one day with nutrients and another without nutrients with osmotized water 💦💦 Session 45 min. of binaural sounds for growth and healing 🎼 and music 😉👍 Merry Christmas 🎅🏻